|
|
Post by wannabe on May 27, 2019 20:28:47 GMT
As the slowest head gasket change / head overhaul in the world continues...
... I've got some seriously burnt-on crap on the piston in the cylinder I had a burnt valve issue - the right-hand valve cut-out has what looks like a hard white substance completely stuck to the surface:

I've tried scraping it with a pointy wooden paintbrush handle (because I don't want to scratch the prarrie canoe out of it) but it just doesn't even make a dent.
In desperation I've even broken out the dremel with a pointy metal bit and ullllllltra-carefully had a go at the surface of it  It's taken off some of the chunks but it's hard to tell the depth of what is left (which you can see in the picture) and I don't want to damage the piston. It's taken off some of the chunks but it's hard to tell the depth of what is left (which you can see in the picture) and I don't want to damage the piston.
So...
How much clearance is there between valves and piston face at the cut-outs? I think my head is basically at max-skim now so I fear the burnt-on stuff is risking making it an interference cylinder...
If I need to clean it off, is there a recommended product / method? I've seen the Mopar Combustion Chamber cleaner mentioned and recommended but it looks like evil prarrie canoe that could cause damage if I don't clean it off and get the engine turned over/oil changed ASAP afterwards: revlimiter.net/blog/2011/04/clean-your-pistons-like-a-boss/ www.ebay.co.uk/itm/GENUINE-MOPAR-Combustion-Chamber-Cleaner-13oz-Aerosol-Can-NEW/123766469323
www.supraforums.com/forum/archive/index.php/t-101191.html |
|
|
|
Post by dadbif on May 27, 2019 20:37:16 GMT
Man up!!! Press some grease between the piston and bore so nothing goes down the sides, mask off all the other nearby holes in the block and get stuck in, ideally hard plastic or wooden scraper, however, I have successfully used metal wallpaper scraper or screwdriver in the past, with great success, you can always polish the surface up afterwards with a bit of wet and dry, a few scratches won’t hurt, it’s only a bloody piston, not a bearing...
|
|
|
|
Post by atlex on May 27, 2019 20:56:35 GMT
ethanol or acetone to help break down the deposits.
scotchbrite !
|
|
|
|
Post by wannabe on May 27, 2019 20:57:08 GMT
Thanks both for the confirmation re: the piston faces  I know keeping the bores undamaged is important but if there's fewer issues with slightly scratched faces, that is good news! Some chap recommended WD40 might help clean it: www.forabodiesonly.com/mopar/threads/clean-dirty-pistons-while-still-in-engine.375470/As we have some of that at home and it's not going to eat the block like that mopar stuff apparently does, I think I'll make a little puddle in the cut-out before bed and leave it to see if it makes it any easier. The missus might have some acetone, although it's not like she ever bothers to paint her nails so may not have any... lol I fear a small amount of crap has gone down the block holes so I'll have to refill the coolant, run it for a while and then drain it down to try and remove anything that's in the system. I need to buy some grease - so far I've been scraping a bit, hoovering it up, scraping some more, hoovering some more...  Thanks again for the help! |
|
|
|
Post by Zed. on May 27, 2019 21:14:36 GMT
nitromors paint stripper used to work for a de-coke, not bothered with it for years though so unsure if it's the same ingredients as anything good seems to be illegal/immoral/carcenogenic/banned under the Geneva convention/insert wahatever amusing comment you can think of out-dated now Man up!!! Press some grease between the piston and bore so nothing goes down the sides, mask off all the other nearby holes in the block and get stuck in, ideally hard plastic or wooden scraper, however, I have successfully used metal wallpaper scraper or screwdriver in the past, with great success, you can always polish the surface up afterwards with a bit of wet and dry, a few scratches won’t hurt, it’s only a bloody piston, not a bearing... I use a 'stanley' blade to back-scrape gasket surfaces and at times, piston crowns. grease can stop crap going down the sides of the pistons but I don't bother - just wipe the bores, turn the engine & wipe again / use compressed air to blow crap away and any excess leftovers will be ejected through the exhaust so don't worry carbon on the combustion chamber & piston crown helps keep heat in the cylinder, also as part of the engine running there is a build-up of carbon on the piston between the crown & the top ring (sorta helps to seal the cylinder) so carbon build is not a bad thing  also, modern fuels are much cleaner burning so less carbon deposits  sorta.... Rich. |
|
|
|
Post by Zed. on May 27, 2019 21:20:51 GMT
also, clean out the headbolt holes before assembly, any oil or water in the threads can resist the bolt tightening & give false torque readings, obviously any dirty threads can do same.
I use an old headbolt (with a few eqiuily spaced cut along the threads length, similar to a thread cutting 'Tap") to eject & clear the boltholes & threads (message me your address & I'll send you one)
Rich.
|
|
|
|
Post by dickie on May 28, 2019 18:46:40 GMT
I have always found Plus Gas good for softening carbon deposits.
A Brass wire brush can be used to good effect as well.
I can never understand the fuss around non interference engines. ( sensible cambelt changes are all you need )
I have an 60 Thou head skim with 10.5 pistons and about 11 mm cam lift. ( My engine has been interfered with )
|
|
|
|
Post by wannabe on May 29, 2019 9:28:38 GMT
I have an 60 Thou head skim with 10.5 pistons and about 11 mm cam lift. ( My engine has been interfered with ) I have no idea how much mine has been skimmed but I don't think any more could be taken off, looking at how little is left before the valve holes start??!  |
|
|
|
Post by dickie on Jun 2, 2019 20:02:39 GMT
Is that a 1600 head ?
If its a Mk2 1800 that's an extreme skim. 100 Thou ??
What pistons live under the lid.
|
|
|
|
Post by Zed. on Jun 2, 2019 20:42:59 GMT
if you want to know how much has been removed then measure the head's thickness? there must be a min/max thickness somewhere on the internet... sorta interested in that now Rich. |
|
|
|
Post by wannabe on Jun 2, 2019 21:28:54 GMT
Well, now I look at it again, that is a prarrie canoeload of material removed... This was it when I took it apart (with headgasket still attached) - and this is with a 35thou skim previously (IIRC, and assuming the work paid for was done, of course), and possibly even a bit more before that (before I had the car):  It's a 1600 with standard pistons (because SNC engine) AFAIK - I think the pistons have '17' stamped into them??. I'm not sure if it looks like a massive skim from its previous state above because the headgasket is still on - it's hard to tell. The more I look, the more it looks like the previous skim was already pretty damn tight?? The workshop manual I have says (page B-48) that head height/depth should be 133.8 to 134.0mm (5.268-5.276in), with max grind being 0.20mm (0.008in). Obviously the manual's max grind is OEM spec but now I'm even more concerned I'm going to be slamming pistons into valves, even if timing the cams to OEM timing... TDC for pistons is going to be only the thickness of the headgasket away from the valve surround, surely, assuming the top of the pistos is level with the top of the block? I'm assuming using two headgaskets or a custom, thicker version is a no-go? I used the bloke in a workshop in Aylesbury mentioned by someone on here previously - EMS, I think it's called - I didn't specify any crazy skim, but neither did I specify to only take as small as amount off as possible. I've actually ordered a set of vernier calipers (although not a mega-money set) and they should arrive around Wddnesday, so at least a rough measurement should be forthcoming soon. Your thoughts on if it's even safe to fit are welcome...  |
|
|
|
Post by atlex on Jun 3, 2019 15:38:32 GMT
I think you'd want to get a slightly thicker HG to keep it safe  To paraphrase a friend, your head looks like one of those ones used by racers who rebuild their engines between each and every race weekend. |
|
|
|
Post by Zed. on Jun 3, 2019 15:54:28 GMT
wannabe , if you are worried, smear a layer of plasticine (spelling probably wrong) on number 1 piston crown, fit the gasket & drop the head on with 2 headbolts* on opposing corners, then fit & time the cambelt... then take a bravery pill gently turn the engine a few times BUT if you feel resistance STOP if no resistance (over the friction & valve-spring pressure is felt then remove the head & inspect the marking in the plasticene (sp?) if resistance, remove the head & see if you can determine the cause  Rich. *if the headbolts are 'nipped' as opposed to torqued, the headgasket will not be compressed this & can be repeated same with the cambelt...
|
|
|
|
Post by wannabe on Jun 3, 2019 21:02:10 GMT
wannabe , if you are worried, smear a layer of plasticine (spelling probably wrong) on number 1 piston crown, fit the gasket & drop the head on with 2 headbolts* on opposing corners, then fit & time the cambelt... then take a bravery pill gently turn the engine a few times BUT if you feel resistance STOP if no resistance (over the friction & valve-spring pressure is felt then remove the head & inspect the marking in the plasticene (sp?) if resistance, remove the head & see if you can determine the cause Rich. *if the headbolts are 'nipped' as opposed to torqued, the headgasket will not be compressed this & can be repeated same with the cambelt... A good idea! I was thinking about doing that to check what happens so reckon I'll have to give it a try. I guess it's possible to peer down the sparkplug holes and see if there are any indentations as the piston moves down. (Now I think about it, are the plugs at risk of touching the pistons?! I'll have to fit one to check...) I found this listing on ebay, with a picture - a 40thou headskim is clearly less than I have... lol www.ebay.co.uk/itm/Mazda-MX5-MK1-1-6-EUNOS-Import-NA6CE-40thou-Skimmed-Machined-Rebuilt-Head/183770959532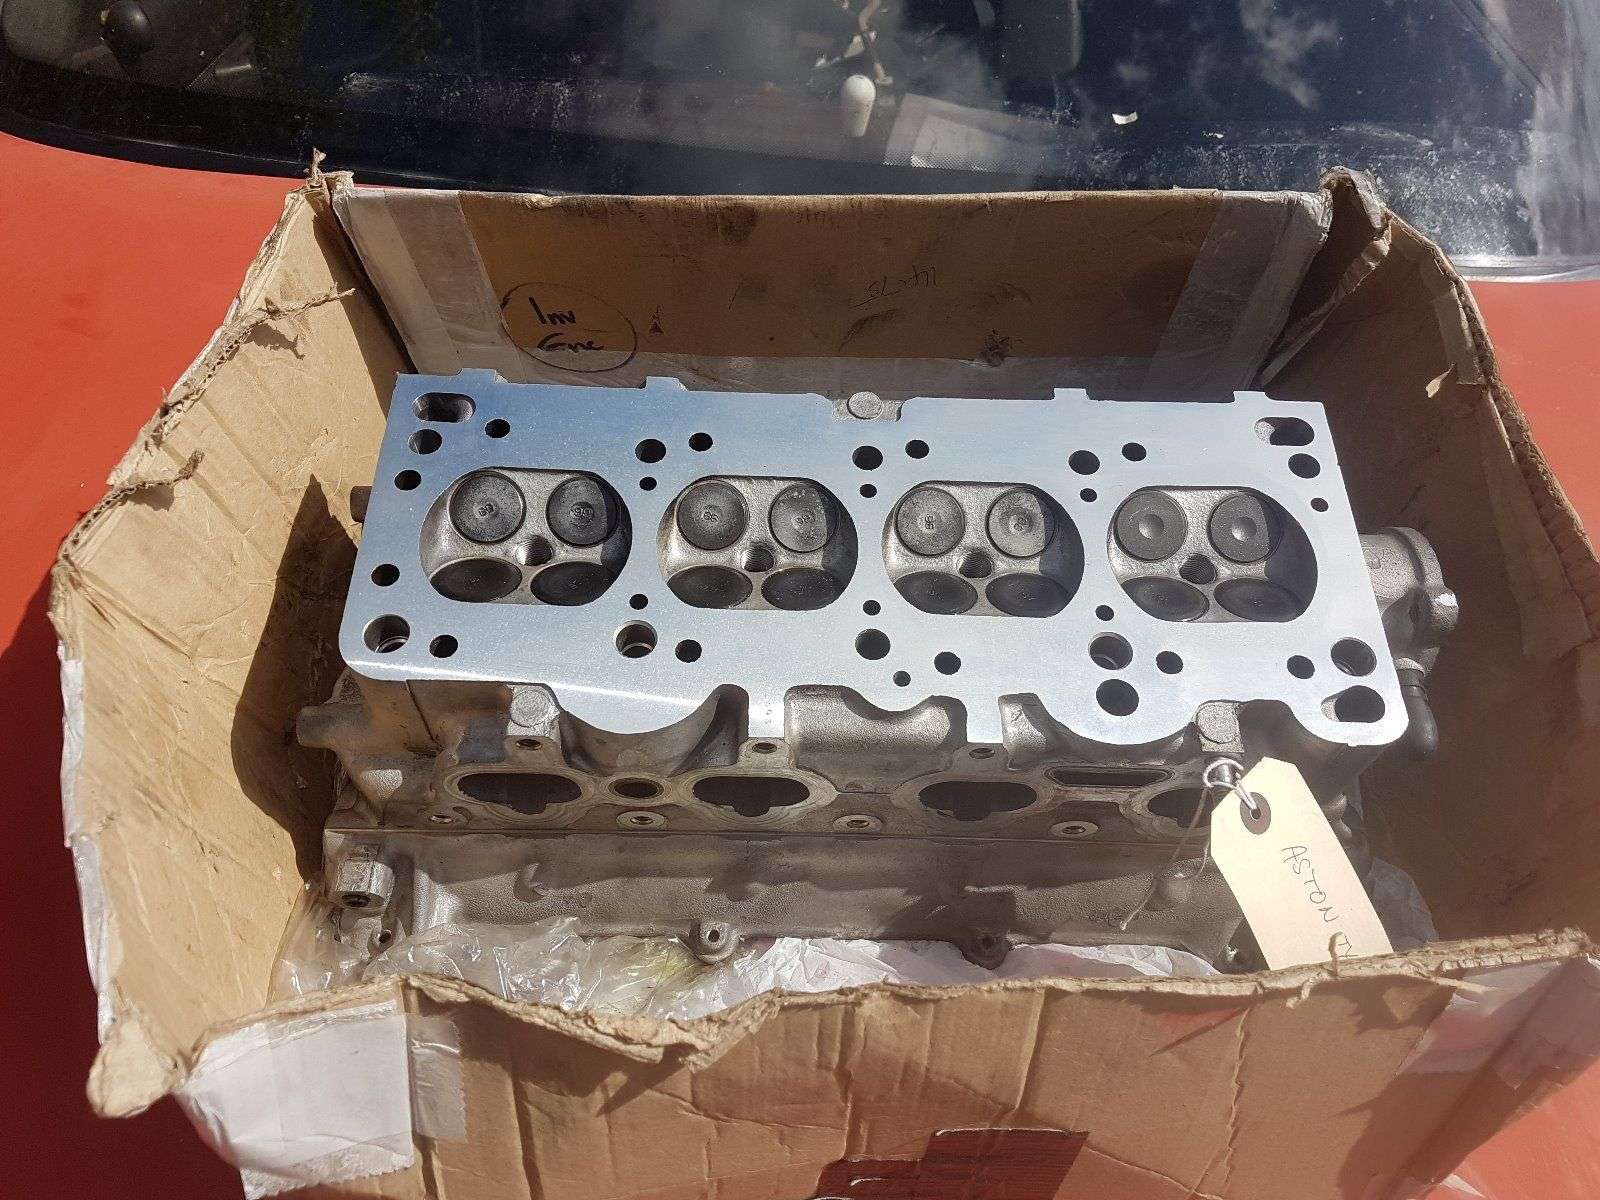 |
|
|
|
Post by Zed. on Jun 3, 2019 22:16:13 GMT
the 1.6 engine's head (that I've just removed) is 133.8mm thick so I guess thats standard? I'll get a photo of the chamber BUT as it's a casting the chamber will be around the shape of the mold +/_ casting tolerences and manufacturing / maching relative to the 'step' Rich. |
|

 It's taken off some of the chunks but it's hard to tell the depth of what is left (which you can see in the picture) and I don't want to damage the piston.

 I know keeping the bores undamaged is important but if there's fewer issues with slightly scratched faces, that is good news!


 le sigh