

NoPro diy Washer Bottle - Suzuki Cappuccino!
Apr 11, 2018 21:30:06 GMT
moro, myothercarsa2cv, and 2 more like this
Post by atlex on Apr 11, 2018 21:30:06 GMT
Suzuki Cappuccinos have a lovely bottle that lets us relocate stuff from the engine bay of mk1/mk2 cars  it fits nicely behind the firewall. NoPro sold this bottle with fittings but at a premium. You can make fittings yourself with a little work. You can get these bottles from breaker cappuccinos but it isn't always easy to find them.
So there is a link to Rakuten to get this bottle new. Rakuten.. is a bit japanese, so it isn't always obvious how to use the site. The bottle is like, 20-30 quid, but the import duty on that will be +- 15 quid. It was 20 quid for two bottles in my case. Your mileage may vary. Rakuten takes paypal from what I recall.
global.rakuten.com/en/store/suzukimotors/item/jrxl381a-10/?siteID=je6NUbpObpQ-oaYJRK1kM8evKqgV2wlajw
(Found via mazdaroadster.net/showthread.php?13376-Cappuccino-windshield-washer-bottles-a-la-Nopro-cheap-on-Rakuten&highlight=rakuten )
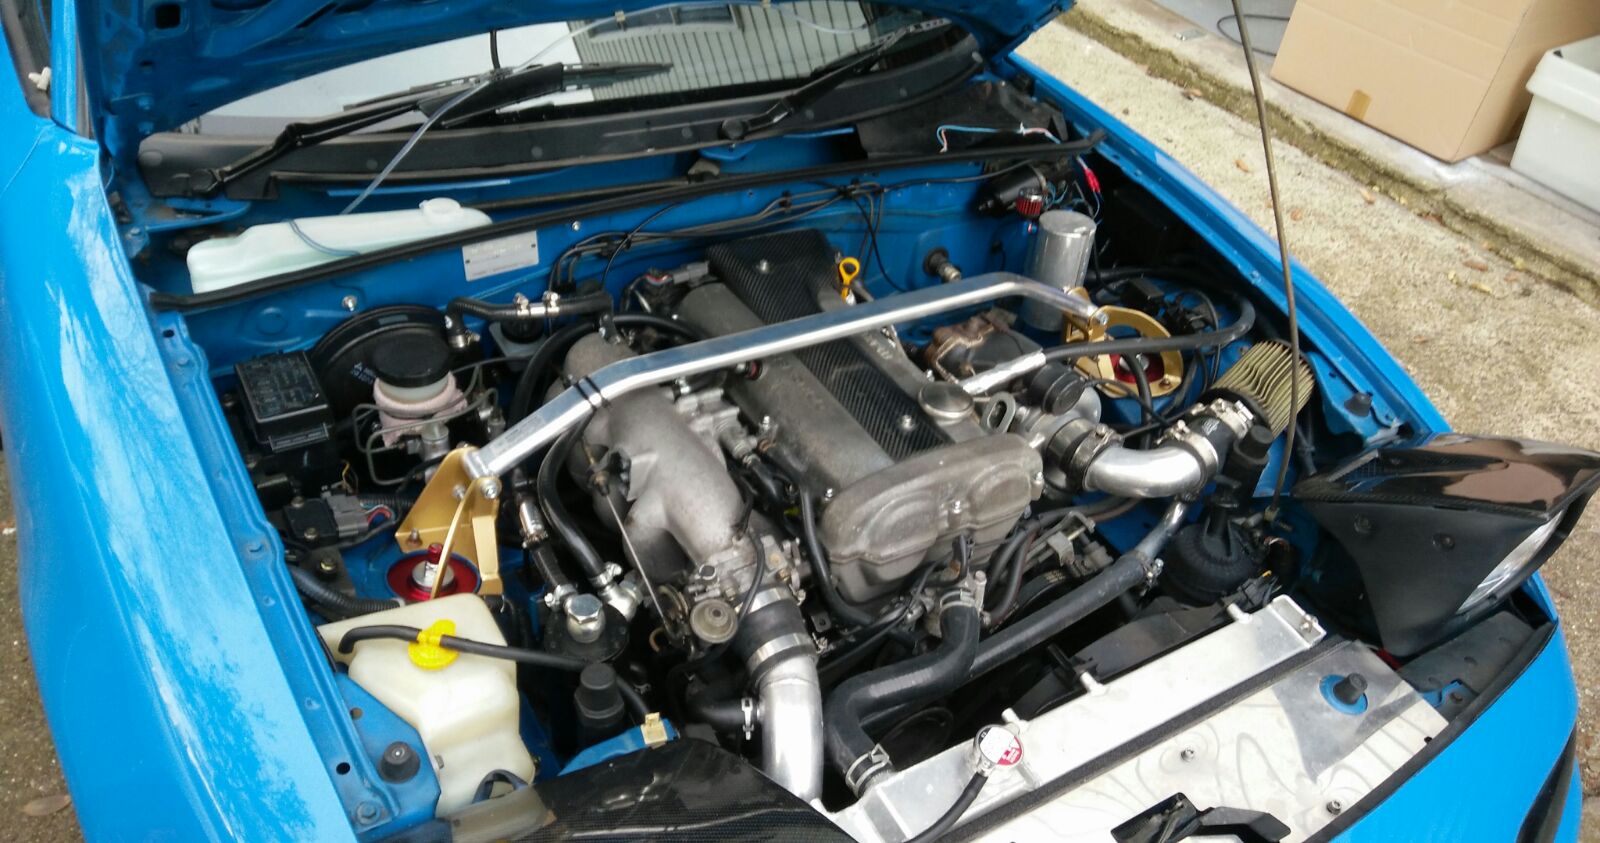
I've done this mod twice now. Once as a normal washer bottle..
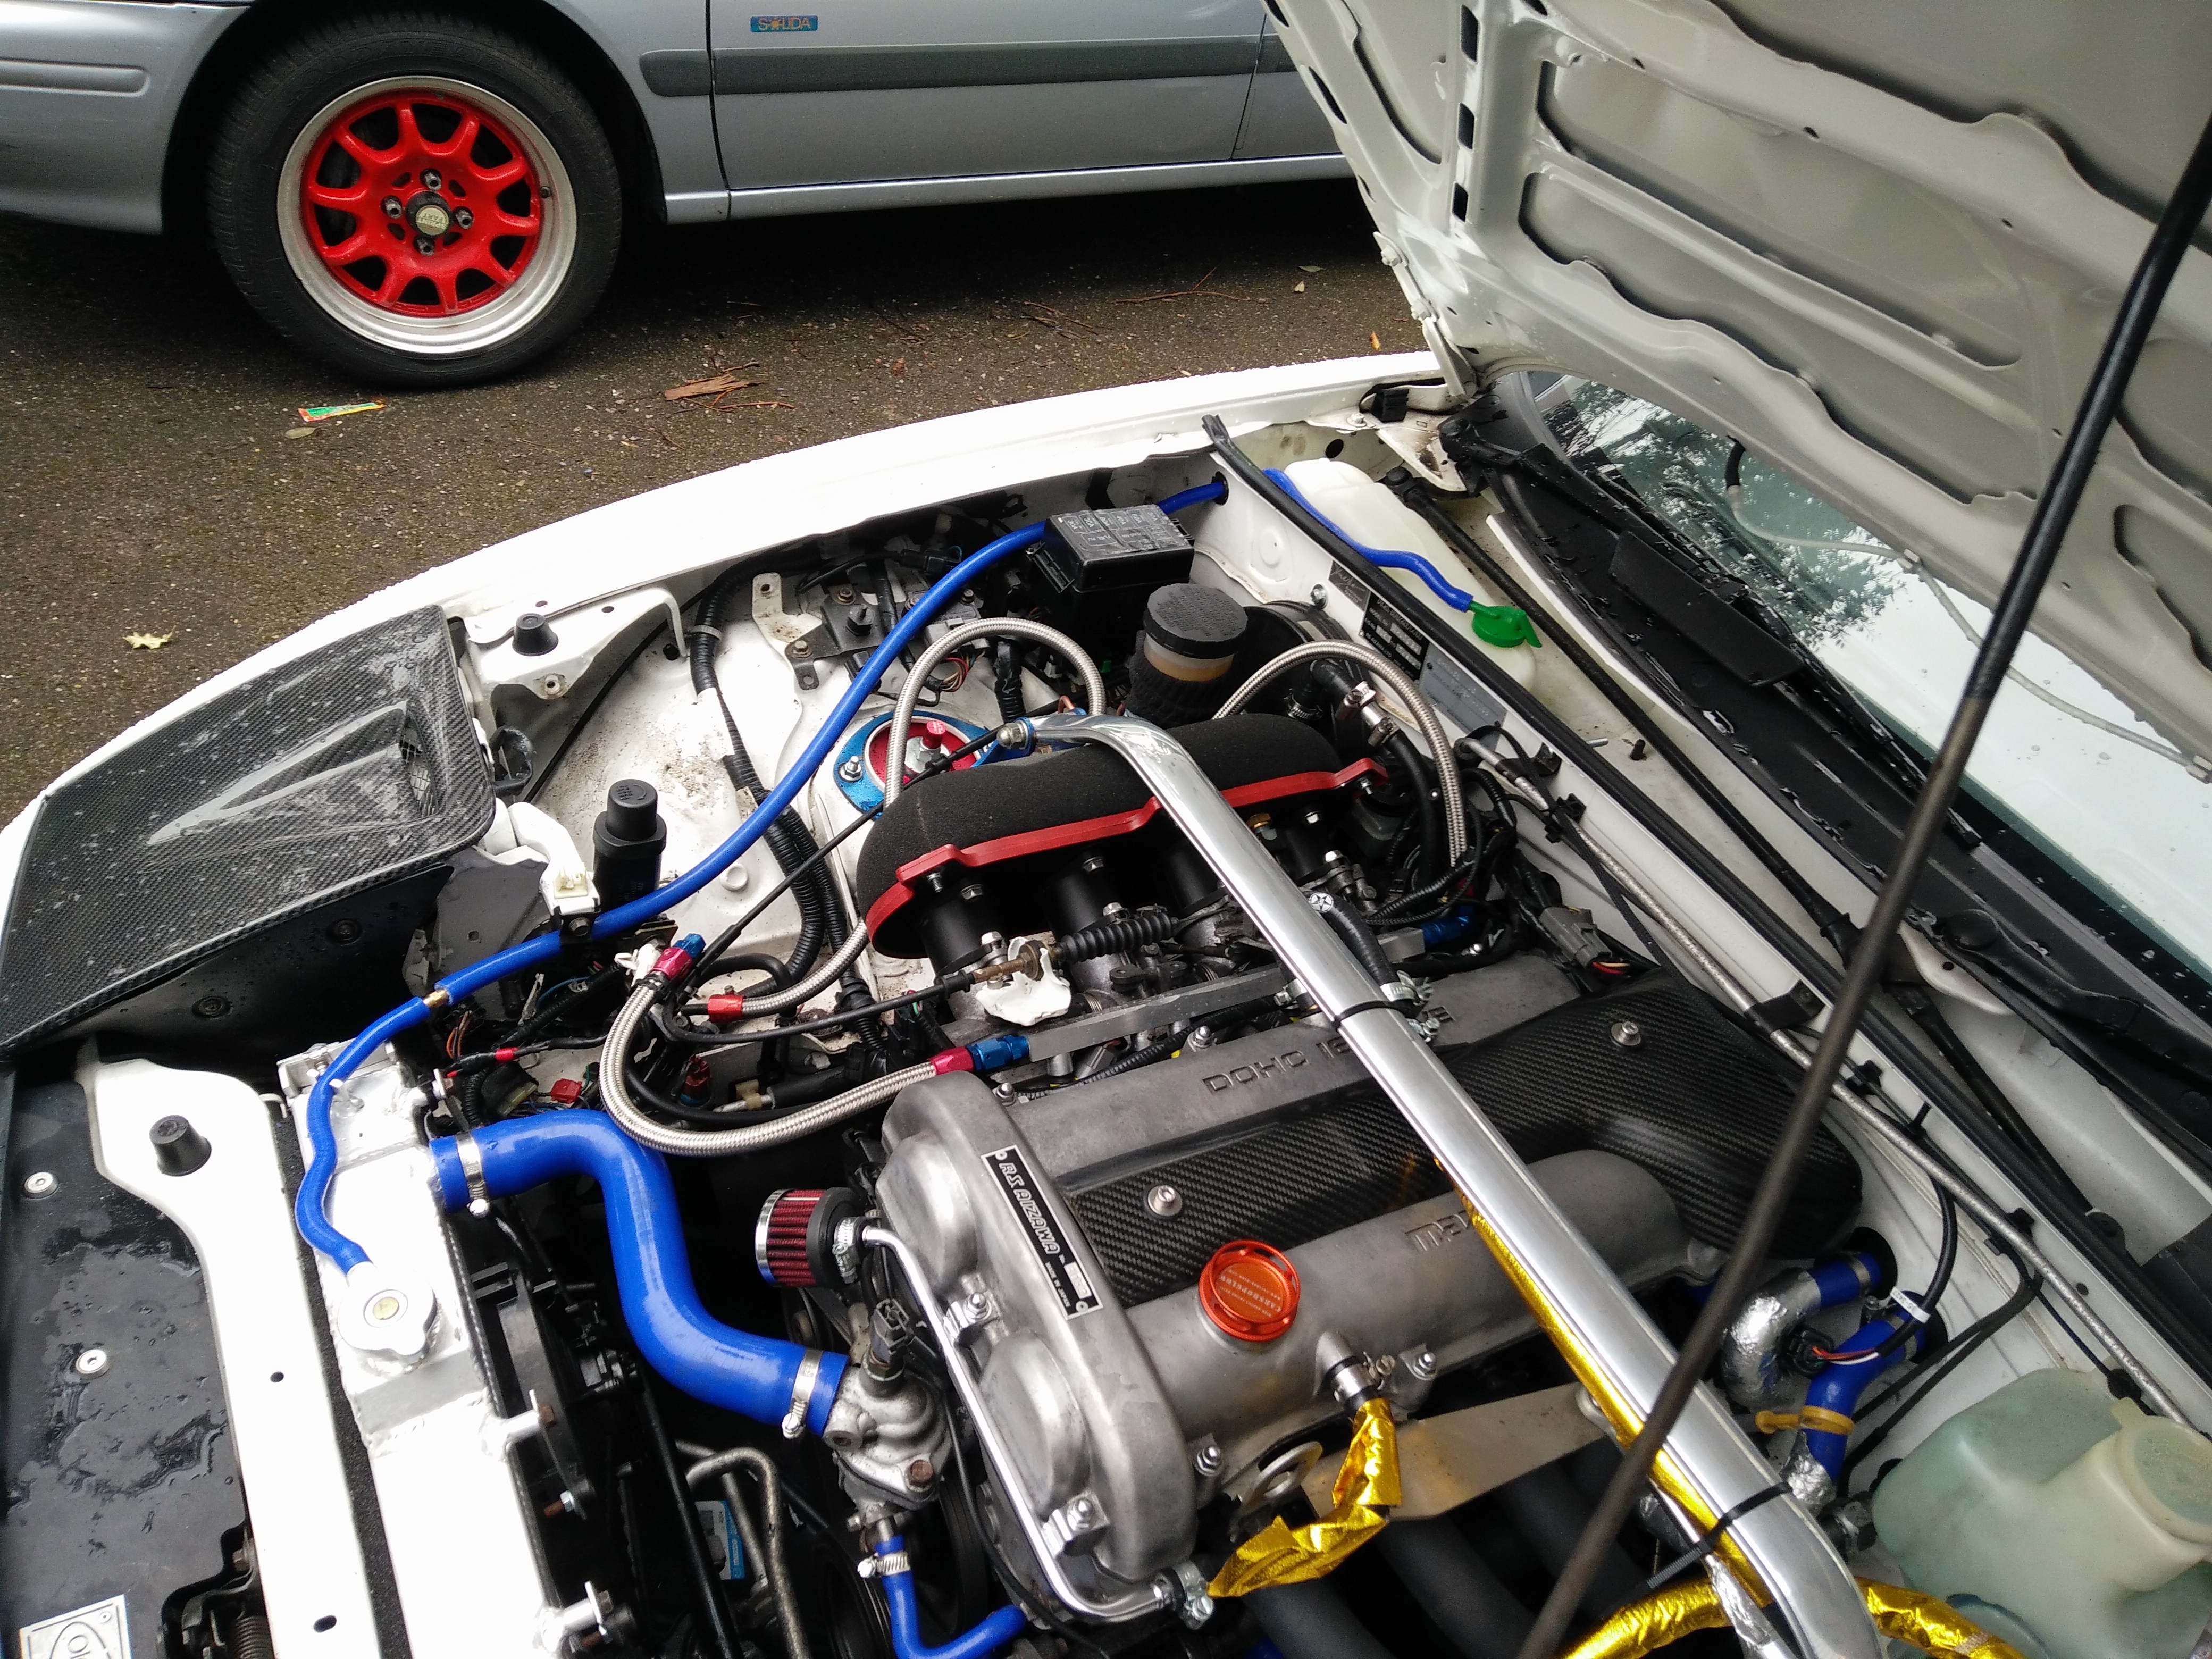
And once to make air space for my ITBs.. well, take a look. Suzuki's expansion tank takes the same size cap as the washer bottles! I love standardisation. an 18mm/17mm blanking plug fits where the 12v pump motor would go.
Ebay item link for the cap ;-) www.ebay.co.uk/itm/391652090661
It not only cleans up the engine bay but moves something that is 1-2KGs closer to the centre of the car. Maybe useful for a racekor.
Items you need to do the "normal" washer bottle nopro mod...
A drill with 6mm hss drill bit to drill stock.
Safety glasses because flying aluminium ? IDK. I just use normal eye glasses.
Some aluminium bar stock for brackets.. and somewhere to safely hold and drill that bar. Some strong pliers are enough to cut this bar, you just need two to do it cleanly with some bendy bendy work hardening action. I suggest 15mm x 2mm x 500mm bar stock ideal for four brackets. it's useful bracketbodging material.
M6 bolts - the ones with 10mm heads - about four - ( 3x normal 25mm long and 1x 60mm+ long for the cap side spacered end), and maybe 12 M6 nuts, because you can use them as spacers. for the cap side of the bottle. A good selection of larger washers helps spread the load on the plastic bottle and the firewall.
You'll want some spare wire to run to the relocated 12v pump motor - you use the same motor as in your old washer bottle. Just run wiring for it. You need at least two pieces of good wire, be sure to know the polarity.. so ideally two different colours. Speaker wire will do however. Maybe get some sheath to make it look good. You can run the wires just between the edge of the firewall and the front fenders, or along the scuttle panel where the old windscreen washer tube would have gone.. you may want to look up the "linesman splice". Or just use some electrical wiring spade jobies if you have those.
Spec for the bar stock to make it fit nicely is a 7cm gap between centres of holes for the "cap side" (call it 9cm length) and *about* 11.5cm between centres for the other side. You can use the existing hole there to get the perfect measurement and then fit it - it's a bit off 11.5cm.
Do the smaller bracket first and attach one end to the bottle with a normal M6 and the other to the long M6 bolt going through the firewall (which has a captive nut in just the right place). You're nearly there. Then cut a bar with one hole on one end to about 14cm and then remove the grommet from just above the brake booster, put the bottle in and just mark on the bar where you need the other hole. Cut that hole, put a bolt it in facing away from the bottle with a nut on to secure it and then push that bolt attached to bracket (and the bottle) through the hole in the firewall and you're good to bolt it in securely. Again, to reiterate - anything more than 7cm gap on the cap/right side bracket, and the bottle's fat end will interfere with the hood bolts and the hood won't close properly. Reasons eh.
To steal some of revlimiter's photos of the bottle, it'll be more obvious - but his install was for a US miata, so the measurements are a little different.
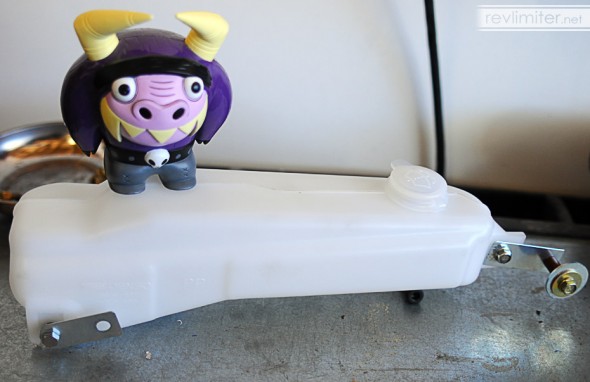
Either way, see this photo - the bar stock on the right should be 7cm between hole centres. The one on the left is what needs your own measurement - it's a bit off 11.5cm.
(see Adam (Revlimiters) post on doing this to an American Miata revlimiter.net/blog/2011/02/nopro-washer-bottle/ )
Final note for the washer bottle - you obviously then hookup the pump to your sprayer hoses, fill the bottle with washer fluid and off you go. Check for leaks tho.
( For the expansion tank style, you don't do any wiring but you do need to run a hose from the radiator (4mm ID), and for that you probably need to make a hole, rust-proof it and grommet it, as I have done in the photo with the white car. But the bar stock and other drilling/bolts are the same spec. )
 it fits nicely behind the firewall. NoPro sold this bottle with fittings but at a premium. You can make fittings yourself with a little work. You can get these bottles from breaker cappuccinos but it isn't always easy to find them.
So there is a link to Rakuten to get this bottle new. Rakuten.. is a bit japanese, so it isn't always obvious how to use the site. The bottle is like, 20-30 quid, but the import duty on that will be +- 15 quid. It was 20 quid for two bottles in my case. Your mileage may vary. Rakuten takes paypal from what I recall.
global.rakuten.com/en/store/suzukimotors/item/jrxl381a-10/?siteID=je6NUbpObpQ-oaYJRK1kM8evKqgV2wlajw
(Found via mazdaroadster.net/showthread.php?13376-Cappuccino-windshield-washer-bottles-a-la-Nopro-cheap-on-Rakuten&highlight=rakuten )
I've done this mod twice now. Once as a normal washer bottle..
And once to make air space for my ITBs.. well, take a look. Suzuki's expansion tank takes the same size cap as the washer bottles! I love standardisation. an 18mm/17mm blanking plug fits where the 12v pump motor would go.
Ebay item link for the cap ;-) www.ebay.co.uk/itm/391652090661
It not only cleans up the engine bay but moves something that is 1-2KGs closer to the centre of the car. Maybe useful for a racekor.
Items you need to do the "normal" washer bottle nopro mod...
A drill with 6mm hss drill bit to drill stock.
Safety glasses because flying aluminium ? IDK. I just use normal eye glasses.
Some aluminium bar stock for brackets.. and somewhere to safely hold and drill that bar. Some strong pliers are enough to cut this bar, you just need two to do it cleanly with some bendy bendy work hardening action. I suggest 15mm x 2mm x 500mm bar stock ideal for four brackets. it's useful bracketbodging material.
M6 bolts - the ones with 10mm heads - about four - ( 3x normal 25mm long and 1x 60mm+ long for the cap side spacered end), and maybe 12 M6 nuts, because you can use them as spacers. for the cap side of the bottle. A good selection of larger washers helps spread the load on the plastic bottle and the firewall.
You'll want some spare wire to run to the relocated 12v pump motor - you use the same motor as in your old washer bottle. Just run wiring for it. You need at least two pieces of good wire, be sure to know the polarity.. so ideally two different colours. Speaker wire will do however. Maybe get some sheath to make it look good. You can run the wires just between the edge of the firewall and the front fenders, or along the scuttle panel where the old windscreen washer tube would have gone.. you may want to look up the "linesman splice". Or just use some electrical wiring spade jobies if you have those.
Spec for the bar stock to make it fit nicely is a 7cm gap between centres of holes for the "cap side" (call it 9cm length) and *about* 11.5cm between centres for the other side. You can use the existing hole there to get the perfect measurement and then fit it - it's a bit off 11.5cm.
Do the smaller bracket first and attach one end to the bottle with a normal M6 and the other to the long M6 bolt going through the firewall (which has a captive nut in just the right place). You're nearly there. Then cut a bar with one hole on one end to about 14cm and then remove the grommet from just above the brake booster, put the bottle in and just mark on the bar where you need the other hole. Cut that hole, put a bolt it in facing away from the bottle with a nut on to secure it and then push that bolt attached to bracket (and the bottle) through the hole in the firewall and you're good to bolt it in securely. Again, to reiterate - anything more than 7cm gap on the cap/right side bracket, and the bottle's fat end will interfere with the hood bolts and the hood won't close properly. Reasons eh.
To steal some of revlimiter's photos of the bottle, it'll be more obvious - but his install was for a US miata, so the measurements are a little different.
Either way, see this photo - the bar stock on the right should be 7cm between hole centres. The one on the left is what needs your own measurement - it's a bit off 11.5cm.
(see Adam (Revlimiters) post on doing this to an American Miata revlimiter.net/blog/2011/02/nopro-washer-bottle/ )
Final note for the washer bottle - you obviously then hookup the pump to your sprayer hoses, fill the bottle with washer fluid and off you go. Check for leaks tho.
( For the expansion tank style, you don't do any wiring but you do need to run a hose from the radiator (4mm ID), and for that you probably need to make a hole, rust-proof it and grommet it, as I have done in the photo with the white car. But the bar stock and other drilling/bolts are the same spec. )


 le sigh