|
|
Post by karture on Sept 22, 2020 20:21:12 GMT
Hi Everybody, I’m Jules, 30 years old and I am working as an Automotive Engineer in The Netherlands, who has helped to build up fast sports cars from the ground, for example at Donkervoort and Vencer. I’m a big petrolhead who’s especially interested in motor sports. At the end of last year, I passed my club racing license and the dream is to start racing. Because of that, I want to build a lightweight track day car that is affordable with a small budget. The reason for the small budget is that I want a car that I can modify extremely and not lose a lot of money when I Canoe things up. This way, I have the freedom to create, Canoe things up and learn a lesson without getting too sad about the lost parts/money. After debating a lot of cars for around 3000e, I decided to go for the Mx5 NB. I had a mx5 NA in the past and think they are difficult to beat regarding price. The NB is the more refined version, had a bit more track width, less bump steer and some minor changes on the suspension. The mx5 is standard double wishbone, has only 2 seats and is light. I also wanted an RWD car, with a lot of aftermarket parts available and knowledge. Above I showed you a picture of its current status, it has only received some Team Dynamics 15 inch wheels and some Federal 595 RS-R semi slicks. 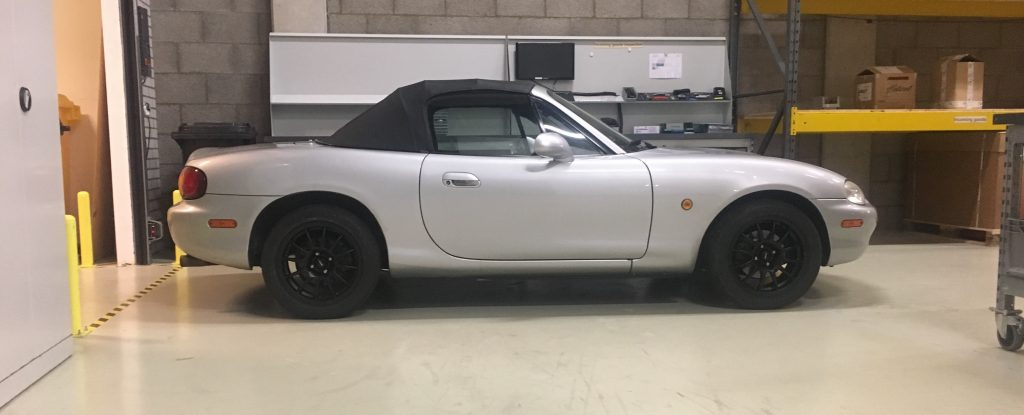 |
|
|
|
Post by karture on Sept 22, 2020 20:25:53 GMT
The first mod I made was a 3D printed intake, below I will tell a bit about the process: To start at the beginning: why use a 3D printer? Well, I have always been fascinated by 3D printers. In my work field, we’ve used quite a lot of 3D printing, mainly for prototypes. As I wanted to learn more about 3D printing myself, I eventually bought my own 3D printer. It was a cheap, Chinese 3D printer, which I’ve modified to meet my personal needs. After a lot of fiddling, I started to produce really nice prints. It was interesting to do the whole process myself, instead of just ordering 3D prints for different prototypes. So to everyone who wants to get involved into 3D printing: I would recommend to buy your own. The next step: find a part to 3D print and use as a functional part within the car. As I have an mx5 and I’ve also never liked the intakes on an mx5 from a visual point of view, my choice was easy. Also, the previous owner of my car badly attached an aftermarket air filter. This sucked a lot of hot air inside the engine. Not the prettiest/best solution, so I decided to design my own intake and move it to the cold side of the engine bay. I didn’t care much about losing or gaining some performance. The first thing I did, was finding my old Xbox Kinekt 3D scanner to scan the area in the engine bay. These 3D scans are really rough but good enough to check the packaging. I used Geomagic to convert the scan data to surfaces and loaded it into Solidworks, where I started designing the intake. I incorporated the temperature sensor and the oil breather hose connection.    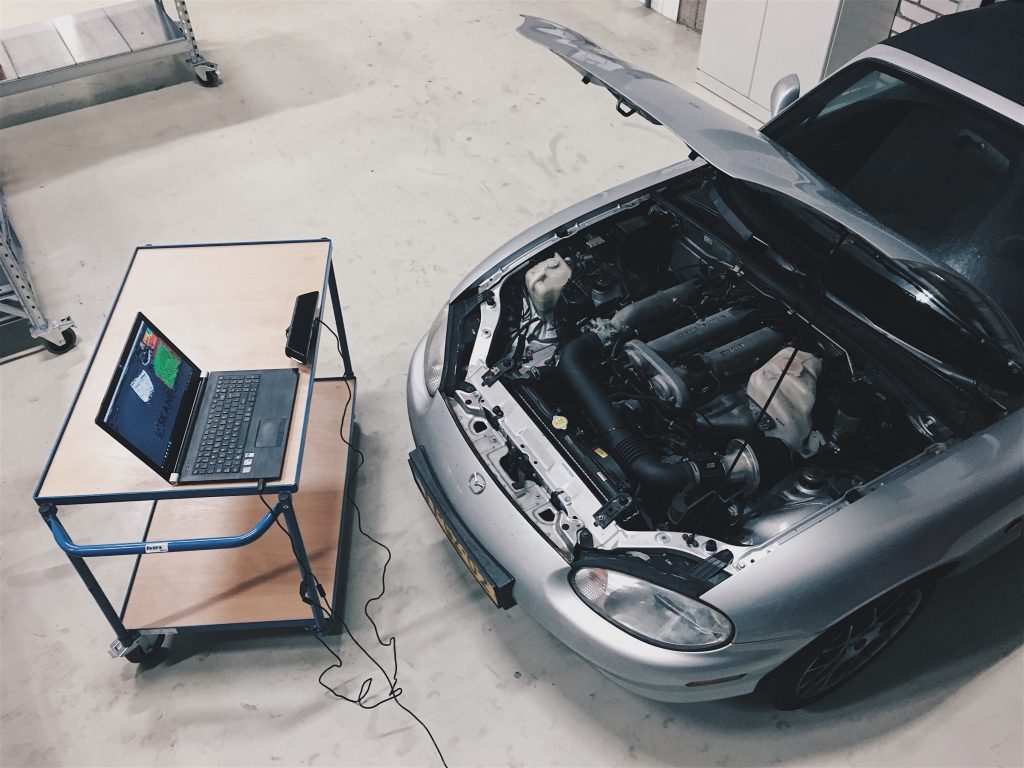 The fun part starts: I printed the first prototype. The material I used, was NylonX. This is a nylon filament with added micro-carbon fibers. At the time, it was a filament with the highest temperature resistance, which could cope with oil and petrol. It came out quite nicely. The only thing I don’t like about FDM (Fused Deposition Modeling) printing are the supports. It takes a lot of time to remove them nicely and clean the surface. However, after a lot of cleaning and sanding the parts did look OK.     Quickly, I came to the conclusion that the intake couldn’t withstand the forces needed to clamp the tubing. I’ve redesigned the intake and made a small pocket on every end. In the small pocket, I added a piece of aluminium tubing, which I turned down in the lathe. This way, I didn’t have any problems with the clamping force. I glued the inserts with Plexus MA 310, a methacrylate glue that – as they say – will glue aluminium and nylon together. This solved the problem; clamping the tubing was no issue anymore. The second problem I had was that I’d noticed that the intake was shrinking over time. I knew the nylon filament is known for attracting moisture. This is the reason why I always store the filament dry and closed, and bake the filament before usage. I adjusted the printing process and tried a couple of more prototypes. 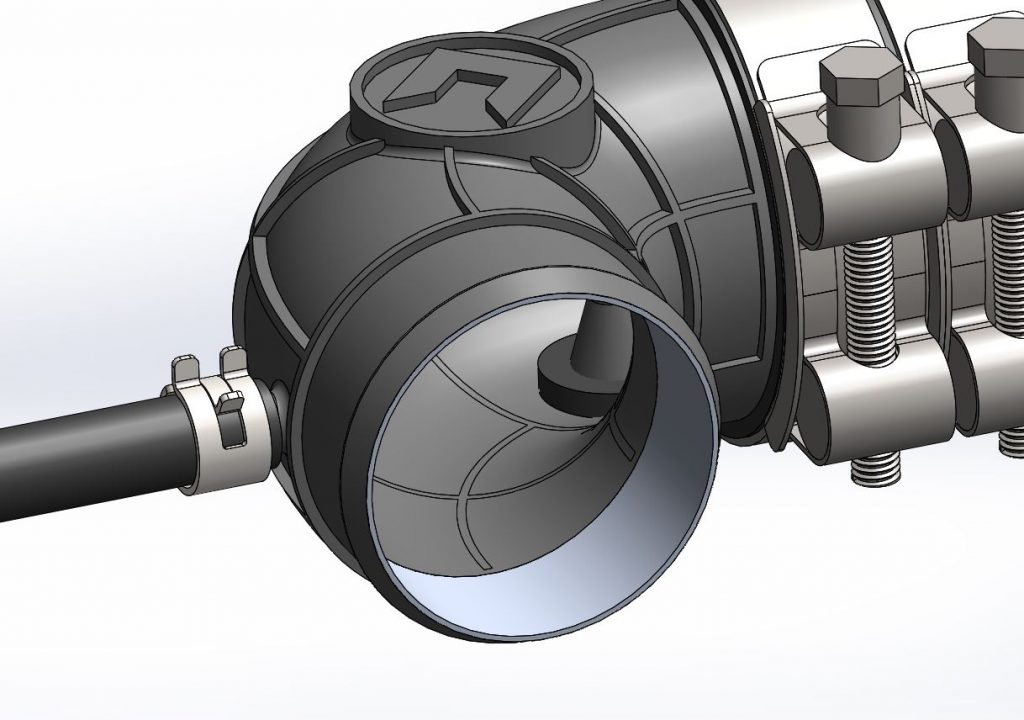 The next prototypes that came out of the printer looked great but over time, they started to shrink again. This also started to become a problem with the aluminium insert, because as you can imagine, the aluminium insert doesn’t shrink over time. This resulted in delamination of the printed intake. At the same time, I started to make use of SLS (selective laser sintering) printing at work. The parts that came out here were amazing, especially the surface finish element. Moreover, the work I’d put into every FDM prototype – to clean up the supports – started to get annoying. So I realized that SLS printing has some other advantages as well in comparison to FDM printing. For instance, the dimension control is a lot better and SLS printing works with a laser. This means there can’t be any moisture trapped in the 3D printed part. As a result, I ordered an SLS printed intake, glued the aluminium inserts in place, painted it black and put the intake on the car again. The results were amazing.     In the picture below, you’ll see two FDM prototypes (left) and the SLS printed part (right). You can clearly see the size difference due to shrinkage of the FDM printed parts over time. I’m really happy with the SLS printed intake. It’s on my car now for more than 2 years, without any problems: no shrinkage, no delamination and it looks a lot better than any FDM print I have ever seen. 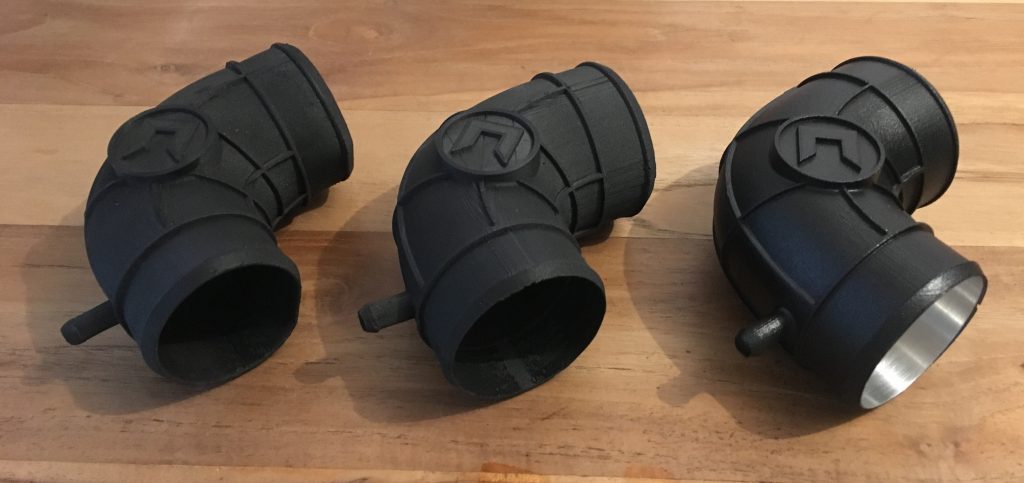 Performance wise, I don’t feel there’s any difference compared to stock. It only sounds and looks a lot better. As I’m not the first one who moved the intake to the other side, there are some opinions. Some guys say they’ve lost some performance in the low RPM range and gained some in the high RPM range. It looks like this is the case, but maybe I was biased already by reading the experience of others. The difference is marginal. But let’s be honest: that’s not the point of designing my own 3D printed intake. I just wanted to look if it was possible to print it myself and learn from the process. If I would gain some extra power, that’s nice. If I would lose some power, I’ve learned a lot during the process. I hope this will clarify most of the questions about my project. Do let me know if you enjoyed reading my first real blog post and also, if you have any questions left: please send a message below or on Instagram. Cheers |
|
|
|
Post by karture on Sept 22, 2020 20:30:02 GMT
As my previous post shows, I’m making a trackday car of my mx5. As the main goal is to build a cheap trackday car, I told myself: looks are not important. I soon found out, however, that this wasn’t true. As much as I love driving a car, I also love to do things differently. That is: building a unique car. So every time I come across something special, I just jump on it. This time, it was a Japanese roadster coupe. So, I came accross some pictures of the Japanese roadster coupe. I just wanted one, or at least one that looks like the japanese version of the coupe. It was almost impossible to buy a coupe and it also wouldn’t make sense to transform it into a trackday car. However, there are some alternatives. A couple of people around the world have started to make their own ‘fastback’ hardtop. It’s more or less a hardtop inspired by the coupe, but the designs show some differences compared to the original ones and are not quit to my liking. I looked into different options, such as buying a miniature model car of the roadster coupe, making a 3D scan, and making a replica. However, this idea stopped really quickly, because I couldn’t find any miniature model. Another option was to make my own coupe. This was feasible but would take a lot of time. So, over time, I also gave up on this idea. I bought an original hardtop and removed as much weight as possible. It was just ready to paint, when an amazing opportunity came across. In The Netherlands, there is an mx5 specialist who imported an mx5 coupe out of Japan. He made a mould of it and then made a couple of fiberglass replica’s. We got in touch and he explained he’d one roof laying around in his garage. I jumped in my car to have look. In the picture below, you’ll see what I found. As you can read, things escalated quite quickly from here. Goodbye cheap and simple trackday car… 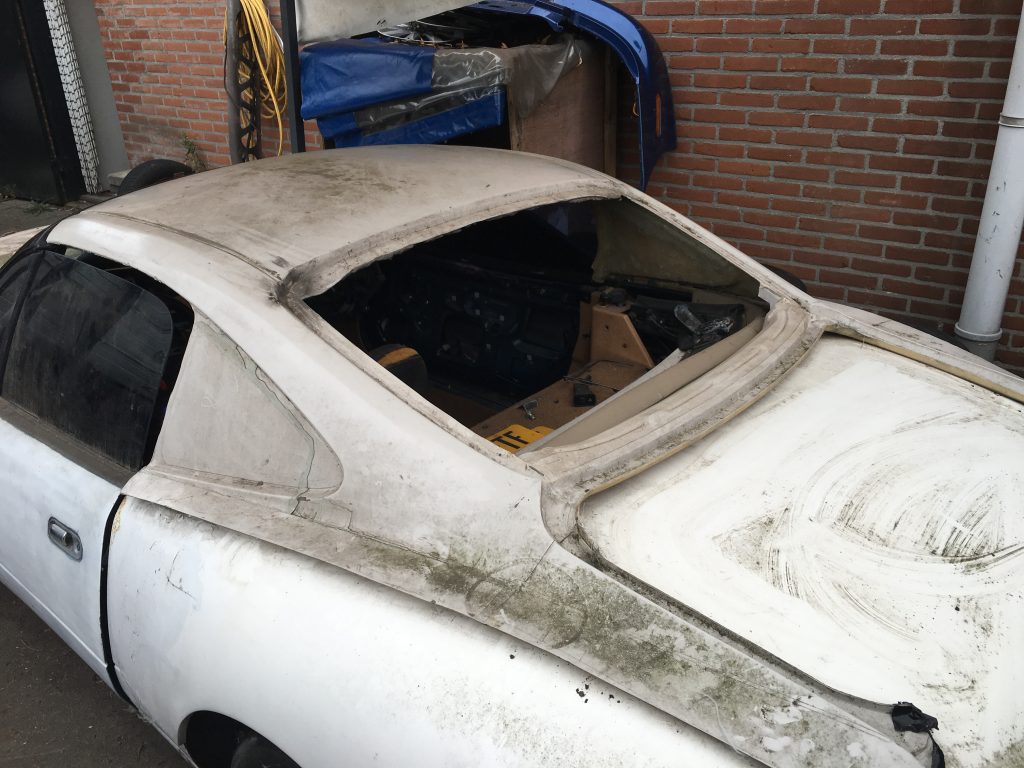 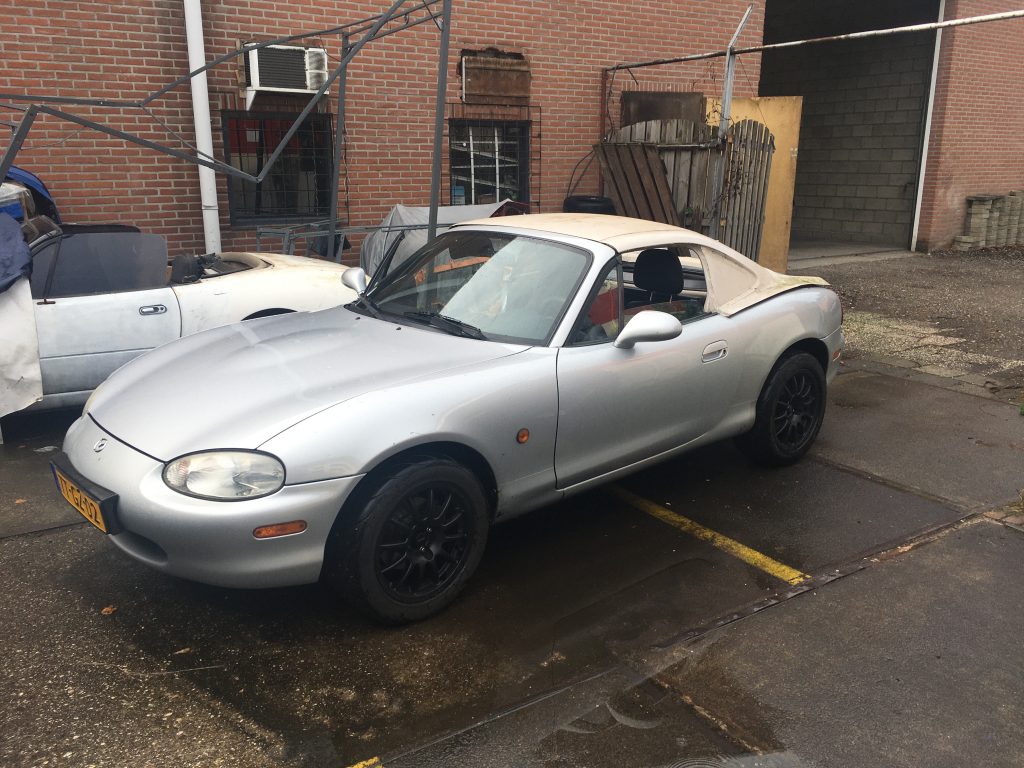 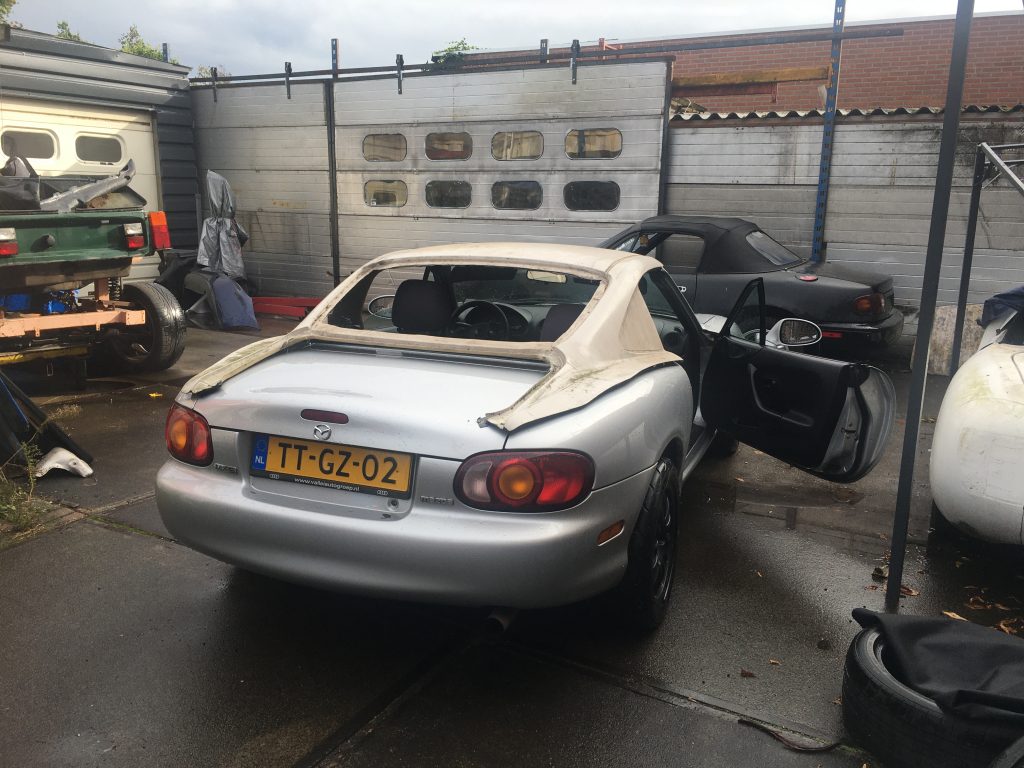 As the pictures show, there was some work involved to make it fit. But I was in love with the look. We agreed on the price and I took the replica coupe roof to a friends shed. After a thorough cleanup, we started test-fitting the roof. The roof looked like a unique and nice base to start with.   After some fidling and trimming, the roof started to fit to the car. It had completely changed the look of the car, even though the fiberglass replica was just a shell. 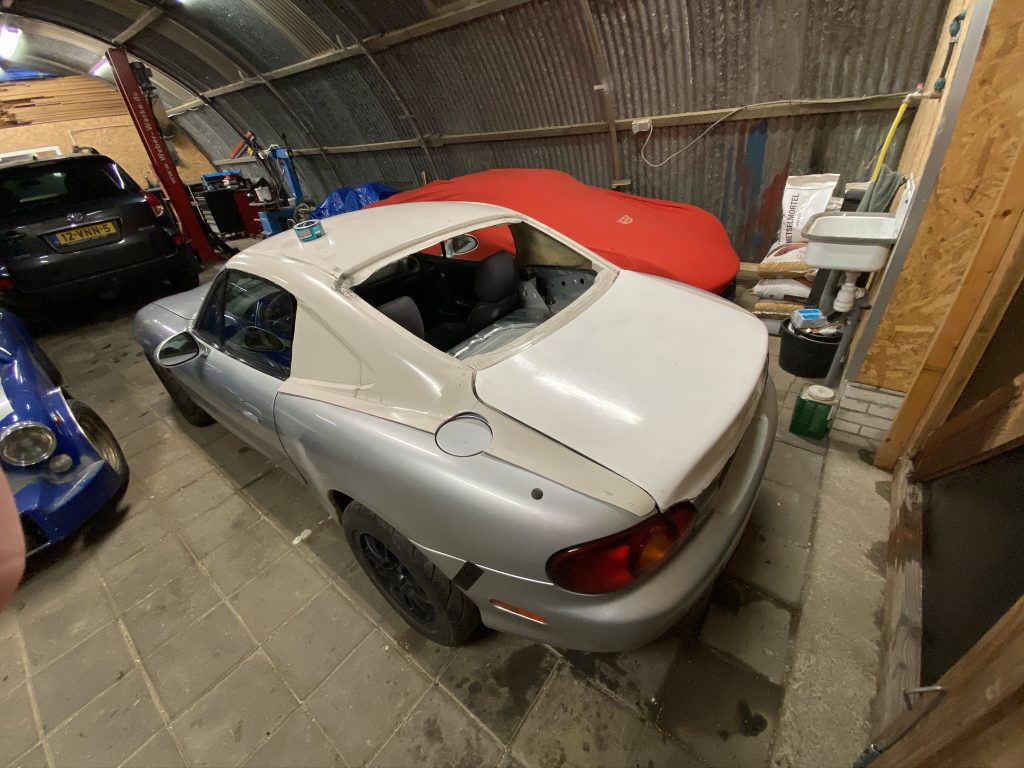 Because it was a bare fiberglass shell, the first step was to make the front mount. This way, I could always align the roof in the same position, and continue working from there. I took out the original soft-top and noticed the front part was made of steal. If I could re-use this part, I could also re-use the original clamps, which would make it easy to pull the roof on and off. So, I start hacking the original soft-top and was left with a welded two piece steel connection part. I separated the two pieces by drilling all the spot welds. I only needed the lower part, which is used to screw the original clamps to. Also, it would help to get rid of some unnecessary weight. 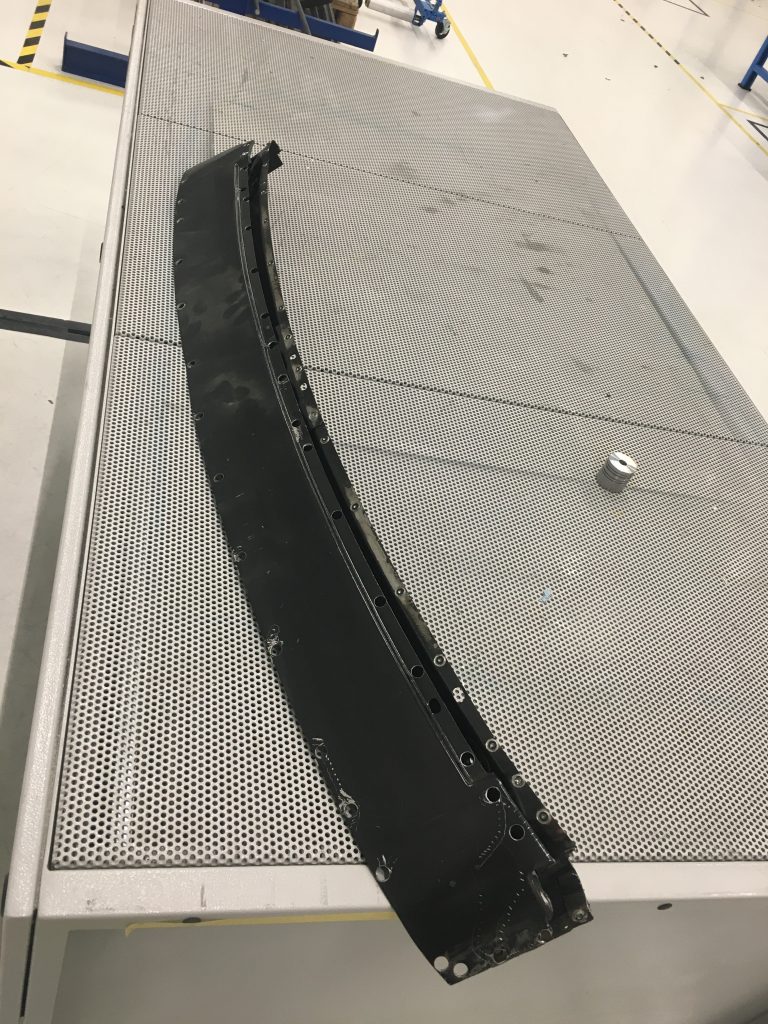 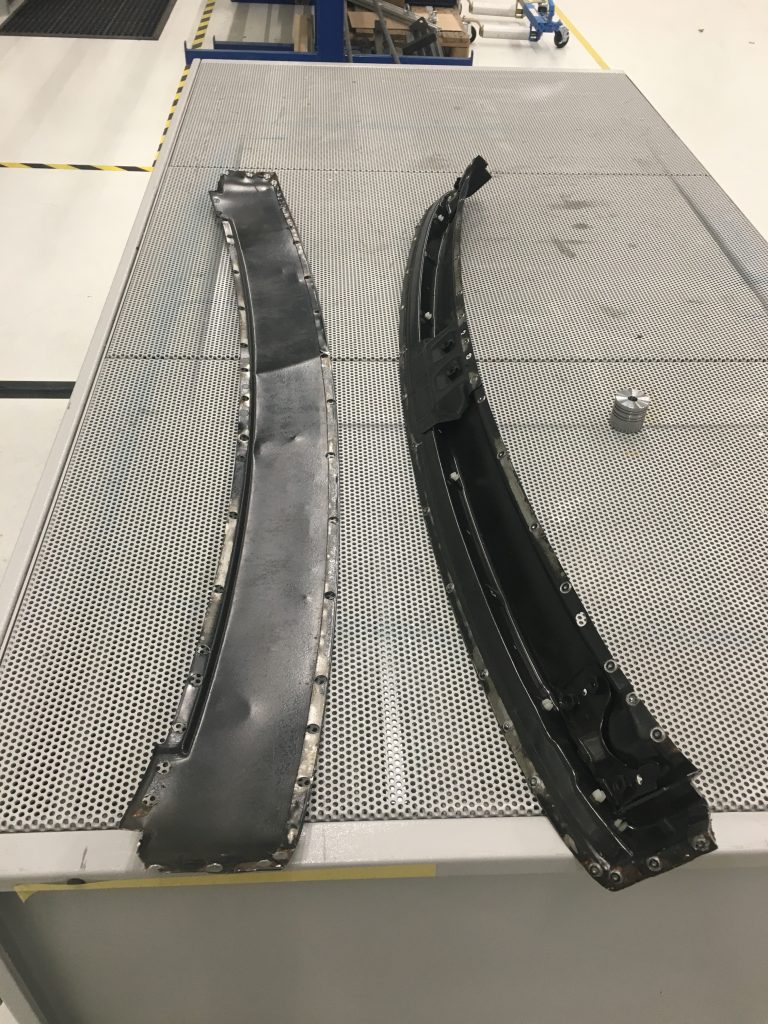 After this, I pressed some ‘speedholes’ in the connection bar. The main reasons were: removing extra weight, getting some structural integrity back after splitting the two halves and finally, of course, because it looks cool. The next step was to start painting. I painted it black and glued the connection bar to the right postion in the fiberglass shell. I used some polyurethane glue, to compensate for the differences in thermal expansion. Another reasons was to keep the connection more or less flexible, because there always will be some movement in the roof.    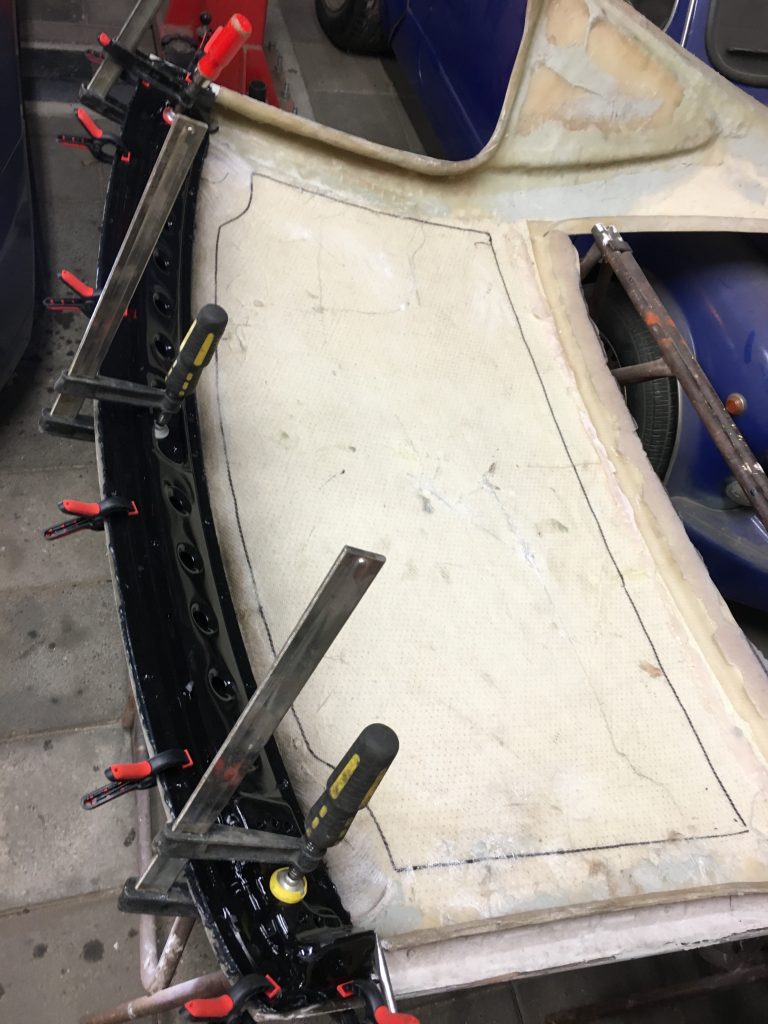 As you can see on the pictures above, the fiberglass roof isn’t perfect yet. It’s quit rough and needs a lot of work. Nevertheless, I’m really happy with the current look and feel that, in the end, it will be quite unique. Cheers |
|
|
|
Post by moclan on Sept 22, 2020 20:45:01 GMT
Following ...
|
|
|
|
Post by wannabe on Sept 22, 2020 21:20:01 GMT
This is awesome  You don't do things by halves!  |
|
|
|
Mx5 coupe
Sept 23, 2020 8:37:46 GMT
via mobile
Post by Vindi (Russell) on Sept 23, 2020 8:37:46 GMT
Love it!! I've made a few fastbacks over the years but never been 100% happy with how they have turned out. The main difference is I wanted mine to remain removable which adds a bit more complication
I'll be following this closely, good luck with it!!
Russell
|
|
|
|
Post by thruxton on Sept 23, 2020 12:19:06 GMT
As Russell said, Love it.
This has livened things up here.
Been some good post recently and this is a cracker!
Please keep posting, this is new and very interesting.
Regards.
Rich.
|
|
gbuk
Chats A Bit
 
Posts: 130 
|
Post by gbuk on Sept 23, 2020 20:14:13 GMT
As Russell said, Love it. This has livened things up here. Been some good post recently and this is a cracker! Please keep posting, this is new and very interesting. Regards. Rich. What they said. Watching with interest  |
|
|
|
Post by scottydugg on Sept 24, 2020 8:30:41 GMT
As above, look forward to seeing where you go with this.
Everyone loves a speed-hole!
|
|
|
|
Post by karture on Sept 24, 2020 8:36:45 GMT
Thanks guys, this motivates me to post more. I'm already a bit further in the build, on my instagram is a sneak peek of the current status. I will try to have a new post finished by the weekend.
|
|
|
|
Post by mrwallace on Sept 24, 2020 8:59:52 GMT
Very cool project! Keep us updated.
|
|
|
|
Post by FFS Corders on Sept 24, 2020 16:16:20 GMT
This is very good reading! Did the specialist still have the mould? As I can see that still having plenty of interest for further batches once word gets out there of its existence
|
|
|
|
Mx5 coupe
Sept 24, 2020 23:55:56 GMT
via mobile
Post by Vindi (Russell) on Sept 24, 2020 23:55:56 GMT
Thanks guys, this motivates me to post more. I'm already a bit further in the build, on my instagram is a sneak peek of the current status. I will try to have a new post finished by the weekend. What's your Instagram? Really interested in how this progresses. As per Corders comment, I wonder if any more of these could be made by the same guy? I'd be interested if that was possible as I don't think I could afford a real one! Russell |
|
|
|
Mx5 coupe
Sept 28, 2020 9:31:47 GMT
via mobile
Post by niklas on Sept 28, 2020 9:31:47 GMT
Lovely!
|
|
|
|
Post by karture on Sept 28, 2020 19:36:44 GMT
Thanks guys, this motivates me to post more. I'm already a bit further in the build, on my instagram is a sneak peek of the current status. I will try to have a new post finished by the weekend. What's your Instagram? Really interested in how this progresses. As per Corders comment, I wonder if any more of these could be made by the same guy? I'd be interested if that was possible as I don't think I could afford a real one! Russell Instagram @julescobben I had the opportunity to buy the one he had laying around last year. As per the picture it was there a really long time. I didn't saw the mould laying around. I send him an update a couple of time, but since a couple of months he is not responding anymore. He also told me he retired. I will try to contact him again. His website was www.mx5teo.nl, but the website seems also down. I sometimes play with the idea of making a mould when the project is finished and will also make a mould of the inner structure. Something that is completly missing, and what I'm making myself at this point. |
|