Post by Robinm on Nov 16, 2016 11:02:56 GMT
I recently bought a nice V-spec but as always the leather on these early cars is quite thin and easily damaged, I thought I'd set about restoring the seats and share my experience, it's the first time I've tried to do any leather restoration.
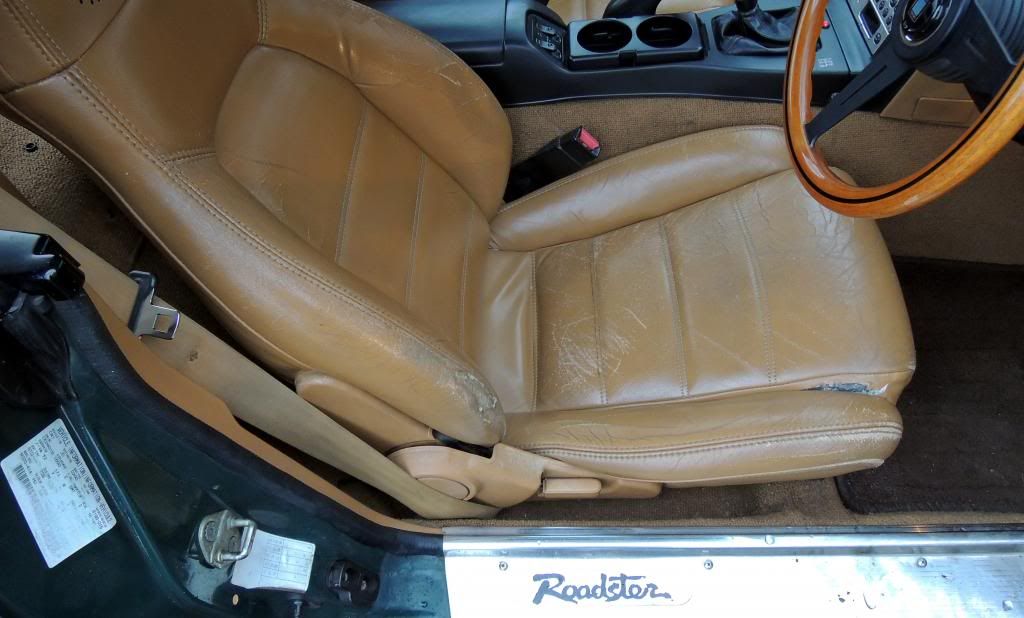
Here's how they were to start, fairly typical on a 20 year old MK1 with leather seats. They were dry, cracked and scuffed up pretty badly, the rest of the car is a lot better than how the seats looked, something had to be done about them.
I took the seats out of the car, so much easier to do the work indoors and have access to the whole seat, also I don't have a wife to tell me not to do it in the lounge
First I sewed up the splits in the seam on the fronts of the seats, this was more to tie the sides of the material together for the leather filler than a finished effect.
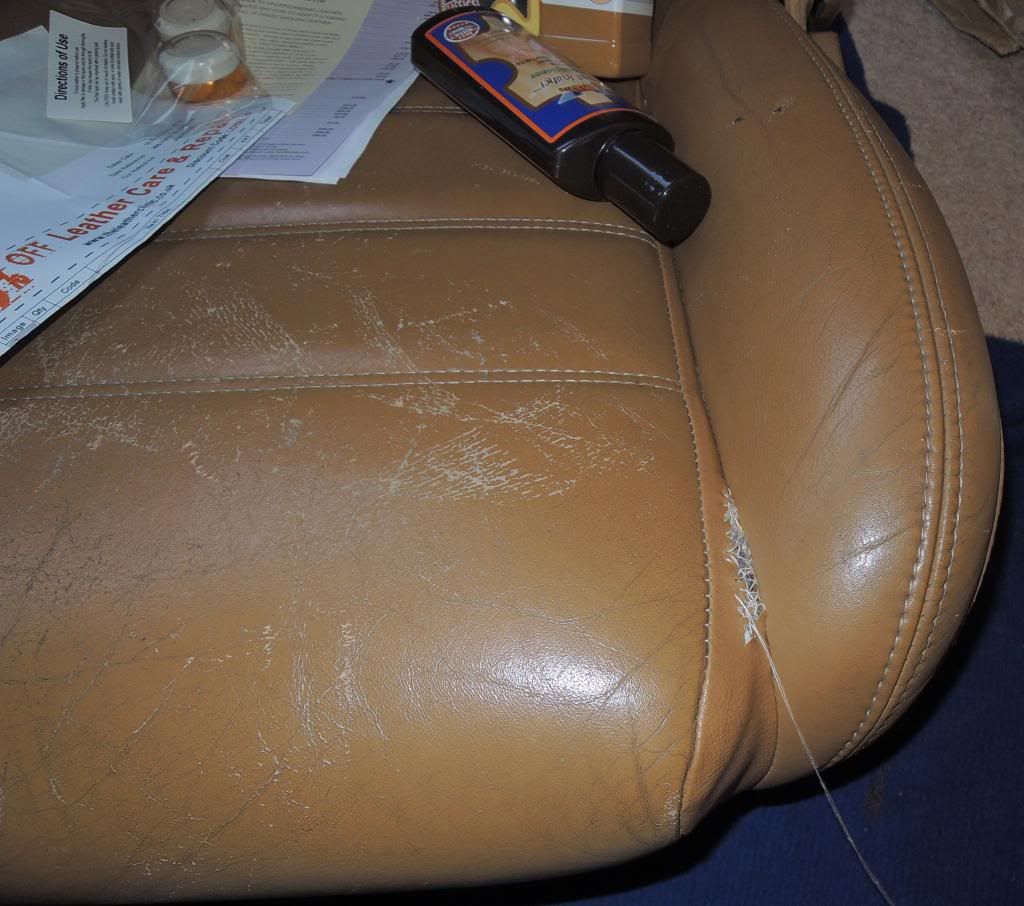
I bought 'Gliptone' products to do the restoration from Liquid leather UK. www.liquidleather.com/22-scuffmaster-dyes The products used were GT12 leather cleaner, GT11 conditioner and the leather dye for Tan Eunos seats, they have hundreds of colours, these are the Mazda ones: www.liquidlea... bank.htm#Mazda apparently there were four colours of Tan for the V-spec? (news to me), I just asked for the most commonly used colour.
The seats had been treated with something years ago by the look of them so they first had a rub down with cellulose thinners to get them as clean as possible. This makes the leather even more dry and hard so several repeated treatments of the GT12 cleaner and GT11 conditioner were needed to soften them back up. The GT12 contains glycerine which really soaks in and makes the leather supple again, the GT11 works well, soaks in and actually smells like leather, this can be used regularly after the restoration to keep the leather supple.
Once all of these processes had been done it was time for the leather filler. I bought this separately from here: It's a paste which is smeared on with a flat knife to fill in blemishes, cracks and holes, it stays as flexible as the leather but can be sanded and overpainted, clever stuff.
Quite a bit of filling required..
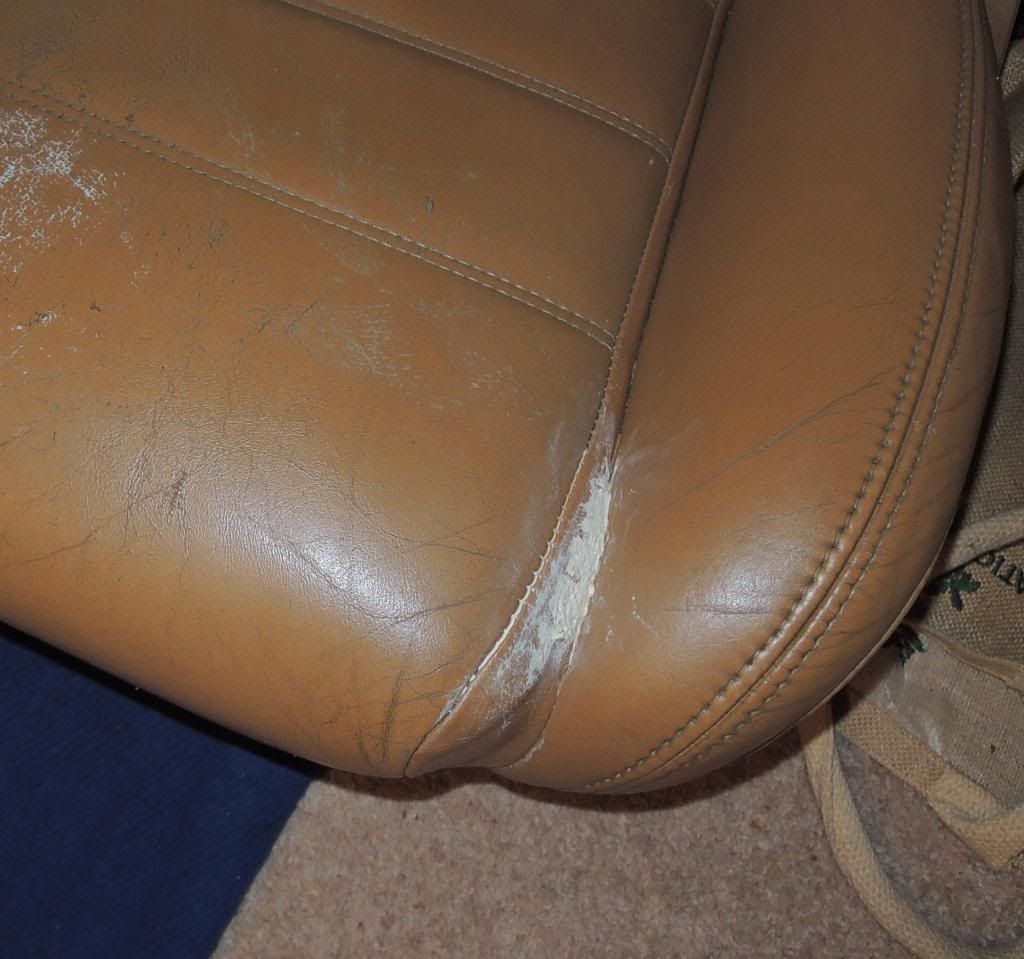
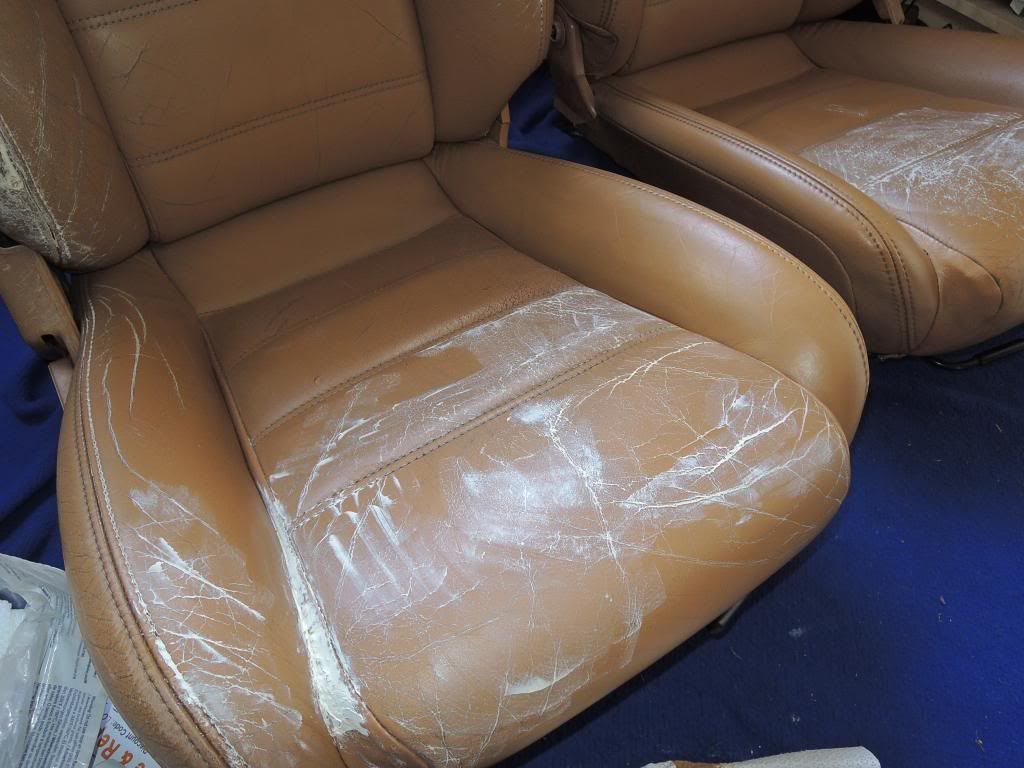
Deep cracks need several thin layers to fill them, once it's all done and dried the seats were then sanded smooth with a fine grade of wet-and-dry paper, I used 800 grade.
Once the seats were filled all over and sanded smooth they were ready for the dye, this acts as a permanent colour and a final finish. The Gliptone dye is water-based and applied with a slightly damp sponge, here's the first coat going on:
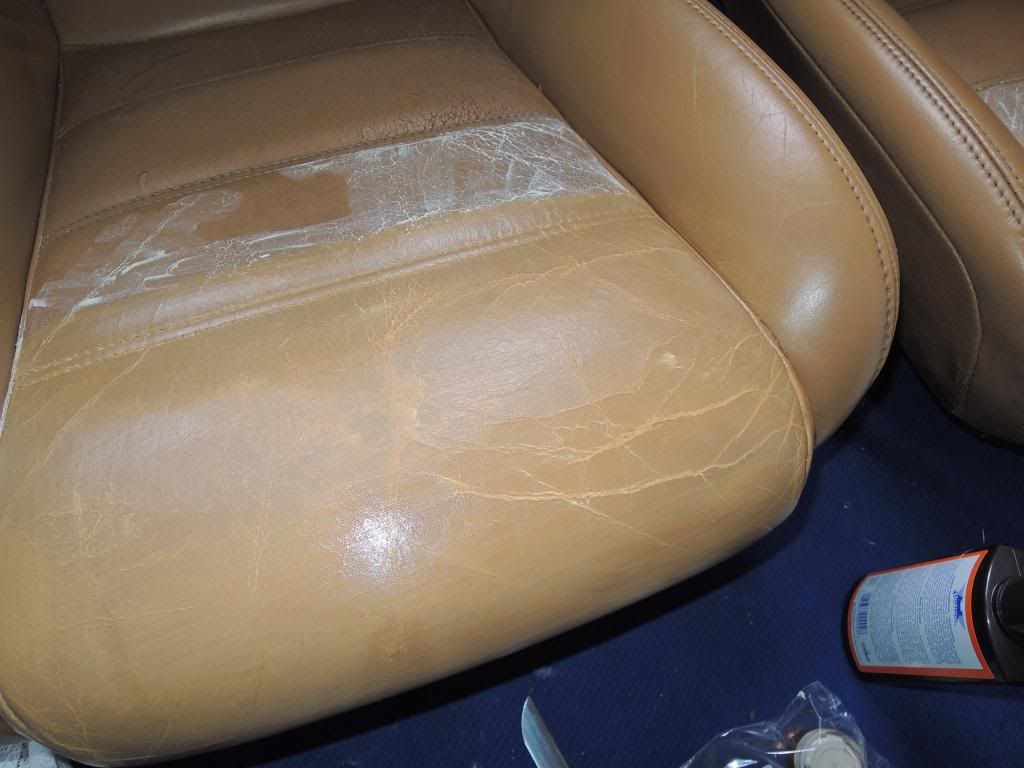
The dye is applied in several thin coats, building up the colour as it goes, the first coat barely covers the filler but further coats cover it completely. I got the hang of using the sponge after the first couple of coats, sometimes a dabbing motion works best and other times very light brushing over the surface. 250ml was enough to do both seats.
This was after two coats:
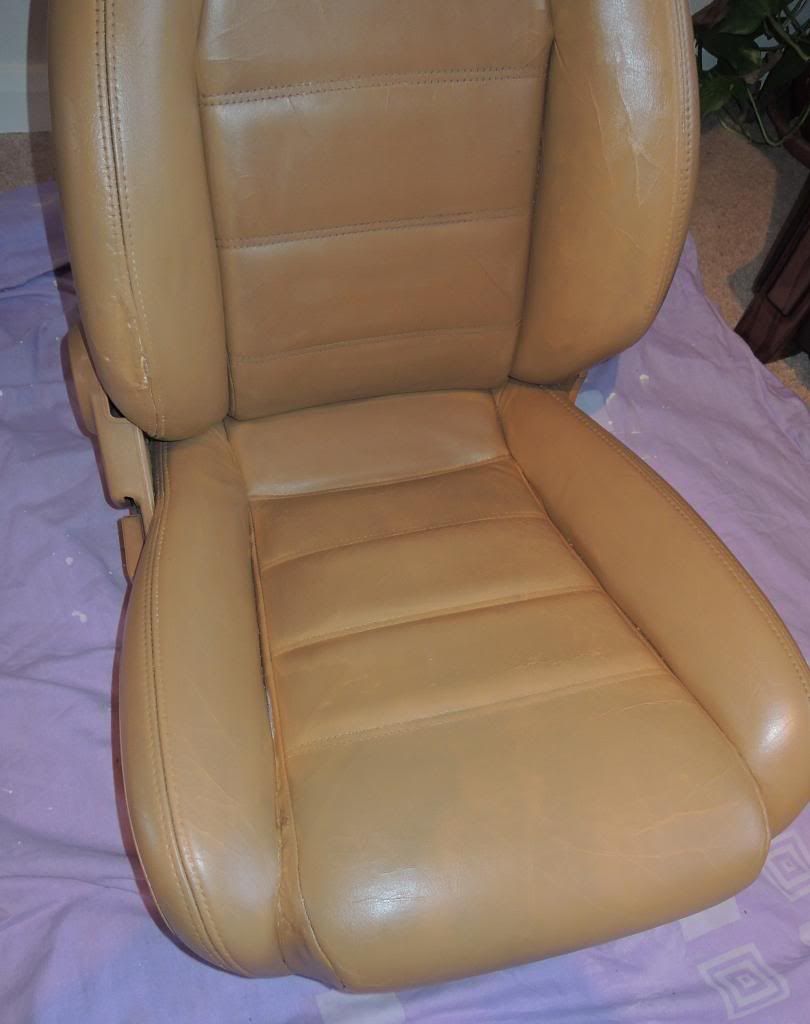
It does recommend using an airbrush to do the final coats but I found with practised and careful use of a damp sponge this wasn't necessary, you have to wear latex gloves though as the sponge becomes a sticky mess after a while, also it's best to leave the coat to dry thoroughly for an hour or two before applying the next.
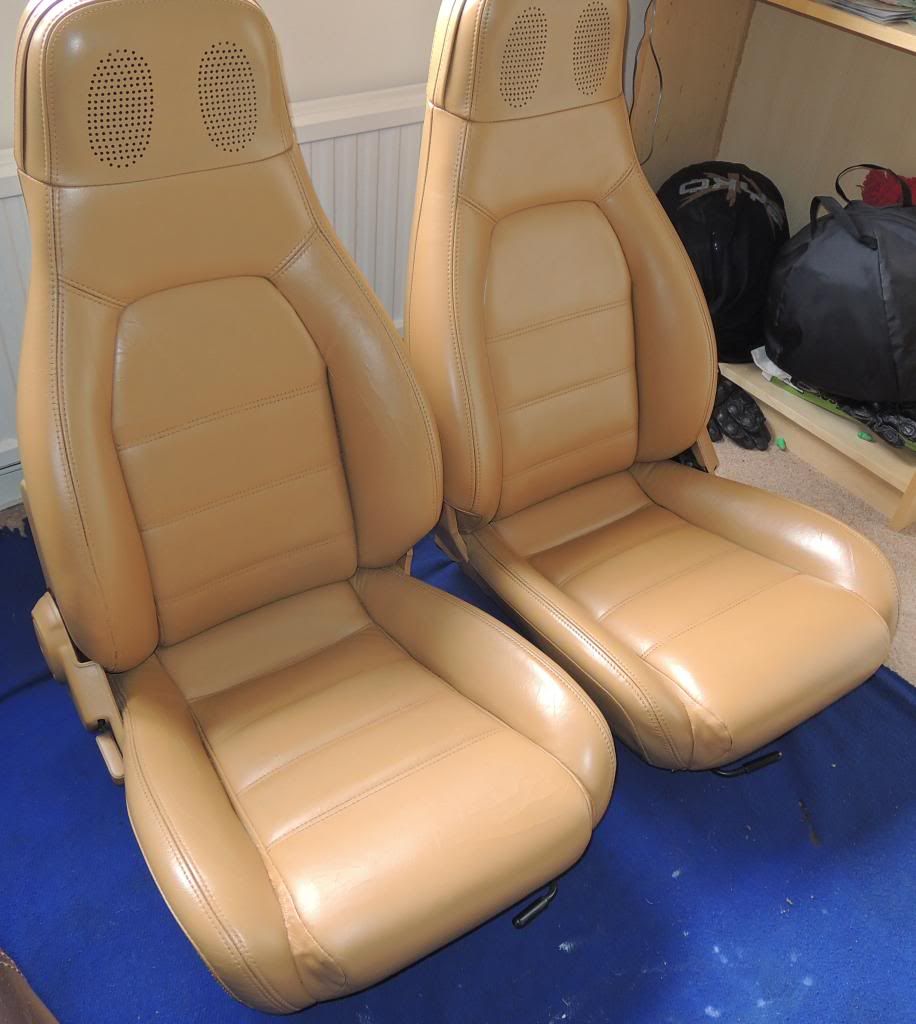
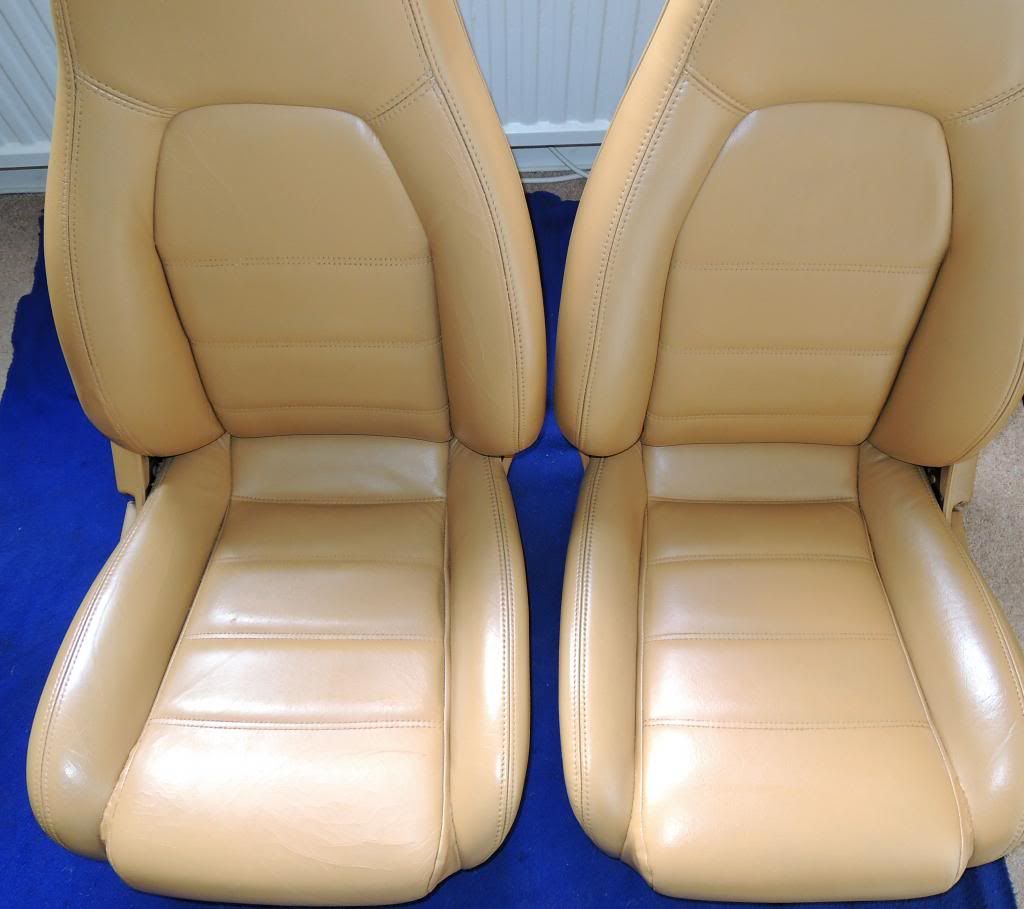
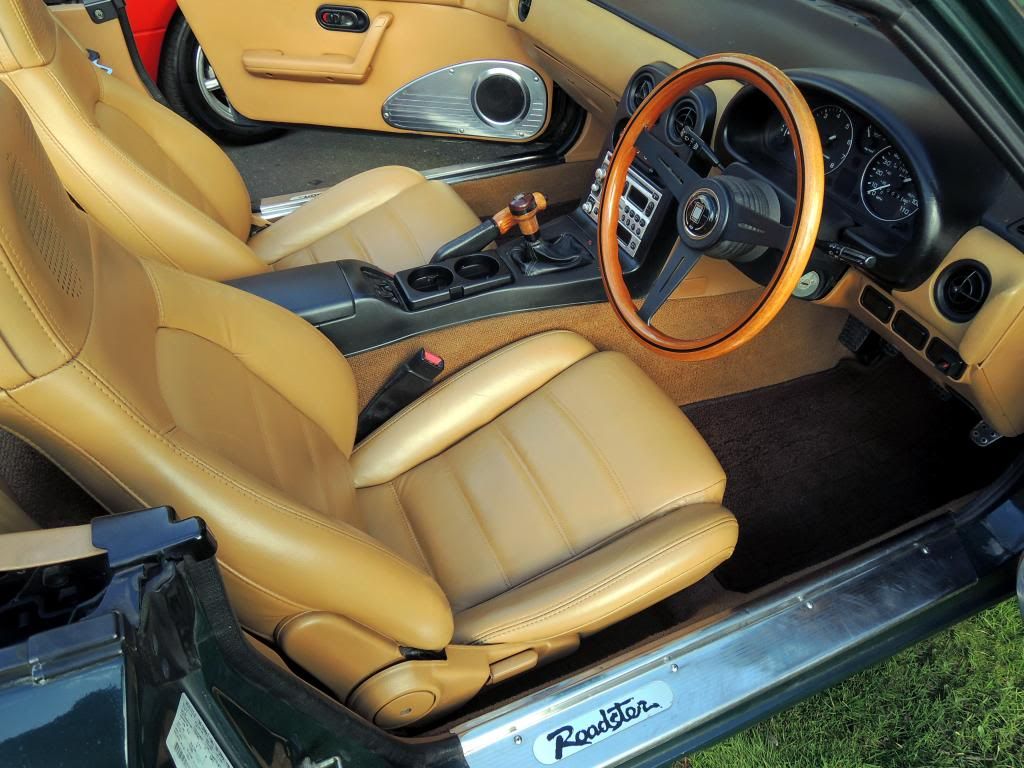
Here's the finished result after five coats, not bad for an outlay of £43 and a few hours work, the seats have been transformed and although not blemish-free, they look amazing compared to how they did look. The finish is supposed to last for years if regularly cleaned and conditioned. I can recommend the products from Liquid leather, they all worked brilliantly, especially the scuffmaster leather dye which is amazing stuff.
Once the carpets are steam cleaned (might do a write-up on this too if there's any interest) these are going to look great back in the car:
Here's how they were to start, fairly typical on a 20 year old MK1 with leather seats. They were dry, cracked and scuffed up pretty badly, the rest of the car is a lot better than how the seats looked, something had to be done about them.

I took the seats out of the car, so much easier to do the work indoors and have access to the whole seat, also I don't have a wife to tell me not to do it in the lounge

First I sewed up the splits in the seam on the fronts of the seats, this was more to tie the sides of the material together for the leather filler than a finished effect.

I bought 'Gliptone' products to do the restoration from Liquid leather UK. www.liquidleather.com/22-scuffmaster-dyes The products used were GT12 leather cleaner, GT11 conditioner and the leather dye for Tan Eunos seats, they have hundreds of colours, these are the Mazda ones: www.liquidlea... bank.htm#Mazda apparently there were four colours of Tan for the V-spec? (news to me), I just asked for the most commonly used colour.
The seats had been treated with something years ago by the look of them so they first had a rub down with cellulose thinners to get them as clean as possible. This makes the leather even more dry and hard so several repeated treatments of the GT12 cleaner and GT11 conditioner were needed to soften them back up. The GT12 contains glycerine which really soaks in and makes the leather supple again, the GT11 works well, soaks in and actually smells like leather, this can be used regularly after the restoration to keep the leather supple.
Once all of these processes had been done it was time for the leather filler. I bought this separately from here: It's a paste which is smeared on with a flat knife to fill in blemishes, cracks and holes, it stays as flexible as the leather but can be sanded and overpainted, clever stuff.
Quite a bit of filling required..


Deep cracks need several thin layers to fill them, once it's all done and dried the seats were then sanded smooth with a fine grade of wet-and-dry paper, I used 800 grade.
Once the seats were filled all over and sanded smooth they were ready for the dye, this acts as a permanent colour and a final finish. The Gliptone dye is water-based and applied with a slightly damp sponge, here's the first coat going on:

The dye is applied in several thin coats, building up the colour as it goes, the first coat barely covers the filler but further coats cover it completely. I got the hang of using the sponge after the first couple of coats, sometimes a dabbing motion works best and other times very light brushing over the surface. 250ml was enough to do both seats.
This was after two coats:

It does recommend using an airbrush to do the final coats but I found with practised and careful use of a damp sponge this wasn't necessary, you have to wear latex gloves though as the sponge becomes a sticky mess after a while, also it's best to leave the coat to dry thoroughly for an hour or two before applying the next.
Here's the finished result after five coats, not bad for an outlay of £43 and a few hours work, the seats have been transformed and although not blemish-free, they look amazing compared to how they did look. The finish is supposed to last for years if regularly cleaned and conditioned. I can recommend the products from Liquid leather, they all worked brilliantly, especially the scuffmaster leather dye which is amazing stuff.
Once the carpets are steam cleaned (might do a write-up on this too if there's any interest) these are going to look great back in the car:




 le sigh