|
|
Post by Zed. on Dec 14, 2022 15:12:02 GMT
Font lip looks good, will really offset the BeIgE as well! Right ok this time I really must put my foot down and insist that a red car cannot possibly be called BeIgE I won't be respraying it BeIgE for a while if I bother at all, you are welcome to call it BeIgE when it is Toyota BeIgE Everything BeIgE looks BeIgE when you get to my age…. Trust me on this. Regards. Rich.  High compression ITB's it is then! With BeIgE intakes... on the BeIgE car Hummmmmmmm.... looks like the comitee has voted  Rich. |
|
|
|
Post by dadbif on Dec 14, 2022 19:45:11 GMT
Democracy in action
beige typeface, it’s catching…
|
|
|
|
Post by Bilbo on Dec 14, 2022 22:56:33 GMT
At this point I may actually take a hearing aid to a painters and get them to make up the exact colour of it 😂
|
|
|
|
Post by zoona on Dec 15, 2022 1:44:34 GMT
Haven't looked at this for a while - but it looks fucking brilliant.
Keep it up, and ignore the beigeists.
Yes the chin spoler.
|
|
|
|
Post by boggissimo on Dec 15, 2022 9:52:52 GMT
Haven't looked at this for a while - but it looks f ucking brilliant. Keep it up, and ignore the beigeists. Yes the chin spoler. Had to look in BBCode to see how you got that past the swear filter! Good effort. Just checking it works for me too: ar se |
|
|
|
Post by dadbif on Dec 15, 2022 12:15:57 GMT
I never realised a “chin spoler” was obscene
|
|
|
|
Post by zoona on Dec 15, 2022 15:28:05 GMT
Had to look in BBCode to see how you got that past the swear filter! Good effort. Just checking it works for me too: ar seI feel that i need to be able to express myself linguistically... (somebody else on here told me how to do it - i can't claim credit) I never realised a “chin spoler” was obscene Just for fun, I looked it up on Urban Dictionary... www.urbandictionary.com/define.php?term=Chin%20SpoilerAnyway, look forward to more 1970s shi tbox updates. |
|
|
|
Post by Bilbo on Dec 17, 2022 4:08:55 GMT
Got to love Urban Dictionary, any phrase or word you can think of has some not very family friendly description on there 😂
|
|
|
|
Post by Bilbo on Dec 17, 2022 4:10:40 GMT
Illness has subsided a bit now after a few horrendous days, so I finally got back to the unit for the first time this week. Got my heater box finished and an extra mount bracket made up, and put some rubber seals around the hole into the cabin to prevent any air escaping between the heater box and the car, and it delivers a good amount of air out of the windscreen vents, which is all I really care about. So that's that sorted. Not too much going on at the unit at the moment, but another pretty cool car in there at the moment, my mate's 20v AE86. Such a great car, proper rowdy, he's built it up from a dead rain filled shell to what it is now.  Once my heater box was done, I got to work on my fuel filler pipe. I wanted to retain the original fuel flap location, so I hacksawed the end of the filler neck off of the original tank, including the breather pipe part, and welded a reducer pipe I bought onto it, which took it down to 38mm, the same as the MX-5 fuel tank inlet size. I bought a flexible fuel resistant filler pipe, cut it to size, and got everything attached.   I just need to connect the breather pipe you can just about see in the photo above to the one on the tank, and then it's done. Using the original Vauxhall filler neck end meant that I could re-use the rubber mount in the fuel flap, and also keep the original locking fuel cap.  Only a small job really, but it's good to have it ticked off the list. If I get the rad and other bits I need off my mate tomorrow I should be able to get the cooling system sorted this weekend. One job at a time, but we're getting there! |
|
|
|
Post by Bilbo on Dec 18, 2022 9:59:43 GMT
My braided clutch line turned up, so I got that sorted yesterday.  This is an MX-5 one, the 45 degree bent end was perfect for my setup, it clears the VVT pipes perfectly with the bend in it. The one annoying thing about these is they make one end a spinning union, but the other end is fixed, so you have to spin the entire line to thread it in. I got annoyed and ended up removing the slave cylinder and threading it in off the car, then bolting it back in and getting the line fed up into the engine bay. Just needs bleeding now and that's the clutch system good to go! Also my sidelights weren't working before, I bought 2 new bulbs and they now work, so there were luckily no wiring issues, just both bulbs had had it. Speedo cable routed through the car and into the instrument cluster as well, cluster is all back together now and everything bar the handbrake warning light is now working as it should. Will start work on the cooling system tomorrow, and get the relocated shifter made up. |
|
|
|
Post by Bilbo on Dec 22, 2022 2:35:29 GMT
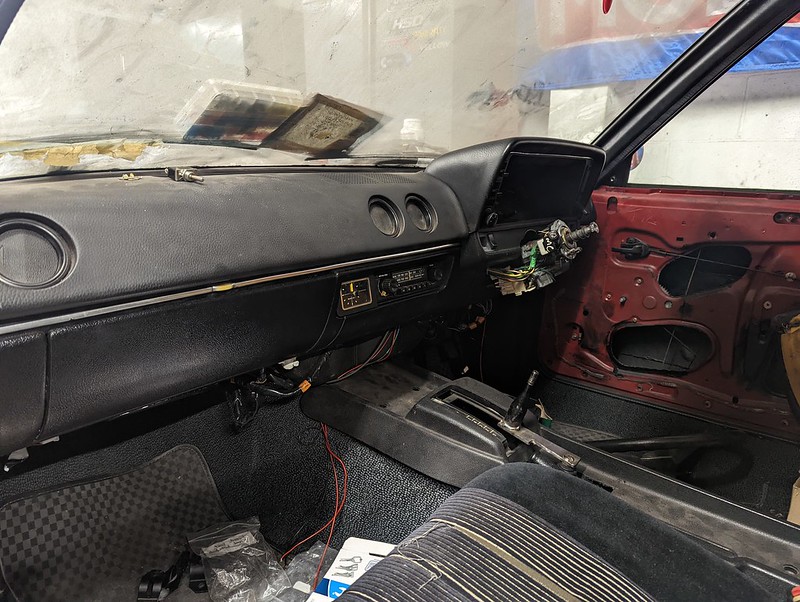
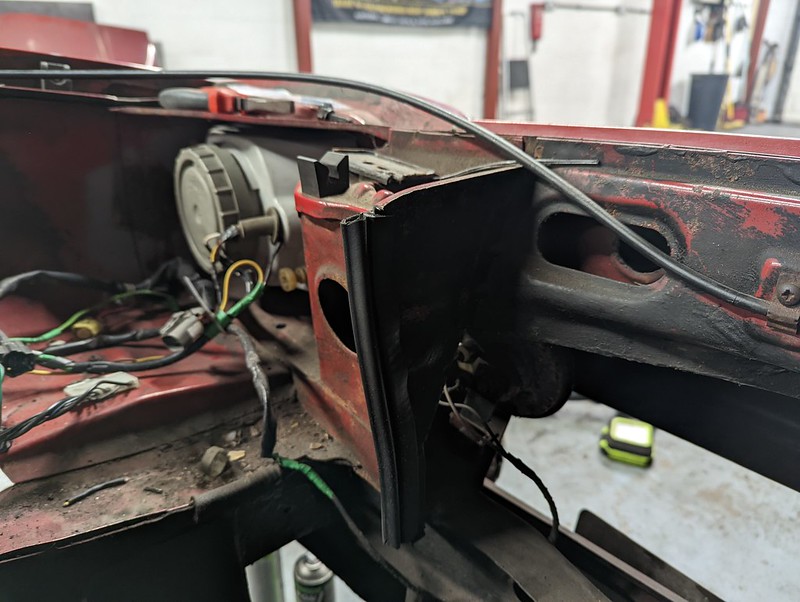
I got the dash and cluster all put back together, I just need to modify an MX-5 ignition barrel cover to hide the last of the wiring around the barrel and stalk.  You can also see V1 of my relocated shifter in the photo. It's not bolted in right now so is sitting a little weird, but I was just getting an idea for what I wanted. I'm going to modify it to sit lower, and then get the centre console modified to hide it underneath a shifter boot. I cut the original rad side mounts off to make way for the 5 rad. Cut up an old boot seal from a mk2 5 I broke last year, which was perfect for covering the metal edges:  With this done I got the bottom radiator mount made up. I cleaned up the original lower rad mount, got some box section, and cut it to size. The mk2 5 rads have locating grommets on the bottom, so I got a hole cut out of the box section on each end for them to sit in. I also cut a hole in the centre for the drain plug to sit in (I don't use the drain plug for coolant draining, I always pop the bottom hose off, so I don't need access to it). Then I welded it onto the original rad mount and got it painted.  All went pretty well, I just want to weld some end pieces on that attach each end to the big ARB mounts on each side. It's fairly sturdy but only being welded in the middle currently it has some flex that I'd like to get rid of. The radiator itself I got some other old rubber seal cut up and double sided taped it to the bottom of the rad. When the grommets locate the plastic bottom just about contacts the mount I made, so the rubber pads this a bit to prevent any damage from vibration over time. It fits pretty well:   The rubber stripping I added provides a decent amount of padding at the top of the rad edge, and holds it firmly in place without any metal on metal contact. Currently I have the top cable tied, but I will probably make some proper mounts for it, this was just a test fit. Top hose is perfect, the bottom hose rubs the ARB a little, so some minor modification needed, but it's not too bad. Rad fan plug reaches easily, and I'll get the 2nd fan fitted and wired up to work independently at some point. Quite happy with this, the airflow looks like it'll be great, and with a little more work the hoses should all be good and I'll get the system filled with coolant. Just got to sort the heater matrix hoses out. |
|
|
|
Post by wannabe on Dec 22, 2022 11:18:58 GMT
I can't wait to see this running  If I was anywhere nearer I'd come over to get in your way give you a hand!  |
|
|
|
Post by Zed. on Dec 22, 2022 14:55:20 GMT
 I didn't know you were on insta Chris?  Rich. |
|
|
|
Post by Bilbo on Dec 25, 2022 3:06:33 GMT
I can't wait to see this running  If I was anywhere nearer I'd come over to get in your way give you a hand!  Same! Cheers mate, to be honest about 80% of the time is spent working out how to sort things than actually doing any work, so it's quite dull on the average day 😂 |
|
|
|
Post by Bilbo on Dec 25, 2022 3:07:15 GMT
 I didn't know you were on insta Chris?  Rich. God's colour scheme has a large following 😂 |
|