|
|
Post by Bilbo on Sept 24, 2022 23:55:13 GMT
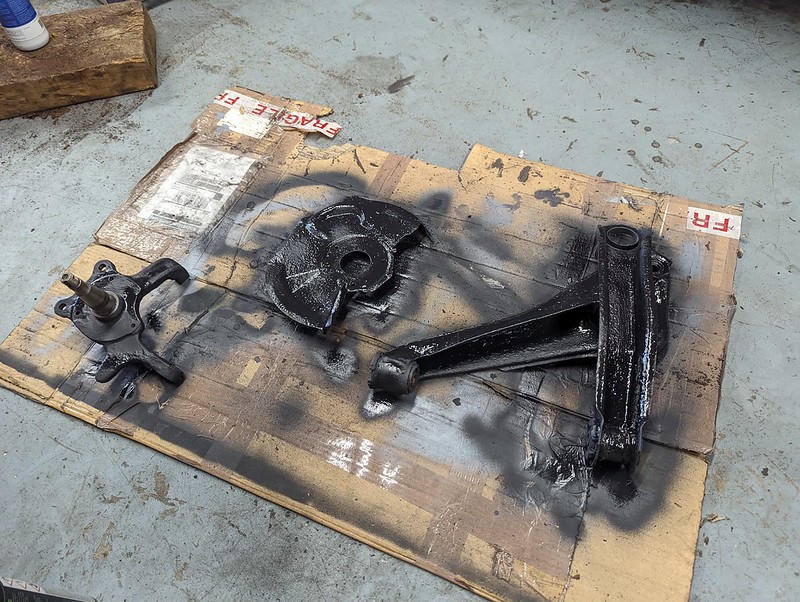
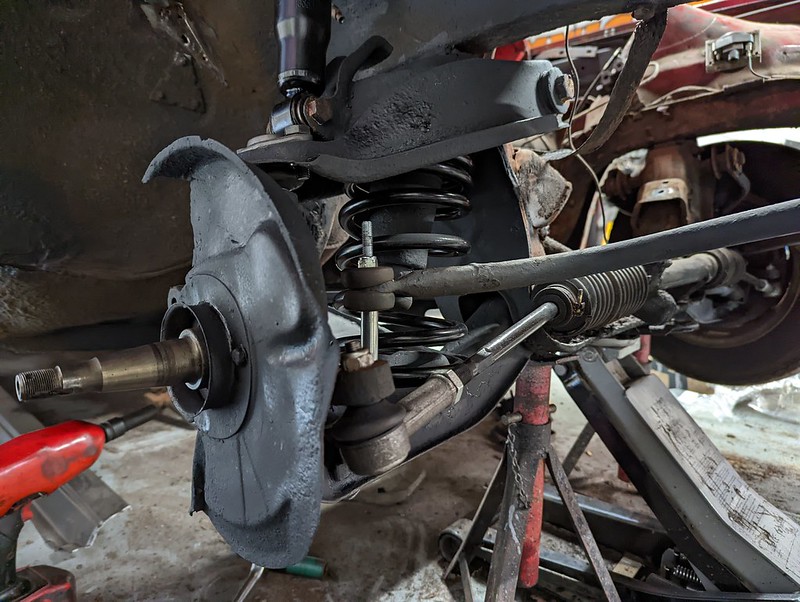
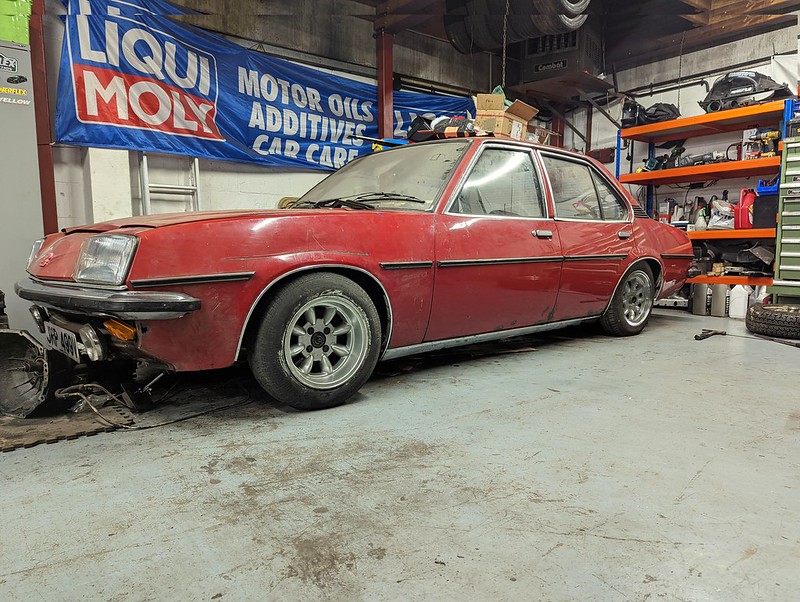
Found some more rust. Not the end of the world, but the triangular bracket below it is for the throttle pedal bolts, so I think I'll get this sorted. Wouldn't want the pedal to go through into the front arch when I boot it haha.  Bit of rust above that section as well, goes straight into the engine bay, will be easy enough to sort. Glad I spotted this, it was just a tiny pinhole before I buzzed it back. Today I finally got around to doing the front driver's side suspension bits. It was in a bit of a state:  Everything was a bit rusty, old underseal was all flaking off, various splits in ball joint dust covers, needed some love. Started by taking everything off, most bits came undone fine actually, just the bolts on the top ball joint and the stabiliser link had to be cut off, much the same as the other side. Didn't follow common safety guidance of compressing the spring, did exactly what I did on the other side. Undo everything, stand back at arms length and smack the top ball joint with a lump hammer. The spring removes itself, very efficient 😂 With everything removed I wire brushed things down and got some Hydrate80 painted on. No issues with any of the parts, just surface rust. The brake dust shield was a little scabby, but still plenty useable. Everything turned nice and black:  Let it dry and then primed:  And finally painted:  Got the new lower ball joint pressed in with some help from a mate, and then got all the new parts out and fitted. All went pretty well and it's looking great now!   Front end stuff is now mostly done, going to get new discs ordered and get the new wheel bearings fitted. Should probably refurb the calipers soon, been putting it off as they're sat in a box looking absolutely god awful haha. |
|
|
|
Post by dadbif on Sept 25, 2022 7:28:56 GMT
Bread is good for soldering copper pipes when you can’t turn the water off…. amazing stuff. Tastes good too. Well maybe not using it to stuff copper pipes, I heard that's how they make bread sticks. It expands inside the pipe, stopping any dribbles whilst you solder up, then dissolves completely when you turn the water back on. What plumbers used before aerosol freezing kit. |
|
|
|
Post by Bilbo on Sept 26, 2022 0:29:32 GMT
Tastes good too. Well maybe not using it to stuff copper pipes, I heard that's how they make bread sticks. It expands inside the pipe, stopping any dribbles whilst you solder up, then dissolves completely when you turn the water back on. What plumbers used before aerosol freezing kit. That's pretty genius to be honest. Credit to the first guy who looked at a loaf of bread and thought "I know" haha. |
|
|
|
Post by Bilbo on Sept 26, 2022 0:30:58 GMT
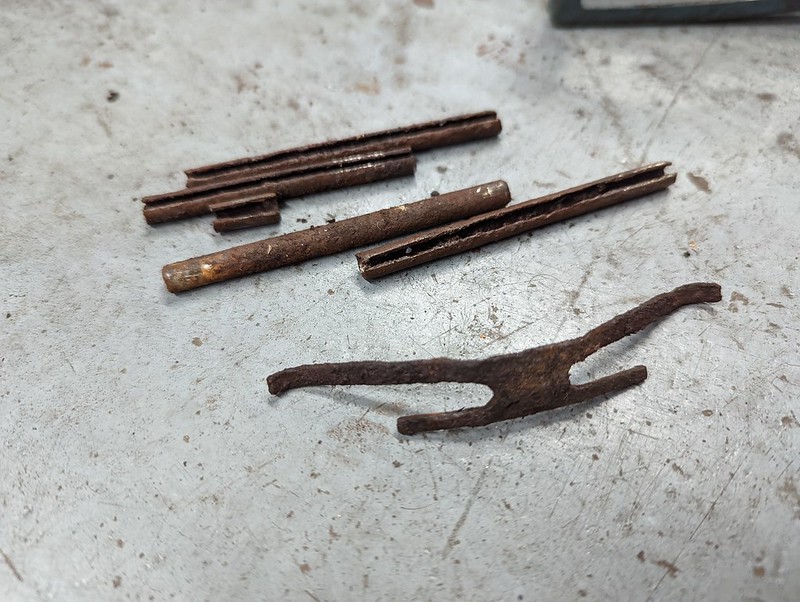
So I finally bothered to do the calipers today. I didn't get any good photos of them before, so here's a crappy portrait photo of them disassembled:  They were very corroded. The retaining pins were seized in place in both parts of the caliper, and one of the pads had become stuck to the yoke end of the caliper. Bit of spray and some prolonged punch work and a few swings of the hammer and everything was free and off. The old retaining pins and spreader springs were in pretty bad shape, one of the retaining pins even snapped on removal.  Luckily I had already bought a new set of both. I got the brake hoses removed, the banjo bolts are a bit past their best so I will probably replace them. What surprised me was the condition of the pistons. Looked inside the banjo bolt hole as best I could and the piston looks brand new. The piston dust covers are still good, and there appears to be no leakage from the fluid still inside the caliper, so the seals seem to be fine as well. I managed to push both pistons in by hand, neither were seized at all. So I'm not going to touch either of them for now, we'll see if everything behaves when it comes to fitting and bleeding them down the line. I cleaned the calipers up a bit and sprayed them in some silver caliper paint. Got the heater on them to dry them quicker, and then immediately ruined how nice and shiny they looked by re-assembling everything with dirty grease covered gloves. Genius. I'm not too bothered about them looking perfectly painted, they still look way better than they did, and now have functional pins and spreader springs installed, as well as new pads.  I've also ordered new discs that should arrive this week, as well as steering rack boots, both of the current ones are split quite badly. We've pencilled in the subframe notching work for next week, but annoyingly the engine mount blank plates I bought that are supposed to be MX-5 specific don't appear to be drilled correctly to fit on the 1.8 block at all, so I'll need to buy some more 5mm plate for those. |
|
|
|
Post by boggissimo on Sept 26, 2022 9:07:44 GMT
Brilliant, had me spitting my virtual coffee over the keyboard this morning! Talking of incongruous things to use in the garage, I think I'll be using bread to get the pilot bearing out of my flywheel tomorrow... Haha, I wish I had filmed it. Ah yeah, the bread trick, it's weird that it works, but it really does work quite well! Turns out I didn't need it. The replacement engine must have come out of an automatic, so it didn't have a proper flywheel and didn't have a pilot bearing. So I took the flywheel off the broken engine and "pressed" it out with a socket and hammer instead. |
|
|
|
Post by Bilbo on Sept 28, 2022 0:24:09 GMT
Haha, I wish I had filmed it. Ah yeah, the bread trick, it's weird that it works, but it really does work quite well! Turns out I didn't need it. The replacement engine must have come out of an automatic, so it didn't have a proper flywheel and didn't have a pilot bearing. So I took the flywheel off the broken engine and "pressed" it out with a socket and hammer instead. Ah nice, good idea on changing the pilot bearing, they can get a bit crunchy over time. I found the auto flywheel in the boot of the Cavalier and it's quite funny how light and flimsy they are compared to a manual one. |
|
|
|
Post by Bilbo on Sept 28, 2022 0:25:23 GMT
So I got some front end bits sorted this evening, starting with the badge. I actually bought an original great condition Vauxhall badge on Ebay, but after 2 weeks I asked if it had been sent and the guy just ignored me and immediately sent me a refund with no explanation haha. Decided I couldn't be bothered trying again, so pried the original off and gave it a go. Not got any good photos of it before, but it was like all the old red Vauxhall badges seem to go:  The paint was almost completely gone, and what was left was extremely faded. So I gave it a quick scuff up and found some Ford Vibrant Red? Radiant Red? Something like that, in the cabinet. Don't know what the original badge red was, but looked close enough for me, so I just went for it. Sprayed the whole badge, put the heater on it to dry, then very carefully rubbed all of the raised edges down with sandpaper, and the tiny bits I literally scratched clean with a fingernail haha. I'm actually so happy with this, I'm not great at very delicate type jobs, don't have much of a steady hand, and usually would end up doing something stupid like putting a massive fingerprint right in the middle 😂 but it's really brought it back:  It's not perfect, and I'm sure the red is the wrong shade, but whatever. It was free, and I think it looks decent. One thing the previous owner did restore to a very good standard was the headlights. They've got all new bits on the back, clips are all new, the glass has been restored, and they look basically brand new. I wanted the car to look a bit more like a car, so I decided to fit them tonight. Got the driver's wing back on after the welding last week, and got the headlights fitted. Then got the Mothers Mag out and polished up the front bumper I rust converted the inside of the other week. Came out really quite good, not mint but nice and shiny for 5 minutes work. Got the bumper fitted, seems to be sitting a bit low on the driver's side, so I think the end mount on the bumper may be bent. I'll get that sorted soon. Gently pressed the badge back in place, and I don't know if it really works that well with the car being red, but this is how it's supposed to look I guess haha:   Ignore the bonnet, it's not bolted in so doesn't shut at the moment, and ignore the indicator as well, that's not actually bolted in yet haha, just hanging there. I have the chrome trim that goes between the lights and the bumper, but it's quite bent in the middle. I'll get that straightened out a bit and mounted soon. Bit by bit it's looking a little more complete. Won't ever be close to concourse but should look good with the new wheels on, oh and after a good wash! It's absolutely caked in dust at the moment. |
|
|
|
Post by Bilbo on Sept 29, 2022 12:15:50 GMT
I got some more free tyres delivered last night. Free and very old once again haha, I just want to test fit them to see what size I need. So this time I had 165/70/13 to try, similar to the previous, sidewall a bit smaller. They were all horrendous to fit, the bead was so tight from age, I thought it was just me being an idiot, but 2 mates turned up who have both fitted tons of tyres before, and had the same problem. Bead so tight even with an absolute ton of tyre soap, they were just shredding. I managed to fit 1 of the tyres out of the 4 without too much damage. Weirdly it was the oldest tyre out of them all haha, I can't even see the rectangle DOT code box on the sidewall, so it must be pretty ancient. Anyway it went on and after some hairspray and fire it inflated fine. Hard to judge at the moment as there's no engine in the car, and the rear doesn't have lowering springs in yet, but they will fit at least.  Needs more sidewall for sure I think, I need all the sidewall for maximum retro. Top view looks promising, plenty of room here for a larger tyre I think. Rear was much the same.  Slight tangent, but my jacking point I welded in works! Ok there's no engine in currently, but it didn't end up in the passenger footwell so I've done something right there at least haha. I knew it would be fine, but it's good to see it in action:  Anyway when I got home last night I got bored and decided to do some Photoshop work. As I could only get 1 tyre to mount without losing all its air I had to jankily Photoshop the rear wheel on. It's much easier when they're straight on, but whatever, it gives an idea:  This is a rough estimate on where the car will sit with the engine, box, interior, all the loom, and rear lowering springs installed. If it sits like this I'll be happy, I think it will look great. I did mention before that I'd love to have a matching fleet, team cream, with red wheels on both the 5 and the Cavalier. Photoshopping red to most colours is pretty easy, but cream was a real pain haha, so it's not perfect, and neither are the wheels. I chose Advan A3As as I absolutely love 13" 3 spokes, such a classic design. Anyway it gives a rough idea:  Honestly I think I rate it like this! Looks a bit different, and that front badge really pops on the cream colour. Anyway this won't be happening until next year if it even does happen at all, but I think I'd like to do it eventually. Not sure whether it would look better with the bump strips removed and the holes smoothed over before painting though. Oh I have also ordered new tyres now, in 175/70/13, so hopefully I can get the wheels actually fitted and stop almost blowing myself up with exploding beads haha. |
|
|
|
Post by Zed. on Sept 29, 2022 15:47:37 GMT
red looks better than beige  Rich. |
|
|
|
Post by boggissimo on Sept 29, 2022 20:19:24 GMT
I actually prefer the minilite-style wheels. I'm not quite sure that going ultra-low will match up with big sidewalls, though it will certainly turn heads and be unique, whatever colour you make it.
You've probably already said, but are you going to turbo it??
|
|
|
|
Post by Bilbo on Sept 29, 2022 22:49:59 GMT
red looks better than beige  Rich. Not this again, it's not bloody beige 😂 I actually prefer the minilite-style wheels. I'm not quite sure that going ultra-low will match up with big sidewalls, though it will certainly turn heads and be unique, whatever colour you make it. You've probably already said, but are you going to turbo it?? The Minilites do suit it I think yeah. I won't be going too low, I just lowered it more on the cream one to see what it was like. I don't think it's going to be very low at all with just the 40mm springs on. Nah this is going to be my daily, so I'll be leaving the engine completely standard, bar maybe a basic intake. If that ever changes and it's not my daily anymore, I would 100% consider ITBs, just think n/a power would much better suit a car of this age. |
|
|
|
Post by zoona on Sept 29, 2022 23:39:29 GMT
I'm with Zed. That's beige. Or is it magnolia?
|
|
|
|
Post by Zed. on Sept 30, 2022 16:12:21 GMT
it's bloody beige edited & corrected for you  Rich. |
|
|
|
Post by Zed. on Sept 30, 2022 16:18:08 GMT
|
|
|
|
Post by thruxton on Sept 30, 2022 16:55:04 GMT
Being an old person and therefore an “authority” on this particular colour.
I can and do emphatically declare it ….. Beige.
Regards.
Rich.
|
|


 le sigh