|
|
Post by Bilbo on Oct 19, 2020 9:48:04 GMT
A few friends and I are on the verge of securing a decent sized unit for our cars beware of... mighty5s.com/post/39928/threadcan be an accident, can be deliberate, can be shit luck  make a rule for 1 hour's 'cool-down' time for any hot work (grinding / welding etc.) and keep the place tidy with no rags, papers or fluids exposed... it's hard to do but so easy to forget (& then its a problem  ) make sure you know & fully trust the friends, people abuse friendships and tools, materials & even parts go missing in shared accomodation  also, beware of utility bills, might find unfair split of electricity costs and water can be silly. sorry to preach but been there before  Rich. Man that is gutting, and yeah the one guy in the group who is the welder/fabricator is actually the one who insisted I pulled up the carpet when he was doing my sills, and without him 2 hidden lighters would have gone up right in the spot the floor did actually set on fire! He's pretty hot on that (pardon the pun lol). It also has a mezzanine second floor, so we can keep the work space totally clutter free apart from the stuff we need for each job. Oh yeah there's 6 of us, and we've all known each other for ages, so that'll be ok. We've already said no randoms at the unit, not even to sell parts. We don't want anyone seeing anything we have, no matter how briefly it is for. |
|
|
|
Post by scottydugg on Oct 19, 2020 10:53:09 GMT
I wouldn't be calling it scrapyard spec anymore, it's in better condition than mine now!  Have you already got braided rear lines? Only reason I ask is I've a set of rears I don't need (buried somewhere whilst I paint the garage). |
|
|
|
Post by Zed. on Oct 19, 2020 17:22:05 GMT
We've already said no randoms at the unit, not even to sell parts. We don't want anyone seeing anything we have, no matter how briefly it is for. and that  Rich. |
|
|
|
Post by wannabe on Oct 19, 2020 21:33:06 GMT
Your neighbours must love you  lol I fear what lies underneath my externally rusty bits!!  |
|
|
|
Post by Bilbo on Oct 22, 2020 8:31:40 GMT
I wouldn't be calling it scrapyard spec anymore, it's in better condition than mine now!  Have you already got braided rear lines? Only reason I ask is I've a set of rears I don't need (buried somewhere whilst I paint the garage). Haha, I was thinking that the other day actually! But I will hold back on a name change until it doesn't feel deadly to drive anymore! We've already said no randoms at the unit, not even to sell parts. We don't want anyone seeing anything we have, no matter how briefly it is for. and that  Rich. It's actually the biggest point for me I think! Your neighbours must love you  lol I fear what lies underneath my externally rusty bits!!  Haha, to be honest it's not very often we make noise so it's all good. But yeah it was pretty loud haha. Well fingers crossed for you. If it hasn't been bodged in the past hopefully it won't be as bad as mine has been. |
|
|
|
Post by wannabe on Oct 22, 2020 14:58:42 GMT
Your neighbours must love you  lol I fear what lies underneath my externally rusty bits!!  Haha, to be honest it's not very often we make noise so it's all good. But yeah it was pretty loud haha. Well fingers crossed for you. If it hasn't been bodged in the past hopefully it won't be as bad as mine has been. I don't even think my shell is straight so I'm not holding out hope  lol |
|
|
|
Post by Bilbo on Nov 15, 2020 2:33:08 GMT
Been a little while as always, been busy! The unit is a go, and it's coming together nicely! I've got most of my stuff in there now that I need (apart from a few bits that are at my parent's that I'll get after Lockdown 2: Electric Avenue has finished) and I haven't wasted any time getting the 5 apart and prepared for what has now become a lengthy refurb/rebuild. So here it is:  2 floors, the bottom can fit 5-6 cars, and the top is a mezzanine with space for all of our parts and tools. There's 6 of us and we have divided the space up nicely, it's turning into a proper cool little workshop! I now have quite a bit more stuff than this, and will be getting some racking for extra storage: 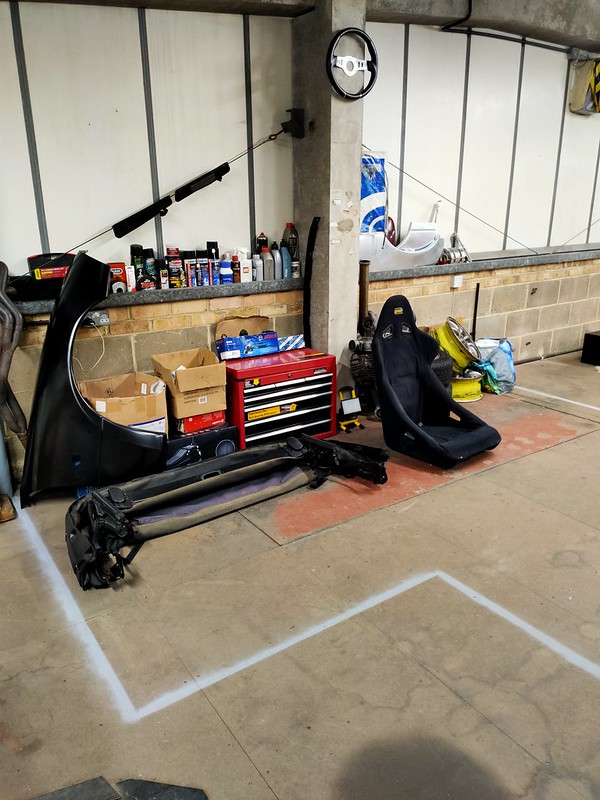 We have put the 5 in sideways to maximise space: 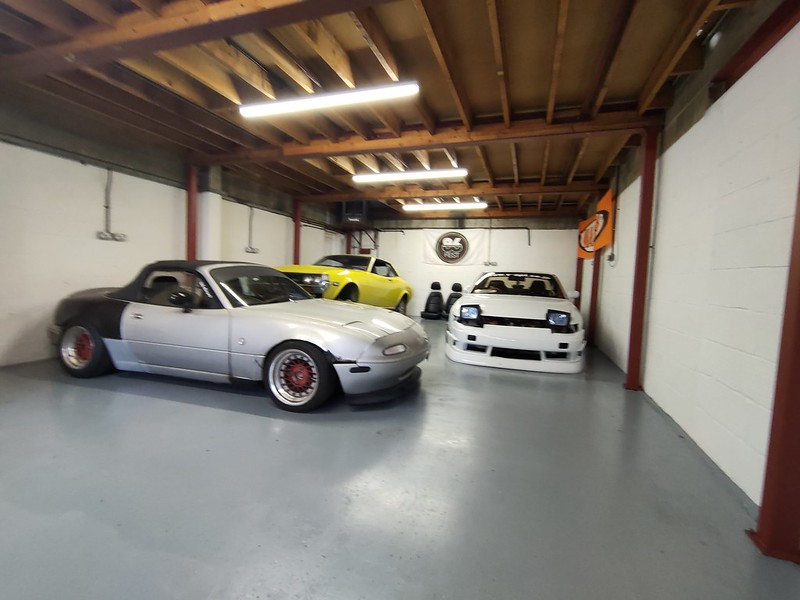 For anyone into proper cool classic cars, yes the yellow car is a Toyota Celica, I believe a '77 plate. It belongs to my mate, and it has been off the road dry stored since 1986! It still has the tax disc from '86 in the window. A little tatty, and in need of some major recommissioning, but pretty damn clean underneath. We have sort of penciled it to hopefully be somewhat ready by later on next year, would be awesome to see it on the road. Very cool cars, and you see very few of these in the UK that aren't the Fastback versions. I started off on the 5 by stripping the wings and bumpers off, this maximised front and back space for a start! Plenty to do for the respray, but it is getting closer now, the body prep will begin soon:  I decided it was time to rip the centre console out and properly sort out the wiring, get my switches wired in etc.  I have made the decision to relocate the radio and heater controls, getting rid of certain things that weren't needed in the process. I have gutted the inners of the glovebox so it is now just a cover that opens, to reveal the radio and a small cubby box which was previously part of the tombstone console: 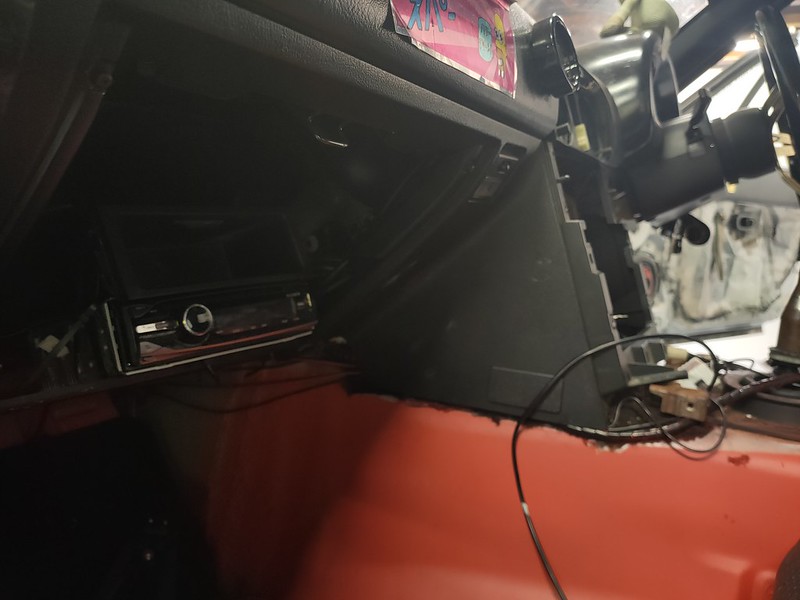 I also looked at the various parts of the heater controls, and have binned off the bits I don't need. I always have my heater on Windscreen setting, and I never have it on recirculate, so both those sliders were redundant to me. I cut the heater control panel down to just a small square, retaining the fan speed setting, and A/C (now just a second fan) button. As for the heat control slider, as this works on a push/pull cable mechanism, I am going to fit it into the dash next to the driver, sort of like a weird Choke type cable that can be pushed and pulled to adjust the heat setting. 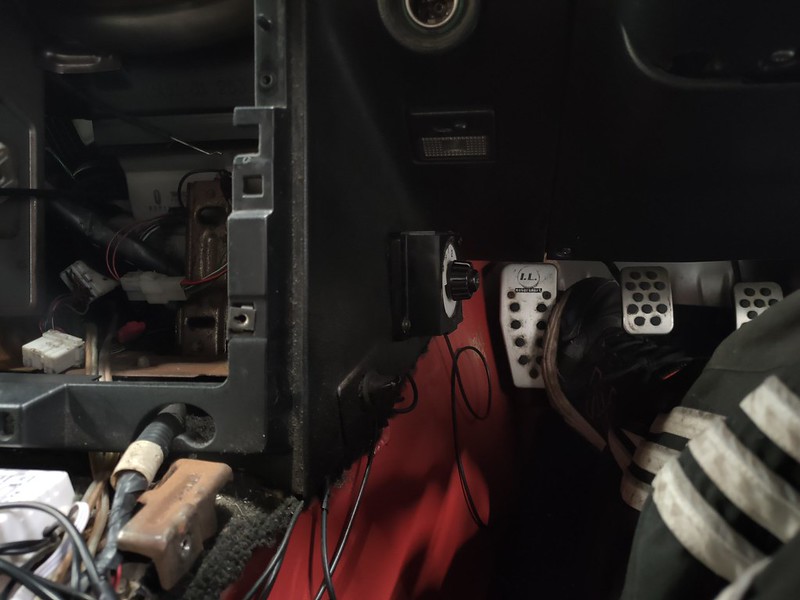 As you can see, chopping down the heater panel has saved a load of space wherever I decided to put it, it goes nicely down next to my left knee now, and I have tested it out and it is mounted far away enough to not be an issue for leg room. I have tested and it all works. With my interior LEDs, exterior neons, and 1-into-2 cigarette lighter attachment, wires were just everywhere. It was a mess, and I got sick of it. So I decided to pop the cig lighter out, hide it behind the dash, and I Dremeled out the hole where it was so that my double cig lighter unit fits snugly:  I usually keep both sets of lights plugged in, but 2 USBs are also available for charging. I've sorted some wiring out, and it is ready to be wired onto my switches for the switch panel. I've cut templates out to redo the metal backing panel for the tombstone, which I'm going to have on both the large lower hole and smaller upper hole where the heater controls were. The upper hole will be my switch panel, and the lower hole I am planning to run a Nexus tablet, and hopefully get the bluetooth add-on for my ECU so that I can run Shadowdash and display multiple gauges right in front of me without the need for the laptop! All in all good progress! A second 5 belonging to a mate has joined mine now, albeit a rather rusty breaker mk2.5. It is/was an Arizona edition, but it had been bodged/neglected rust wise, and the parts far far outweighed the value of the complete car. Lovely colour in the right light though, it has the same tone to it as those yellow Renault Spiders. 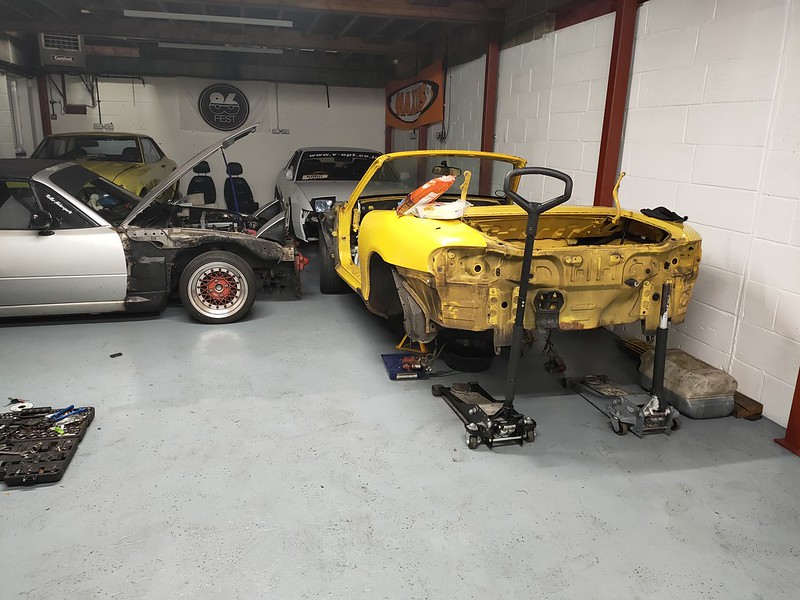 |
|
|
|
Post by dadbif on Nov 15, 2020 8:11:48 GMT
Good idea about the heater controls, removing them makes a lot of space, however, I have concerns about the repositioned temperature control, that will at the very least remove your left kneecap/severely lacerate your leg in even a minor frontal impact.
|
|
|
|
Post by batou on Nov 15, 2020 8:46:54 GMT
That unit looks absolutely perfect, wish I'd invested in commercial property few years back lol! Would love to see the progress on the Celica build when you get round to it, its such a iconic boso car and has that original mustang vibe from the rear. Once of those or a Kenmeri Skyline would be on my bucket list, shame about the prices of these now but at least the Celica is a little more attainable. Good progress on the car, but with a workshop like that I'd be spending a lot of time there so should get plenty done, wiring can be a pain though, I'm putting off pulling things apart to source some very minor gremlins as I'll probably make it worse  . I can see the 5 is fairly low so you'll probably know, when you go over a massive, obnoxiously large, thicc speedhump (at an angle of course, not head on splitter destruction), what is usually the first thing that clunks underneath, is it the frame rail or the sill/sideskirt area? I can see theres a few more things that hit before the oil pan so just curious. I think I'm 305-310mm at the front at the moment (centre of wheel to ground) so nothing drastic. |
|
|
|
Post by wannabe on Nov 15, 2020 23:04:39 GMT
I'm not sure I understand removing the heater direction controls - won't you be positively arctic with the roof down in winter if you've not got any heat on your feet/legs? lol
|
|
|
|
Post by suggs84 on Nov 16, 2020 12:03:44 GMT
I'm not sure I understand removing the heater direction controls - won't you be positively arctic with the roof down in winter if you've not got any heat on your feet/legs? lol I have to agree with this! But full respect for trying something different  |
|
|
|
Post by Bilbo on Nov 22, 2020 17:32:53 GMT
Good idea about the heater controls, removing them makes a lot of space, however, I have concerns about the repositioned temperature control, that will at the very least remove your left kneecap/severely lacerate your leg in even a minor frontal impact. Do you mean the cable I will be relocating? If so I will be putting it way way up high, so nowhere near me. I don't fancy painting the interior even more red with my own blood haha. If you mean the little heater knob I have put down nearish my left knee, it is quite far away from my knee due to my very low mounted seat, and while it is held fairly securely, it's only held in with 1 self tapper lol, so if it took a hit it'd rip out so easy I reckon. That unit looks absolutely perfect, wish I'd invested in commercial property few years back lol! Would love to see the progress on the Celica build when you get round to it, its such a iconic boso car and has that original mustang vibe from the rear. Once of those or a Kenmeri Skyline would be on my bucket list, shame about the prices of these now but at least the Celica is a little more attainable. Good progress on the car, but with a workshop like that I'd be spending a lot of time there so should get plenty done, wiring can be a pain though, I'm putting off pulling things apart to source some very minor gremlins as I'll probably make it worse  . I can see the 5 is fairly low so you'll probably know, when you go over a massive, obnoxiously large, thicc speedhump (at an angle of course, not head on splitter destruction), what is usually the first thing that clunks underneath, is it the frame rail or the sill/sideskirt area? I can see theres a few more things that hit before the oil pan so just curious. I think I'm 305-310mm at the front at the moment (centre of wheel to ground) so nothing drastic. I will post photos of the Celica as it progresses. It's slow at the moment as he's been fixing things on his S13. I'm hoping it will be ready to fire up at least in the spring. It is honestly so good, it was absolutely hacking it down, so nice to be able to walk indoors and just work in the dry and out of the wind! Yeah it is low, I will be raising it slightly when it comes back out, just to make it a bit easier to push on down certain B roads, so I don't rip stuff off. Erm in terms of what hits first, my exhaust sits a little low so usually that, but usually it's the chassis rails if you hit a nasty nasty bump. I'm not too concerned about my sump as I have 10mm engine raisers on my engine mounts, so it actually sits just above the subframe and out of the way. I would highly recommend some! The subframe does very occasionally hit those random big catseyes you get, normally when overtaking on a cambered country road. I'm not sure I understand removing the heater direction controls - won't you be positively arctic with the roof down in winter if you've not got any heat on your feet/legs? lol I have to agree with this! But full respect for trying something different  Haha, you'd think so but I have noticed one thing since removing the carpet, and sound deadening/insulation. My legs get bloody hot on long drives. The transmission tunnel has turned into a radiator hahaha. Excellent for winter, bit concerned about summer though haha! |
|
|
|
Post by Bilbo on Nov 22, 2020 17:57:33 GMT
Terrible photo, but this is the aircon I yeeted out:  It was dead and I removed the aircon box inside months ago, so this was just a job I was putting off. Saved a load of weight and took the bracket off as well, which is a bit tricky to get to, but weighs quite a lot. The front facing bolt on the bracket I re-fitted, but used a spacer on the bolt so it would thread in the same as before. This is also an oil pump bolt I believe, so needs to be re-fitted to prevent oil seeping. I wired up my second fan (the wire between the loom plug and fan plug was missing, so I just soldered a wire in instead). I then took the 2 wires that went into the interior aircon box originally and soldered those up to bridge the connection. The AC button now functions purely as a secondary fan, handy if I ever get any cooling issues! So I wanted to make a switch panel up that could be mounted under the center tombstone, but also not be attached to the tombstone so that I could just leave it in place and not disturb any wiring if I ever needed to remove the tombstone. To do this I need a spacer of some kind to mount the switch panel to, and also to butt it up tight to the tombstone itself. I was looking around for just anything, didn't need to be pretty. Then I saw a fusebox lying around from the mk2.5 my mate has broken for parts. I took it, pulled the lid off, cut the ends off of the lid, and used the original HVAC screw holes, and made this: 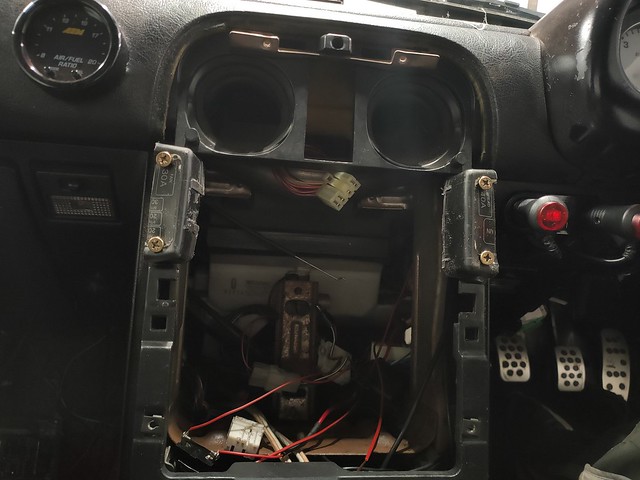 Ugly! But sturdy, and also hidden. I made up a new switch panel that was wide enough for this area, drilled the holes out for the switches, sanded it with 2000 grit to get a brushed look, and have now mounted it to the spacer:  It fits perfectly, tombstone clips in as it did OE, nothing in the way. Lovely. I also spliced into my wideband live wire and ran it to a switch so I can leave it off if I sit with ignition on but engine not running (as I sometimes do), and spliced into my clutch switch and have wired this up to the Top Gun style super race red switch. This will turn Launch Control on and off. Middle switch is currently non-functional, but I will find something for this. 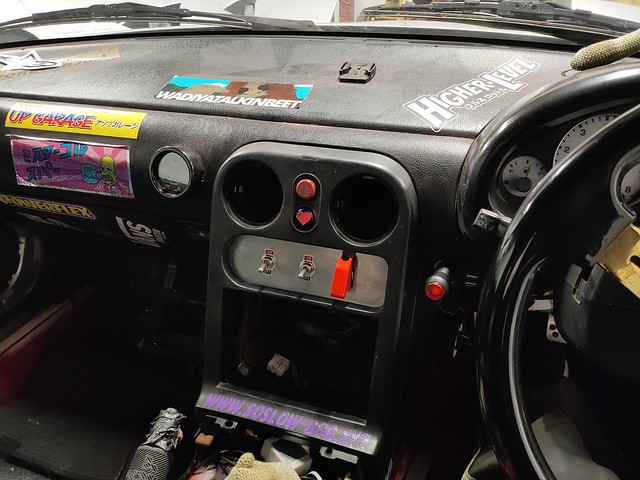 Looks pretty good. I have also cut out a metal plate for the double din hole below and sprayed it black. I will be mounting some strong magnets to this in order to mount a Nexus tablet. I contacted James from DIY EFI enquiring about his soon to be available bluetooth adapter for the Speeduino. He asked me to check my ECU had the bluetooth module installed, which it does: 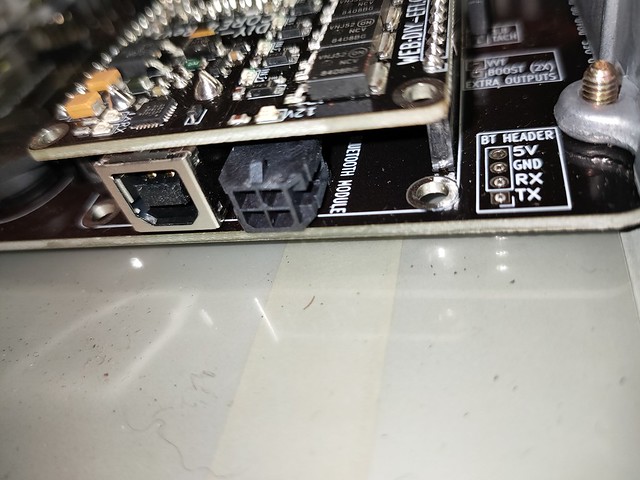 So he is making me a bluetooth dongle up so I can link to the Nexus tablet. I have also seen the thread by JoeyTalent in 2016, and will be planning on setting up the Nexus tablet to switch on and off on ignition power. The plan being that it will run seamlessly when I get into the car, and I can display a customised set of gauges without needing to use the laptop, ideal! |
|
|
|
Post by Bilbo on Nov 29, 2020 21:22:07 GMT
So I've been cracking on with the center console rebuild. Going pretty well and getting pretty close to being done now! I decided to get a Nexus 7 (2012) tablet. Very old yes, and I made sure to install a custom ROM that used an old version of Android so it didn't run dog slow. I decided on a Nexus because they're a good tablet, they have the capability to work on ignition power, and they're cheap. This one was £20 on Ebay, ideal! I did a bit of cutting of the back of the tombstone and did a basic test fit  Looking pretty good! Now I do a lot of HTML and CSS at work, so I don't mind giving more technical stuff a go. I have to admit though, I'm not well versed in Command, so it took a bit of research online! Just staring at this for hours, every time I completed a task successfully it was like the "we're in" moment in every 80s/90s hacker movie haha. 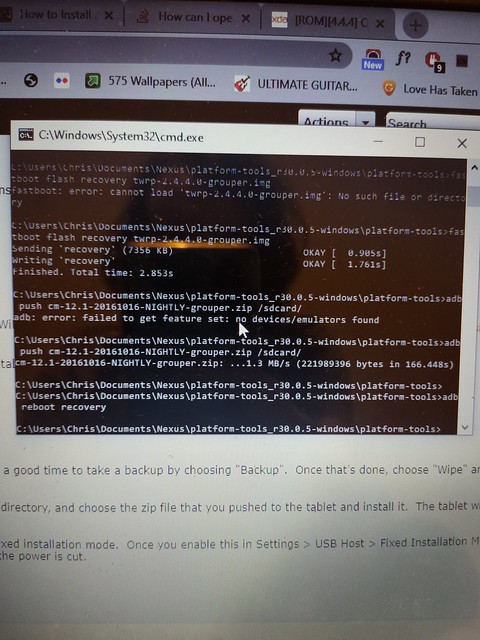 I used JoeyTalent's Nexus post for the bulk of the advice, but as it was written in 2016 there are many dead links. So I had to piece together some bits from various Google searches, downloaded the SDK Manager for Android etc. I installed a custom recovery (TWRP), which provides an interface when booted that allowed me to flash a custom ROM (essentially giving me a modified version of Android with more customisation options). I found a custom ROM online someone had made a mirror for. It is the work of Timur, who seems to have been a well known person in the Nexus community. I'm running Android 4.2.2, yes that's old! But it means the Nexus doesn't run like utter crap, which was somewhat well known if you installed newer versions of Android. Plus ShadowDash still works on 4.2.2 so it makes no odds to me. Anyway blah blah, why did I need to do this? Well I want the Nexus to be put into "Fixed Installation Mode", so it starts up when it receives charging power, and shuts down or deep sleeps when the power is taken away. Standard Android options don't allow for this, hence having to go through that process. So I installed it all:  and after a lot of pissing around and setting things up, the Nexus now has "Fixed Installation Mode" available. I have also set the screen to never sleep when charging, so it won't turn off when the car is running. I bought an OTG cable, which is essentially a Micro USB to Female USB A converter. This is the type of cable you need for the Fixed Installation Mode to work. I have tested it out and it powers up and powers down when I turn the ignition on and off. However I was running this off of my 12v cigarette lighter attachment for the test, which already has enough things on it, so I have bought a 12v to 5v converter that I will be splicing into my ignition 12v to run the tablet separately. Here it is in test fit mode again, but this time with ShadowDash running to see how it will look:  I need to get the paid version of ShadowDash and also get my bluetooth dongle for the ECU ordered, then I can set it up properly and get it installed in the car permanently! |
|
|
|
Post by suggs84 on Nov 30, 2020 9:20:40 GMT
This looks really smart and the gauges look great and easy to read etc. I'm loving the fact the tablet cost 20 quid!! Thing is, if you can get away with using an old one, why spend a fortune on a brand new tablet!?
|
|