Nix's Engine Swapped Golden Nugget
May 18, 2021 14:30:40 GMT
howardb66, lowender, and 2 more like this
Post by nix on May 18, 2021 14:30:40 GMT
I'm gonna warn you all now that this is likely gonna be a bit of a rambling
Back in February, I bought this Golden Nugget MX5 and had started buying turbo parts before I'd even bought the car because going from a 300HP WRX to a 140hp MX5 just wasn't going to cut it.
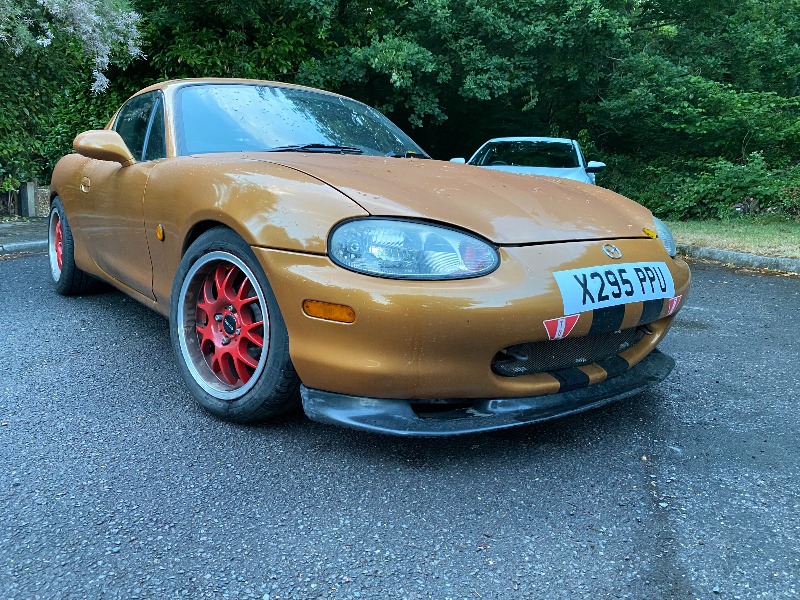
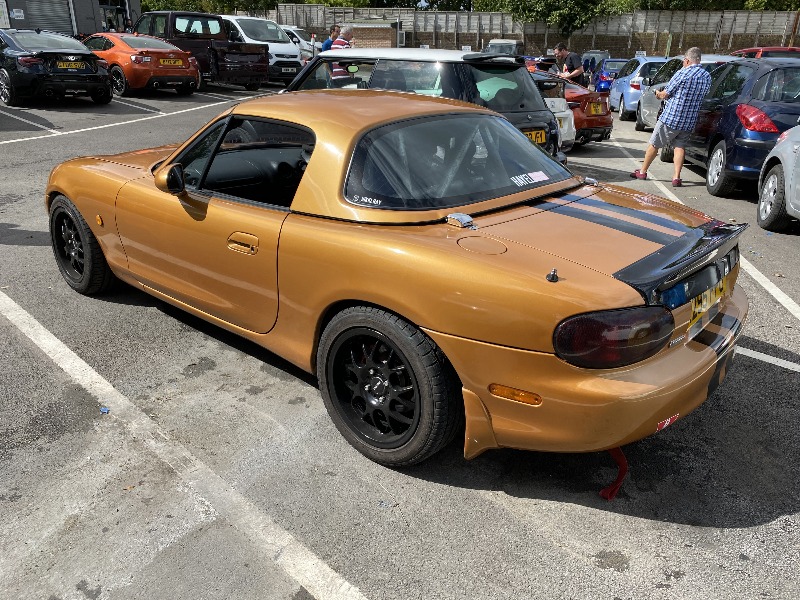
t came with some questionable stickers, coilovers and choice of alloys but it was cheap. It did also come with stripes along the bonnet but I removed those before I took this picture (Still haven't removed the rest). So I jumped on the internet and got to ordering parts but I wanted to do this on a tight budget and do it for less than £2k as I already have another long running project car that is burning money and this was a temporary setup so didn't want to throw too much money at it.
I work as a welder/fabricator so figured I'd make my own manifold, downpipe and exhaust as I've done with most of my cars as without including labour it keeps the cost way down. Now the manifold for this car was a bit of an inside joke between my friend and I where we joked about Subaru swapping my original mx5 (which incidentally someone in the states actually did this). Instead we thought it would be funny to try and get some Subaru farty burble on an I4 so I spent some time in Fusion and designed a manifold that would just about fit in an MX5 but had runners with really unequal lengths and we came up with this piece of madness with exhuast runners 2 & 4 being double the length of runners 1 & 3.
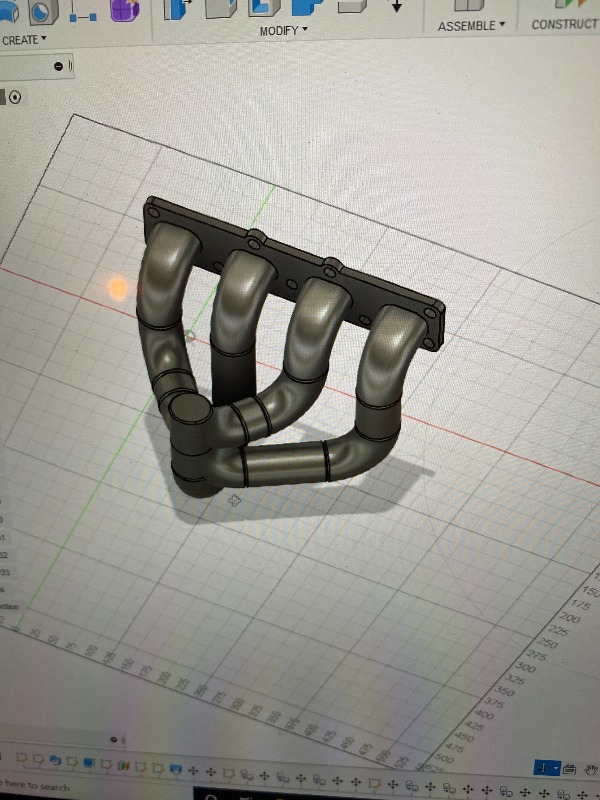
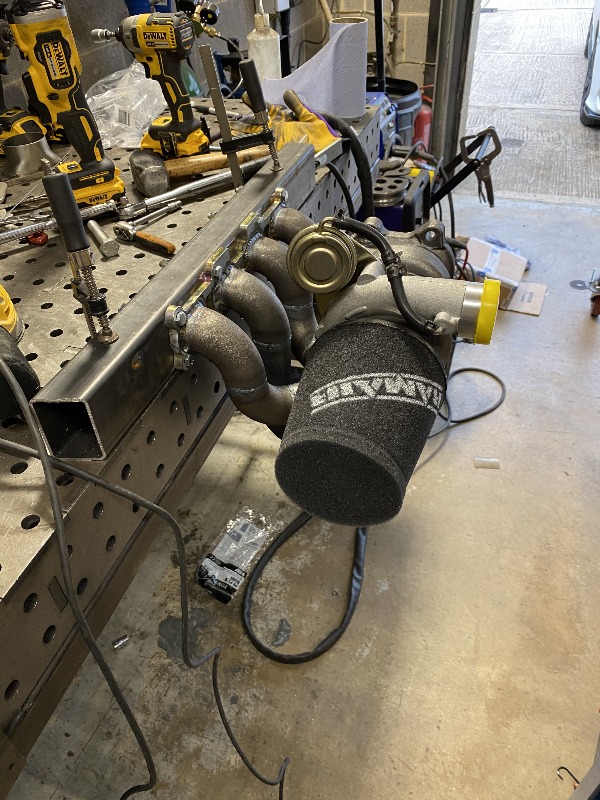
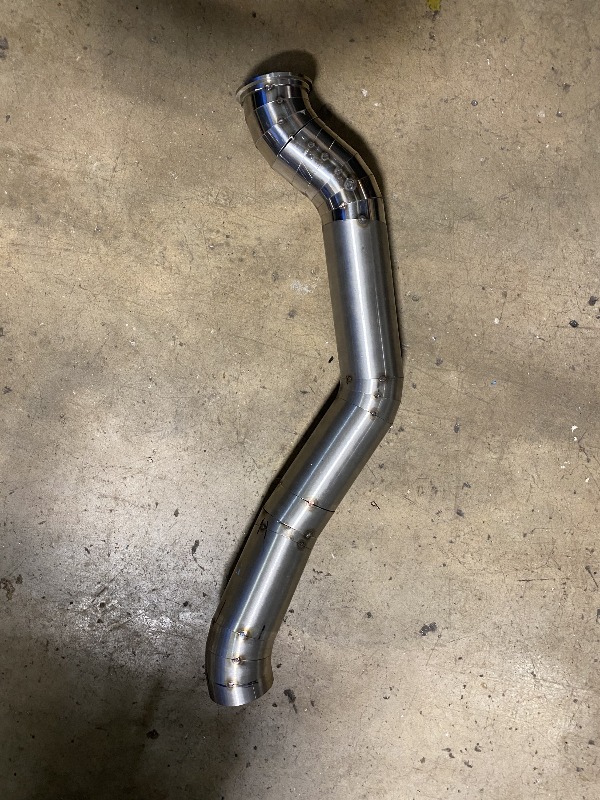
I didn't exactly build this to make insane power as the limits of the BP8 engine internals are well documented and I wasn't in the mode to go through another engine build so any loss/limitations due to the inefficient manifold design is not a problem. Next up was an exhaust and as with my previous mx5 I wanted to do full 3 inch all way from the turbo and as I was on a tight budget that meant no mandrel bends, so enter 3 inch pie cuts lots and lots of them.
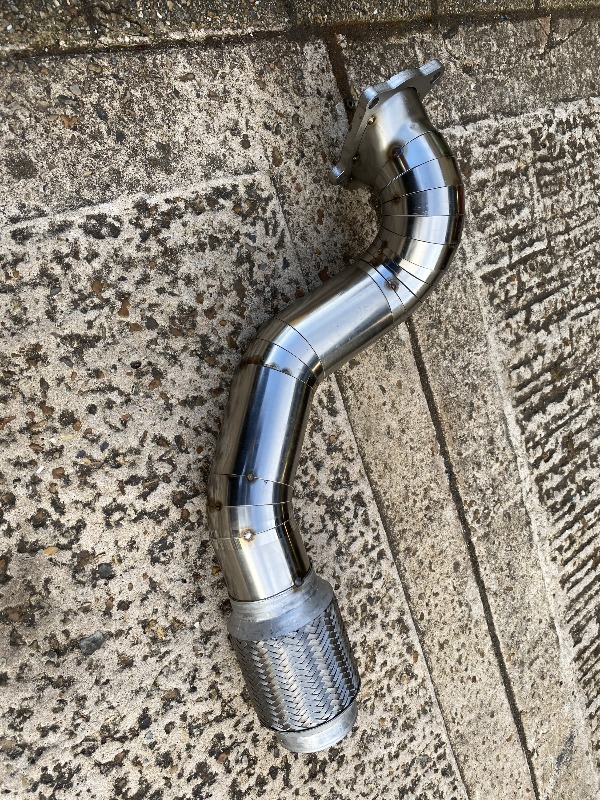
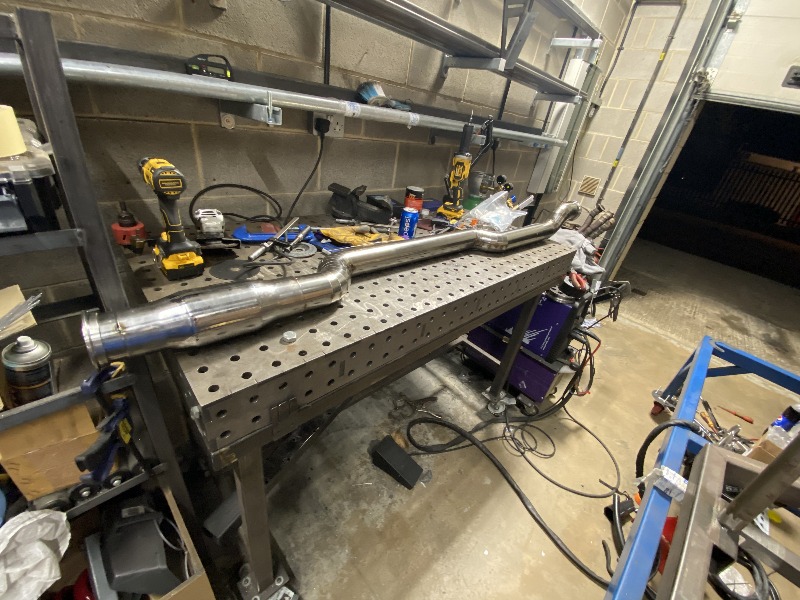
Unfortunately I never actually took pictures of the completed exhaust but It looked awesome, and I even threw in a cat to keep the MOT man happy. After that everything was pretty straight forward, I sourced a "New old stock" ME221 for a bargain price, got some reconditioned RX8 Yellow injectors, Intercooler, piping and fittings for a turbo. Now for the turbo, previously on my last 5 I bought a used Subaru WRX turbo and rebuilt it but I couldn't find any decent stock this time round so opted for the finest ebay China spec turbo (which is about the same price as a genuine TD04 that needs a rebuild).
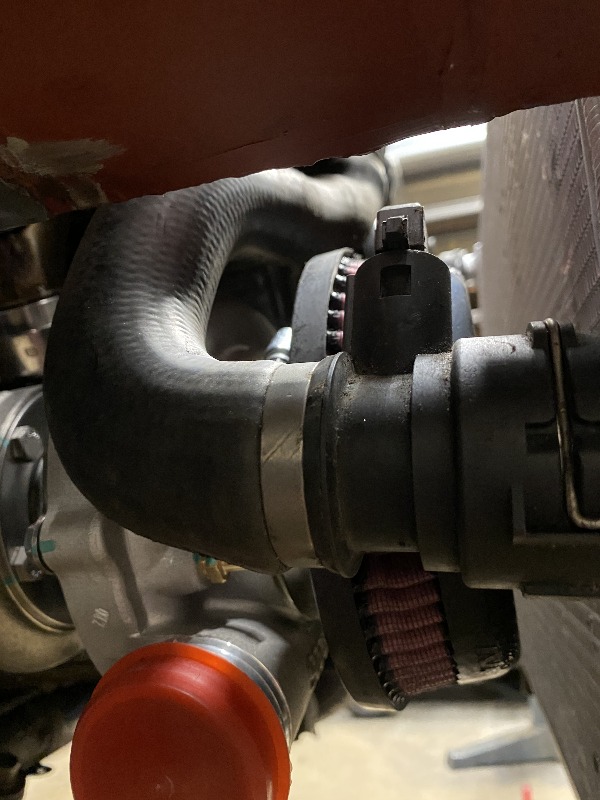
Next up I threw in a wideband, boost gauge and a few other bits and got the thing running, unfortunately I didn't have access to a dyno (especially as this was in the middle of Lockdown 1.0) so I opted for some street tuning and got the fuel and ignition timing dialled in to where I was happy with it. I started to crank the boost up from 7 pounds and left it at about 12 pounds with a conservative tune. so the turbo install ended up looking like this. Looks a bit messy but it all works and that's all I need for now
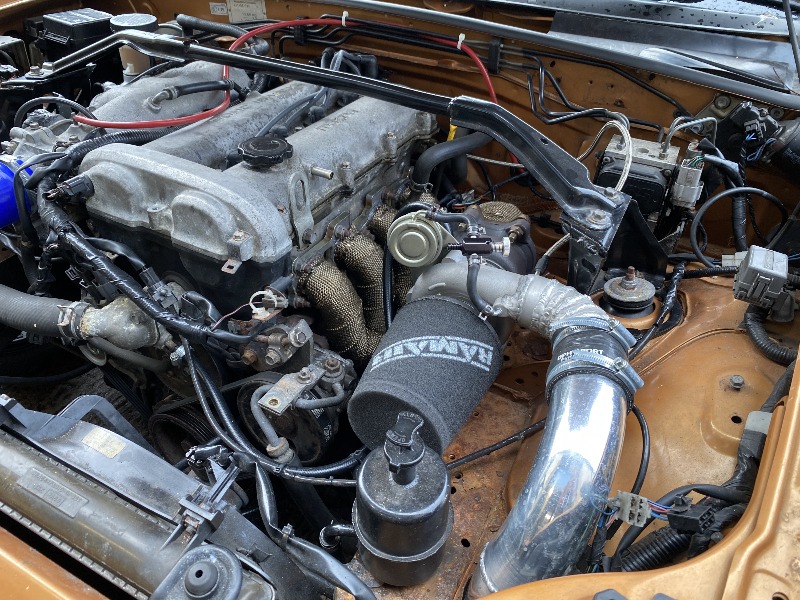
I have skipped some things that I would normally absolutely do on a turbo conversion but as I knew this was only a temporary setup I couldn't justify the money. As such, I'm still running a stock radiator and single fan, stock clutch and no re-circ or dump valve for the turbo. So far its been reliable and not had any issues except coolant temps when drifting, doing burnouts or doing doughnuts.
So all in all the turbo install came to a total of £1734 which I'm quite happy with and this included the following:
Ebay TD04 Turbo
Custom Manifold
Custom 3 inch stainless downpipe
Custom 3 inch stainless exhaust
Reconditioned Rx8 Yellow Injectors
Generic Intercooler
Intercooler Piping
AEM Wideband
Turbo Smart Boost Gauge
ME221 ECU
Air Filter
Turbo Fittings and Hoses
Spark plugs
Poly Engine Mounts
And a few other parts required for a turbo install.
After the turbo project I also pulled the ABS out as the sensors are knacked, one snapped off in the hub and both front sensor bolts sheared off in the hubs. Replaced the lot with Full Braided stainless lines and an adjustable rear bias valve. Also painted the wheels black and swapped the shredded budget tires for a set of TOYO TR1's as they are certainly better than the bald tires I pulled off. I also threw together a rollbar from some ROPT510 I had left over from a roll cage we built, so that I could throw in a bucket seat and use harnesses.
Now if you wondering what the Exhaust sounds like then its a little like this (Ignore the terrible cutting around the exhaust, its since has a tidy bumper cut):
I had originally planned on starting the engine swap in February but it ended up being March/April time when I actually started. So for starters I pulled the turbo 1.8 out of the car and sold it to a lovely chap on facebook who'd just blown his stock 1.8 up.
When I purchased the car last year I'd seen that the front chassis legs had had some welding done on them, it looked prarrie canoe but I assumed that it was solid... Boy was I wrong.
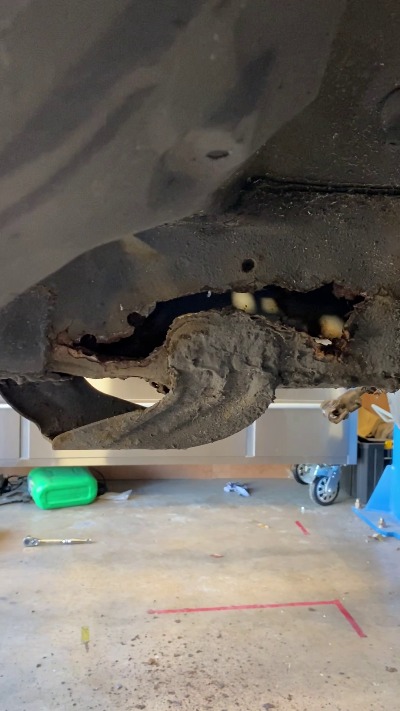
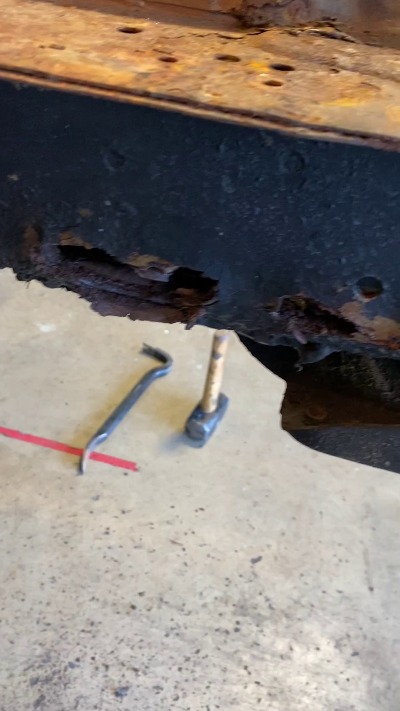
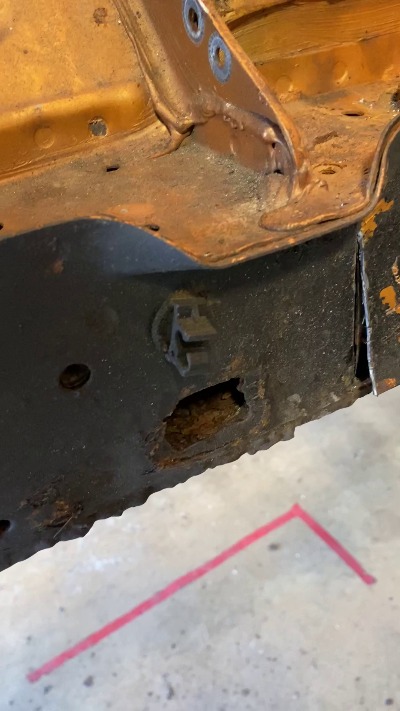
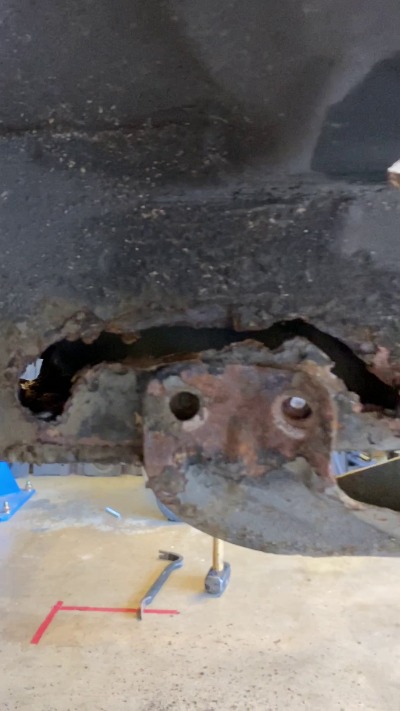
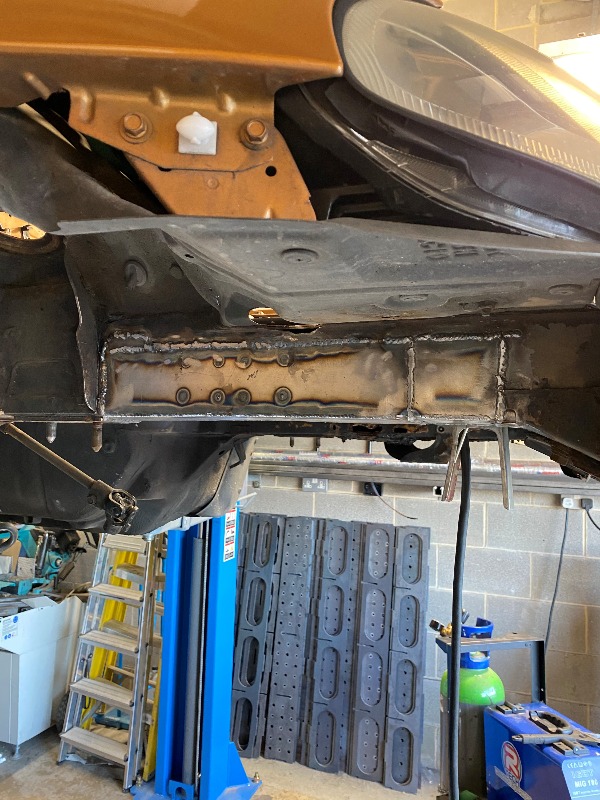
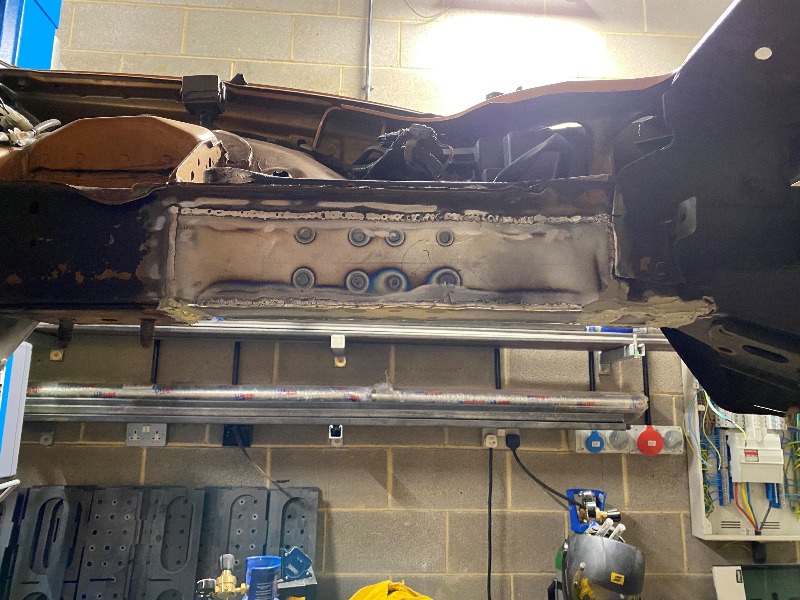
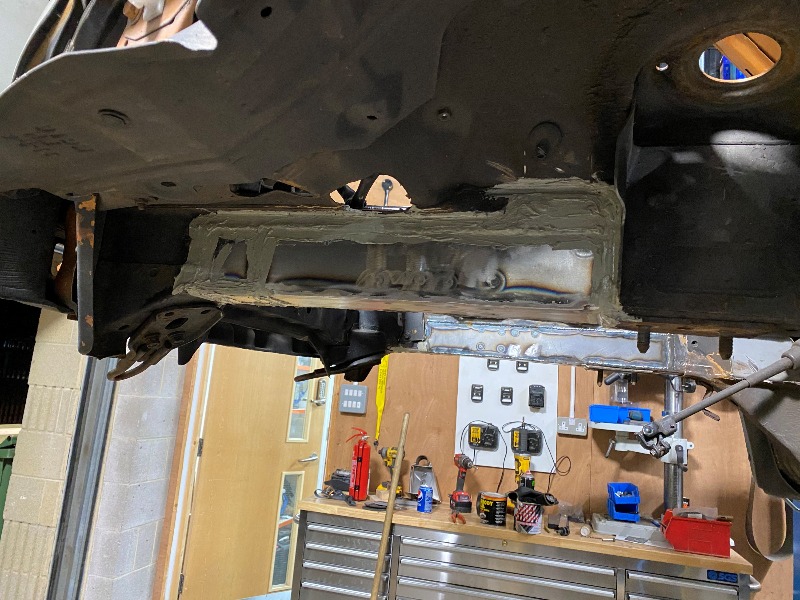
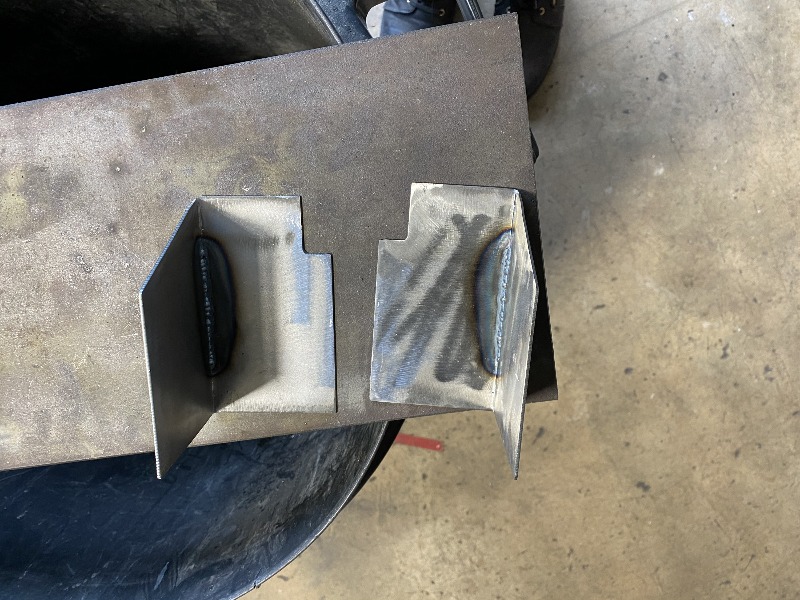
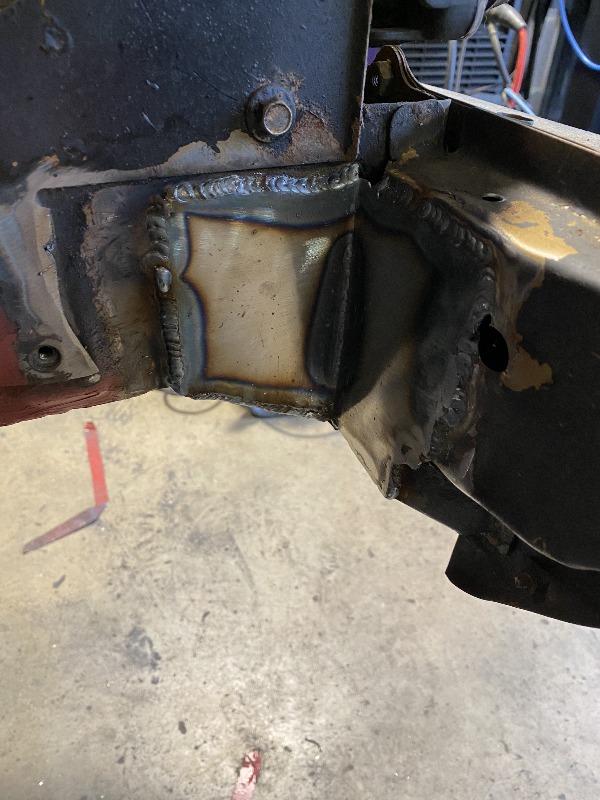
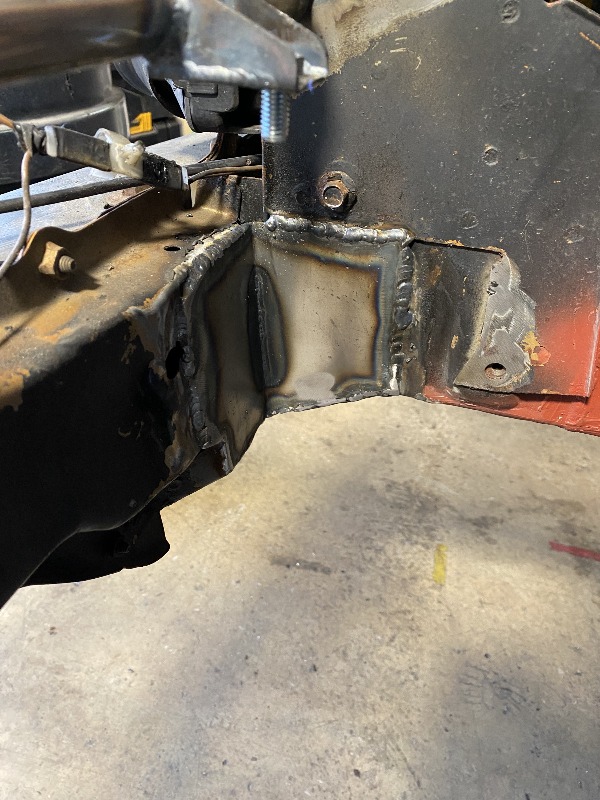
So that was just the rust that broke apart once I started jabbing it with a crowbar, effectively all that the previous owners had done is weld (if you can call it that) some steel plates over the top of the rust and then paint over the top of it all. It had been noted in the most recent MOT that there was "Minor Corrosion" but it was definitely more than minor! So I took some rough measurements and worked out how big of a patch I needed, then jumped into Fusion 360, draw them out and fired up the cnc plasma to cut them out. I also designed and cut some internal reinforcements to sit inside the chassis leg where the anti roll bar mounts are. The end result looked something like this
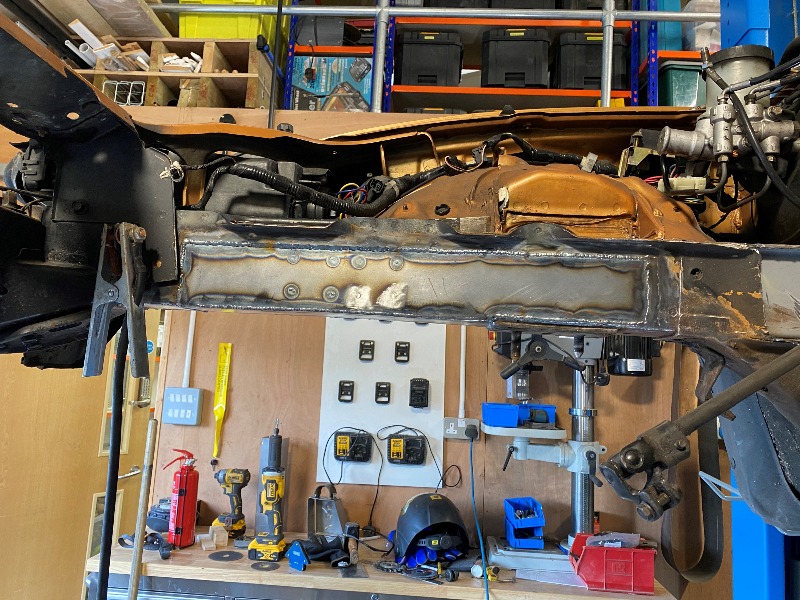
All of that probably took about a week of evenings to get done but I wanted to get it sorted now whilst I had easy access to everything and before the new engine went in. So onto the rest of the project, The plan is to swap in a Tailgate McNoIndicate M52TU straight 6 along with the Tailgate McNoIndicate gearbox and Tailgate McNoIndicate Diff and then slap a turbo on the side of it. I know that a couple of people have managed to get the engine in and get it running but beyond that the details are all a bit murky. As such I thought I'd give it a crack. I got hold of a M52TUB25 (2.5L i6) along with the accompanying Getrag 5 Speed from a guy who was breaking one for about £270 delivered. Then I started putting together a plan and started gathering parts, I got hold of a e36 Diff with the ratios that I wanted, as well as a donor prop shaft and a donor Tailgate McNoIndicate axle so that I can make a mock up axle to send off to manufactured. I also started learning the ins and outs of reflashing Tailgate McNoIndicate ECU's so that I could run the standard ECU even with the turbo.
Now originally I had planned on initially running the engine for a while without a turbo but decided that I couldn't be bothered to pull it all back out at a later date to change the head gasket. Instead I decided to do the upgrades now and just go straight into Turbo charging it. So the bottom end on these engines is good for 600hp+ however as they are high compression you'll blow the head gasket long before you get there. The easiest and what seems like the most common fix amongst Tailgate McNoIndicate guys is to install a decompression plate, this is essentially a 2.5mm stainless steel plate that replaces the middle layer of an MLS. Along with the decompression plate I also installed ARP head bolts... or at least tried to.
So these engines are notorious for the threads stripping out of the block when torqueing the head bolts and when I did the 3rd and final pass with the torque wrench 2 of the threads stripped. As I said this is a fairly common issue when reinstalling the heads on these engines and there are a couple of solutions. Option 1 is get the block and head machined to take a larger head stud, but as I'd already thrown down nearly £300 on ARP head bolts I reluctant to buy another set along with the machining costs. So I decided to go with option 2, which is to drill and time-sert the broken threads, this still ending up costing the best part of £500 to buy the time-serts and the installation tools. (So if anybody has a Tailgate McNoIndicate with stripped threads in the block feel free to hit me up :lol: ) So I got the engine all back together with the new gasket set and ARP head studs.
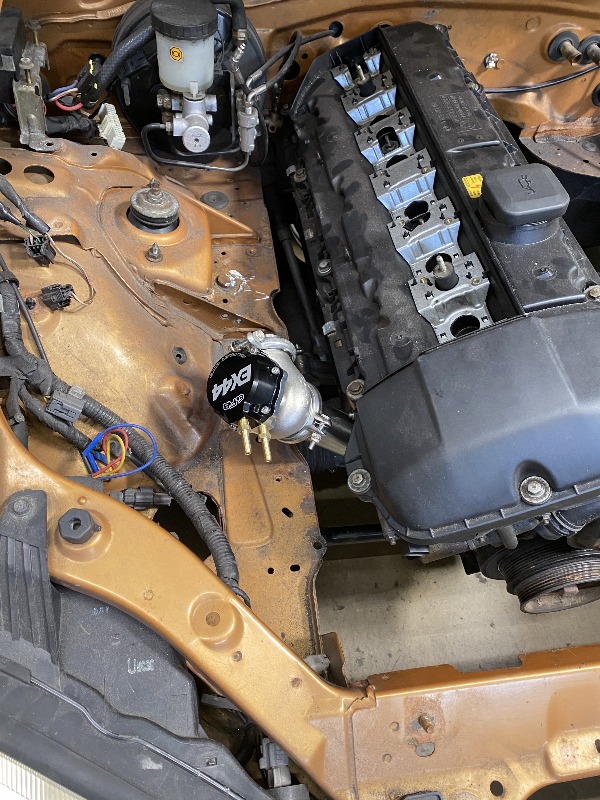
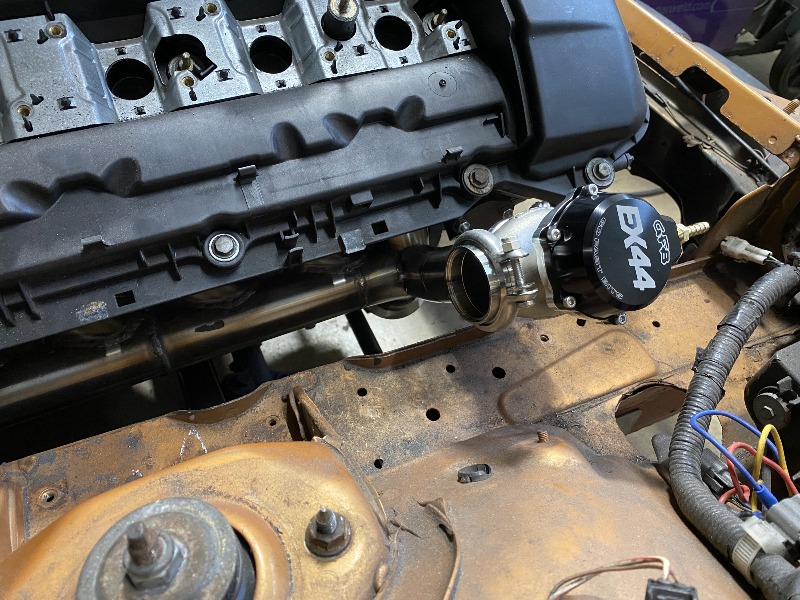
Next up was sorting out a turbo, So I jumped on the internet and did some research to find the best turbo match to get the power and responsiveness that I'm after and settled on a GT3071R. Now this isn't some money no object project where I can throw down £2000 on a turbo so I decided id go for a cheap Chinese turbo to begin with as it had worked well for me so far and see what happens. Well I ended up getting a GT3071R "Racing Turbo" from Maxpeedingrods as they have stainless V-band exhaust housings and for less than £400 I cant complain. Then I looked into a wastegate to go with it and decided that on this cheaping out was just not worth it as I've never met a single persons that had a good experience with cheap wastegates so I order a GFB EX44 wastegate.
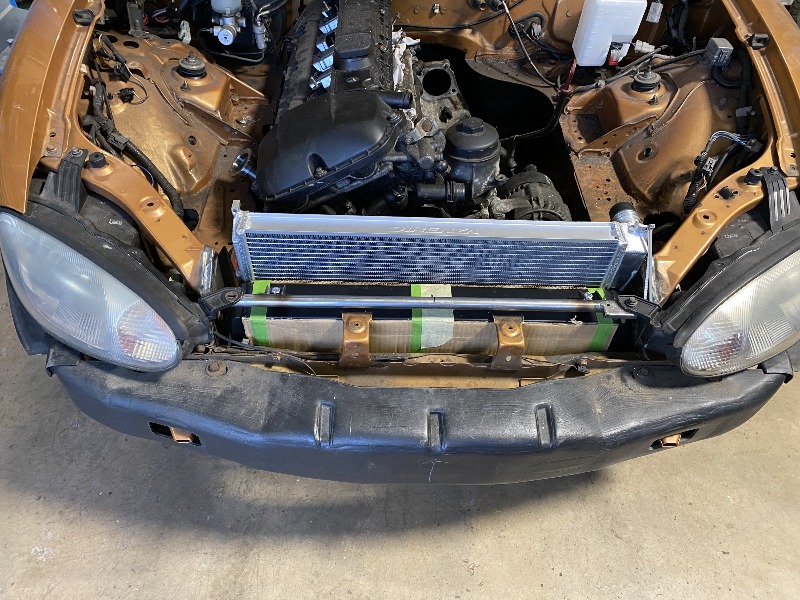
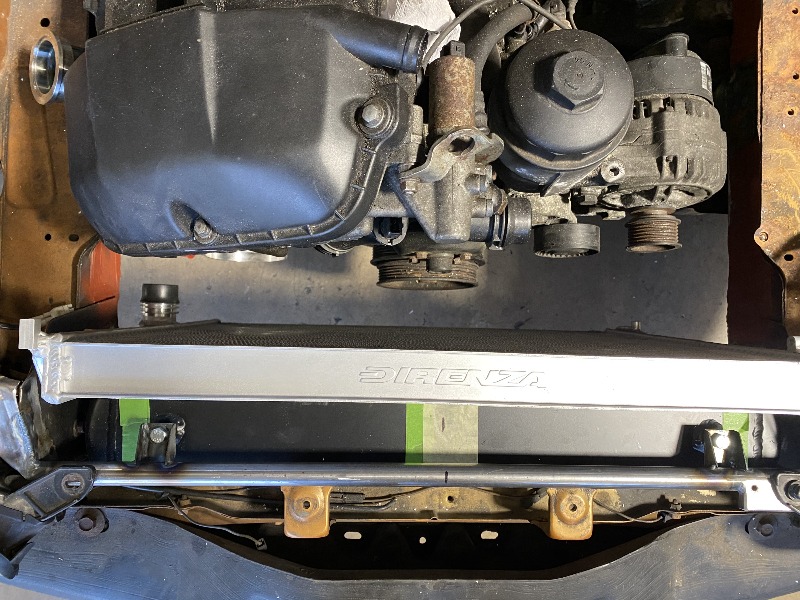
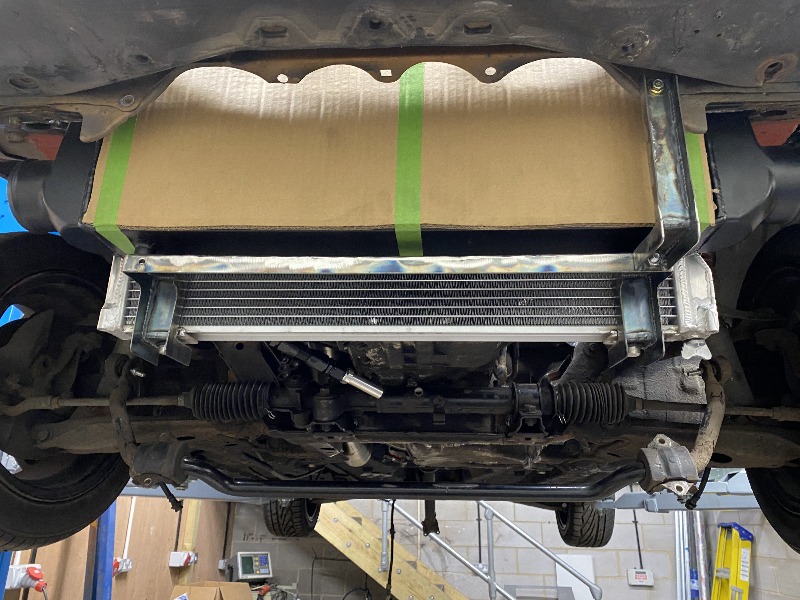
I also order a bunch of other crap as well; e46 Alloy Radiator, Intercooler, Poly gearbox bushings, engine mounts bushings, Chassis mount gear assembly and a load of other stuff that I cant be bothered to mention.
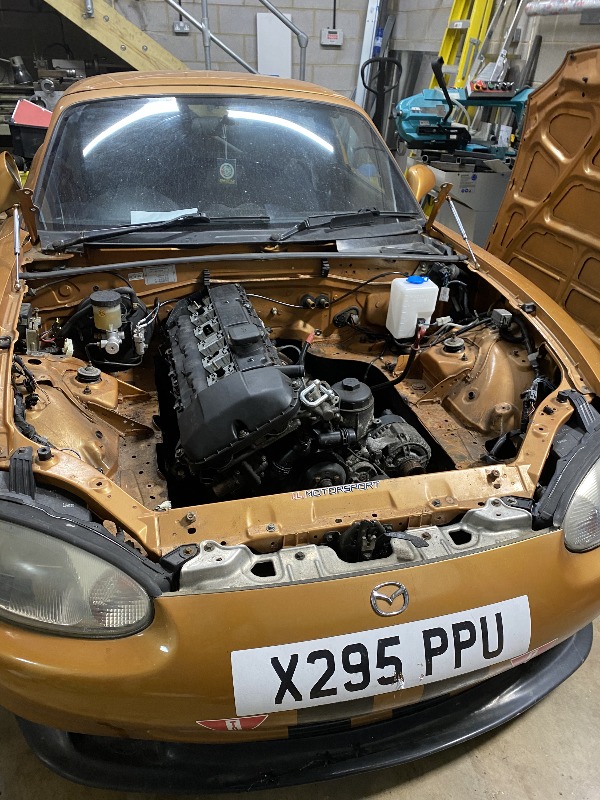
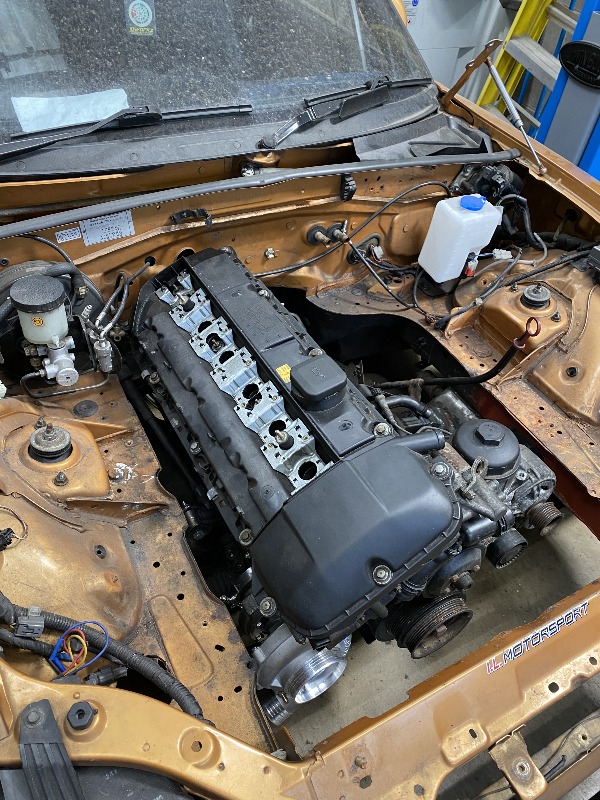
Anyway I've actually been working on this for a little while and getting the engine in was surprisingly easy, however getting it to sit exactly where it should was a tad more tricky. I started by trimming the back corner section that joins the chassis leg to the firewall, I had to cut that out entirely on the drivers side. Next up was the subframe, I needed to trim a fair amount of it out and due to the 30 degree lean of the engine more of the subframe has to be removed from the passenger side than the drivers side. I welded it all back to together so that it has some structural rigidity then started work on engine mounts. So this was the first attempt at sitting it on its mounts, however here the engine is sat about 30mm to far back and about 20mm to high in the engine bay.
after that I tweaked the mounts slightly and got it far enough forward however dropping the engine 20mm is where things got tricky as at this point there was only about 5mm Clearance between the oil ban and the steering rack. So after some investigation and help from a member of a certain MX5 nut related forum I came up with a plan. I initially cut out some 10mm spacers to drop the whole front subframe slightly and then later modified the subframe mounting points so that it sat 10mm lower. I ended up having to modify the subframe instead of using spacers as the studs just aren't long enough and its an absolute pig to change them. I also remade the engine mounts so that the engine sat about 10mm lower in the subframe and then moved the steering rack down by 5mm I had to sacrifice power steering as well but that doesn't really bother me that much. I really didn't want to have to move the rack but I had no choice if I wanted to get the engine in at the right height, we'll see how bad the bump steer is later I guess, although I may see if there is something I can do to address that at some point.
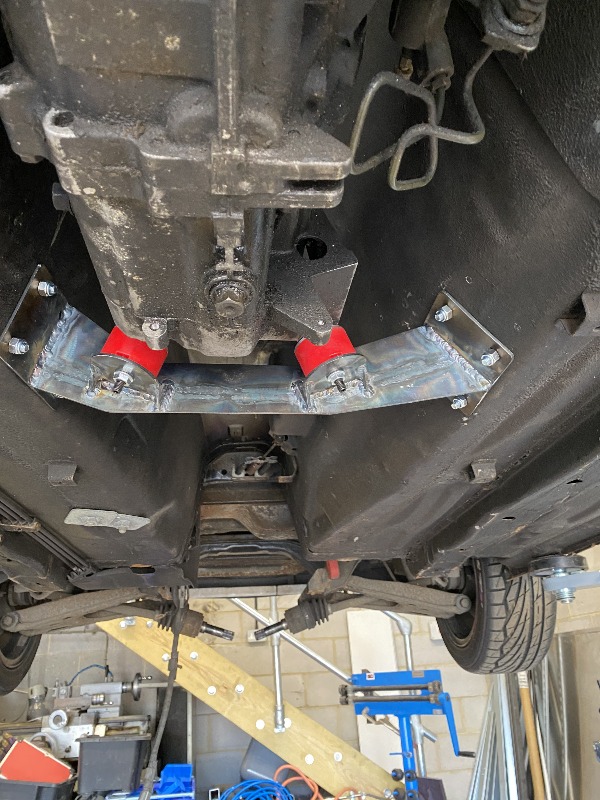
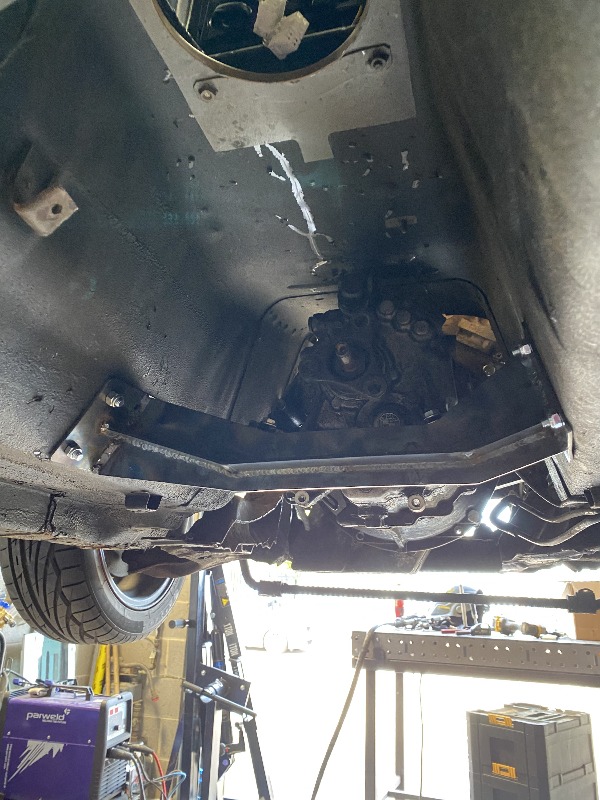
so after the engine was mounted where it needed to be, the next job was to get the gearbox mounted. I don't currently own a gearbox jack so I called in some muscle to help me fit the gearbox and got it bolted to the engine. Once again I took some measurements jumped into fusion 360 and designed a new gearbox crossmember then fired up the cnc plasma to cut it out. The crossmember bolts into the tunnel with 8 bolts and has reinforcement plates that site inside the car under the carpet. A few hours later I had this
After the engine was in properly it became clear that that standard MX5 anti roll bar just isn't going to fit, so I did some research and took a punt on an e36 anti roll bar as the overall width and mounting point width are close enough that it should work. An MX5 ARB as about 1035mm wide but the drop links mount on the inside, the e36 roll bar is about 980mm wide but the droplinks mount on the outside so the droplinks land in virtually the same place and its the right shape to fit around the engine. So once again I took some measurements and made some new ARB mounts and some spacer blocks to set the bar at the right height.
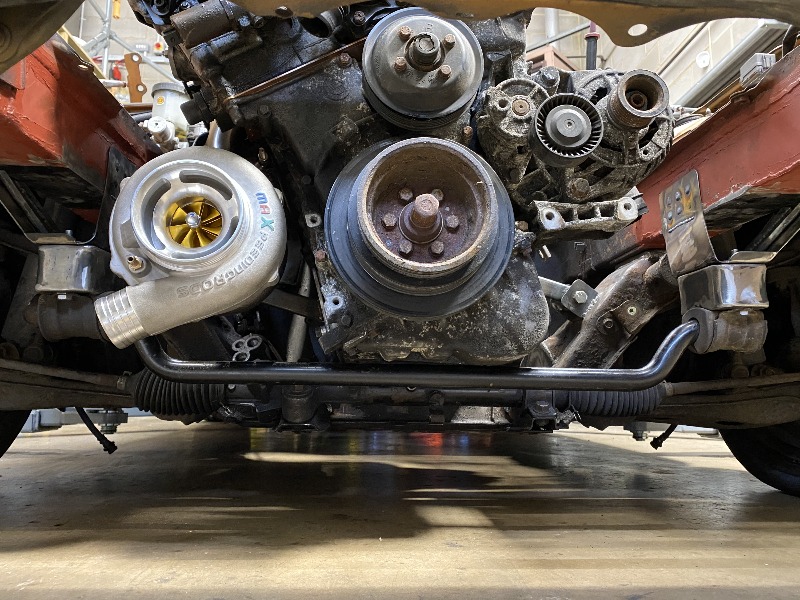
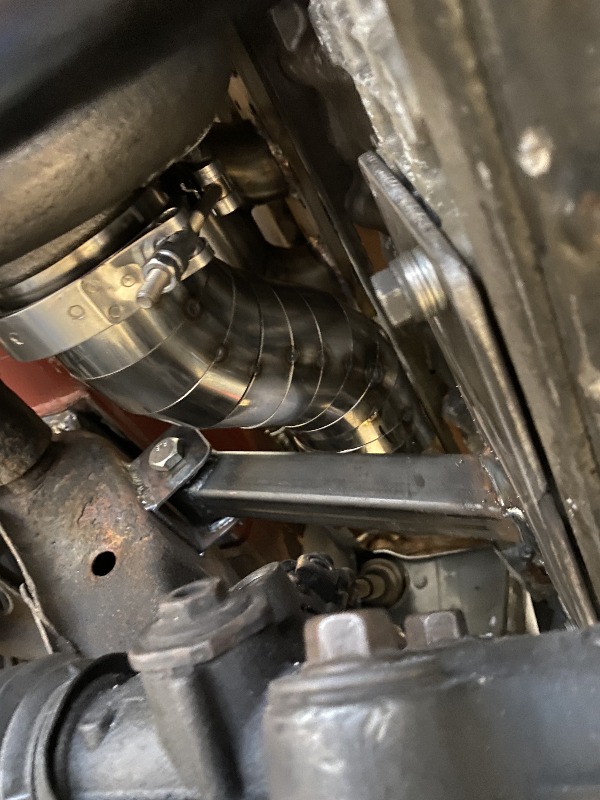
Next up I wanted to get the turbo fitted as there isn't really a lot of room in the engine bay. Now most Tailgate McNoIndicate guys top mount there turbos but in an MX5 there just isn't room to top mount the turbo if you want a bonnet on the car, my only option is to low mount the turbo so I want to do it early to make sure there is room. Originally I wanted to do some sort of tubular manifold but there just isn't enough room to do anything meaningful or worthwhile so I decided my best bet was to create a simple log manifold. So I made the manifold out of some 44mm ID (48mm OD) 304 stainless pipe with 2mm wall thickness, once I had the front section tacked together I decided to test fit it to make sure it would fit and see if I have enough height underneath to do a passive oil drain. The turbo fits but the jurys still out on whether I'll need to run a scavenge pump on the turbo oil drain.
and here it is after the manifold was all welded up
continued on next post...
Back in February, I bought this Golden Nugget MX5 and had started buying turbo parts before I'd even bought the car because going from a 300HP WRX to a 140hp MX5 just wasn't going to cut it.

t came with some questionable stickers, coilovers and choice of alloys but it was cheap. It did also come with stripes along the bonnet but I removed those before I took this picture (Still haven't removed the rest). So I jumped on the internet and got to ordering parts but I wanted to do this on a tight budget and do it for less than £2k as I already have another long running project car that is burning money and this was a temporary setup so didn't want to throw too much money at it.
I work as a welder/fabricator so figured I'd make my own manifold, downpipe and exhaust as I've done with most of my cars as without including labour it keeps the cost way down. Now the manifold for this car was a bit of an inside joke between my friend and I where we joked about Subaru swapping my original mx5 (which incidentally someone in the states actually did this). Instead we thought it would be funny to try and get some Subaru farty burble on an I4 so I spent some time in Fusion and designed a manifold that would just about fit in an MX5 but had runners with really unequal lengths and we came up with this piece of madness with exhuast runners 2 & 4 being double the length of runners 1 & 3.


I didn't exactly build this to make insane power as the limits of the BP8 engine internals are well documented and I wasn't in the mode to go through another engine build so any loss/limitations due to the inefficient manifold design is not a problem. Next up was an exhaust and as with my previous mx5 I wanted to do full 3 inch all way from the turbo and as I was on a tight budget that meant no mandrel bends, so enter 3 inch pie cuts lots and lots of them.


Unfortunately I never actually took pictures of the completed exhaust but It looked awesome, and I even threw in a cat to keep the MOT man happy. After that everything was pretty straight forward, I sourced a "New old stock" ME221 for a bargain price, got some reconditioned RX8 Yellow injectors, Intercooler, piping and fittings for a turbo. Now for the turbo, previously on my last 5 I bought a used Subaru WRX turbo and rebuilt it but I couldn't find any decent stock this time round so opted for the finest ebay China spec turbo (which is about the same price as a genuine TD04 that needs a rebuild).
Next up I threw in a wideband, boost gauge and a few other bits and got the thing running, unfortunately I didn't have access to a dyno (especially as this was in the middle of Lockdown 1.0) so I opted for some street tuning and got the fuel and ignition timing dialled in to where I was happy with it. I started to crank the boost up from 7 pounds and left it at about 12 pounds with a conservative tune. so the turbo install ended up looking like this. Looks a bit messy but it all works and that's all I need for now

I have skipped some things that I would normally absolutely do on a turbo conversion but as I knew this was only a temporary setup I couldn't justify the money. As such, I'm still running a stock radiator and single fan, stock clutch and no re-circ or dump valve for the turbo. So far its been reliable and not had any issues except coolant temps when drifting, doing burnouts or doing doughnuts.
So all in all the turbo install came to a total of £1734 which I'm quite happy with and this included the following:
Ebay TD04 Turbo
Custom Manifold
Custom 3 inch stainless downpipe
Custom 3 inch stainless exhaust
Reconditioned Rx8 Yellow Injectors
Generic Intercooler
Intercooler Piping
AEM Wideband
Turbo Smart Boost Gauge
ME221 ECU
Air Filter
Turbo Fittings and Hoses
Spark plugs
Poly Engine Mounts
And a few other parts required for a turbo install.
After the turbo project I also pulled the ABS out as the sensors are knacked, one snapped off in the hub and both front sensor bolts sheared off in the hubs. Replaced the lot with Full Braided stainless lines and an adjustable rear bias valve. Also painted the wheels black and swapped the shredded budget tires for a set of TOYO TR1's as they are certainly better than the bald tires I pulled off. I also threw together a rollbar from some ROPT510 I had left over from a roll cage we built, so that I could throw in a bucket seat and use harnesses.

Now if you wondering what the Exhaust sounds like then its a little like this (Ignore the terrible cutting around the exhaust, its since has a tidy bumper cut):
I had originally planned on starting the engine swap in February but it ended up being March/April time when I actually started. So for starters I pulled the turbo 1.8 out of the car and sold it to a lovely chap on facebook who'd just blown his stock 1.8 up.
When I purchased the car last year I'd seen that the front chassis legs had had some welding done on them, it looked prarrie canoe but I assumed that it was solid... Boy was I wrong.


So that was just the rust that broke apart once I started jabbing it with a crowbar, effectively all that the previous owners had done is weld (if you can call it that) some steel plates over the top of the rust and then paint over the top of it all. It had been noted in the most recent MOT that there was "Minor Corrosion" but it was definitely more than minor! So I took some rough measurements and worked out how big of a patch I needed, then jumped into Fusion 360, draw them out and fired up the cnc plasma to cut them out. I also designed and cut some internal reinforcements to sit inside the chassis leg where the anti roll bar mounts are. The end result looked something like this


All of that probably took about a week of evenings to get done but I wanted to get it sorted now whilst I had easy access to everything and before the new engine went in. So onto the rest of the project, The plan is to swap in a Tailgate McNoIndicate M52TU straight 6 along with the Tailgate McNoIndicate gearbox and Tailgate McNoIndicate Diff and then slap a turbo on the side of it. I know that a couple of people have managed to get the engine in and get it running but beyond that the details are all a bit murky. As such I thought I'd give it a crack. I got hold of a M52TUB25 (2.5L i6) along with the accompanying Getrag 5 Speed from a guy who was breaking one for about £270 delivered. Then I started putting together a plan and started gathering parts, I got hold of a e36 Diff with the ratios that I wanted, as well as a donor prop shaft and a donor Tailgate McNoIndicate axle so that I can make a mock up axle to send off to manufactured. I also started learning the ins and outs of reflashing Tailgate McNoIndicate ECU's so that I could run the standard ECU even with the turbo.
Now originally I had planned on initially running the engine for a while without a turbo but decided that I couldn't be bothered to pull it all back out at a later date to change the head gasket. Instead I decided to do the upgrades now and just go straight into Turbo charging it. So the bottom end on these engines is good for 600hp+ however as they are high compression you'll blow the head gasket long before you get there. The easiest and what seems like the most common fix amongst Tailgate McNoIndicate guys is to install a decompression plate, this is essentially a 2.5mm stainless steel plate that replaces the middle layer of an MLS. Along with the decompression plate I also installed ARP head bolts... or at least tried to.
So these engines are notorious for the threads stripping out of the block when torqueing the head bolts and when I did the 3rd and final pass with the torque wrench 2 of the threads stripped. As I said this is a fairly common issue when reinstalling the heads on these engines and there are a couple of solutions. Option 1 is get the block and head machined to take a larger head stud, but as I'd already thrown down nearly £300 on ARP head bolts I reluctant to buy another set along with the machining costs. So I decided to go with option 2, which is to drill and time-sert the broken threads, this still ending up costing the best part of £500 to buy the time-serts and the installation tools. (So if anybody has a Tailgate McNoIndicate with stripped threads in the block feel free to hit me up :lol: ) So I got the engine all back together with the new gasket set and ARP head studs.
Next up was sorting out a turbo, So I jumped on the internet and did some research to find the best turbo match to get the power and responsiveness that I'm after and settled on a GT3071R. Now this isn't some money no object project where I can throw down £2000 on a turbo so I decided id go for a cheap Chinese turbo to begin with as it had worked well for me so far and see what happens. Well I ended up getting a GT3071R "Racing Turbo" from Maxpeedingrods as they have stainless V-band exhaust housings and for less than £400 I cant complain. Then I looked into a wastegate to go with it and decided that on this cheaping out was just not worth it as I've never met a single persons that had a good experience with cheap wastegates so I order a GFB EX44 wastegate.
I also order a bunch of other crap as well; e46 Alloy Radiator, Intercooler, Poly gearbox bushings, engine mounts bushings, Chassis mount gear assembly and a load of other stuff that I cant be bothered to mention.
Anyway I've actually been working on this for a little while and getting the engine in was surprisingly easy, however getting it to sit exactly where it should was a tad more tricky. I started by trimming the back corner section that joins the chassis leg to the firewall, I had to cut that out entirely on the drivers side. Next up was the subframe, I needed to trim a fair amount of it out and due to the 30 degree lean of the engine more of the subframe has to be removed from the passenger side than the drivers side. I welded it all back to together so that it has some structural rigidity then started work on engine mounts. So this was the first attempt at sitting it on its mounts, however here the engine is sat about 30mm to far back and about 20mm to high in the engine bay.

after that I tweaked the mounts slightly and got it far enough forward however dropping the engine 20mm is where things got tricky as at this point there was only about 5mm Clearance between the oil ban and the steering rack. So after some investigation and help from a member of a certain MX5 nut related forum I came up with a plan. I initially cut out some 10mm spacers to drop the whole front subframe slightly and then later modified the subframe mounting points so that it sat 10mm lower. I ended up having to modify the subframe instead of using spacers as the studs just aren't long enough and its an absolute pig to change them. I also remade the engine mounts so that the engine sat about 10mm lower in the subframe and then moved the steering rack down by 5mm I had to sacrifice power steering as well but that doesn't really bother me that much. I really didn't want to have to move the rack but I had no choice if I wanted to get the engine in at the right height, we'll see how bad the bump steer is later I guess, although I may see if there is something I can do to address that at some point.
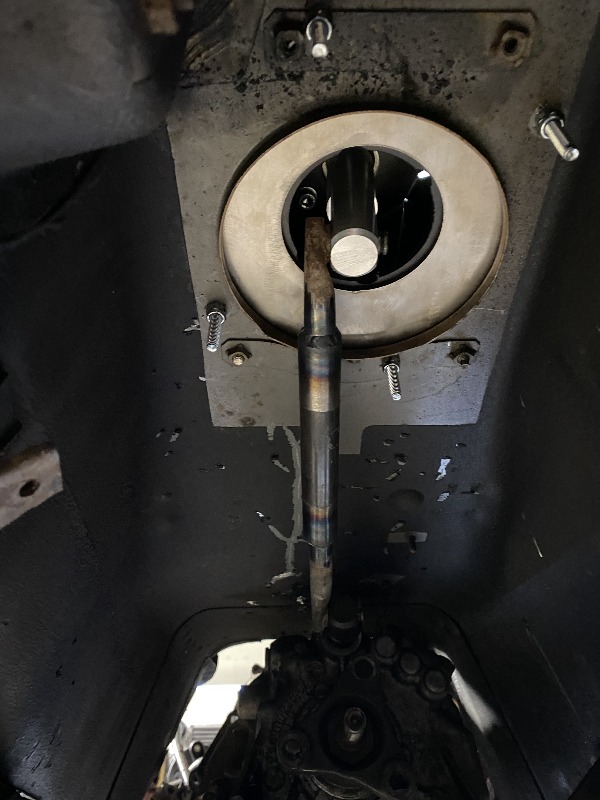
so after the engine was mounted where it needed to be, the next job was to get the gearbox mounted. I don't currently own a gearbox jack so I called in some muscle to help me fit the gearbox and got it bolted to the engine. Once again I took some measurements jumped into fusion 360 and designed a new gearbox crossmember then fired up the cnc plasma to cut it out. The crossmember bolts into the tunnel with 8 bolts and has reinforcement plates that site inside the car under the carpet. A few hours later I had this


After the engine was in properly it became clear that that standard MX5 anti roll bar just isn't going to fit, so I did some research and took a punt on an e36 anti roll bar as the overall width and mounting point width are close enough that it should work. An MX5 ARB as about 1035mm wide but the drop links mount on the inside, the e36 roll bar is about 980mm wide but the droplinks mount on the outside so the droplinks land in virtually the same place and its the right shape to fit around the engine. So once again I took some measurements and made some new ARB mounts and some spacer blocks to set the bar at the right height.
Next up I wanted to get the turbo fitted as there isn't really a lot of room in the engine bay. Now most Tailgate McNoIndicate guys top mount there turbos but in an MX5 there just isn't room to top mount the turbo if you want a bonnet on the car, my only option is to low mount the turbo so I want to do it early to make sure there is room. Originally I wanted to do some sort of tubular manifold but there just isn't enough room to do anything meaningful or worthwhile so I decided my best bet was to create a simple log manifold. So I made the manifold out of some 44mm ID (48mm OD) 304 stainless pipe with 2mm wall thickness, once I had the front section tacked together I decided to test fit it to make sure it would fit and see if I have enough height underneath to do a passive oil drain. The turbo fits but the jurys still out on whether I'll need to run a scavenge pump on the turbo oil drain.
and here it is after the manifold was all welded up


continued on next post...





 Look forward to seeing how this progresses.
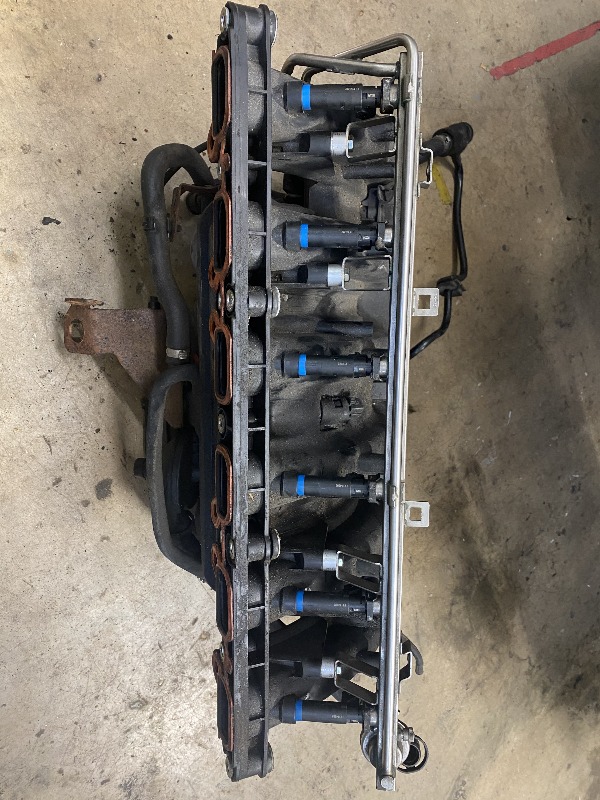


 le sigh