|
|
Post by hoodedreeper on Apr 7, 2016 17:52:04 GMT
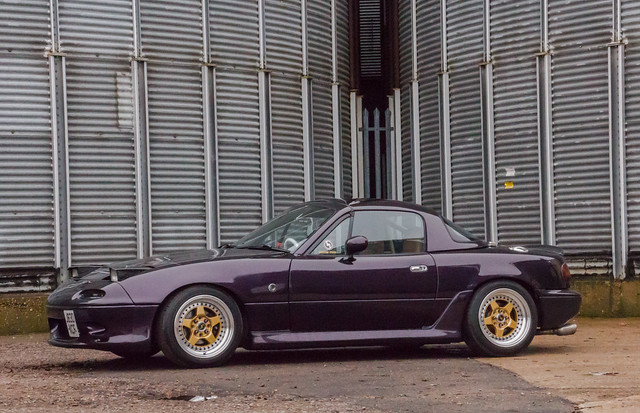
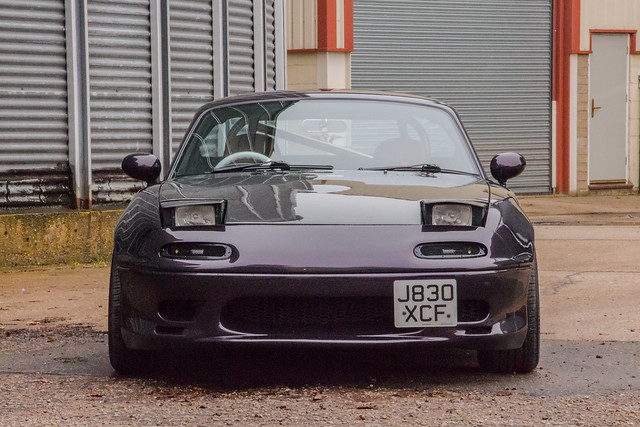
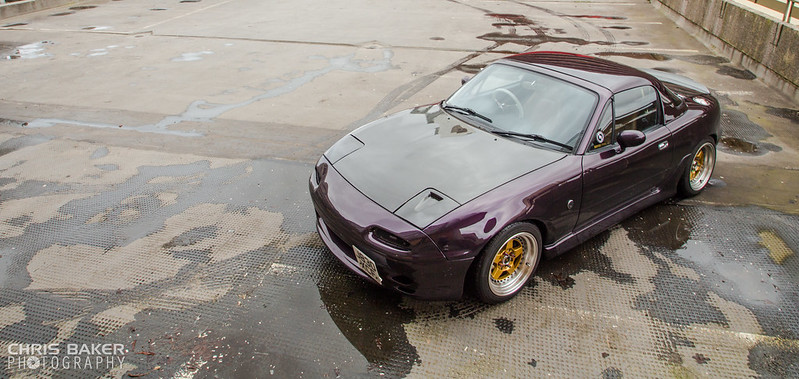
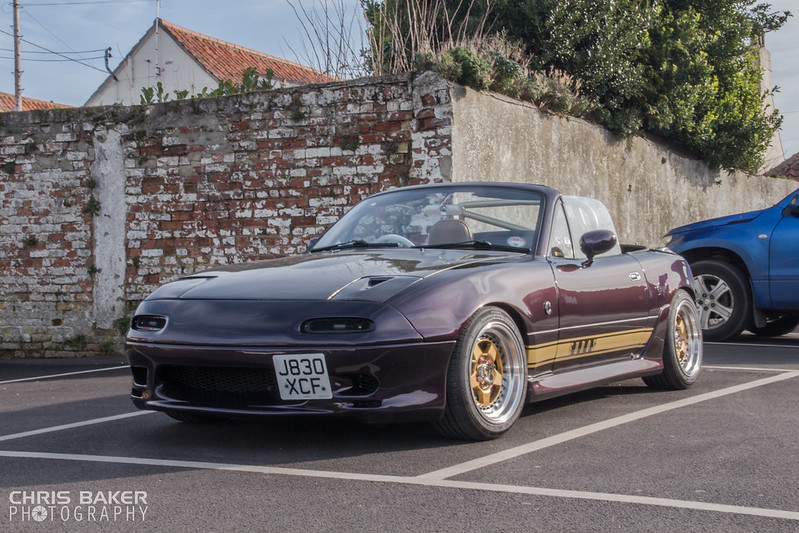
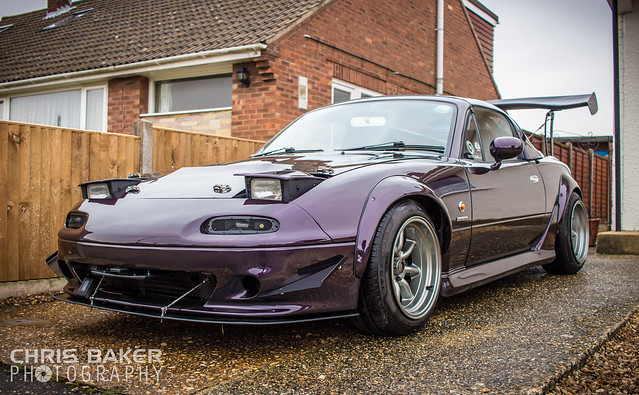
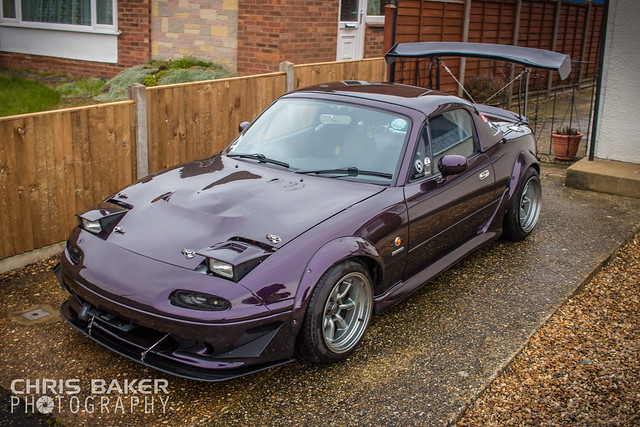
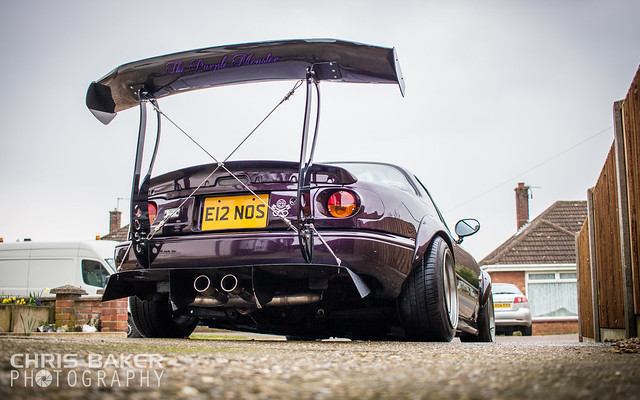
I'll try and condense this as its a lengthy build and probably be a long read It all started off with my Nissan Micra K11,i had this car for almost 5 years and it was my first project car. It needed money spending on it and i had fallen out of love with it. Nobody wanted to buy it whole,so i stripped it and scrapped the shell. 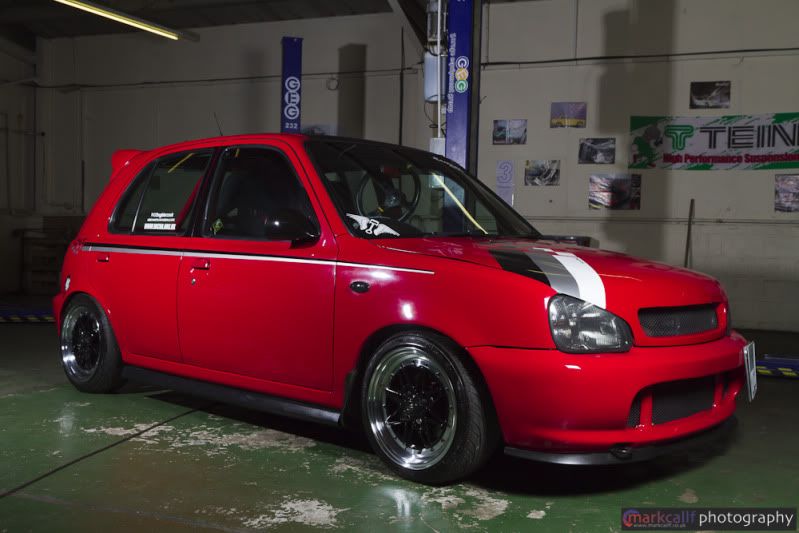 The need for more power was strong,after driving my other half's MR2 Mk2 i had my heart set on one of those. I couldnt find one in my budget so after hours of searching RWD cars my eyes were drawn to the MX5. I purchased a 1.6 import in 2011 to learn how to drift.  Done the usual mods like alloys,coilovers,roll cage etc etc. All was fine until i got hit at a drift day. I repaired and re-painted it then did a DIY Turbo conversion.  Took it drifting again 11 months later and i got hit again.  So i repaired and repainted it (again) and focused on grip. With the intention of forging it over that winter,i changed various bits and pieces until one Sunday afternoon when the car caught fire  A braided oil cooler line had arced against the Alternator live and there was many flames and much smoke.   I thought about it for a while and although it was probably salvageable,the shell was very tired,the doors and wings didnt line up properly,the sills were rotten,majority of it was cabled tied together etc etc. It was time to start a clean slate. I hunted locally for a clean Mk1 shell,couldnt find any until a friend (James Cribb) mentioned he had a mint shell possibly for sale. So with a few phone calls later we had agreed on a deal,and I took delivery a couple of weeks later. The car was purchased in Japan when new,over there it had thousands of pounds spent on it including a highly tuned engine on carbs,Garage Vary body kit,Garage Vary bonnet,centre shotgun exhaust,roll cage and much more! It was used as a Touge Car while over there. While it was over there it had a respray (originally Red,arent they all!) in Honda Amethyst. The inside has been stripped and the floor and behind the seats have been painted the same colour). The car was imported to the UK in 2007,and has covered approx 1500 miles in 7 years. I believe the shell has only covered 40k and you can certainly see that! Theres not a single spot of rust on her! The car got sold earlier this year and was stripped and put back to standard form. The car had a Veilside front bumper,which got removed and a stock bumper was refitted,hence why its a different colour,same goes with the bonnet. The engine was removed and a stock 1.6 long nose engine was put in its place. 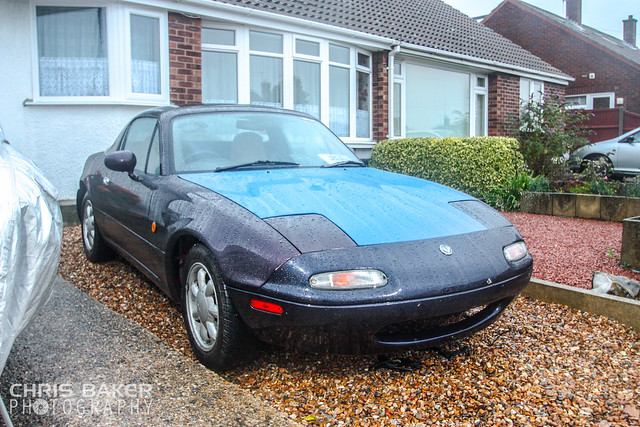   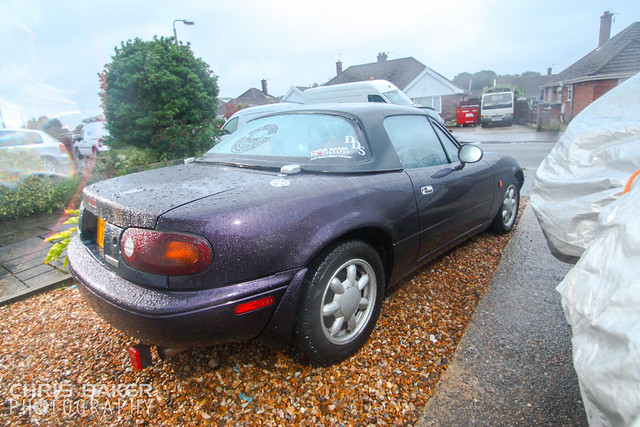 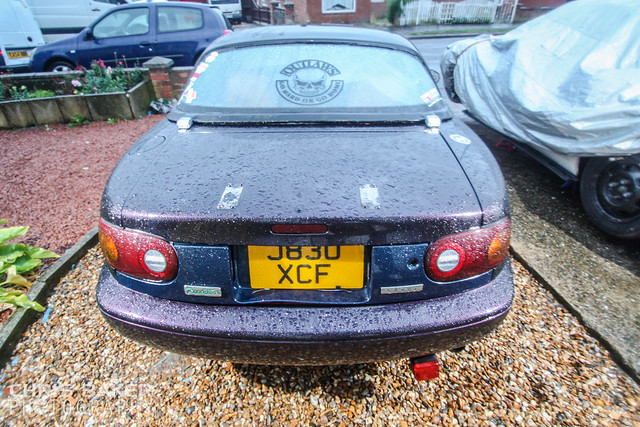 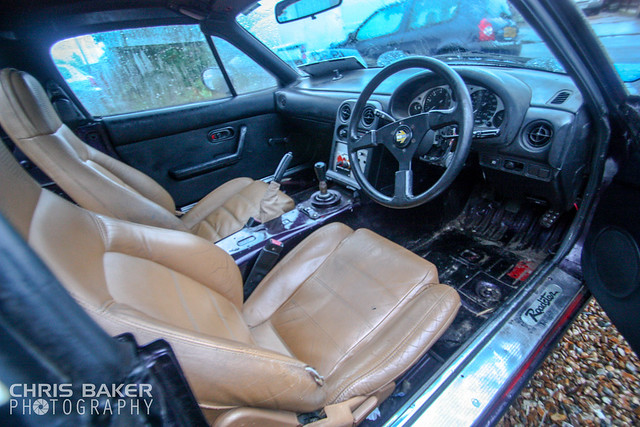  |
|
|
|
Post by hoodedreeper on Apr 7, 2016 17:56:54 GMT
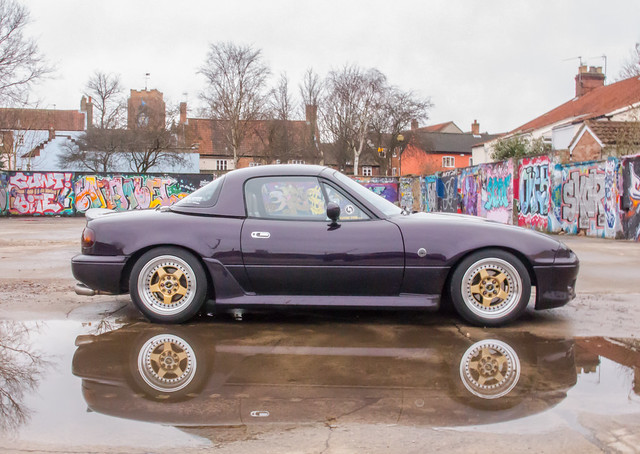
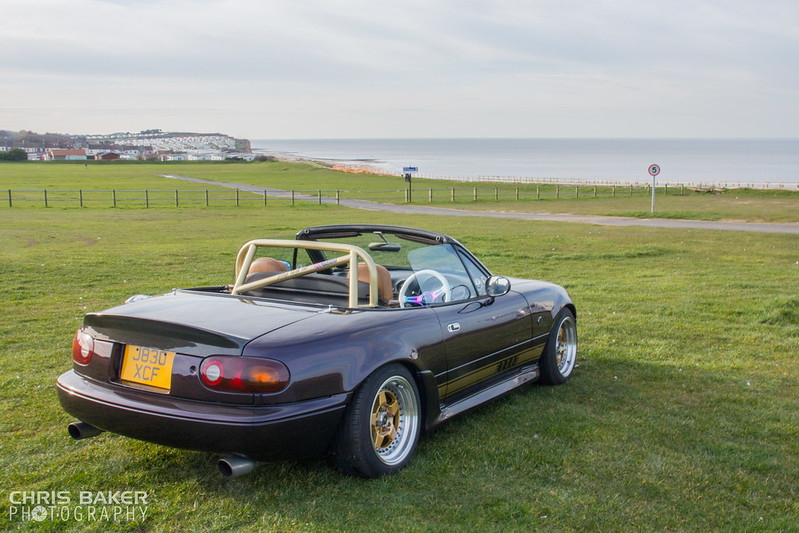
I was lucky enough to keep alot of the stuff from the White MX5,so those parts got transfered over to the Purple shell including the HSD Coilovers,Carbon Bonnet,Carbon Bootlid,Carbon Light Covers,Carbon Plate Panel,Low-Pro headlights and Fuel Cap. Needed some wheels so bought some Japan Racing JR10s and transfered the tyres from the Rota RKRs 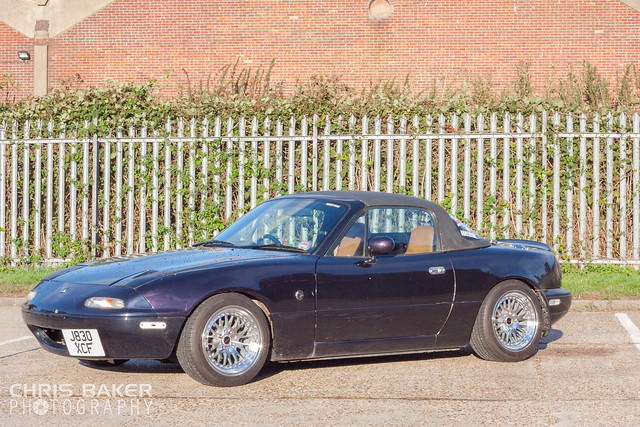 10 days of ownership and my neighbor across the road decided he wanted to reverse into the car. 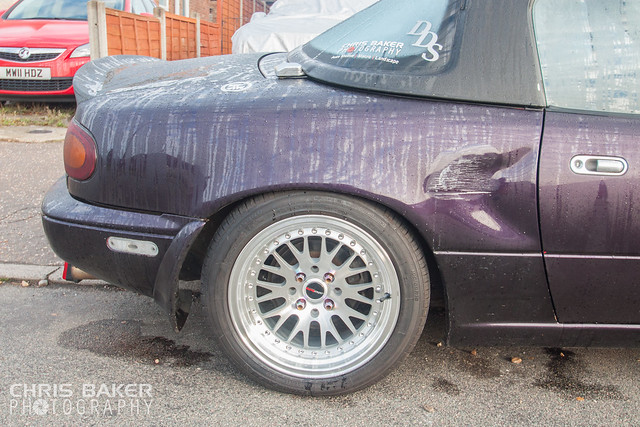 While that was going through the insurance i sold the Turbo Kit from the previous car. I spoke to the body shop and while the dent was being repaired,i got a full respray done along with aerial hole smoothed over,arches rolled and flared,side skirts and aftermarket bumper painted and the hard top  I had decided on a Purple and Gold colour scheme,so the Japan Racing wheels had to go,which made way for a set of gold Traklite wheels. 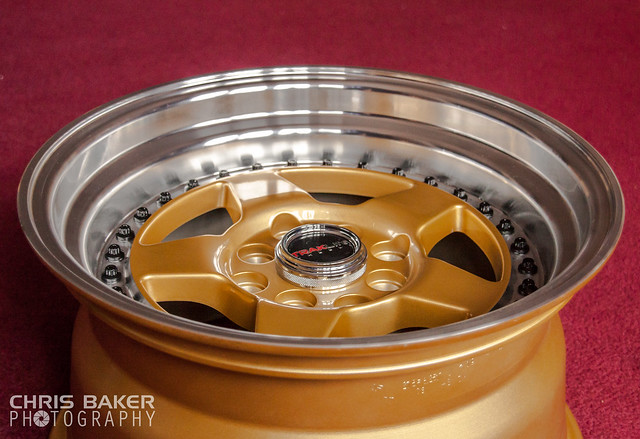 For what seemed an eternity,the car was finished just before Christmas 2013  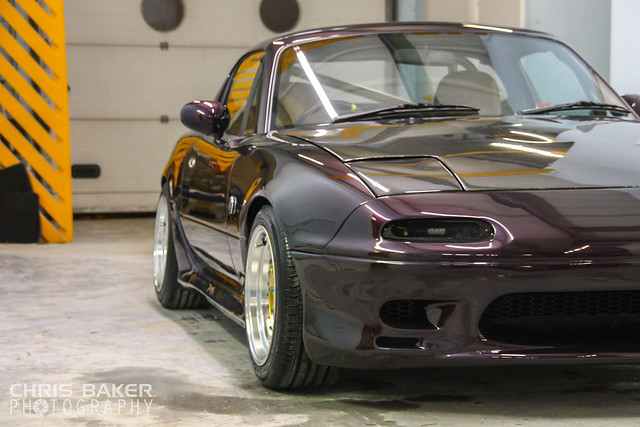 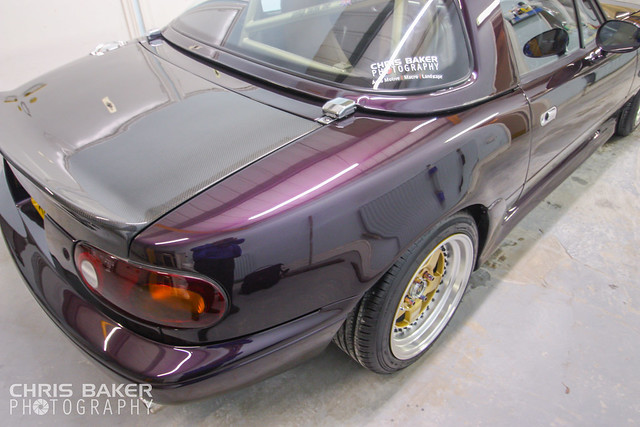 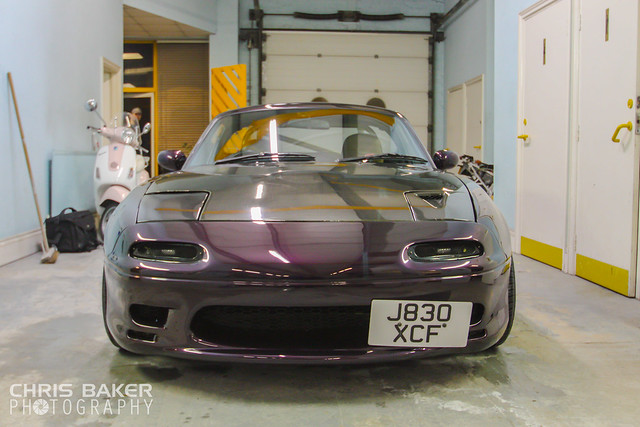 |
|
|
|
Post by hoodedreeper on Apr 7, 2016 17:57:32 GMT
|
|
|
|
Post by hoodedreeper on Apr 7, 2016 17:58:02 GMT
Zoom Side Repeaters 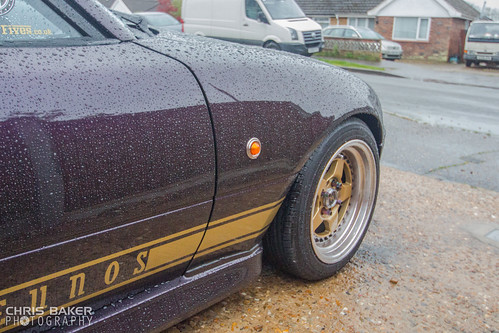 KG Works Door Handles 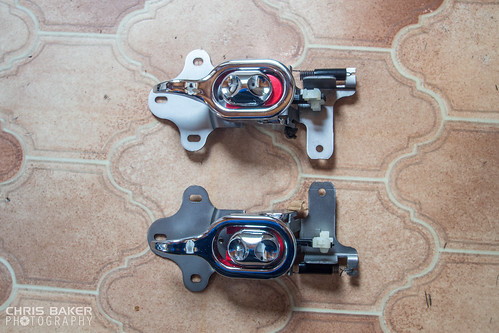 Garage Vary Tail Lights imported from the US 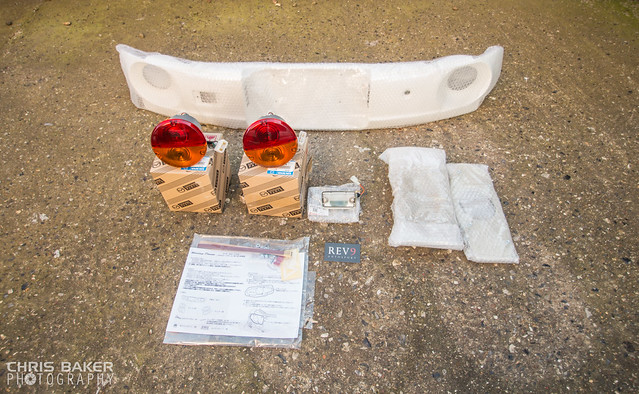 Fujitsubo Manifold with heat wrap along with an un-silenced decat 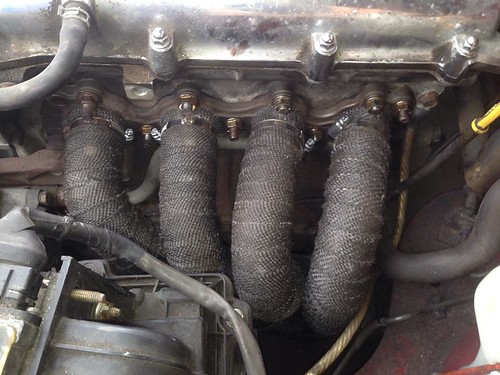 Garage Vary Tail Lights painted and fitted,just in time for the next show 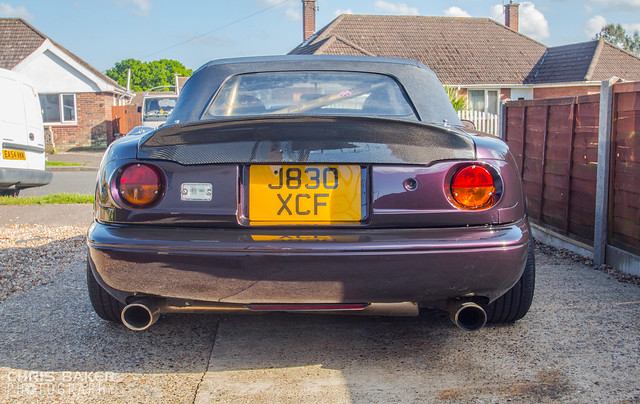  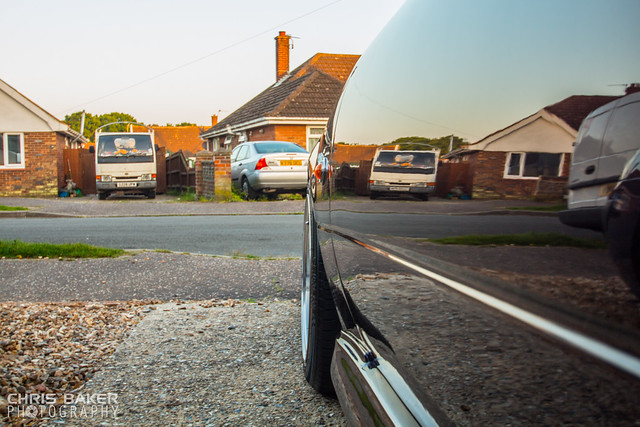 started to practice my light painting technique 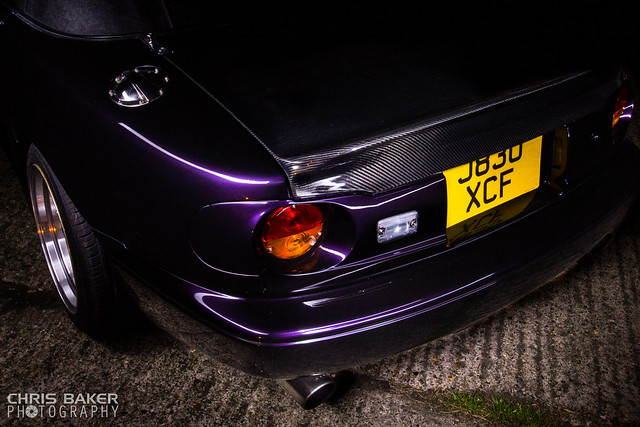 I was lucky enough to be asked to exhibit the car inside the main hall at the Modified Nationals show (this is where all the traders and top cars park) 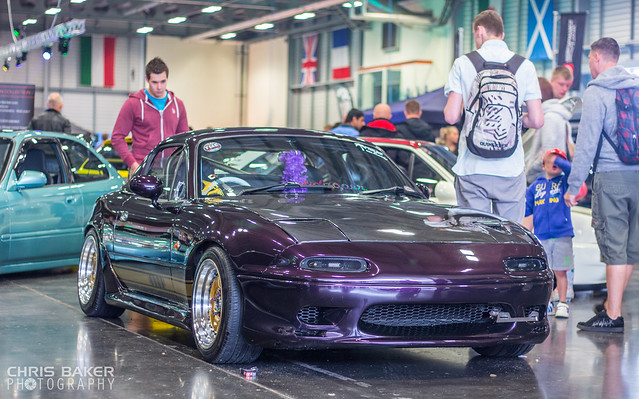 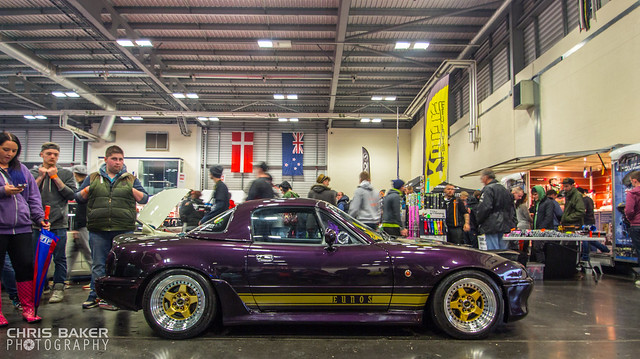 |
|
|
|
Post by hoodedreeper on Apr 7, 2016 17:58:38 GMT
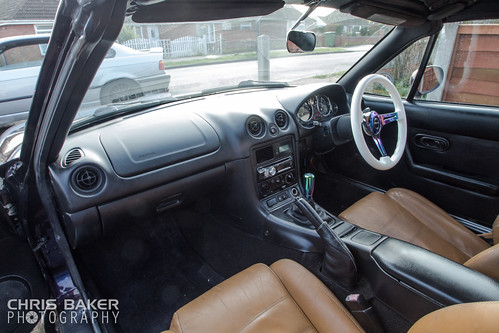
Billet wiper and light stalks 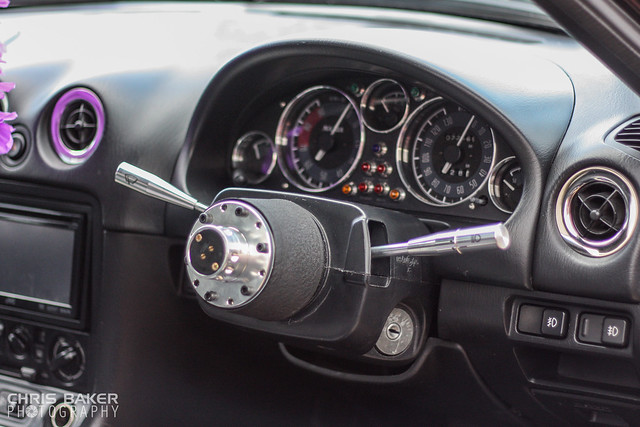 Polished Door Pulls,KG Works handles fitted along with some Carbon Door Cups 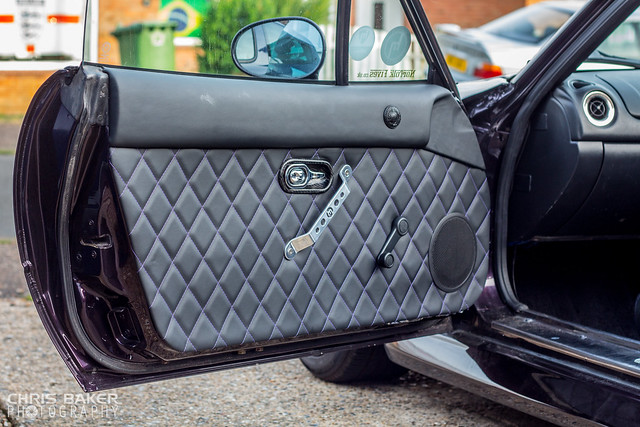 So payday came so i bought (another) set of wheels! Spoke to Barry at Mazdabeat and he sorted me out an awesome deal and the new wheels were with me the following day! I booked the car in at my local STS Tyre Pros for a set of Pirelli P1 195/50/15 tyres to be fitted. Rota RKR Front 15x8j ET0 and Rear 15x9j ET0 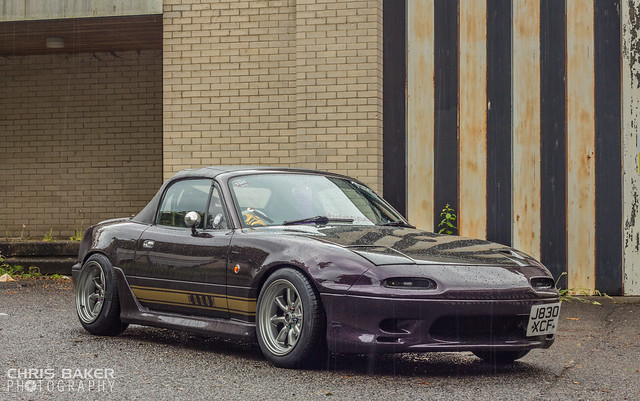 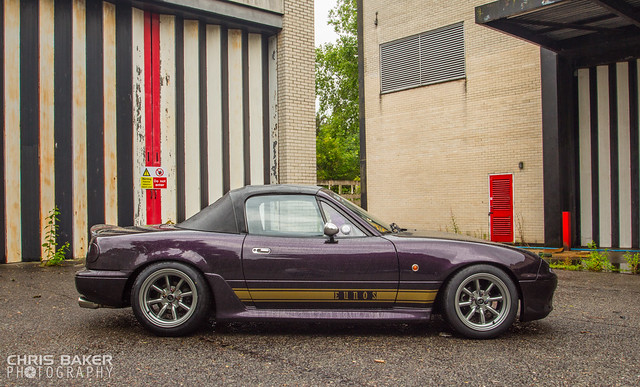 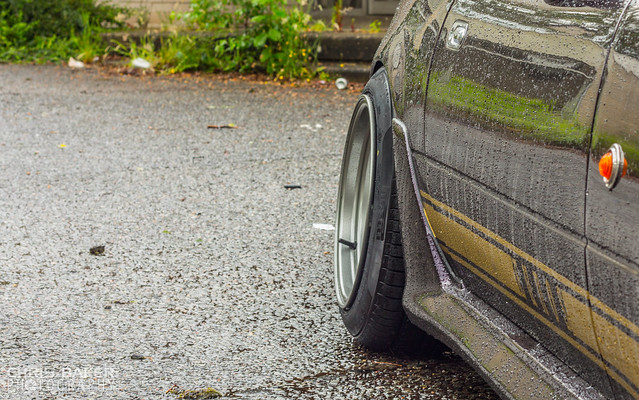 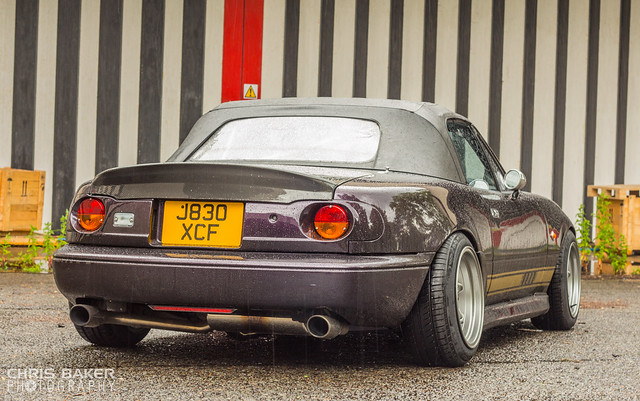 Entered into my first show and shine and won Best JDM  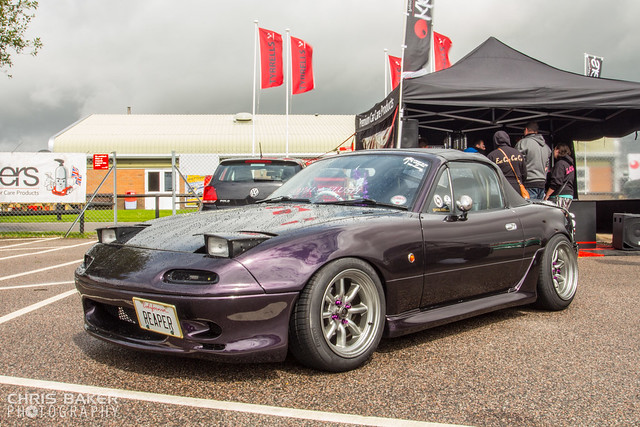 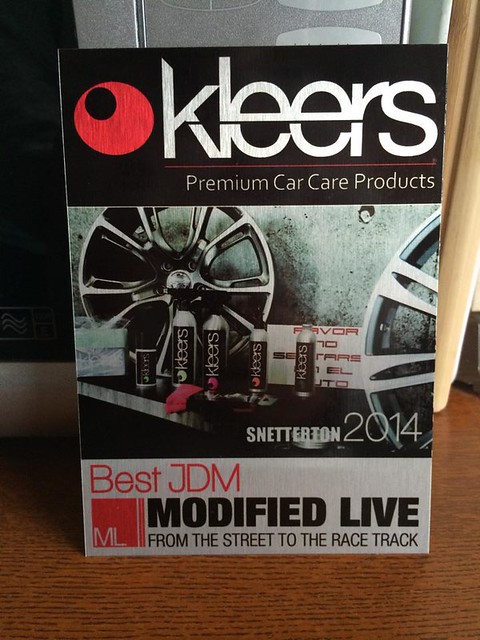 Full underseal and some random photos 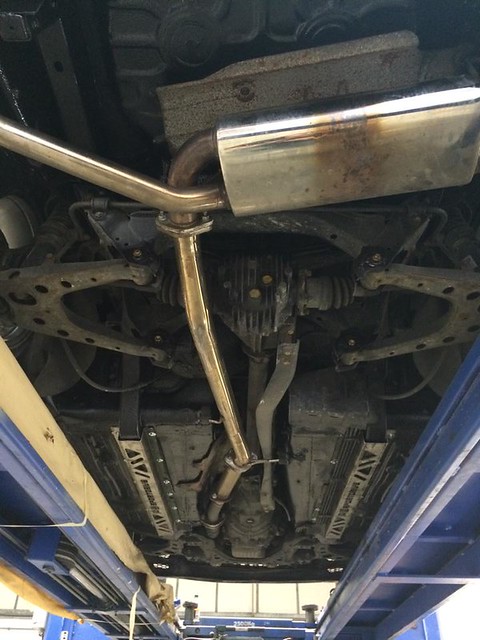 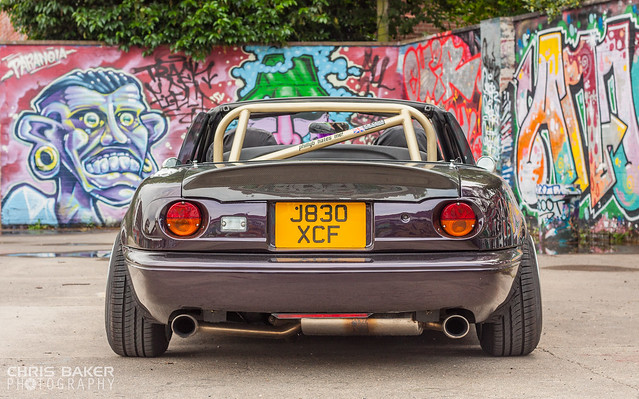 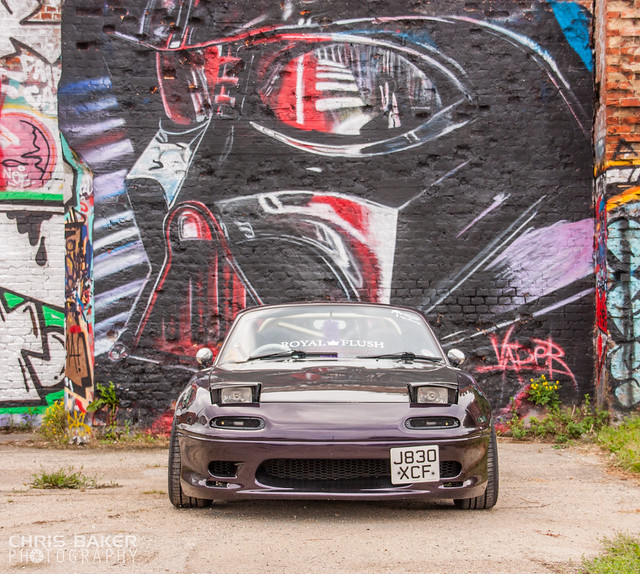 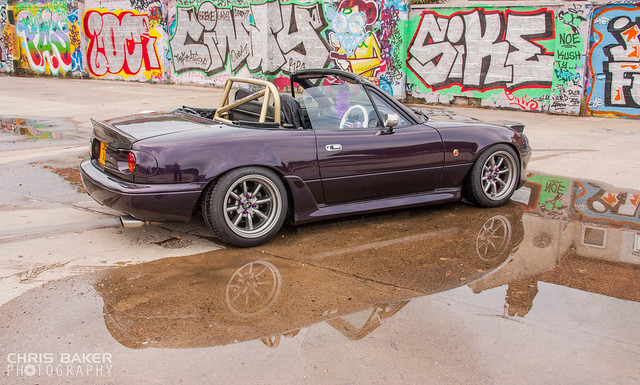 Took a 10hr round trip to collect a Mazdaspeed A-Spec Type 1 bumper 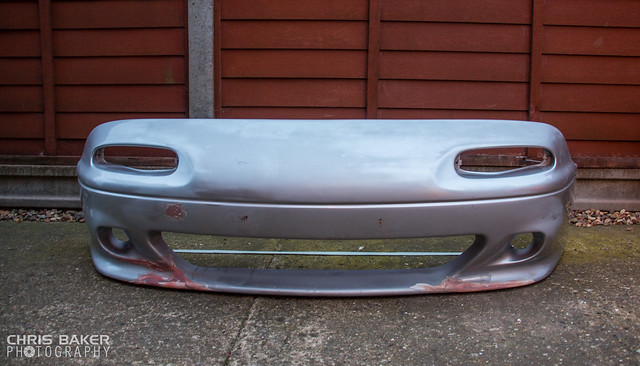 After speaking to the original owner (Richard) of the Purple Monster and looking back on some old photos,coupled with watching some Initial D,i wanted to 'try' and go down a slightly different route. The car has a (what i think) a USDM look,but i wanted to go down the Import look. Now after doing some searching it seems the MX5s in Japan are either near stock looking,or they're all out with big body kits,spoilers etc etc Now this is gonna be difficult as i've already got the body work how i wanted it. So i set to start making some small changes. The first one being some new Show Plates. I thought it would be awesome to replicate the original licence plate the Monster had while it was in Japan. So i came up with this: 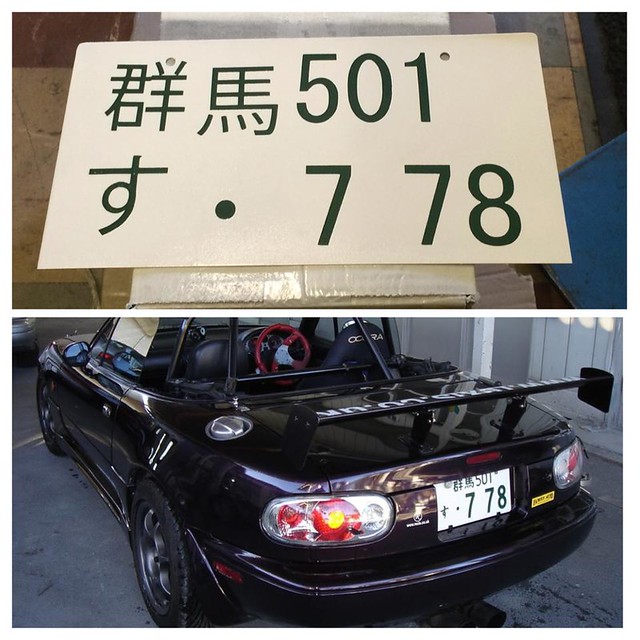 I know its not exactly the same,but for a DIY job it didnt come out too bad (considering a pressed Import Plate to me made is £28.00! (nearly $47 each for those in the US)) Next up was Japfest 2 at Donington Park. MX5Nutz had an incredible club stand of 120+ MX5s on display ranging from stock,to modified,to drift,to race. There was certainly something for everyone. Sketchy (who did an amazing job organising the show and day) had kindly asked me to join the display cars at the front,which circled Ron's Damm'd MX5. It was an emotional day for most and i know Ron was looking down smiling and laughing. I really hope we done him proud  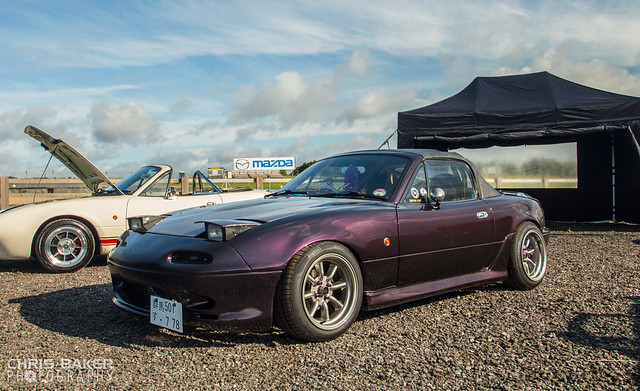 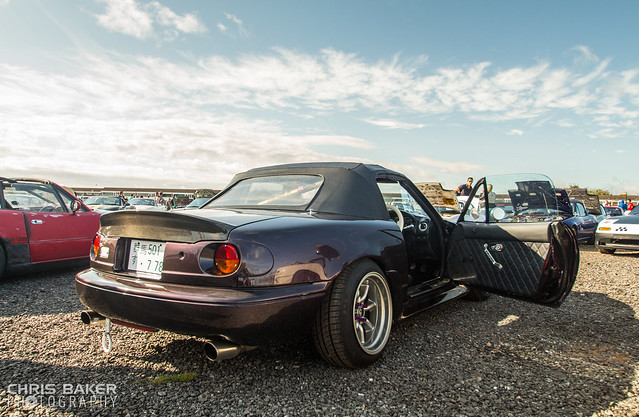 Awhile ago i was browing Club Roadster and came across a photo of a Mk2/NB dashboard with this strange looking air vents. So i did some reading into it and the vents were from a Mitsubishi Eclipse 00-05 (from memory). So i trawled through Ebay.com and managed to find a seller with them for a reasonable price. A 2 week wait later and they arrived on my door step. Fitting was straight forward and incredibly easy,and they finish the dash off nicely 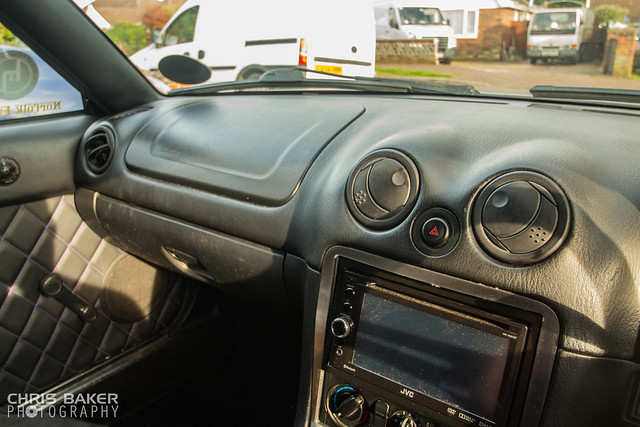 |
|
|
|
Post by hoodedreeper on Apr 7, 2016 17:59:04 GMT
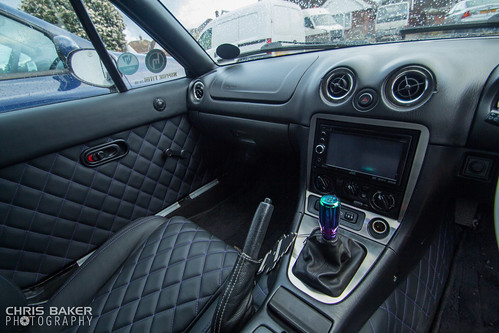
JAE at Wickstead Park 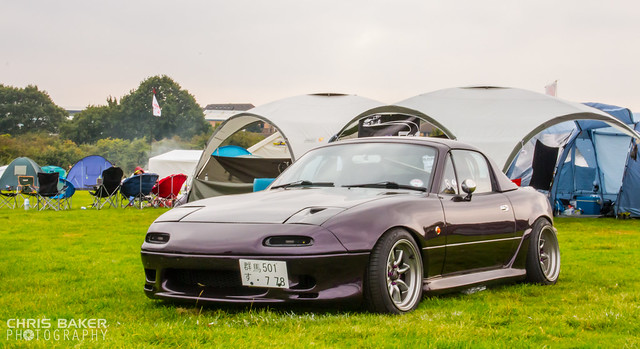 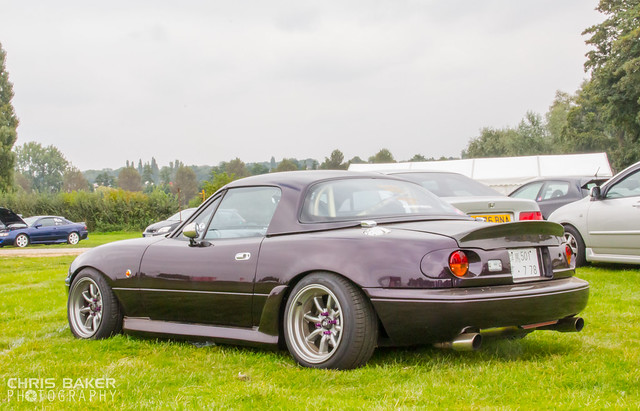 I had won a Nardi Deep Corn steering wheel and boss on eBay,which was promptly fitted once I got home. I also received my Jass Performance Sport Gear Knob and Handbrake Lever too 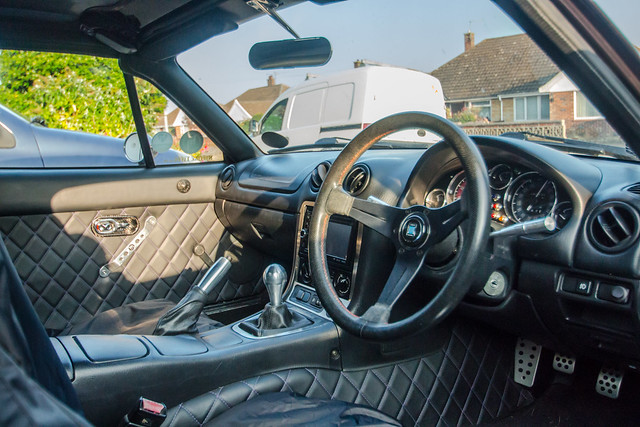 The car got dropped off at H&S Performance and the engine was pulled out. The car was then dropped off at AutoDoc Bodyshop for the main work to begin. While the car was in the bodyshop,the guys at H&S Performance did a full service of the engine while it was out. Spark Plugs Oil/Oil Filter/Sump Plug Cambelt & tensioners Waterpump Clutch Thermostat & Coolant Sensor Painted Upper and Lower Thermostat Housings Painted Inlet Manifold with Throttle Body Painted Rocker Cover Painted Cambelt Cover Engine Block Painted The car was finished and dropped back off at H&S where more parts were fitted along side the re-fitting of the engine. Clutch Slave Cylinder Alloy Radiator Eunos Racing Development Silicone Radiator Hoses New Expansion Bottle New Washer Bottle Polished Oil Cap Polished Plug Cover Stainless Fusebox Cover Painted Radiator Panel cover Painted Scuttle Panel Cover Countersunk Purple Washers and Bolts Its far from finished,there's still alot to fit/change but the main bulk of changes have been made  I was torn between painting the bay Purple or White. White was a big gamble but I think I've pulled it off well  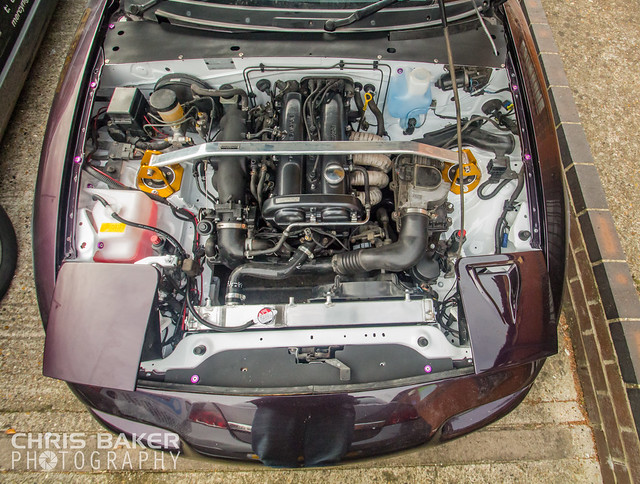 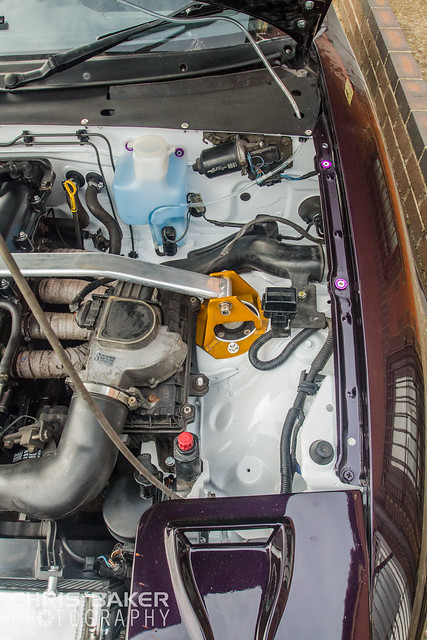 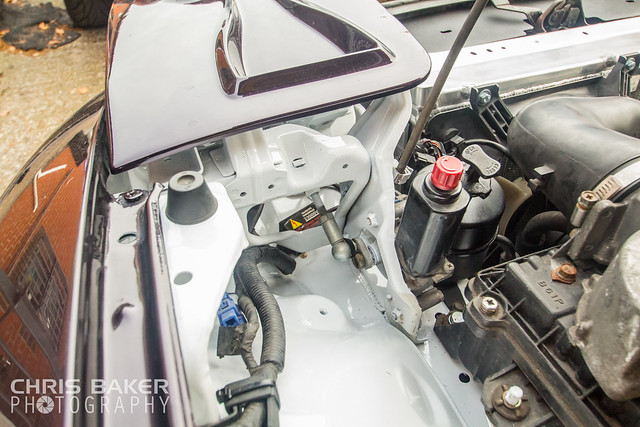 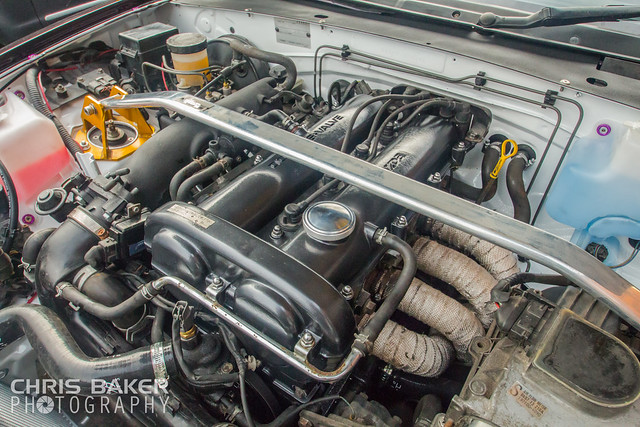 I wasn't too keen on the Tailgate McNoIndicate Sparkling Graphite painted rocker cover,it looked too dark against the black Inlet Manifold and the front cross over pipe for the air box. So I sent the spare over to a local Powder Coaters. I got it back at the beginning of the week and fitted it today 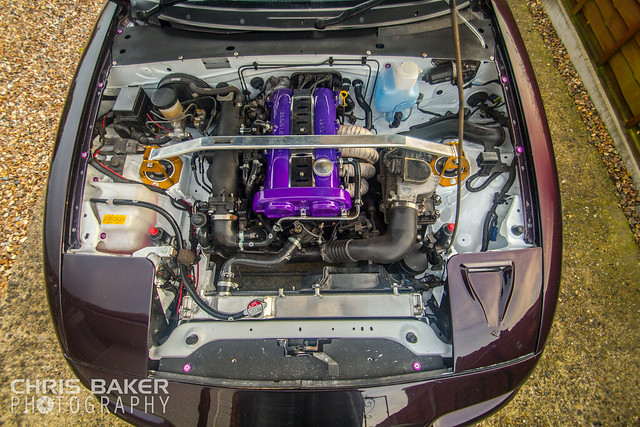 I also fitted a Polished Plug Cover,both work really well  I also took a visit back down to H&S Performance who helped me fit a Stoney Racing Ancillary Hose Kit. These guys have been incredible the past couple of months and I cant thank them enough. Then this happened.... |
|
|
|
Post by hoodedreeper on Apr 7, 2016 17:59:27 GMT
It all started back in January when i was at Autosport International. I was surrounded by Forced Induction on the MX5Nutz Club Stand,staring at the display of Turbo and Supercharged cars for 3 days started the urge. At the time,the Interior was booked in to be done in March,and aesthetically the car was pretty much done which only left the engine bay. Having gone the Turbo route with the previous MX5,i thought i'd head down the other path and try out a Supercharger. So it seems the Eaton M45 from a Mini Cooper S was the popular choice to fit,so the search for one began. Having just missed one on eBay that had covered 25k and being the later generation with teflon blades,it went for £450 delivered. At least i knew this was the kind of money region i was looking at for a unit. Then i happened to stumble across a For Sale advert on Facebook for one. I dont think i could have sent a message to the seller quick enough! After a few messages back and forth,i had managed to secure myself a Charger that had only covered 19 delivery miles (yes,you did read that correct). It was removed due to a damaged pulley,which by looking at the photos was some-what repairable anyway. Included was a second throttle body with blanking plates and dual cable throttle wheel,all for the sum of £140.00 delivered!   Amongst the vast amount of research i found Aran and Taffylude's build threads on Nutz,who both kindly documentated everything including where to buy it and the costs. This was the perfect Guide for a novice like myself! Massive thanks to them both! So i took the Charger to work to give it a good clean,removing the PTO and making a blanking plate. At this point i also cut the mounting lug off and blanked the breather port next to it. 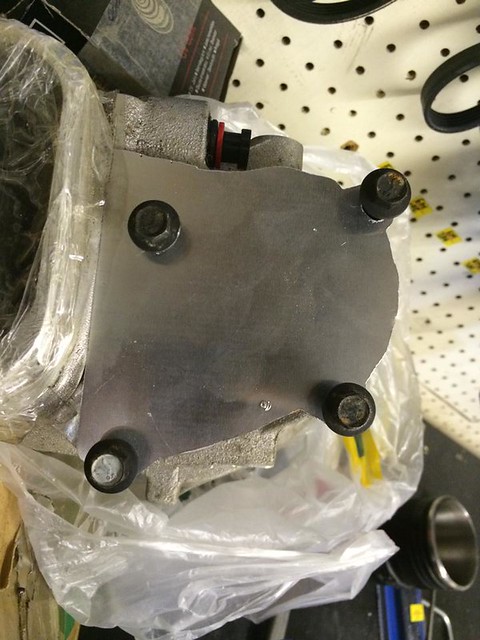 RX8 420cc Injectors purchased,these worked great on the turbo build and will help give me some extra ponies. These were sent off to BLiNK Motorsport to be cleaned/flow tested/new seals. They did an incredible job and had a very fast turn around,highly recommend them! 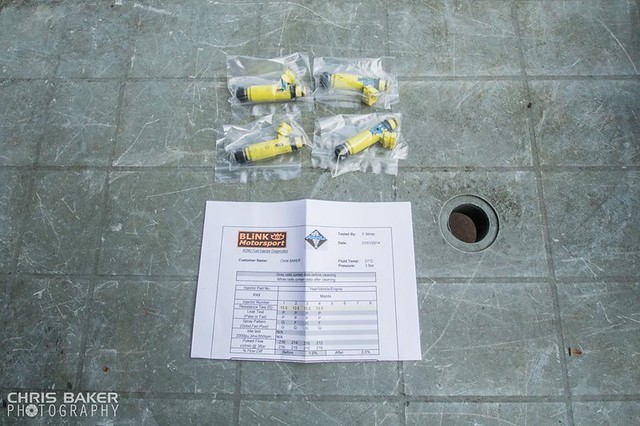 AEM Wideband 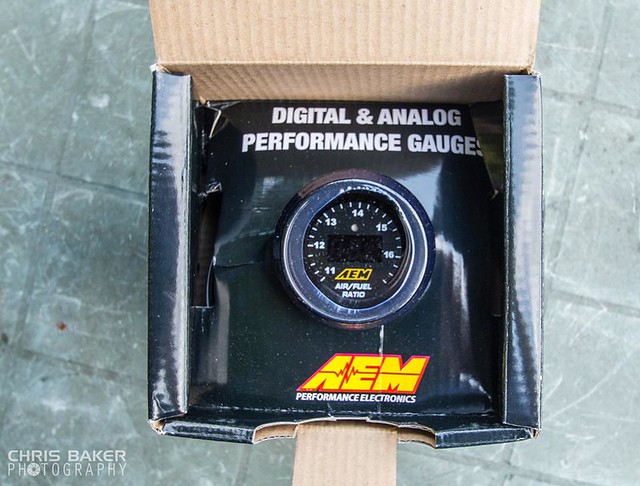 As the weather was good,i got some painting done. I wanted a pretty basic looking engine bay,almost OEM,so i went for the classic Wrinkle Black finish. I ended up painting the Inlet Manifold,both Throttle Bodies,Radiator Slam Panel,Wiper Scuttle Panel and Thermostat Housing. Sadly i've only got a photo of the Throttle Body at the time (the rest can be seen in the engine bay photos above) 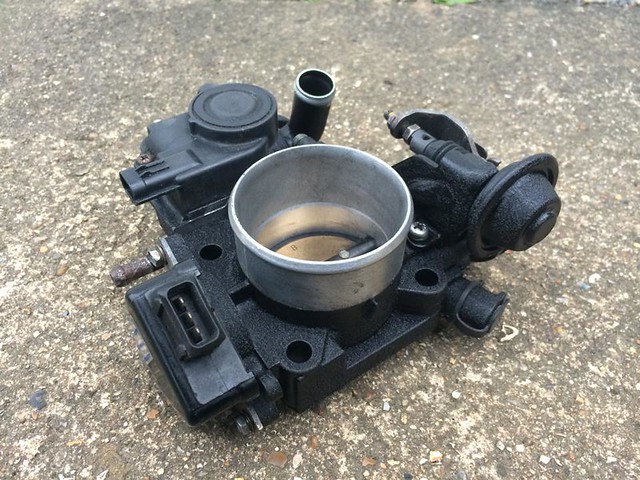 TR Lane Kit ordered,this was one of the most expensive items and took approx 6 weeks to be made. 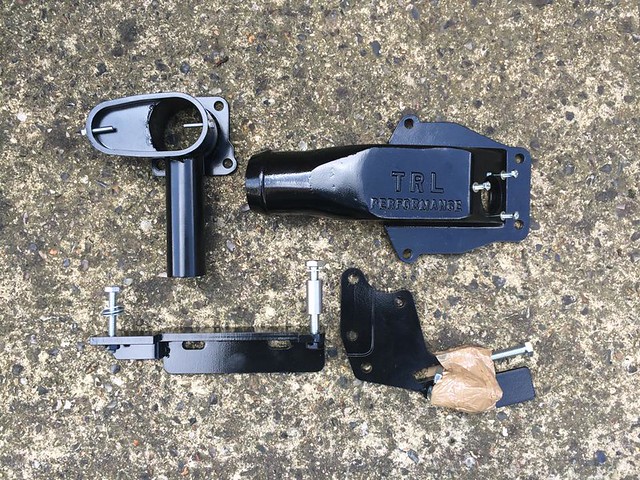 It didnt matter that the original pulley was damaged as it was being replaced with a smaller one. I went for a 15% reduction as i wanted it reliable and i had read smaller pulleys could lead to potential belt slip. I ordered one along with a modified By-Pass Valve from 1320.co.uk I knew removing the pulley was going to be a major task,so i left that in the capable hands of an Engineering company around the corner from mine. It took them a few days to do,but it came off clean which is the main thing 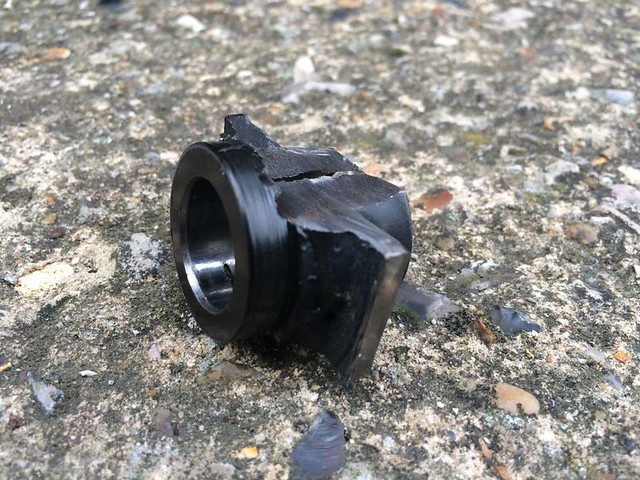 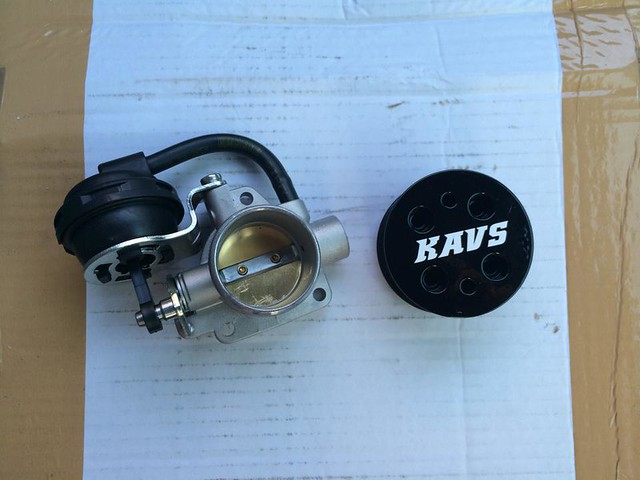 I made some gaskets for the TR Lane inlet and outlet and bolted them together. The charger received a coat of Wrinkle Black paint too 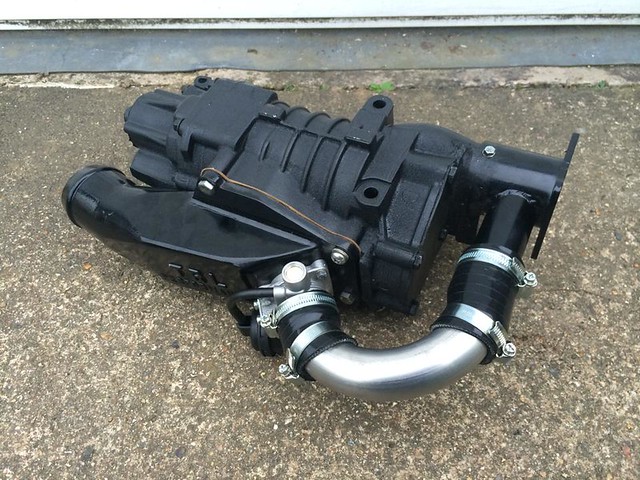 In the mean time i was getting ready for the engine bay work to be done,which saw alot of new gaskets and bits and pieces ordered,aswell as new nuts,bolts and washers for various things for the build. Luckily i got majority of the parts from MX5 Parts when they had their discount on! This then brings me to last week,i had booked the week off so i could fit it. With the turbo build i had to get alot of help from various people as i was pretty clueless with what to do and how to fit it. I managed to fit the kit on my own! Doesn't sound alot to most,but its pretty achievable on my part (yes,i admit i had to get a second opinion on a few bits,but i'd rather be 100% sure!) Here are some various photos from the fitting stage: Radiator Fan moved into the centre,brackets made and the fan wiring extended  Intercooler Pipework Mock Up (Driver's Side) 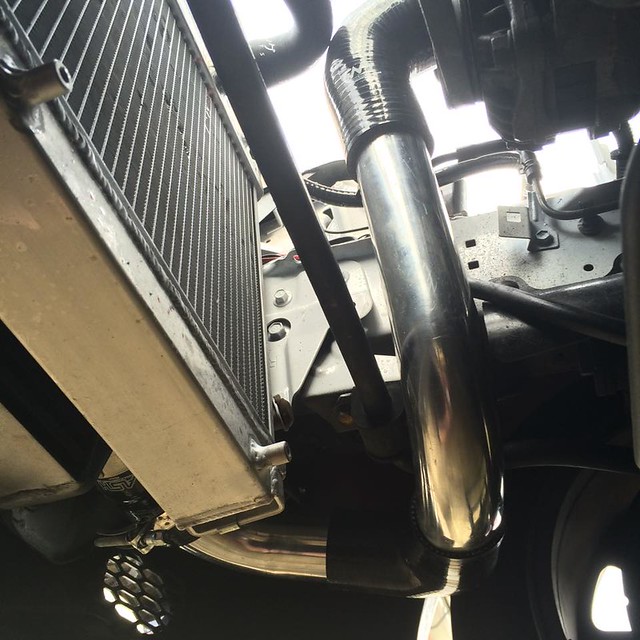 I got the Charger mounted in the Engine Bay (knowing it would need adjusting at a later date). Also got the Tensioner Bracket on and the Intercooler all plumbed in   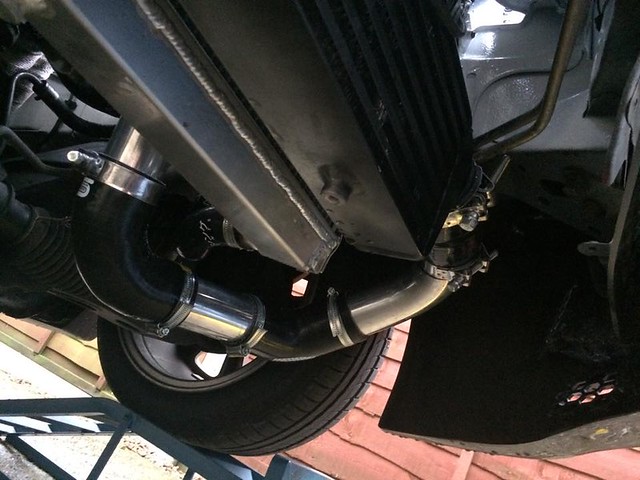 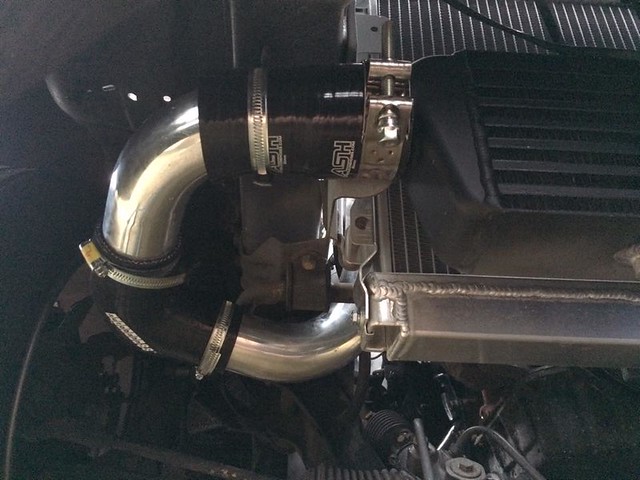 |
|
|
|
Post by hoodedreeper on Apr 7, 2016 18:00:27 GMT
IAT and Idle Speed Valve hose fitted to the Intake hose 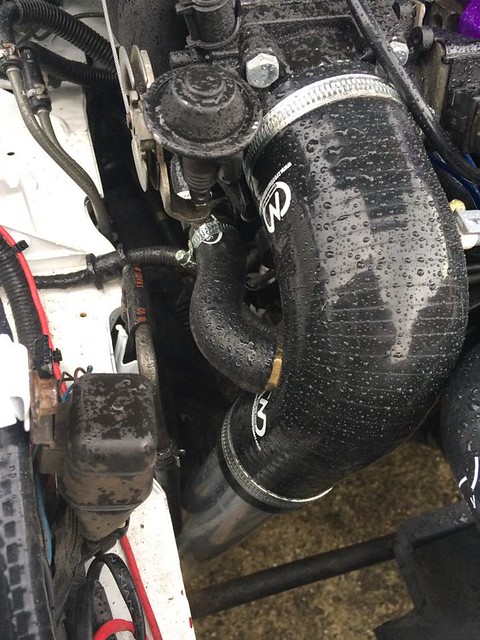 RX8 420cc Injectors Fitted (after several issues with a crushed O-Ring!)  Belt fitted and tensioned. Air ducting and Pipercross Foam Filter fitted too. Megasquirt 2 V3 had also arrived and was fitted 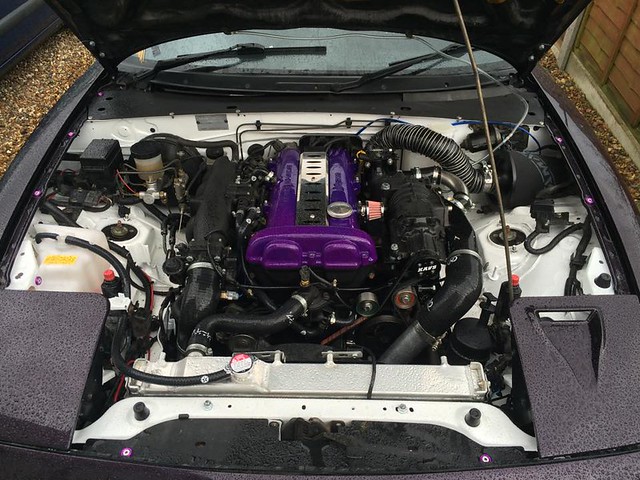 And there we have it! Supercharged in 7 days  Tailgate McNoIndicate E36 Variable TPS and the adaptor plate 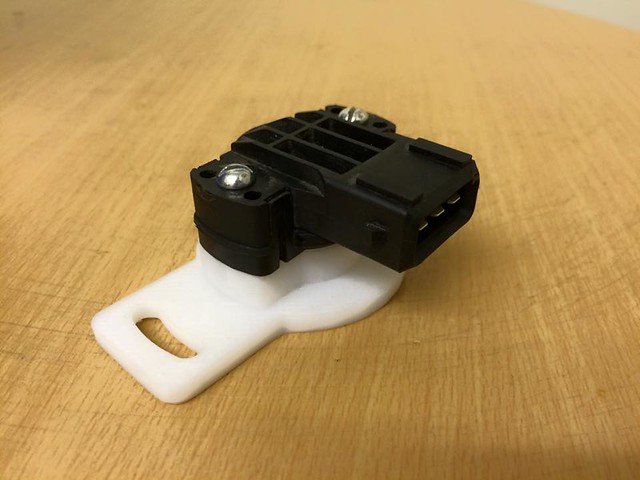 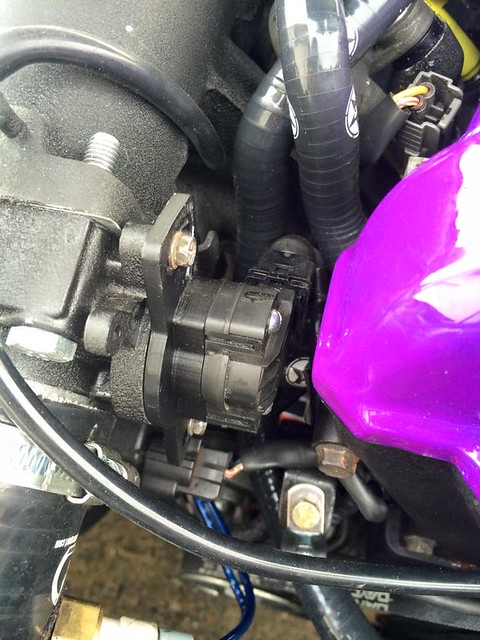 1.8 Dimpled & Grooved Discs,Ferodo Pads and HEL Stainless Hoses fitted 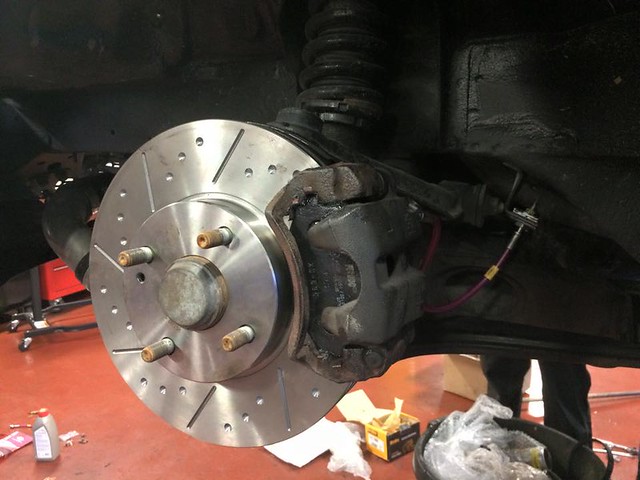 Finally got round to getting the hose take off and IAT bung welded onto the Intercooler pipe  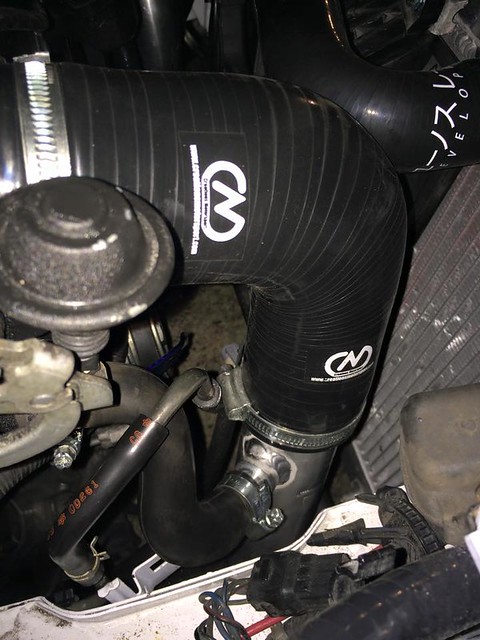 Alloy Washer Bottle fitted 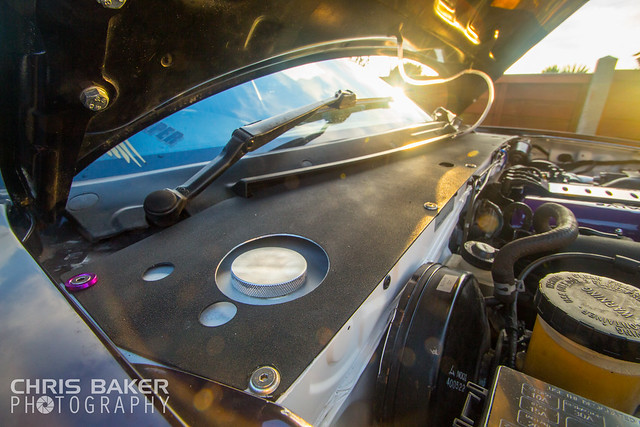 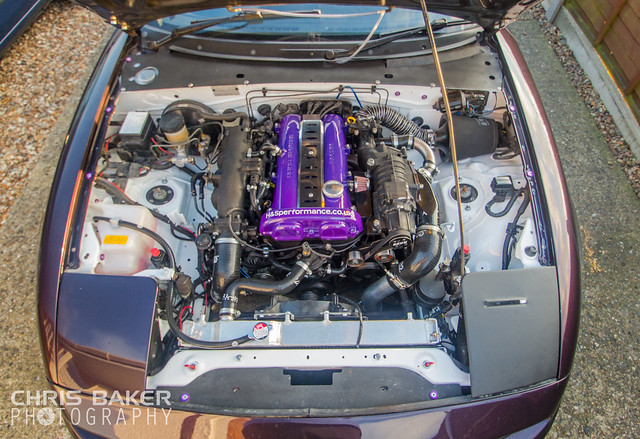 I embarked on a road trip to go visit Nick at Skuzzle Motorsport to have the car mapped.  Nick worked his magic and was incredibly speedy in mapping her! Thinking it would take all day,infact only took him till Lunch time. When I had it dyno'd a few weeks after it was charged,it was 142hp @ the wheels and 180hp @ the flywheel. She's now a healthy 170hp @ the wheels and 204hp @ the flywheel! Its a lot smoother to drive and less punchy,Nick said he can adjust it to bring back some of the punchy-ness,but I'd have to sacrifice some Torque which I didn't want to do. The fueling is a lot better,she doesn't flame any more,but Nick kindly demonstrated how to change that in Tuner Studio. He did adjust it so it pops and burbles nicely at 4000rpm now  Overall,incredibly happy and pleased with the results and the work/service by Nick! Cant recommend him enough! So me and Mrs Reeper spent another day in the area and then headed home. Needless to say,after a 577 mile round trip,the Monster is in need of a bath now 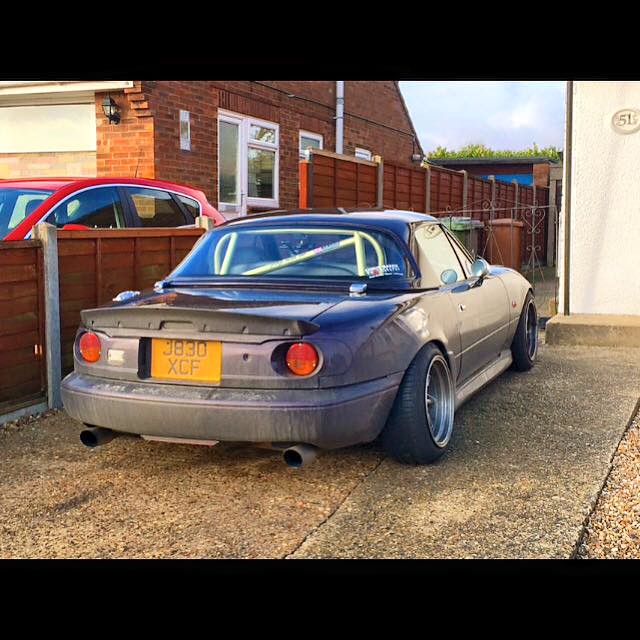 I'm sure everyone on here has dreamt of owning a particular car/car part. Ever since I've been involved with modified cars,i've always fallen in love with one particular alloy wheel. I promised myself that one day I hope I could be so lucky to own such a wheel. So I bit the bullet and ordered them,knowing they're custom made to order,the waiting time would be an absolute killer and it seemed a lot longer than it actually was. So after a 12 week wait and numerous emails sent bugging Rich at Driftworks,i finally took delivery of them today! //WORK Meister S12P 15x9j ET0 in Gloss White 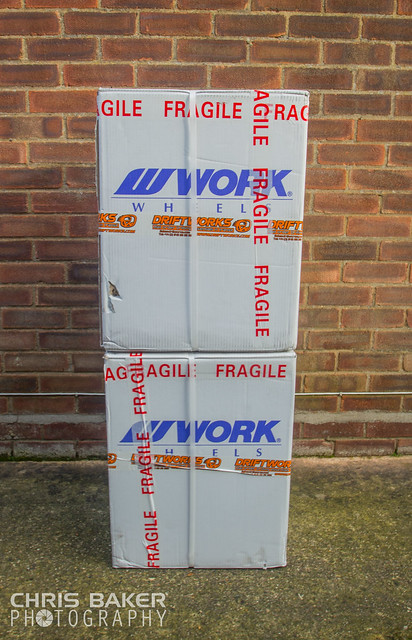  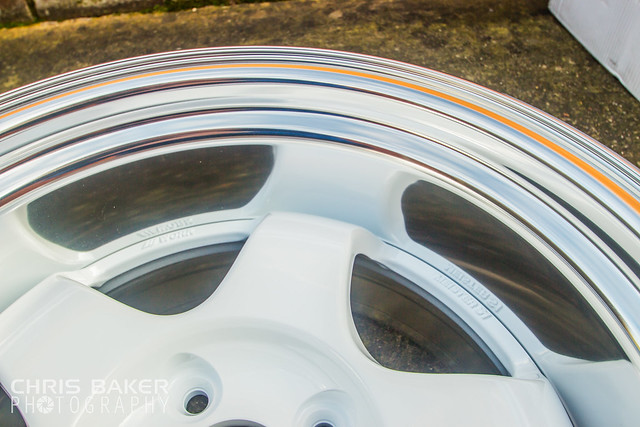 Mrs Reeper bought me some Wide Arches for Christmas. So i'll need to wait to have those fitted before the Works can go on. I'll be wrapping them in 205/50 Rainsport 3 tyres. They seem to have a very good review and they're pretty good price wise. I embarked on another roadtrip,this one was certainly worth it! I've been searching for a Garage Vary bonnet ever since i had the previous MX5. I had missed out on countless chances,but i finally managed to get my hands on one! Another reason why i wanted one so much,was because the Monster had one,when it was over in Japan 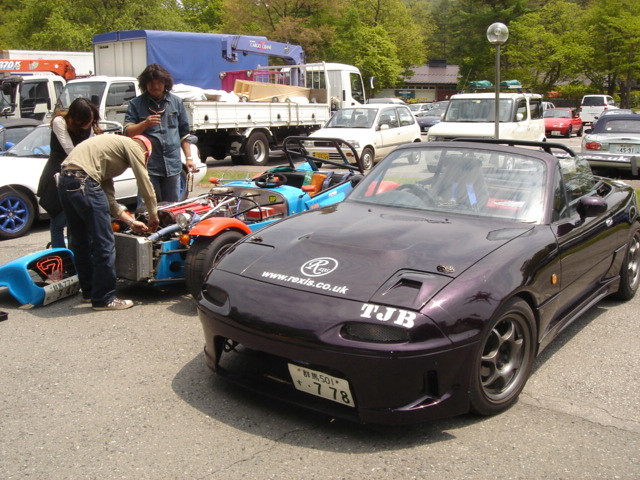 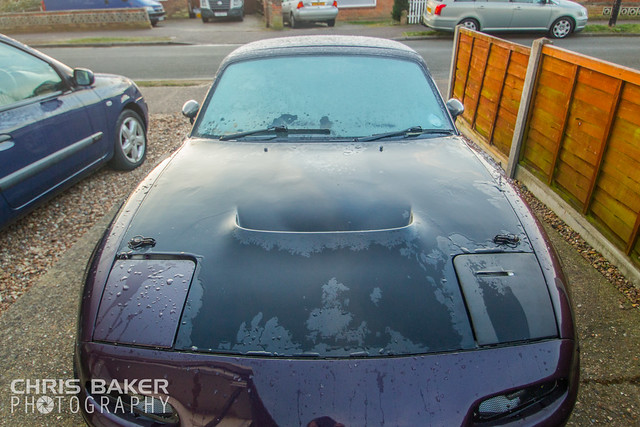 I couldn't resist a trial fit of the //WORK Meisters and Arches 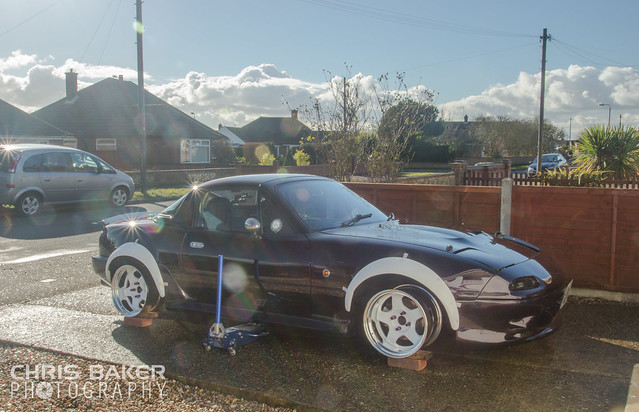 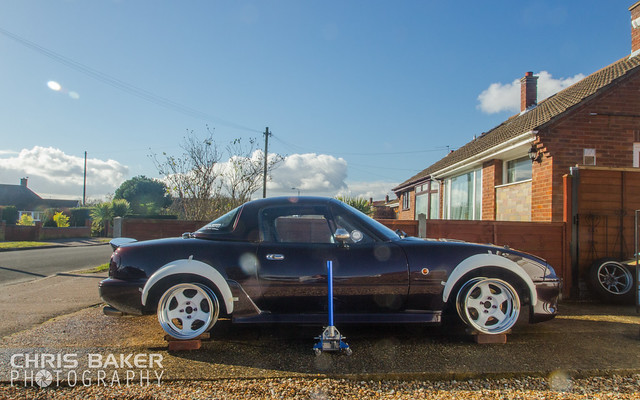  I did some more JDM parts hunting. In particular two items that the Monster had fitted when over in Japan. I don't want to replicate the car completely,but have bits and pieces fitted again Dcuatro Headlight Cover 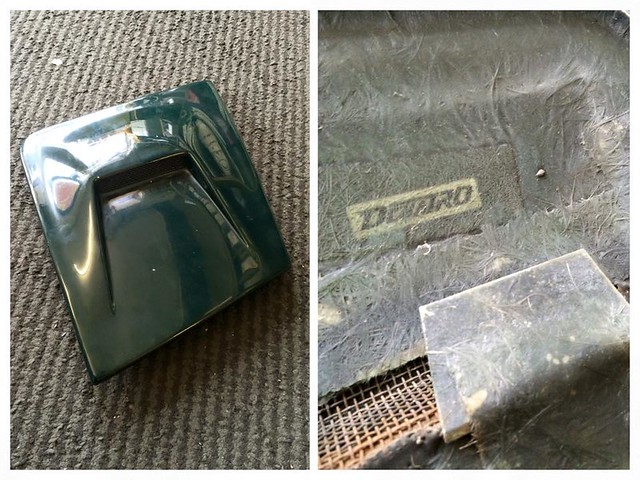 Also a Zoom Fuel Lid  |
|
|
|
Post by hoodedreeper on Apr 7, 2016 18:02:19 GMT
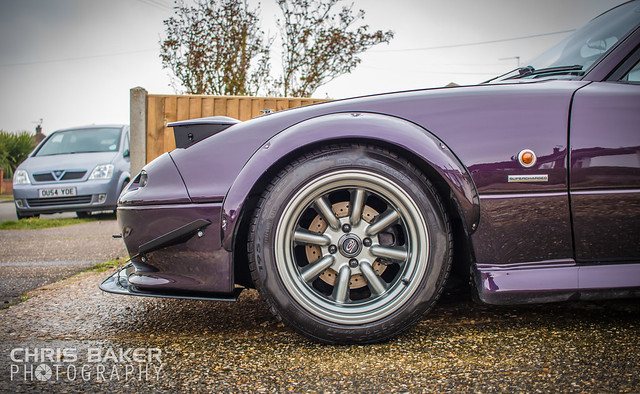
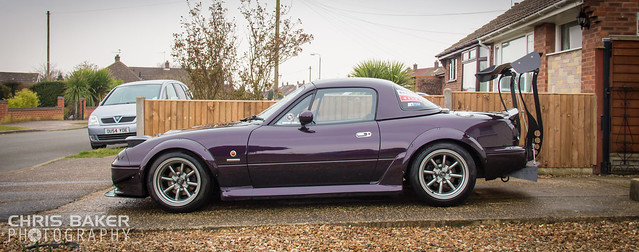
When I first got the car,there was a sticker covering the aerial hole. From what I can understand,these were issued out to show your level of skill? (I could be completely wrong) I found a blog from about 4-5 years ago by 7Tune who was selling them. I also found them on the D.Speed website,but I never received a reply from either. So I contacted a friend to see if he could replicate it,this man is a genius when it comes to graphic design and vinyl printing/making!  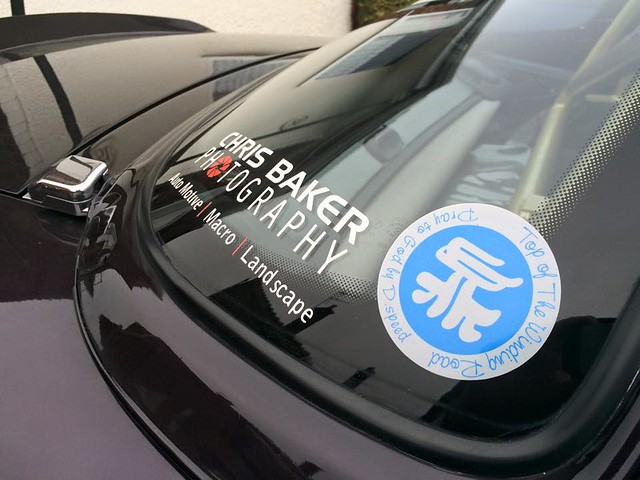 I went to my very first track day at Snetterton! Arriving full of nerves and worry I headed out on track for the sighting laps and then a quick novice session before the day kick started. It took some time getting used to it as I wasn't used to this style of driving. I could have entered the corners with more speed,or I could have turned in later. But I didn't want to put too much stress on the car or get over confident and end up binning it. 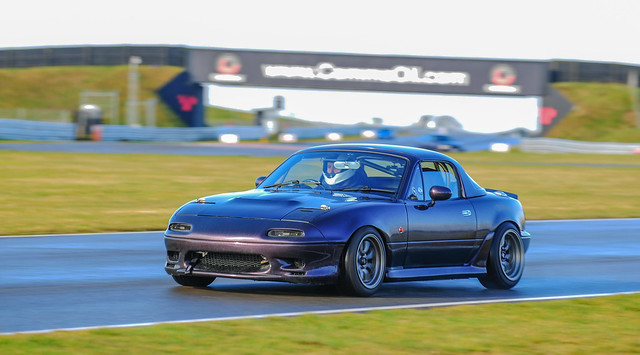 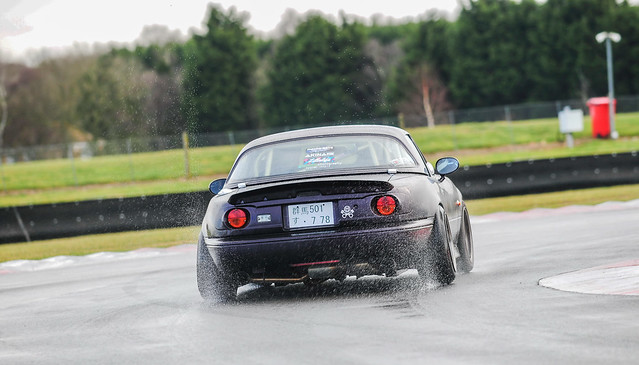  After the track day i needed abit more support,i was trying to push myself into the seat around the corners and ended up having bad back ache for a few days after. So I was on the hunt for a cheap bucket seat. This Sparco Sprint V seat appeared on ebay and I got it for a decent price. Knowing the stock seat runner fits with minor adjustment,i knew it was worth paying abit more for that 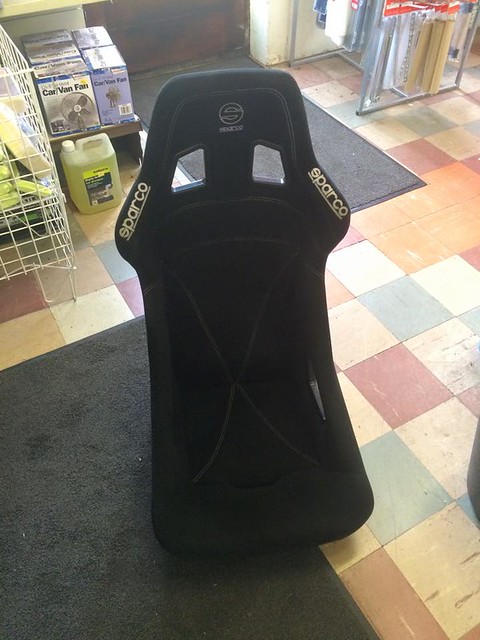 It didn't take long for the runner to be modified and bolted on  My Uniroyal Rainsport 3 tyres arrived,i went for 205/50/15 in the end 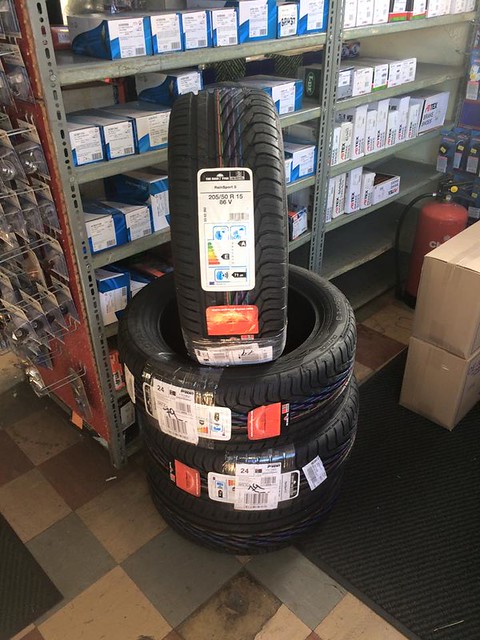 And fitted   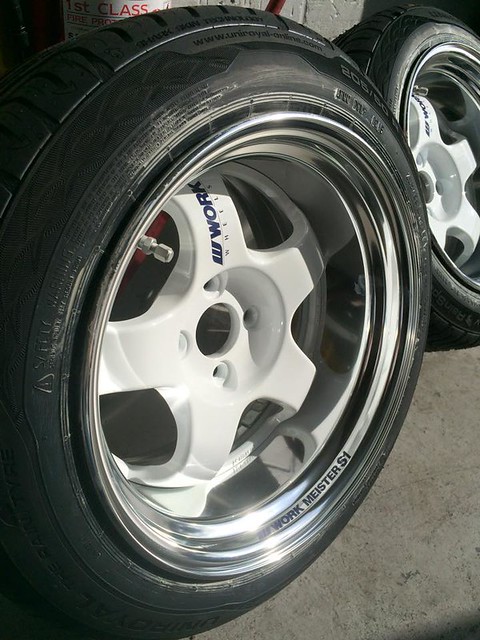 They've got a tiny bit of stretch,abit more than I was expecting but nevermind. These will do until I can find a decent 215 or 225 that's for road use and isn't gonna require a visit to the bank manager lol 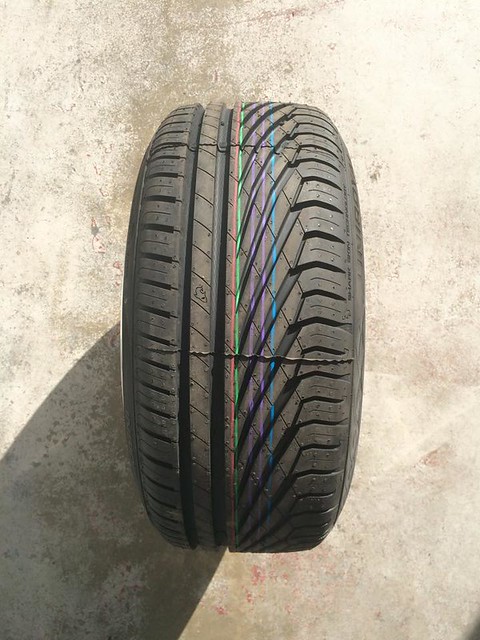 Photos speak louder than words  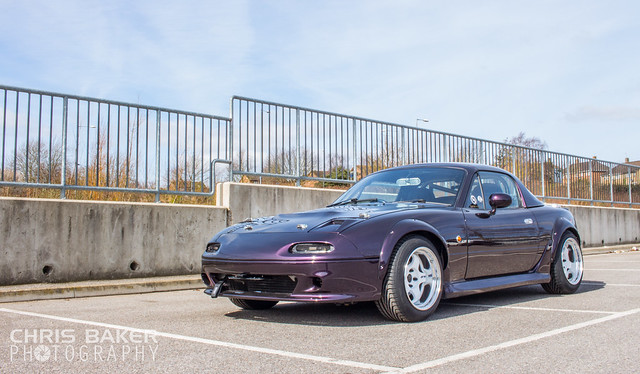 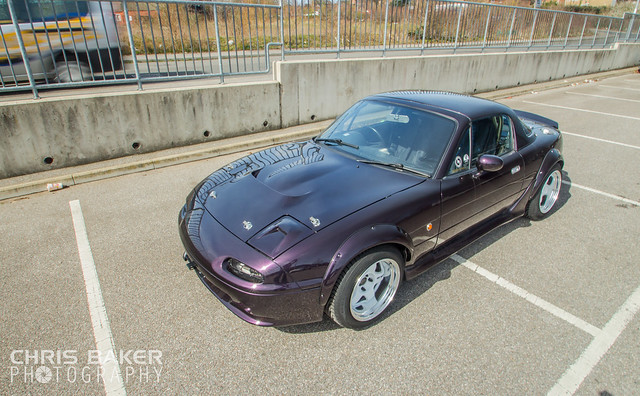  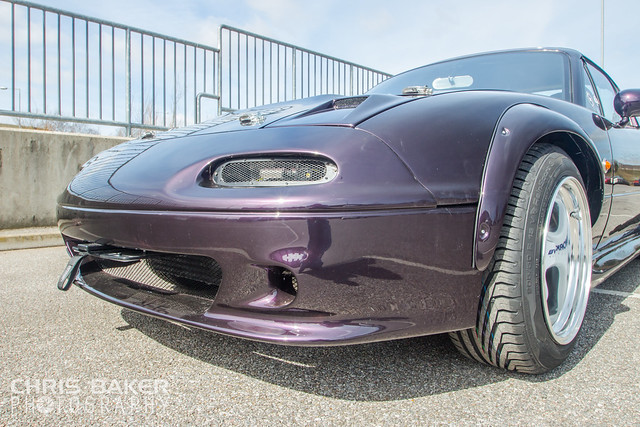 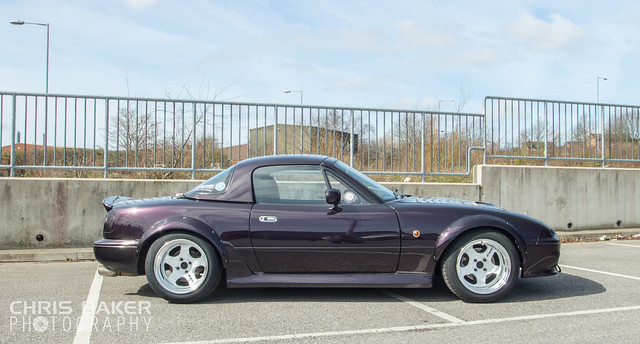 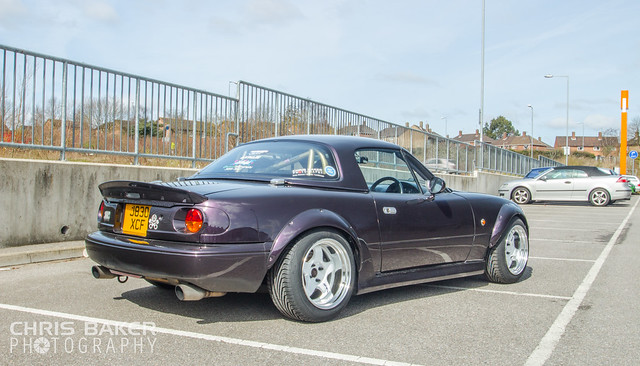 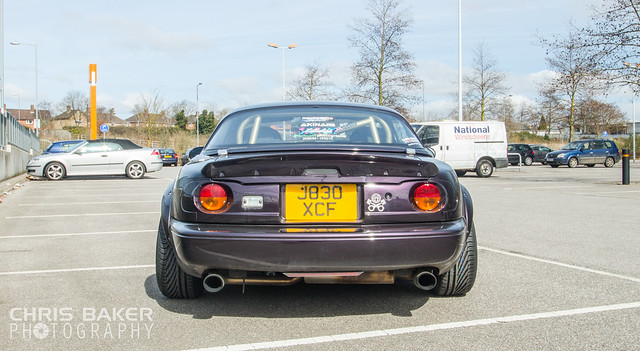 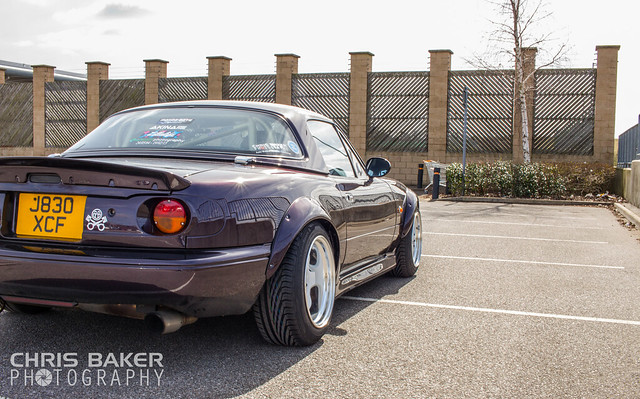 Wide Arches from Fast5.co.uk Mazdaspeed Bumper Dcuatro Light Cover Garage Vary Bonnet colour coded Garage Vary Tail Lights adjusted/modified //Work Meister S1 15x9j ET0 Uniroyal Rainsport3 205/50/15 |
|
|
|
Post by hoodedreeper on Apr 7, 2016 18:03:02 GMT
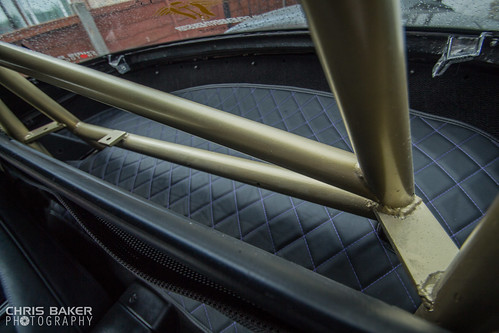
I've been sitting on the fence about getting a strut brace since the charger has been fitted. Very disappointed that the Mazdaspeed Brace wouldn't fit over,and I wasn't 100% sold on using an OEM brace. So I fired an email over to Moss Europe to enquire about their Cobalt 3pt brace,and I was informed that it would fit. Very fast delivery from them as always,and they were true to their word! 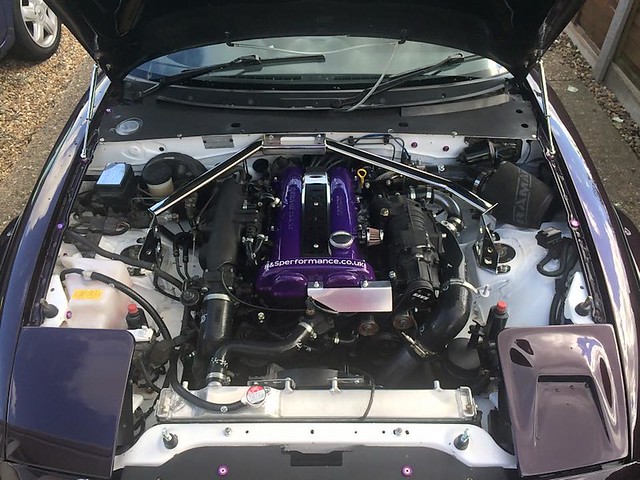 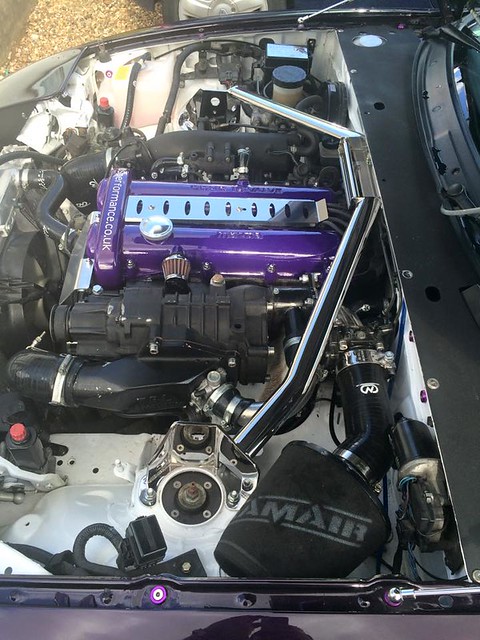 Awhile back SpeedHunters posted a photo on their Instagram asking to see their reader's rides that were Supercharged,ready for their next article. I thought I'd send them some photos and info,knowing that there are some SERIOUS cars around the world,mine would never be picked. How wrong was I! Happened to look on their site to see if the article was published. Scrolling through reading about the numerous cars they've chosen across the world until I stumbled on photos of the Purple Monster! You can read the article here >> www.speedhunters.com/2015/04/iamthespeedhunter-your-supercharged-rides/I took a road trip across the country ready for Japfest at Castle Combe. A couple of days before the show,a friend asked if I could help out on a trade stand,a valeting company called Auto Perfection.   It seems like i'm pretty good at keeping things a secret... 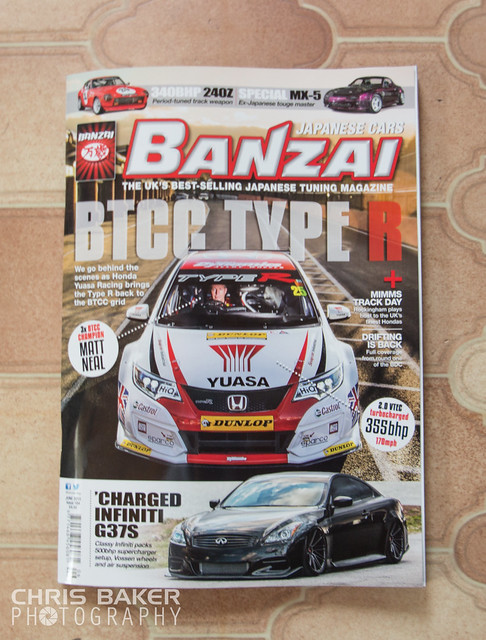 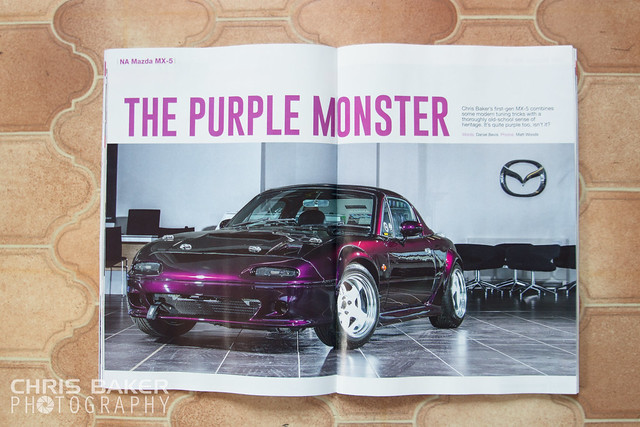 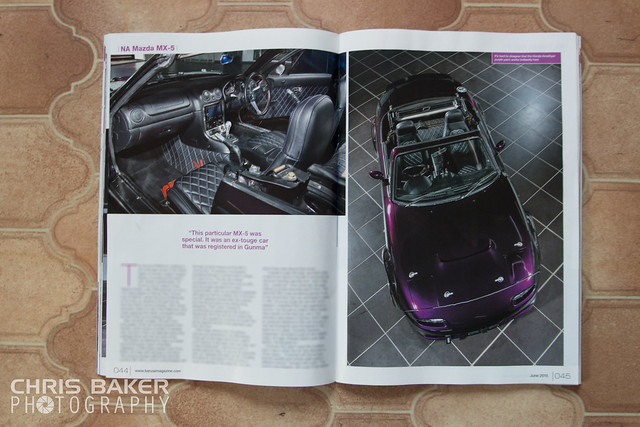 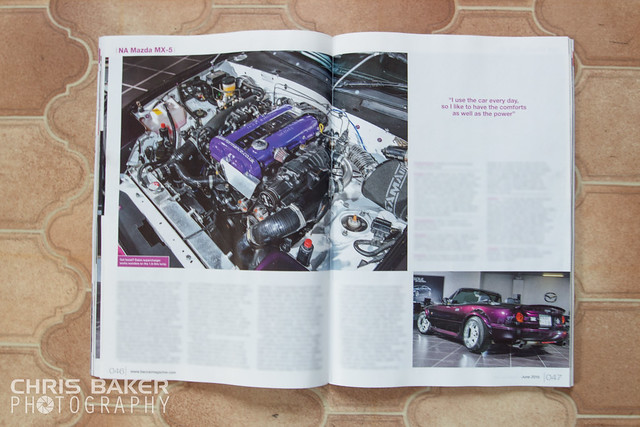 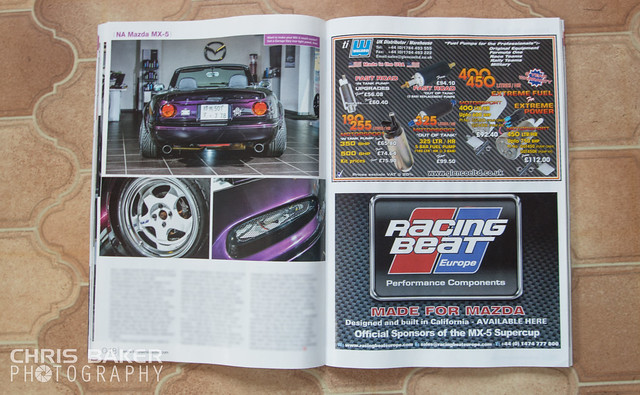 I removed the charger to make up some support brackets. Since the new stainless elbow adds weight to the end,i noticed the inlet now has some slight movement. 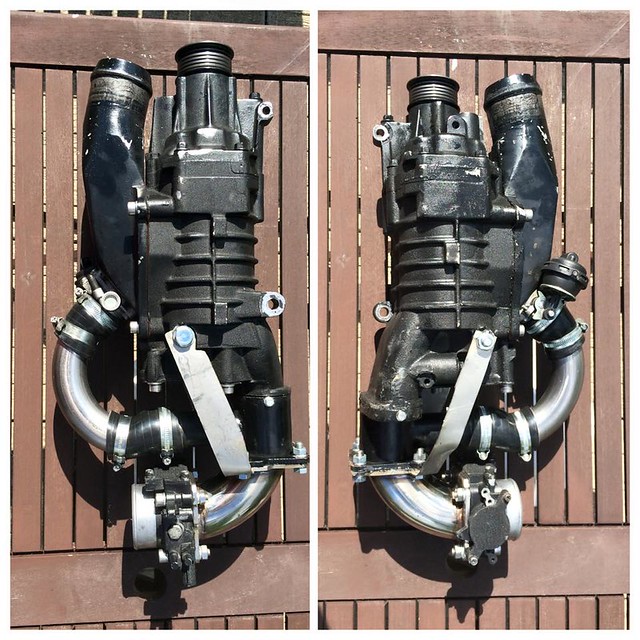 While the charger was off I did an oil change. Considering it was supposed to have 20 delivery miles when I bought it,the oil says differently! 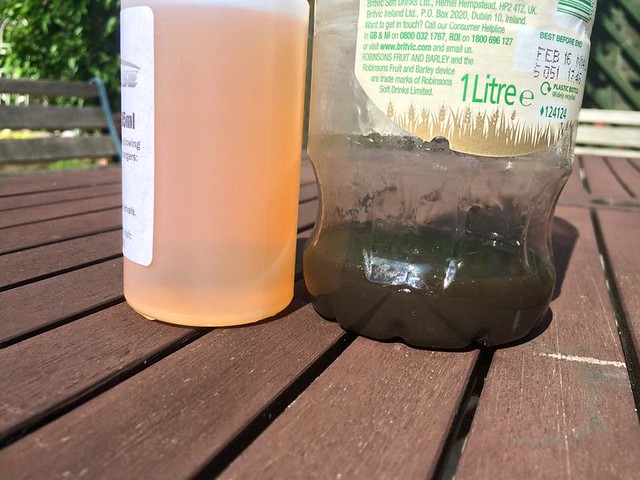 Gave the charger and inlet a lick of paint,looks good as new! Also cut down the silicone elbow for the Air Filter as I noticed the foam filter itself keeps coming off. But it seems it works itself loose from vibration,so will be ordering a smaller filter. 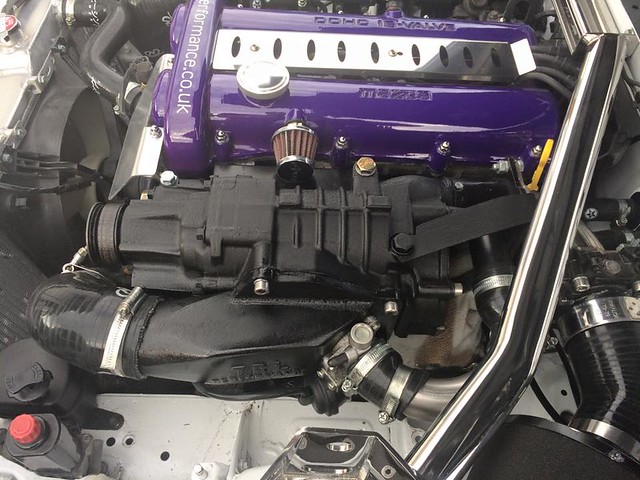 I also had the CD of photos from the Banzai Magazine photoshoot come through the post today. Here are some shots that didn't appear in the magazine (and some that did)  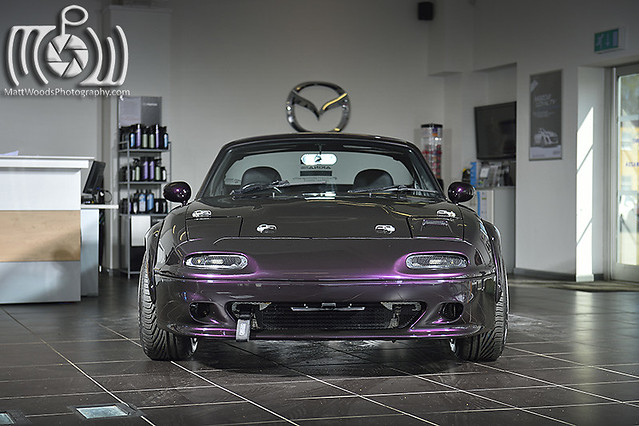 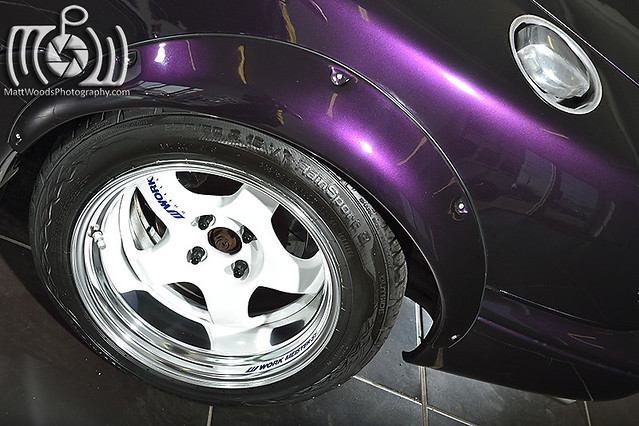 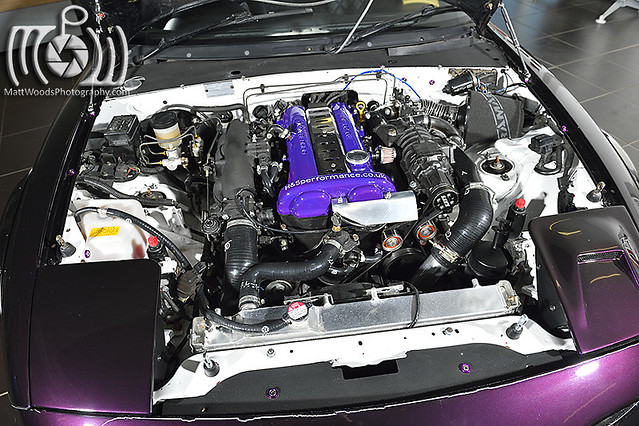 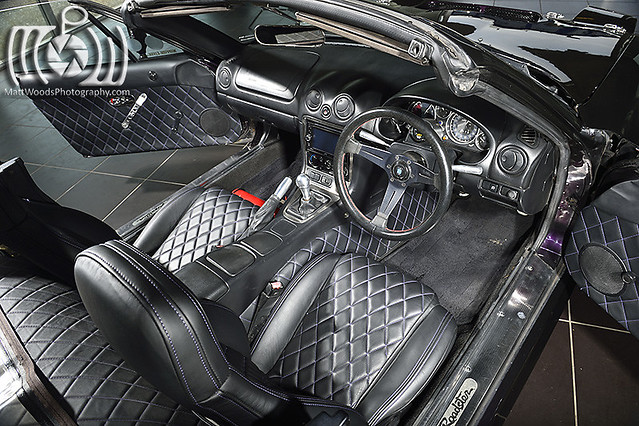 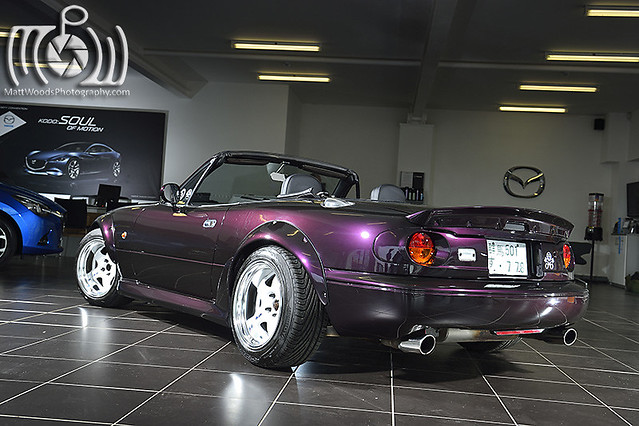 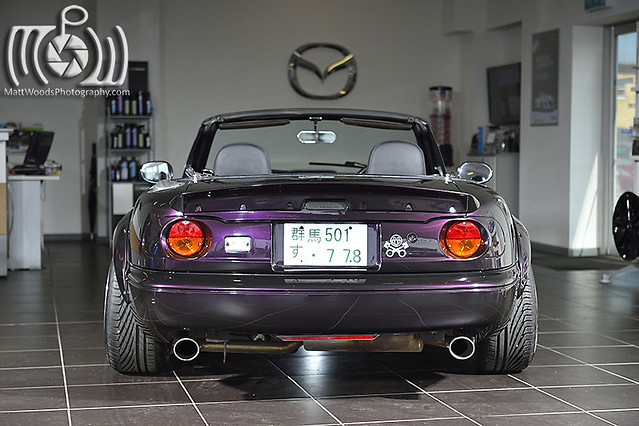 I've had my TR Lane cage powder coated for awhile, finally got around to fitting it 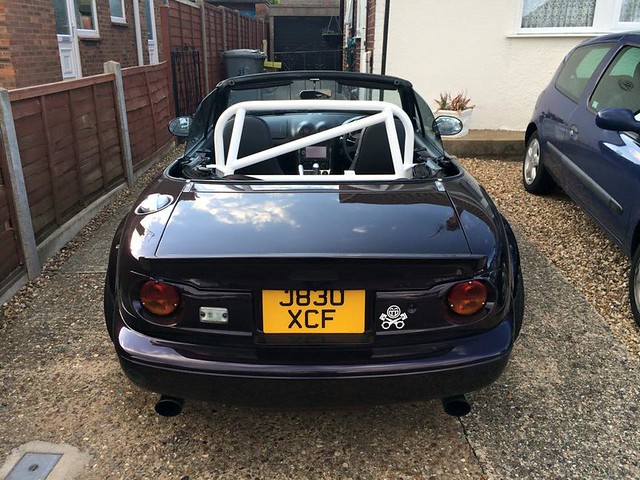 Which meant I could finally fit the Carbon Miata seat belt extenders too 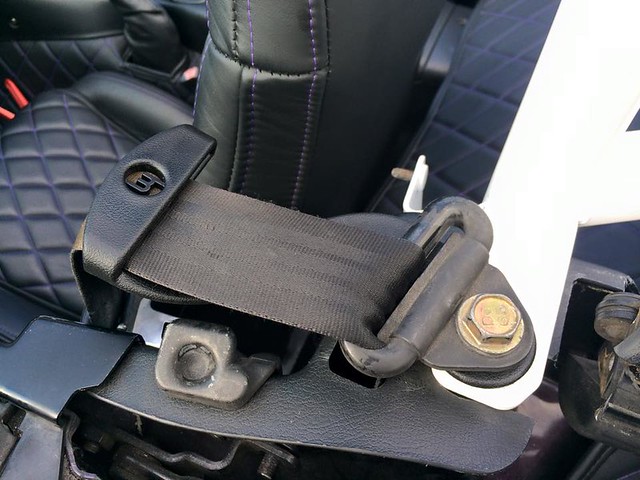 I've been meaning to do an Over The Rad Intercooler set up for awhile (I should have done it at the beginning really). Managed to get everything off eBay for a reasonable price 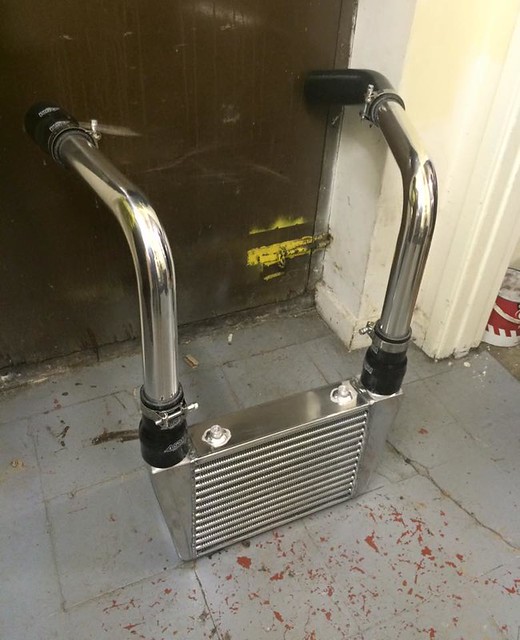 With some help from H&S Performance (as always,a flawless job!) they moved the radiator and fitted the new set up (inc getting the IAT boss welded). Today I made a new slam panel and tensioner cover. With the old tensioner cover,i think the water was coming up underneath causing the tensioners to corrode. I'll see if this helps,fingers crossed it does  Just need to paint both covers,but I ran out of time today  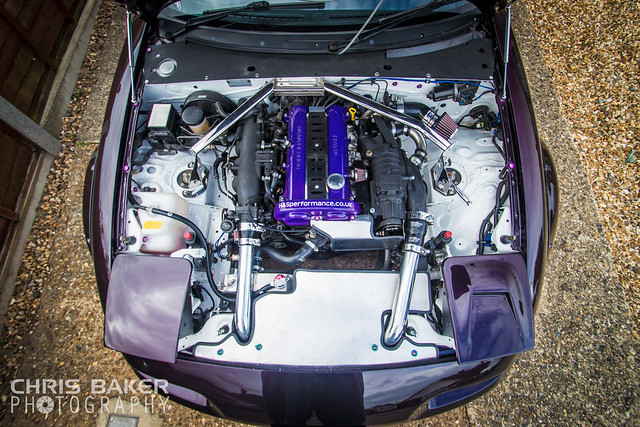 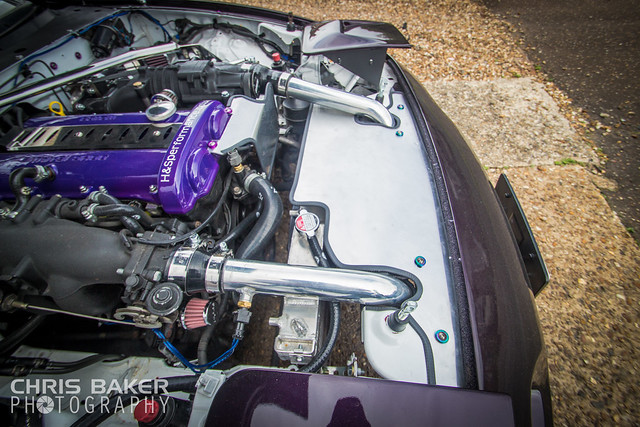 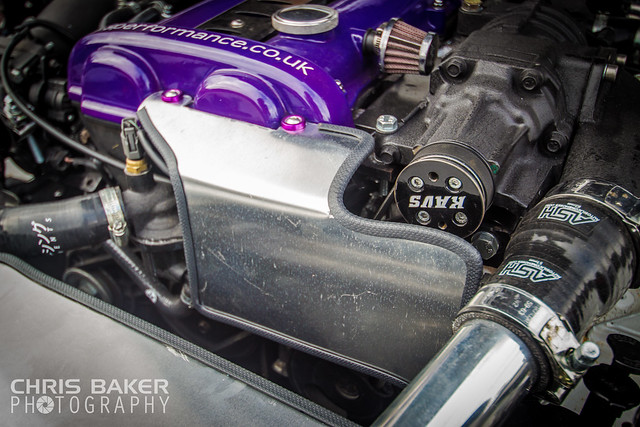 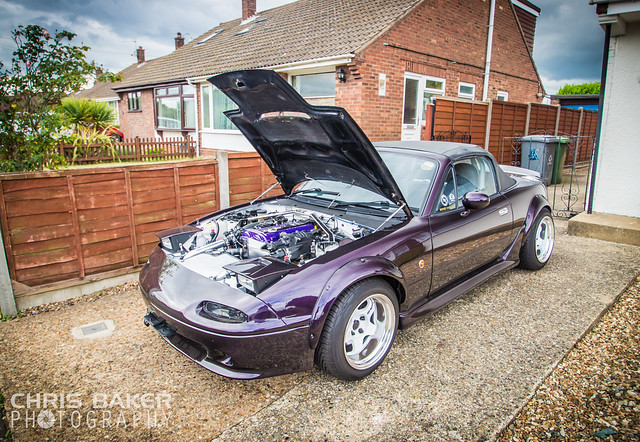 |
|
|
|
Post by hoodedreeper on Apr 7, 2016 18:03:32 GMT
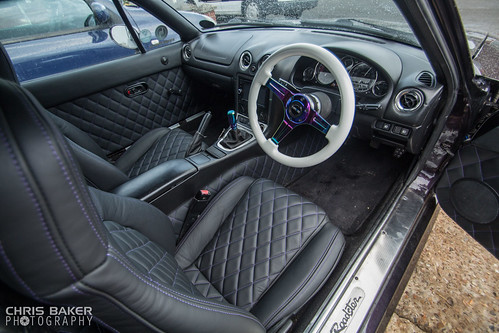
I noticed an oil leak since the supercharger had its oil change. The drain/fill plug was dry and tight,but it was coming from the side. Took the Outlet off and this was the gasket 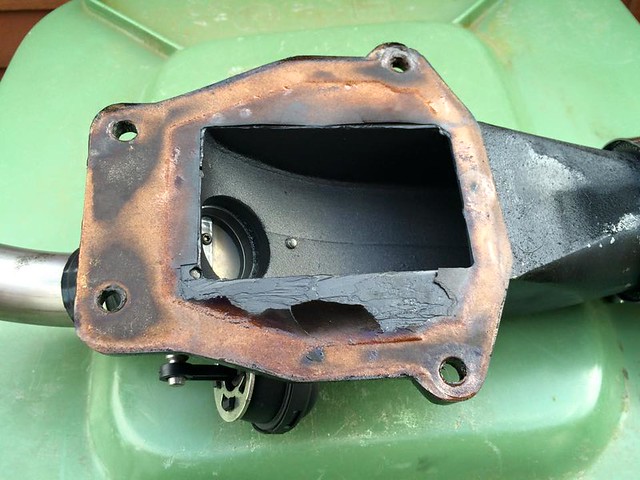 At the time of fitting the Charger I only had really thin gasket paper (that's all we sold at work at the time). Remade them with the new thicker paper and so far its cured the leak. Next on my to-do list was to fit the Harness Eyelets I've had kicking about for awhile. In prep for the next track day (when ever that will be) 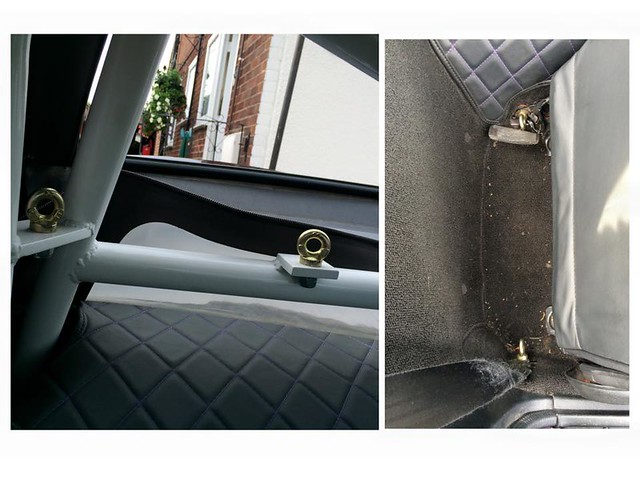 I've re-made the radiator slam panel in a thicker Aluminum and painted it with Black Stone Chip and lacquered. 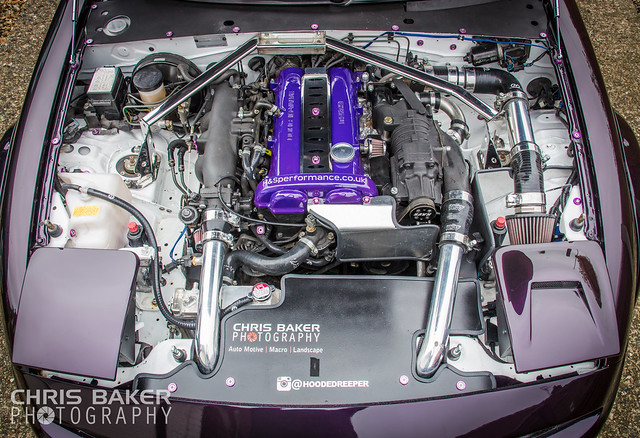 I haven't been happy with the current location for the Air Filter. Being next to the Manifold and Charger wasn't any help,so I relocated it. On my last 5 I did a very similar thing with the Turbo except the filter came from the side.  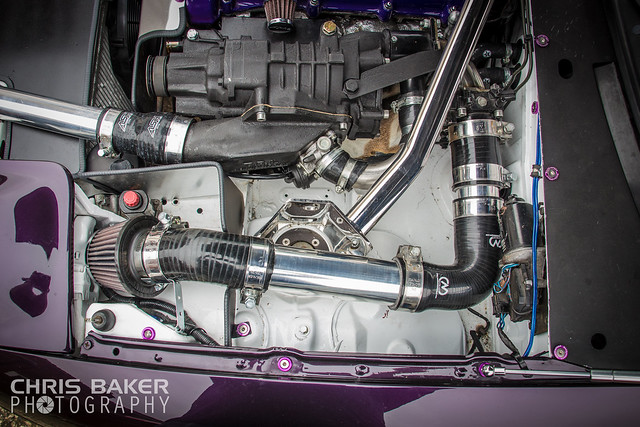 I received my Aluminium Window Handles from Carbon Miata. These have finished the doorcards off perfectly and match Carbon Miata's Door Pulls and KG Works Door Handles a treat!  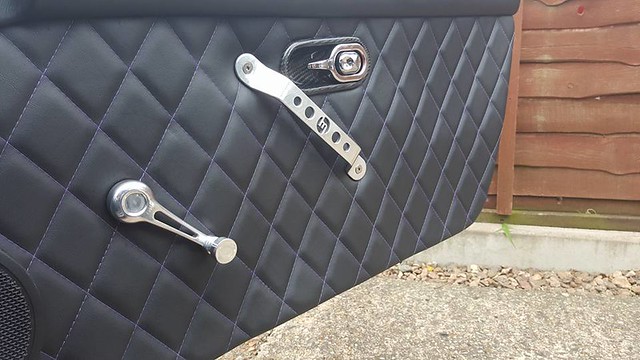 Another little addition I've been working on are some LED under bonnet lights. I originally fitted 2x 17cm White COB strips under the wings,which provided a lot of light to the sides but I needed something from above. Not wanting to cut too much into Garage Vary bonnet,i placed one below the catch. Feeding the wires through the two skins and out above the hinge. I then tucked the wires as best as I could behind the hinge,through underneath the scuttle panel and through the bulk head. Here's a little video (taken on my phone) Remember to watch in HD Back in November 2014 i sent Adam @ RevLimiter a message about some custom dials. I knew what i wanted but it was difficult to transmit that pen and paper. Do i go something Grim Reaper related (to go with the username) or do i go with a Purple Monster theme? I couldnt find any images that helped or inspired,so one night i drew a design up in Photoshop. Not having done this before,it didnt turn out too bad,especially the colouring! So i sent the logo over to Adam and he loved it! A few ideas were thrown back and forth and we finally settled for this design. 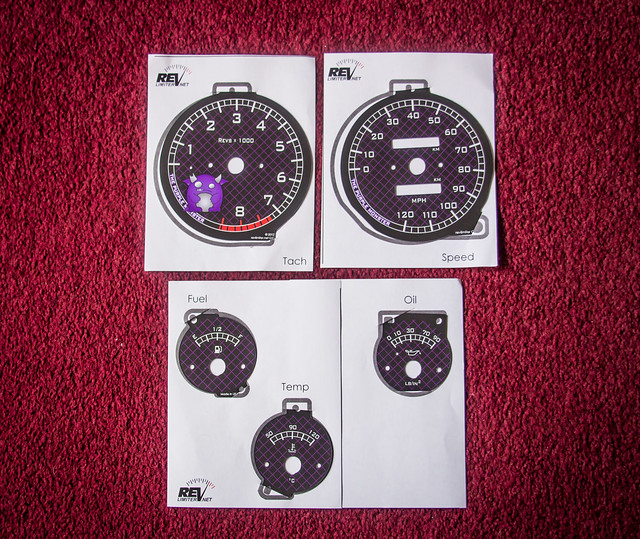 Here are some photos that Adam took,he seems to take them alot better lol 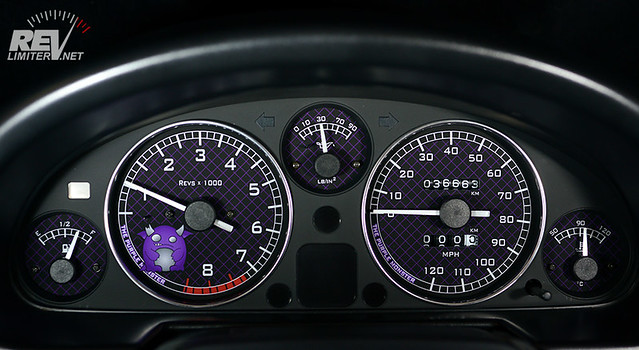 Adam has done an amazing job bringing out the detail in the logo 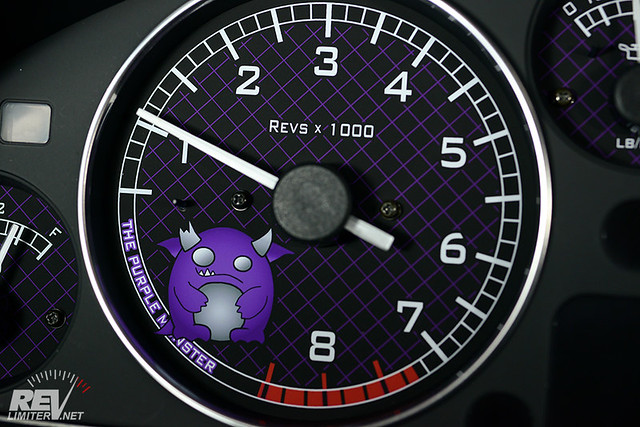 The purple diamonds is a nice reference to the Leather Retrim on the interior 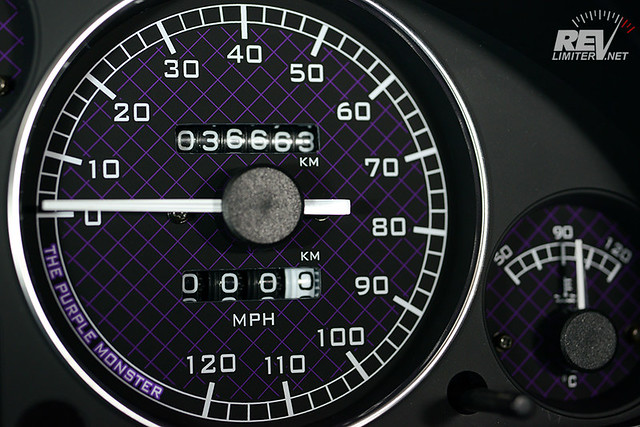 Illumination was also a key factor. The purple numbers and white needles is a great combo IMO,i think being all purple would have been too much. I wanted the logo to just illuminate on the Rev Gauge,and the text on the other. Again,Adam has done an amazing job! 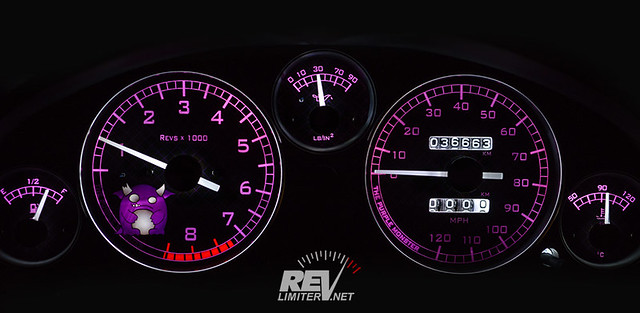 I thought i'd treat the 'ol gal to a personalised number plate,EUNOS Just waiting for the transfer to be complete and i can get them fitted! 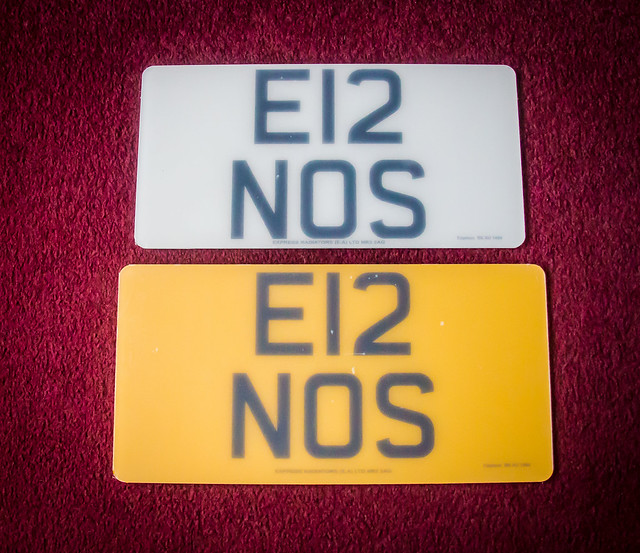 Photos from the MX5 National Rally 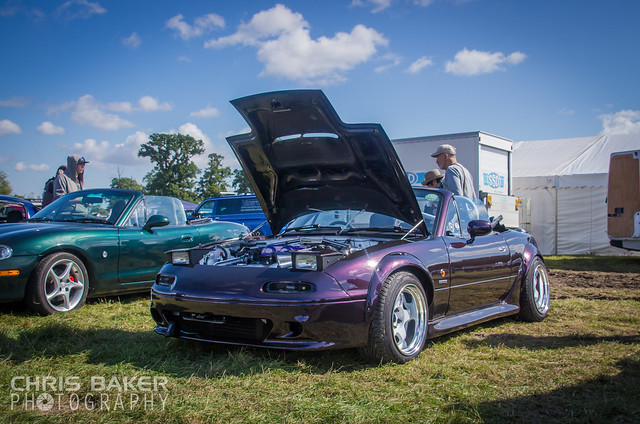  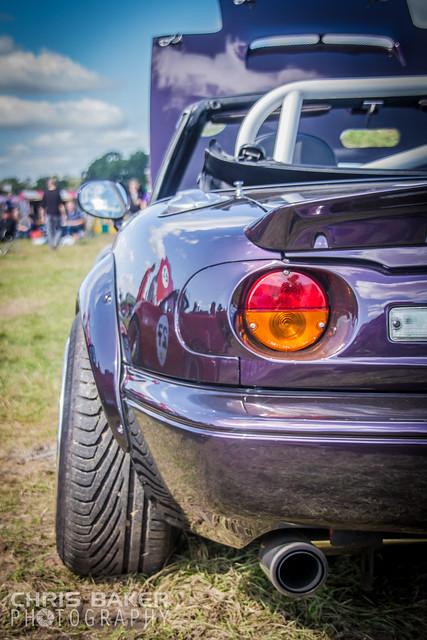 |
|
|
|
Post by hoodedreeper on Apr 7, 2016 18:04:11 GMT
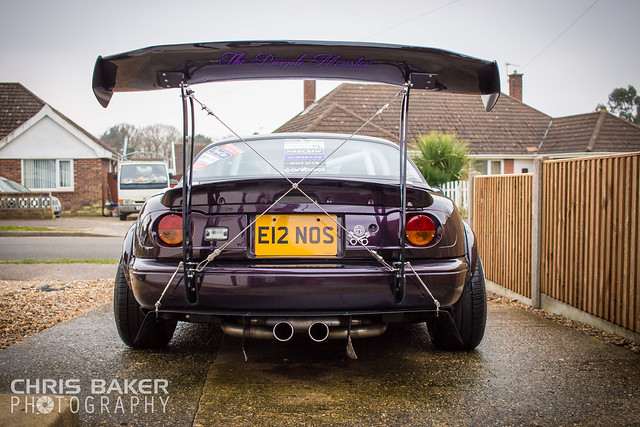
Received the second package from Garage Star,this time a pair of door bushings and a Thermostat sandwich plate. Got the door bushings fitted. The doors definately have that nicer shut noise,but on the odd occasion they need a firmer push to shut them. I guess in time they'll wear abit and it wont happen so much. 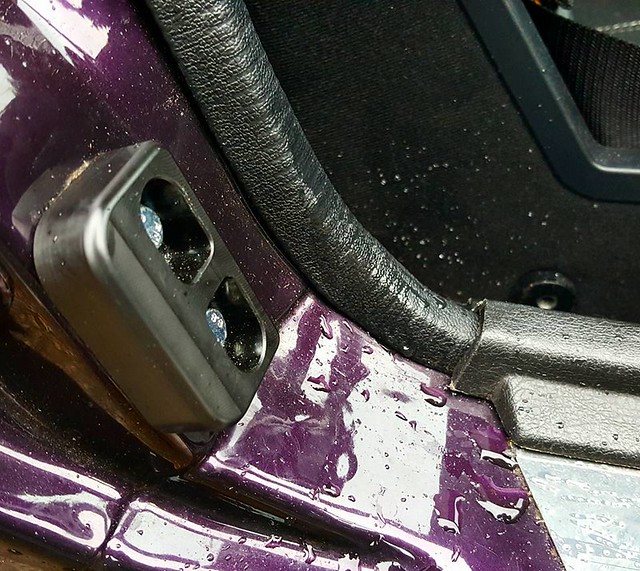 Finally got round to adjusting the coilovers (lowered the front 10mm and raised the rear 5mm). The Works were catching on the rear arches,rather than fitting new tyres (going from a 205/50 to a 195/50) it was easier to raise it. So the Works went back on the car to test for clearance and so far no issues ** I am aware the tyres are fitted incorrectly,the wheels will be coming off again soon for a good clean and a coat of wax ** 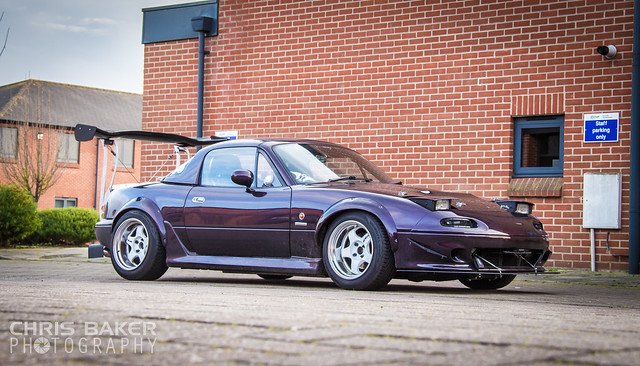 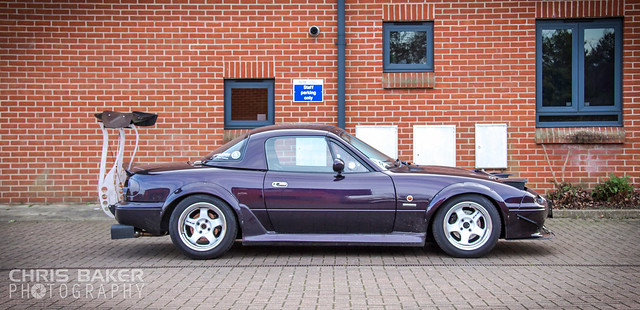 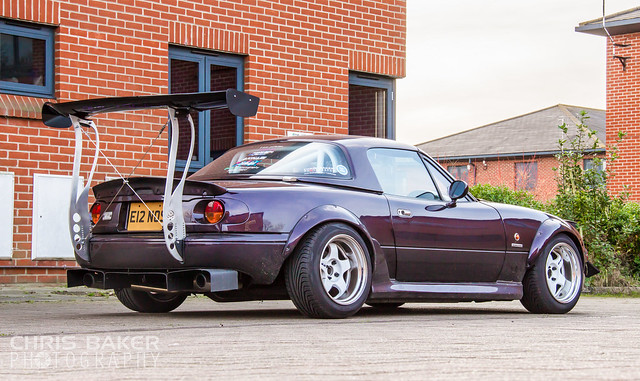 The rear diffuser will be removed shortly,i've got another one coming  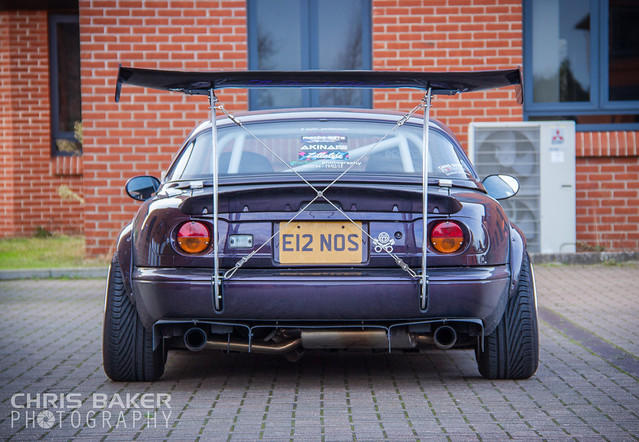 My other half bought me a new steering wheel for Christmas,was a good excuse to order some new bolts too 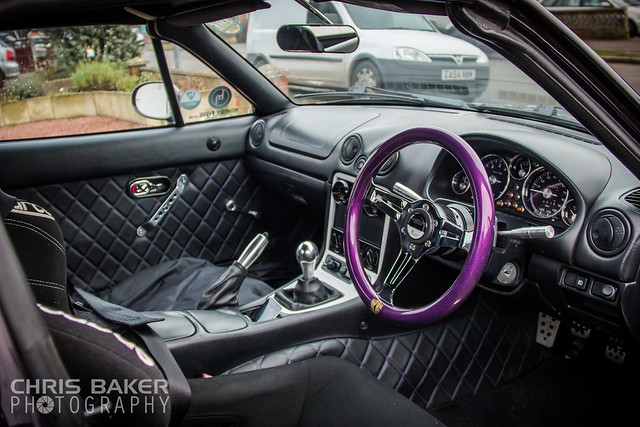 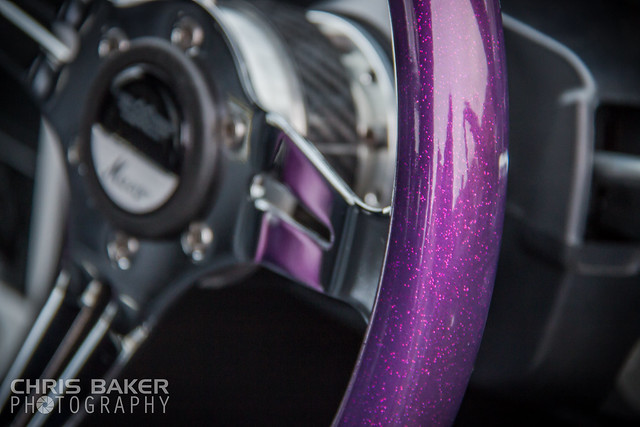 Just before Christmas i headed over to a local company that sells spares and performance parts for Lotus. I guess a perk of where i live is the Lotus factory isn't too far either. I asked to look at their available diffusers as i wasn't 100% happy with the DIY one i had made. So i drove away with their GT3 diffuser,just so happens to be the largest diffuser they do. 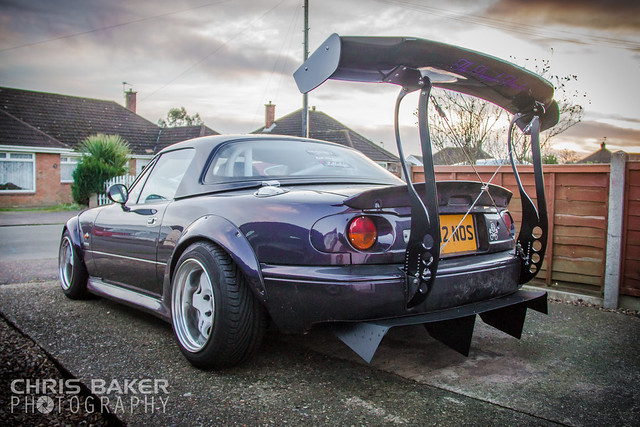 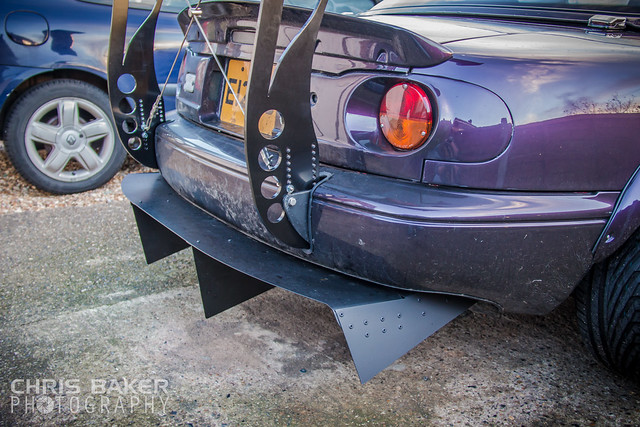 As i've said in the previous posts,i hold my hands up to the Aero not being functional,and that it is mainly for aesthetics I've also rounded the corners off the Garage Star Wing Stands and had them powder coated Gloss Black 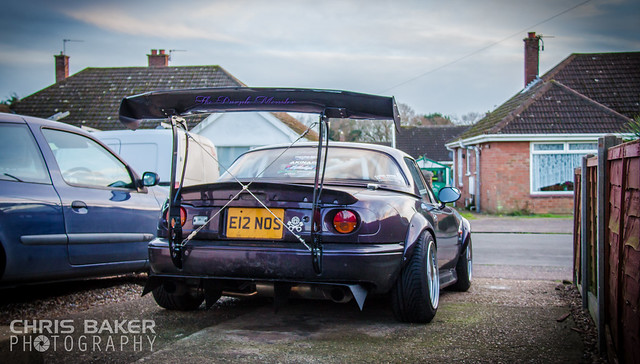 I've also re-made the Wing>Wing Stand brackets to tilt it abit more 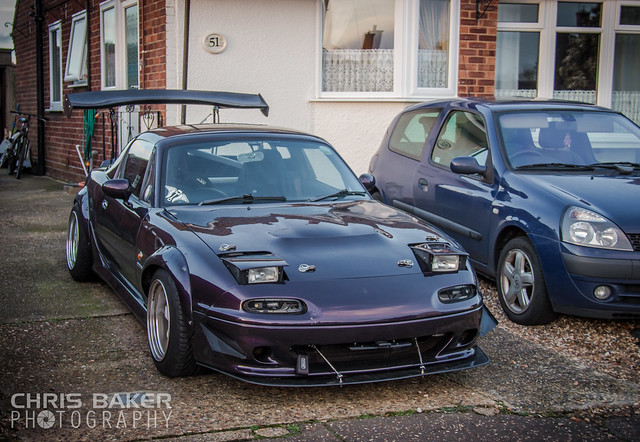 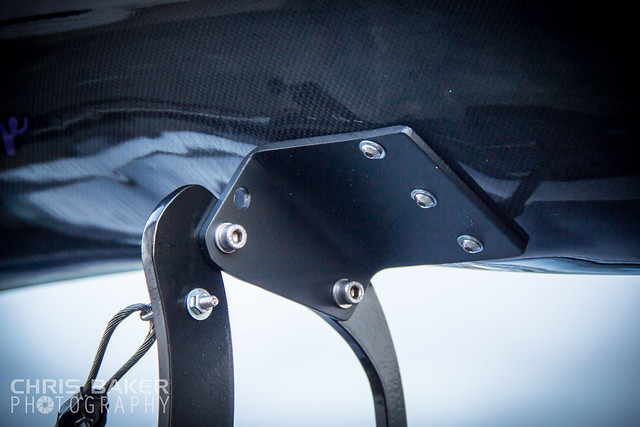 |
|
|
|
Post by hoodedreeper on Apr 7, 2016 18:05:10 GMT
While out driving i noticed some steam coming from the front of the car,originally thinking it was the car in front being abit smokey. After some inspection it was the hose coming off the Water Pump,i knew it was close to the manifold,but didnt realise it was touching. I've been lucky as its been like this for quite awhile and never had any issues. Ordered a new hose and found out that the metal tubing from a vacuum cleaner is the exact same size! Sorted 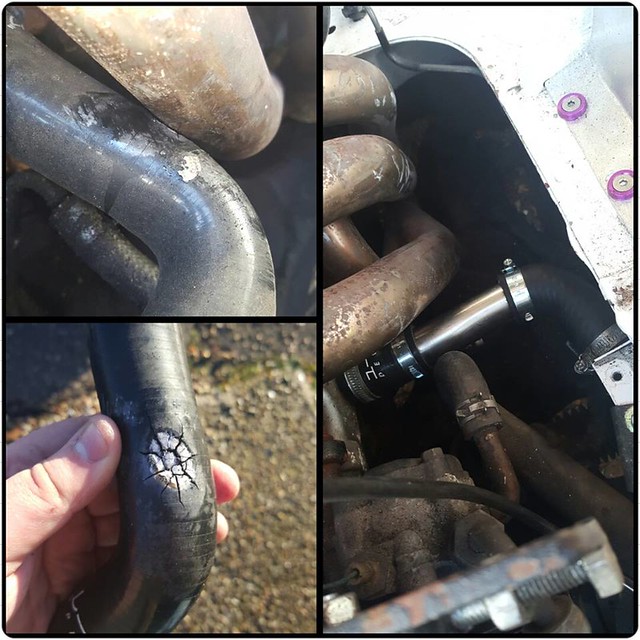 You may remember Adam at RevLimiter making me some bespoke gauges with a Purple Monster logo and purple diamond stitch in the backgorund. I asked him if he could make me some for my AEM gauges. I sent over some templates and he's done an incredible job as always! 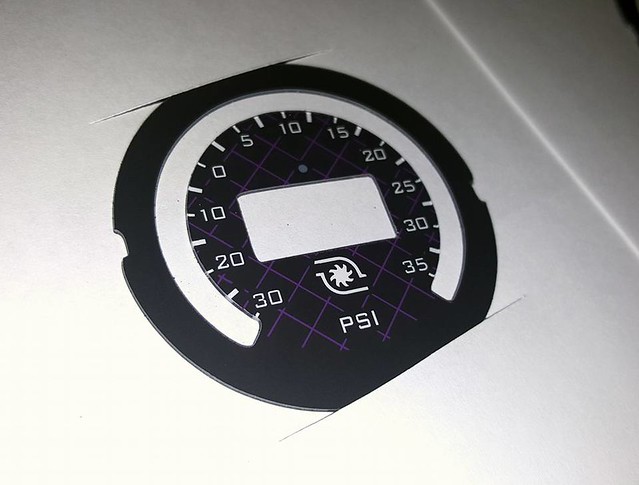 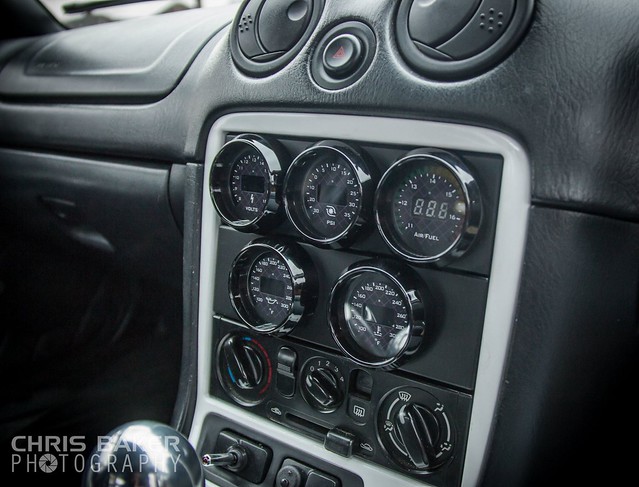 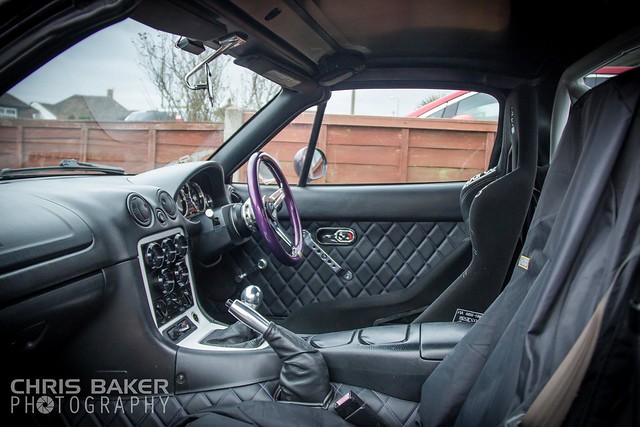 I do my best to keep on top of things,but sadly one thing that has always been neglected and thats the Coilovers. I've never cleaned them,never greased them or serviced them. When i adjusted them a month or so ago,i think i've buggered up the pre-load and it knocks on the passenger side. Good excuse to buy some news one 'ey? 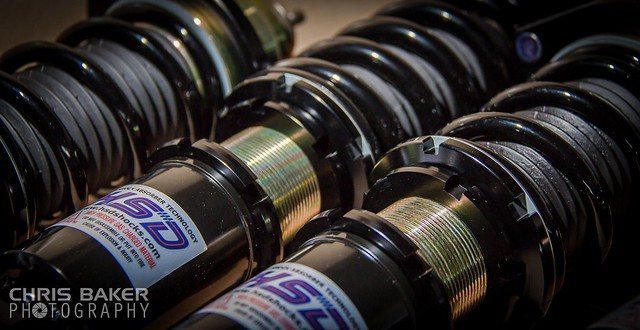 I finally got round to replacing the front Rota RKR 8js for some 9js 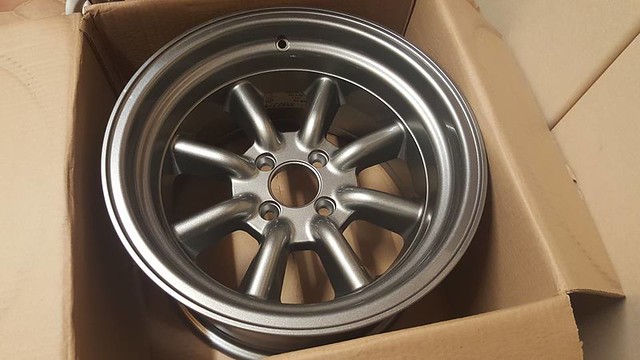 The HSDs got bedded in,new RKRs fitted and then a full geometry done 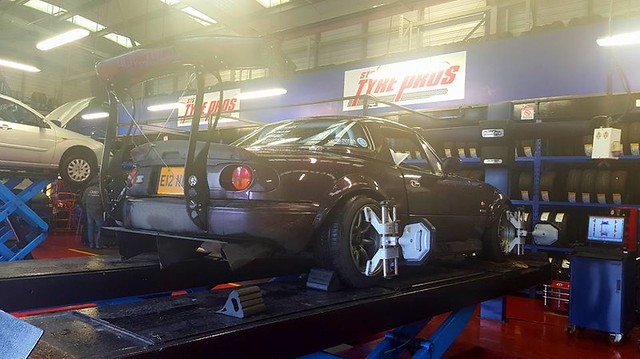 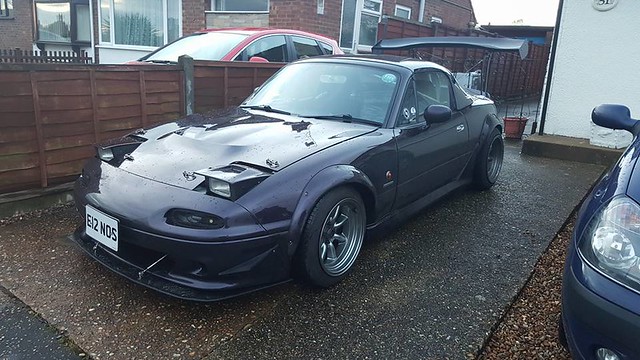 I received my photos from the track day at Lotus Test Track. I'm not happy with the quality of the images,tried to improved them with Adobe Lightroom but when the original image is bad,theres not much you can do. 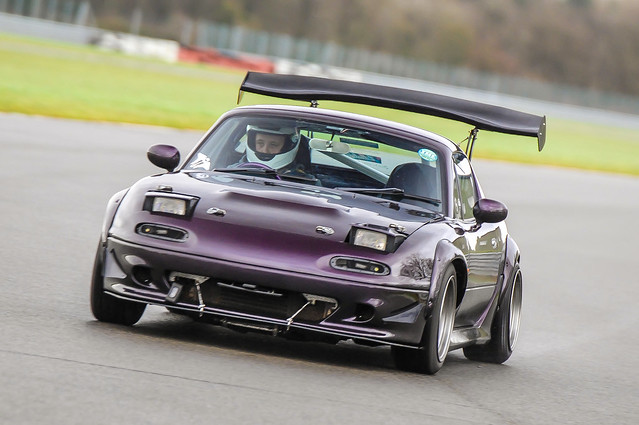 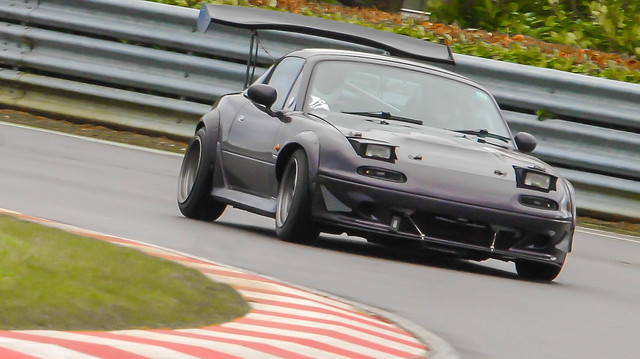 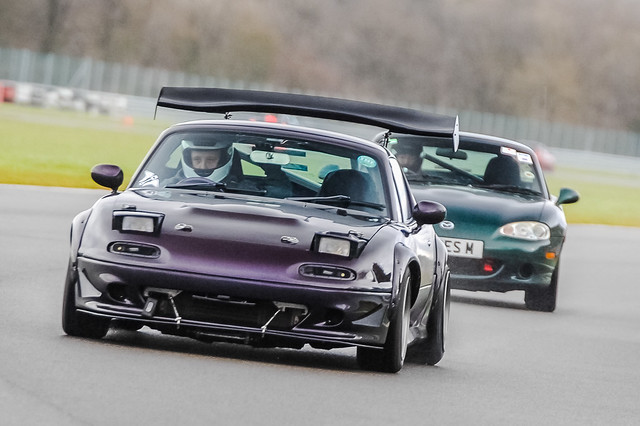 Made some new Canards,this time out of 2mm aluminium and 2mm steel for the brackets (previous ones were 0.8 aluminium for both). Made them abit bigger too,now i need to re-do the splitter and make that bigger too haha 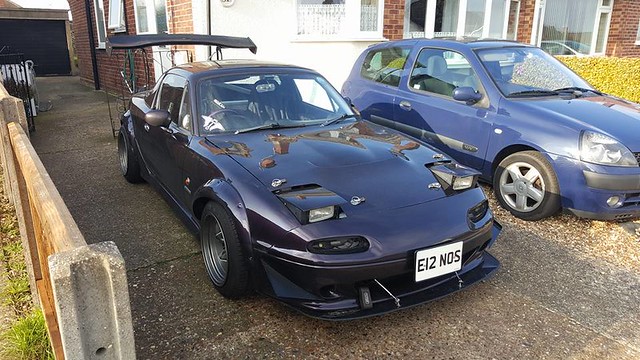 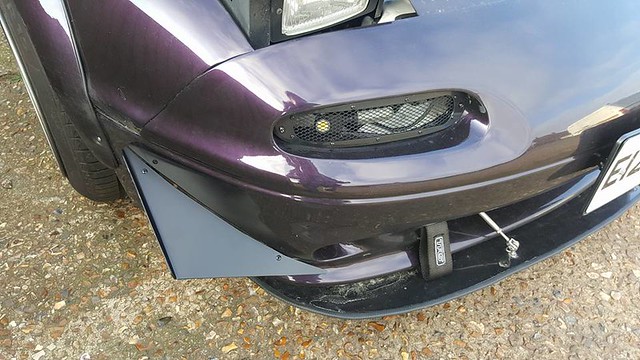 Had a change around with the hard top screen and purchased some slap stickers. Either the stickers are bigger than i thought or the screen is alot smaller than i thought,or both lol I got my friend Jack from J's Garage to fabricate a new exhaust,as the previous one was hidden and looked crap with the diffuser 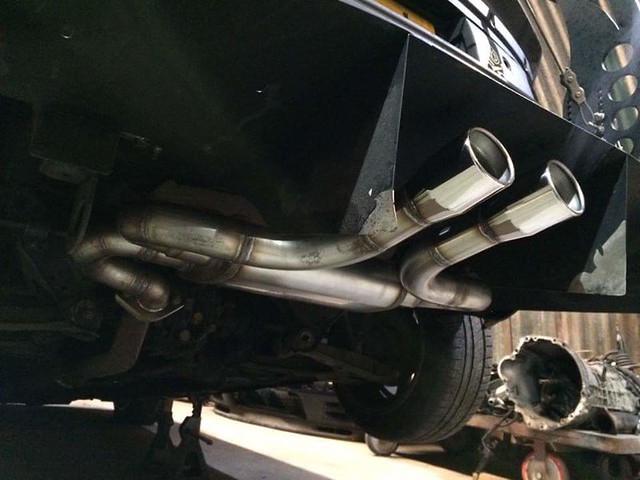 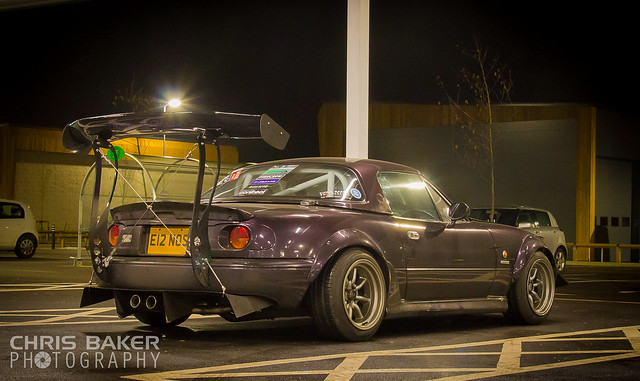 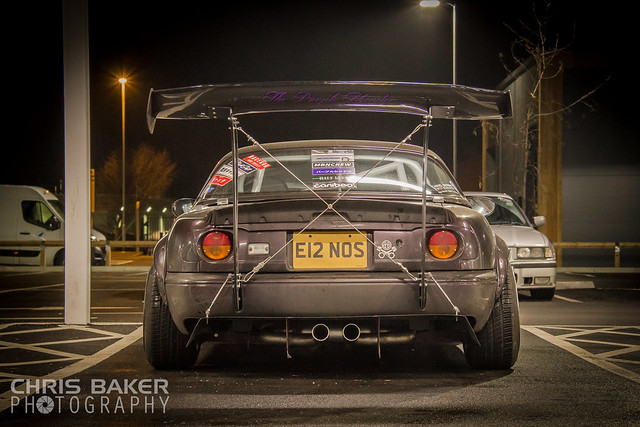 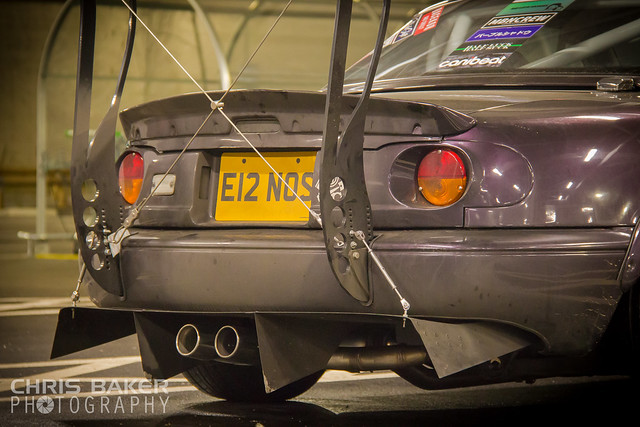 And a short video,its quite echoey,will sort out a better video at a later date |
|
|
|
Post by hoodedreeper on Apr 7, 2016 18:05:58 GMT
|
|
|
|
Post by hoodedreeper on Apr 25, 2016 22:02:02 GMT
A couple of months ago i got chatting to YasidDesign about an illustration of the MX5. I wanted something touge related to take the car back to its roots,but with its current appearance.  Finally got round to shortening the centre fins on the diffuser,haven't hit anything since haha 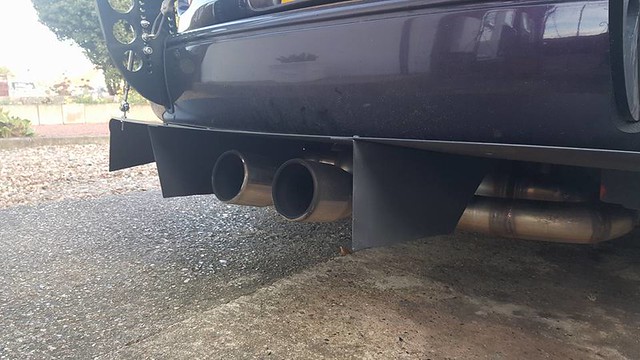 Recently got the car all cleaned up ready for the MX5 Spring Rally at Wentworth House. A big thank you to Stuart at Auto-Genie for the valet work the day before,its a shame the poor weather spoilt the day,but Stuart still did an amazing job inbetween the rain/hail showers! 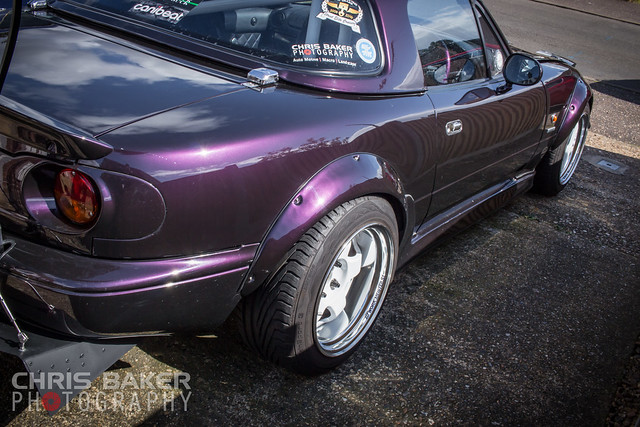 Met up with some crazy northerners before heading to the Rally,perfect excuse for some photos       Sadly didn't come home with a trophey,but i don't blame the judges for choosing the Pitcrew and Italia,both cars are works of art and well deserved winners! I know what i need to improve on (annoyingly i knew they were there but couldnt get it all sorted in time due to lack of money) so i'll hopefully be back for the National Rally or the Spring Rally next year. The car received a big welcome,alot of people seemed to have liked it and was great to speak to so many like minded people  |
|


 A braided oil cooler line had arced against the Alternator live and there was many flames and much smoke.


 A braided oil cooler line had arced against the Alternator live and there was many flames and much smoke.


