|
|
Post by myothercarsa2cv on May 8, 2017 18:36:24 GMT
So awesome. This is definitely looking like the route I'll take when the shell disintegrates  I do need another 7 fix... |
|
|
|
Post by teamawesome on May 8, 2017 19:23:14 GMT
Yeah I'm loving it. We've already ordered an Eleven.
|
|
|
|
Post by teamawesome on May 30, 2017 13:05:57 GMT
This weekend was a weekend of ups and downs. Generally quite happy with the work done but there were problems that I was hoping would be there. First I fitted the brakes, both front and rear. The rear end is completed but unfortunately the front is not. As you can see from the first picture, the lines from the standard Freaky Parts kit are wrong, and too short anyway, so I ordered some more. They arrived really quickly and the length is good, but the chassis end is incorrect. They have fitted a swivel union rather than a bulkhead union. Oh well, hopefully they'll respond soon and we can get them replaced. 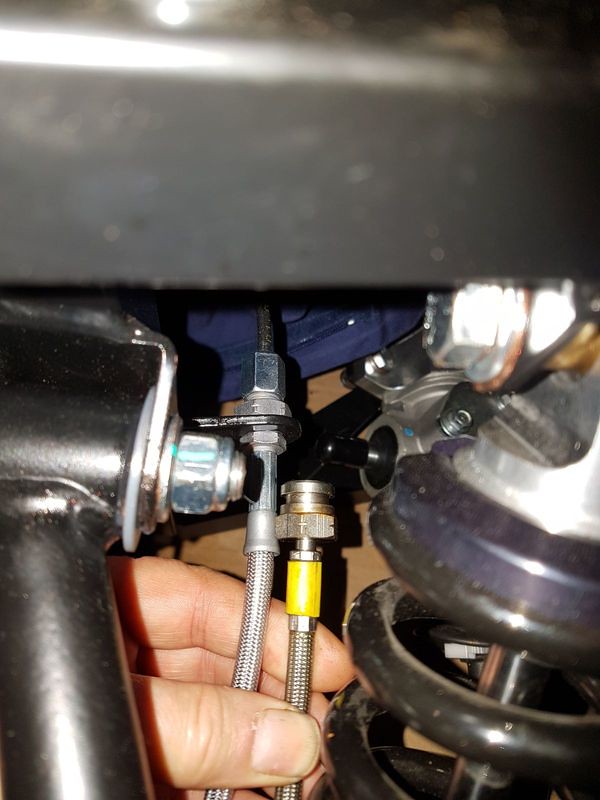 [ 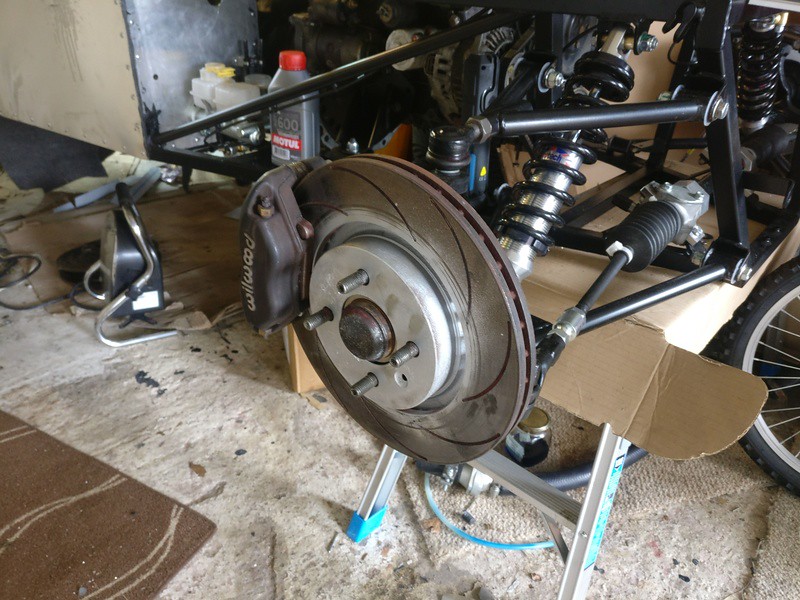 Once the lines are replaced we will be ready to bleed the full system. On Saturday I wanted to fit the fuel tank and to do this we wanted to work out where the swirl pot and pumps will go. This culminated in a trip to Demon Tweaks to buy a swirl pot, some brake fluid and gearbox oil. I'm not using the Westfield boot box so we've used the space for the swirl pot. Here it is: 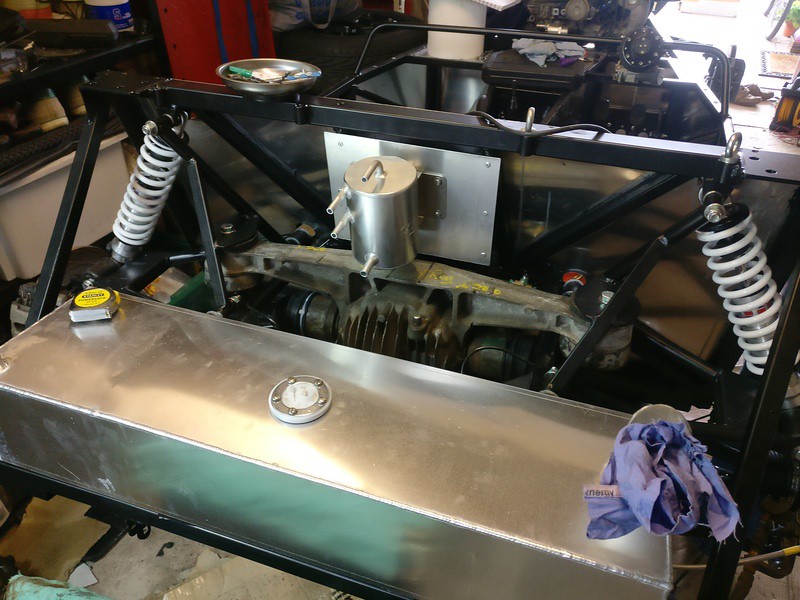 Very simple to mount and should be effective. We're yet to decide where the facet pump will go, it's kind of an awkward shape/design. In all, Saturday was slow going and the above is pretty much all we had to show for it. A lot of planning, which isn't very tangible. Sunday was much better. I started with the fuel lines. Yes, a few steps back! Well I'd ignored Westfield's warnings of mounting them too close to the transmission tunnel and once the engine/box was fitted I could tell that there would be a clash between the file lines and the clutch fork. It took about 2 hours to get the situation sorted but we're there. It's not exactly the prettiest solution but it works. The main issue for the lines looking as they do is that they are very close under the car but I'm using 2 P Clips on the bulkhead to separate them enough to put hoses on. I may try to get a little bend, just to straighten them, but I'm tempted to let sleeping dogs lie. 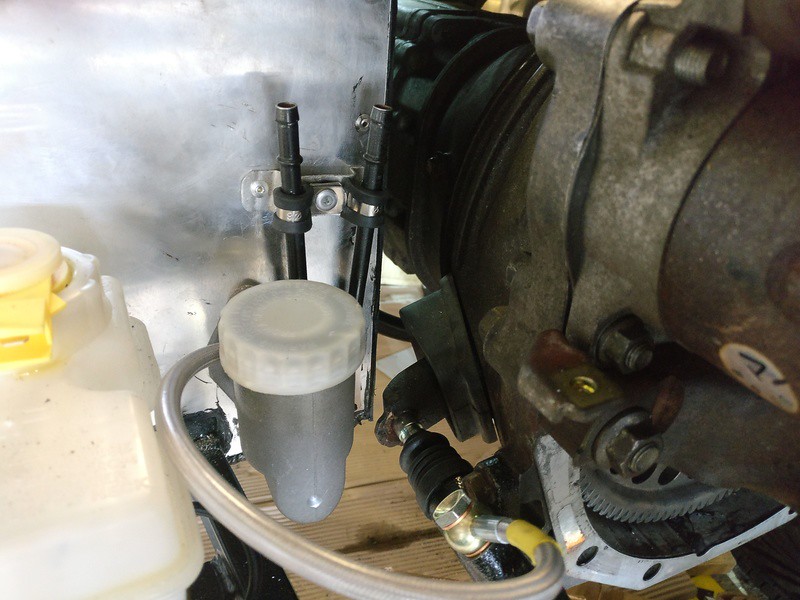 The afternoon was dedicated to the handbrake. It sounds simple but Westfield make 2 huge errors here. Error 1 - there are supposed to be 2 holes drilled in the aluminium panel in the passenger side. They are to mark where you need to drill for the front handbrake mounts. These aren't there. Error 2 - the rear mount is there, but is about an inch too far forward. To get round these you fix number 2 first. We put a adjustable spanner on the cross beam and twisted it round, which has the effect of moving the mount backwards. We did this until the front mounts were level with the bar they mount to. Error 1 is then simple to fix, mark the holes and drill. We could them fit the handbrake cables, although they needed some slight work as the bracket on the Westfield is thicker than the Mazda. They are fitted and working though. 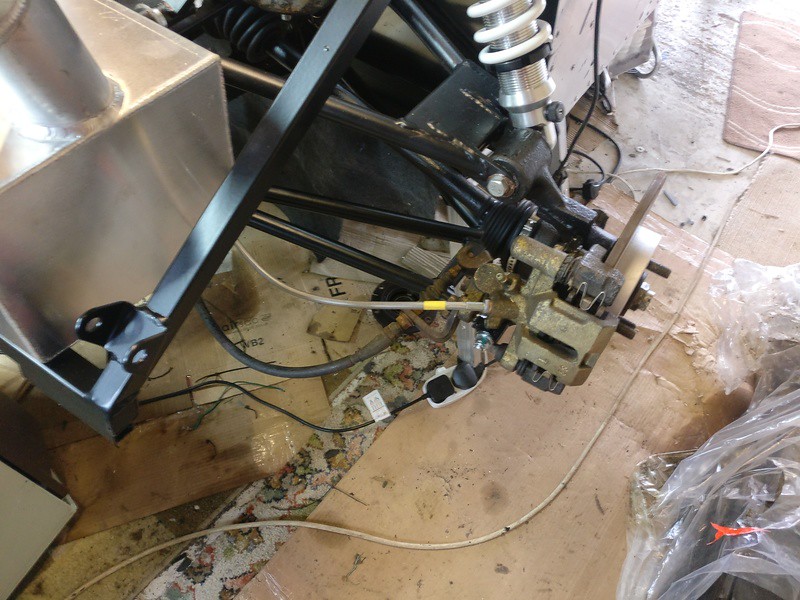 Here you can see the tunnel is complete, ready for covering. The prop shaft was shortened a few weeks ago but it's all very simple. This is where we left it. I have a week off work now so I'll be starting on the wiring harness now. One issue we had that stopped progress a little was the radiator and intercooler. The inlet is very close to the mount and over flow, to the point where I think we'd struggle to get hoses on. The outlet is no better, it comes out very closes to the chassis and I'm not keen on high pressure hoses rubbing against anything! Ok, coolant is relatively low pressure but it's high enough. 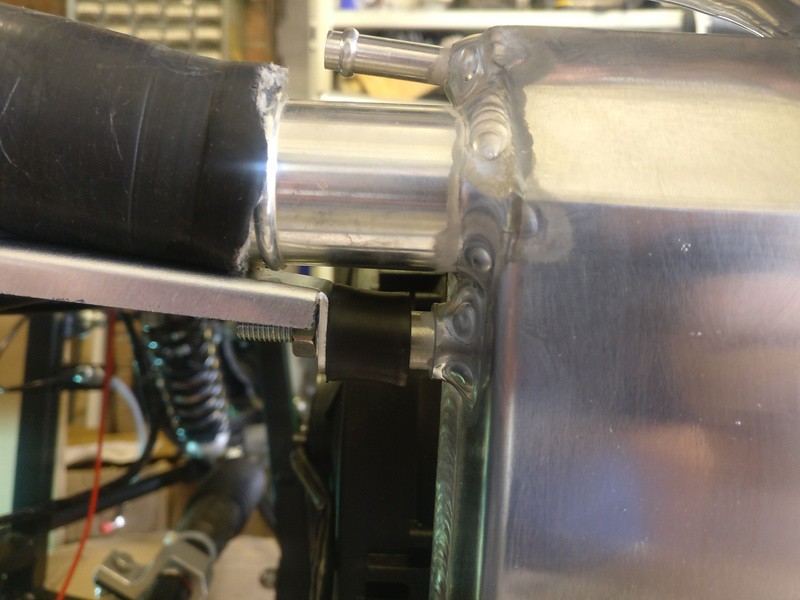 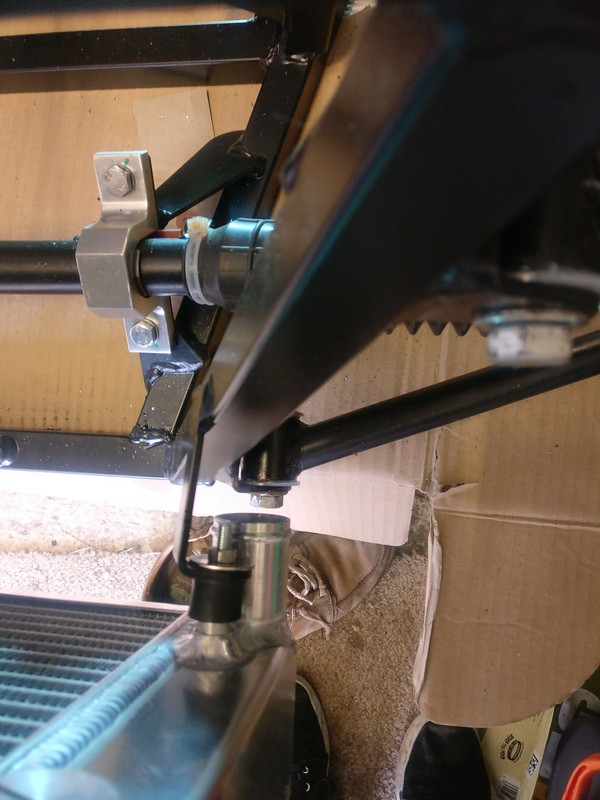 I think it can be made good, and Coolex were adamant they would make good anything that was wrong when I ordered it. Fingers crossed they're good to their word. I also wanted to fit my new sump which is being modified by Doug at G19 Engineering but unfortunately that's not ready yet. Hopefully soon! |
|
|
|
Post by teamawesome on May 31, 2017 19:23:51 GMT
I have the week off work but so I've started to do a little more. I've had to go home to look after the cats while the missus is away so I've brought back some work that I've been dreading. The wiring harness. You may have previously read that I've done the back end harness. Well, now I need to change it slightly. I'm running 2 fuel pumps and the Bosch 044 type are quite hungry at 15amps so I want to add additional wiring direct from the battery. I haven't done this yet as I wanted to start on the main wiring. This is what was waiting for me around 5 hours ago. 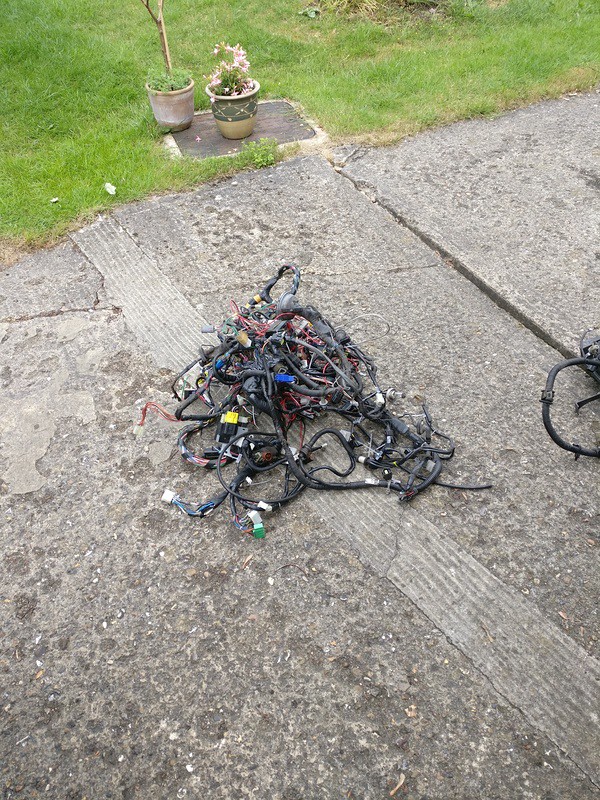 First job was to try and straighten it out a little bit. From there I could start to unwind the tape and convoluted tubing. 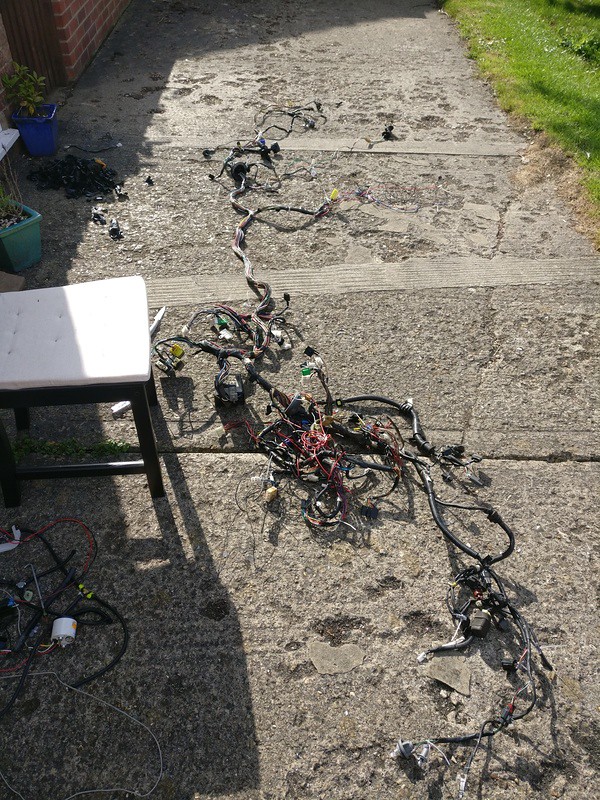 I spent around 4 hours on the harness. Just getting it set out and starting to take out the wires I don't need. I'm going for weight saving so if it's not used I want it out. So far I've removed the door wiring, the heater, and the passenger side headlight motor wiring. I'm already around 1kg of weight saving, maybe slightly more. I'm saving it all and will weigh it when I'm done. This is just from the few things I've removed. 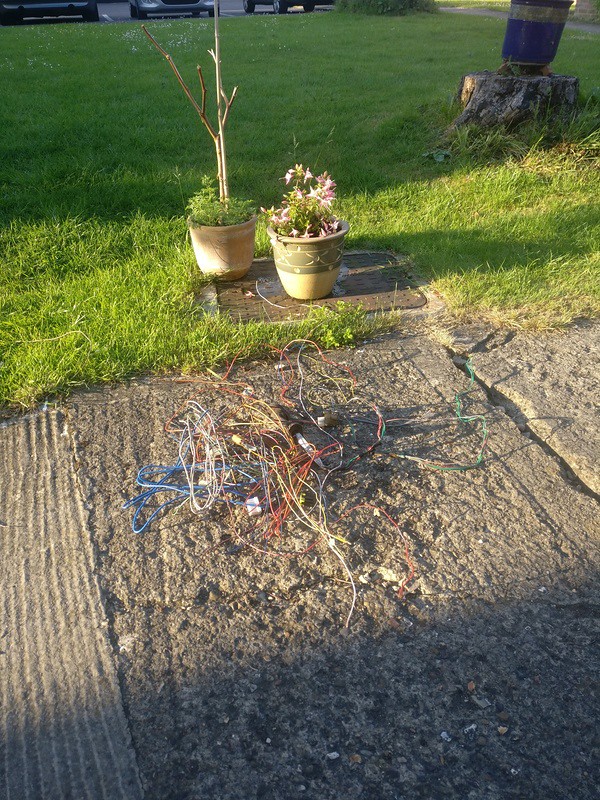 This was a little scary 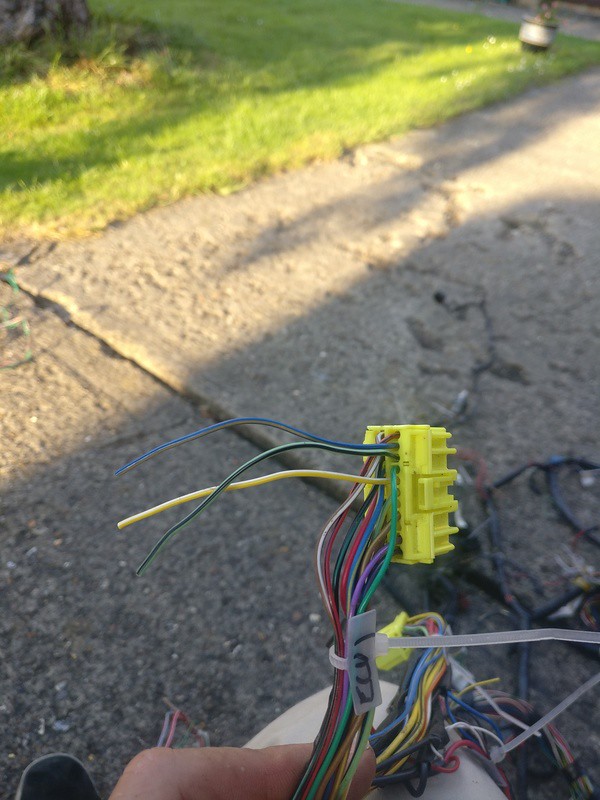 Yup, some of the wiring ended up at the ECU. I consulted a trusty pinout diagram which indicates that of the 3, 1 is for the AC, 1 is for the heater and the last simply isn't used. Phew! |
|
|
|
Post by teamawesome on Jun 20, 2017 21:05:47 GMT
Getting back on this for a full week next week. I've been informed by the factory that my bodywork is ready, a whole week early! We collect that on Friday ready to start next Monday. In the meantime I've been collecting a few new parts. The main one is a roll cage! As I think I've mentioned I'm going for a full cage and aeroscreen setup. That is set to arrive on Thursday but this turned up today: 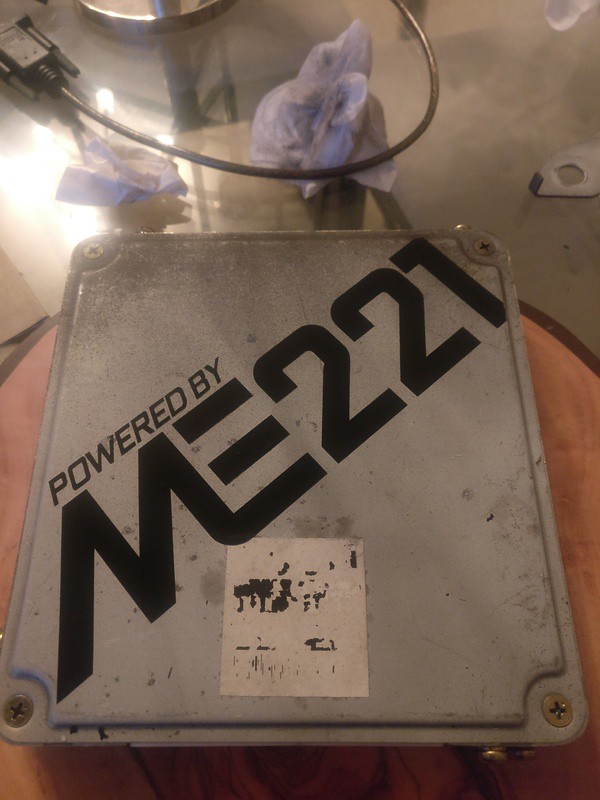 I spent the evening modifying the case to allow the vacuum line, serial cable and knock sensor to hook up it. I gave up my Megasquirt for this so it has effectively cost £300 to upgrade. I'm hoping this will be worth it, although it saves me money on sensor for my digital dash so it should pay for itself! |
|
|
|
Post by teamawesome on Jun 27, 2017 20:20:41 GMT
So I've taken the week off as this has turned up. 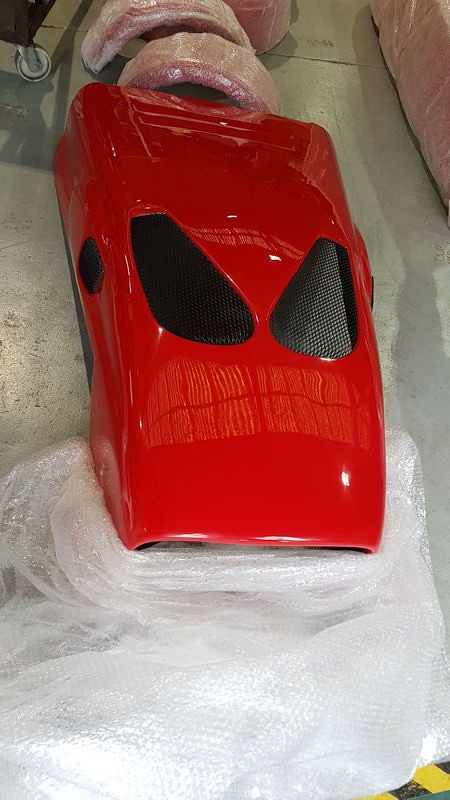 I've decided on this colour to keep the theme from the Mazda going. Keeping it's spirit alive or something gay like that. We'd ordered the cage a few weeks ago so that it could be fitted before the body but it's not played out like that unfortunately and a series of errors, supposedly from the courier, mean it won't be here until Thursday. Day 1 was yesterday but I forgot to post. We started with trying to finish off the fuel system. Putting the fuel pot in and requiring 2 pumps has really made it a lot more difficult and, although space is plentiful, it's quite difficult to see where things can actually mount. We have a plan now and we're just waiting for painted brackets to dry before final fitment. We did manage to get the low pressure pump fitted though. We've used the standard Westfield location. 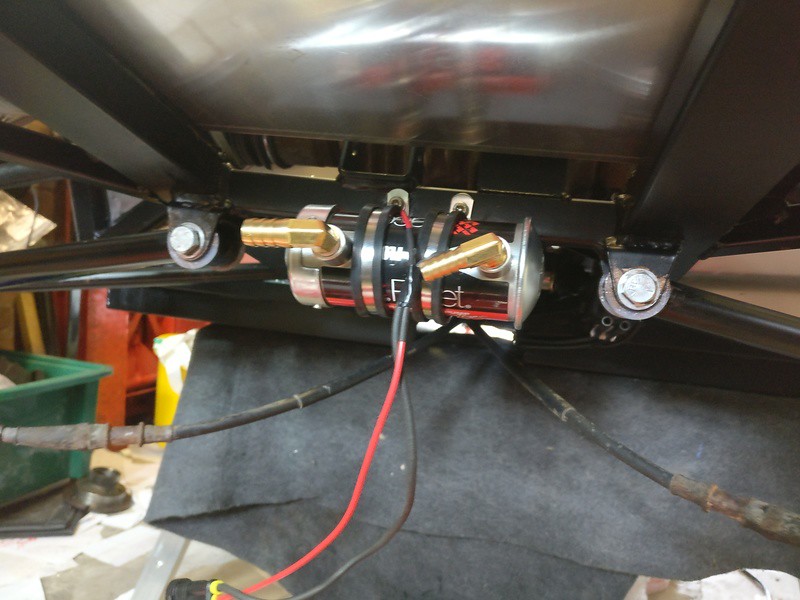 I hate the shape of the Facet pump. I really wish it was a more simple inline design, although I think it works well in this particular location. We also went around the car fitted the custom brake lines that I sourced from Freaky Parts and bled the system. No leaks! Great news! |
|
|
|
Post by teamawesome on Jun 27, 2017 21:44:24 GMT
Day 2 of the Westfield marathon has been pretty good I think. Good for building a Westfield anyway! I started off with painting the bracket for the fuel filter and pump. I layered it on a little thick so that will take a fair while to cure I think! Pictures of that once it's finished and mounted to the car. I think I've chosen a reasonably logical layout but time will tell. After that I fitted the fuel tank. Sounds so easy. Westfield give you the straps and there are only 4 bolts holding it on. Yeah, sounds easy. Except the 2 upper mounting holes aren't there and when you put it on the car it looks like this. 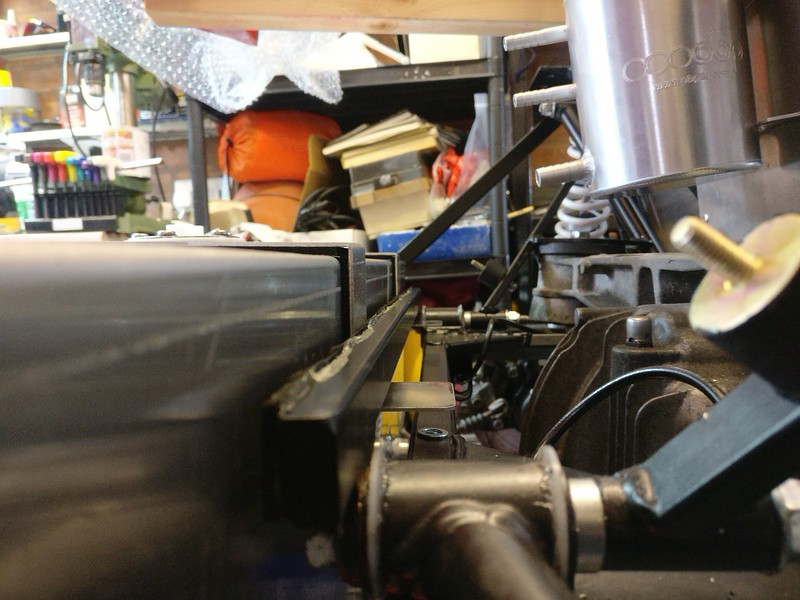 For the not so eagle eyed amongst you I have zoomed in 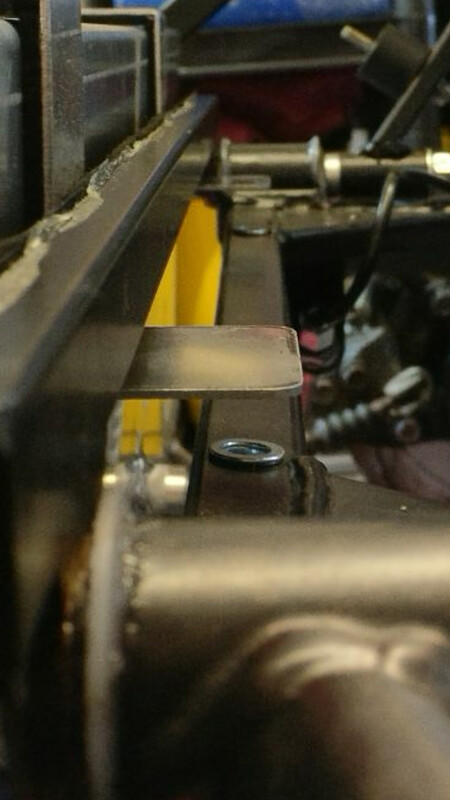 Yeah, that's one hell of a tolerance! Not a problem a guess, I have the ability to stack washers. After drilling the holes we were left with a fitted tank. 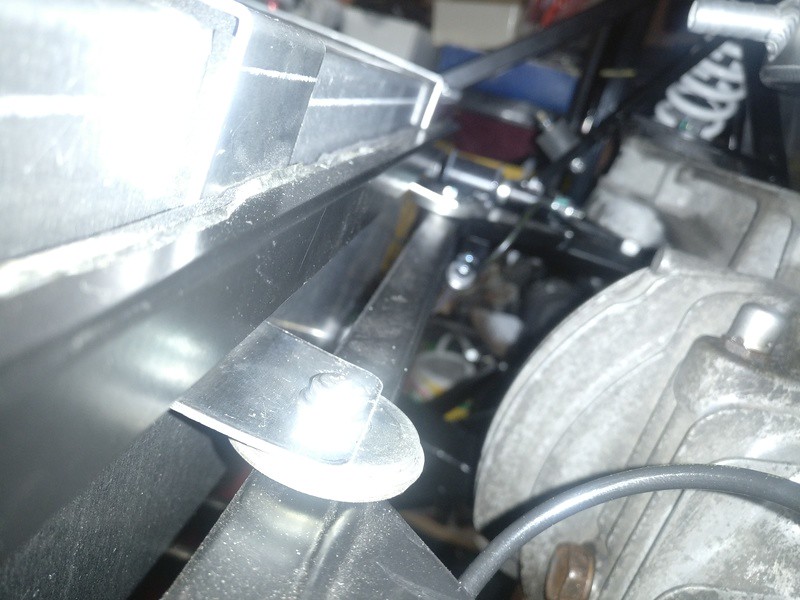 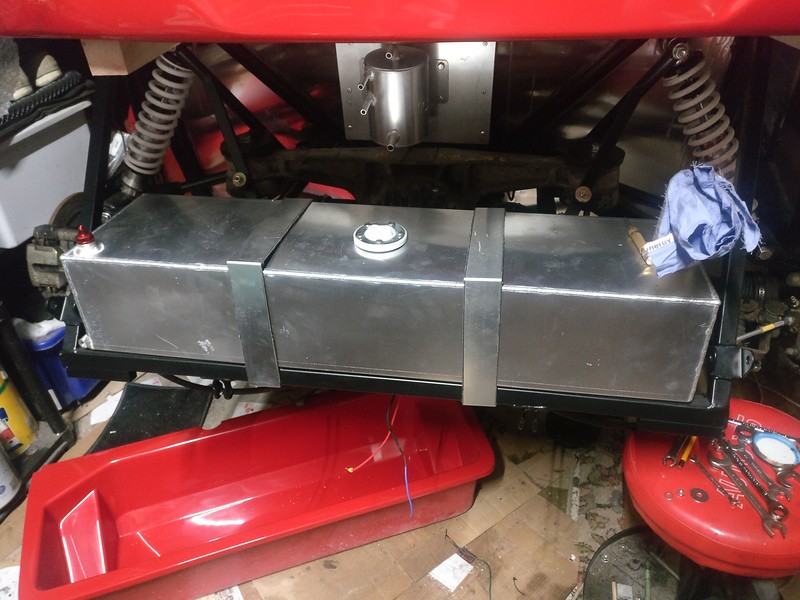 After this we went to get some fuel hose ready to plumb it in but they only had heater hose in stock. I pick up what I need tomorrow. Next I moved onto the steering. We have received the lower steering column and it fits well but the bushing that keeps it in pace is not so good. A part that doesn't quite fit? Is anybody else getting déjà vu? We had to file the plastic busing down and remove powder coating to get it to fit. Honestly, a true bearing would work so much better. The whole point of having this fitted now is that we need to send the Mazda lower steering column away to Westfield. This will become the middle section of the steering column as the wheels are further forward than in the MX5. I'm confident it will fit on it's return as I measured it myself and I've measured the original part so I'll know how much it's been adjusted. They also change the splines so it should be a straight forward fit when it is done. Aim for tomorrow, wiring harness. |
|
|
|
Post by Horney on Jun 28, 2017 8:03:14 GMT
It's amazing Theyve been building these kits for so long and yet so much stuff doesn't fit properly.
|
|
|
|
Post by myothercarsa2cv on Jun 28, 2017 9:56:31 GMT
It's amazing Theyve been building these kits for so long and yet so much stuff doesn't fit properly. Caterhams cost a whole bunch more and still have problems. Admittedly I didn't have anything as bad as that with mine but you do expect better. |
|
|
|
Post by teamawesome on Jun 28, 2017 11:36:15 GMT
Yeah it can be a challenge. Every time we get to a job that should be very simple it becomes a pain! In many respects the wiring has been easy in comparison to some jobs.
|
|
|
|
Post by teamawesome on Jun 28, 2017 21:26:03 GMT
Day 3 and we're still missing the roll cage. I'm getting thoroughly annoyed with these guys now, it's a week late. I had nothing much to do apart from continuing with the wiring. It's the job that never seems to end. We're back to this. 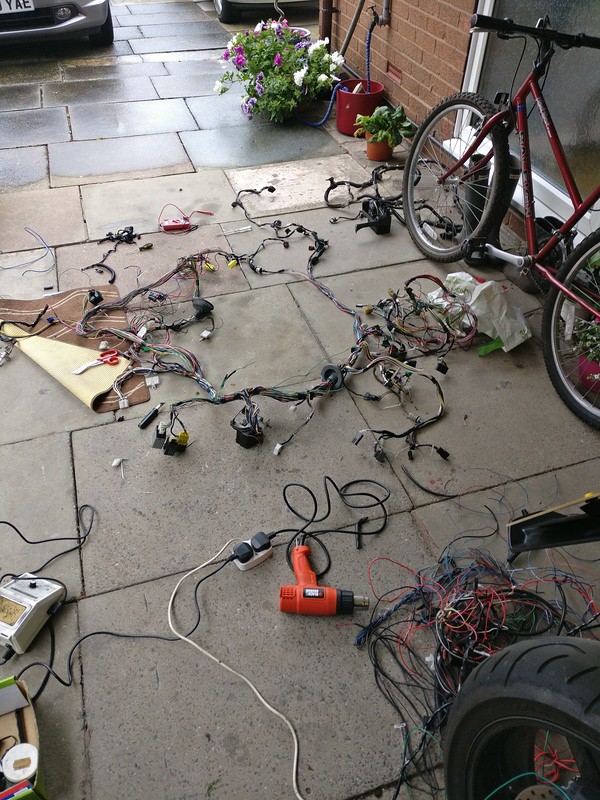 It looks even more rats-nesty since I took all the tape and convoluted tubing off to make access a bit better. I wanted to do the following today: 1. Modify the ECU wiring so that the new ME221 can control the fuel pumps without using a paper clip in the diagnostics box. Mission completed 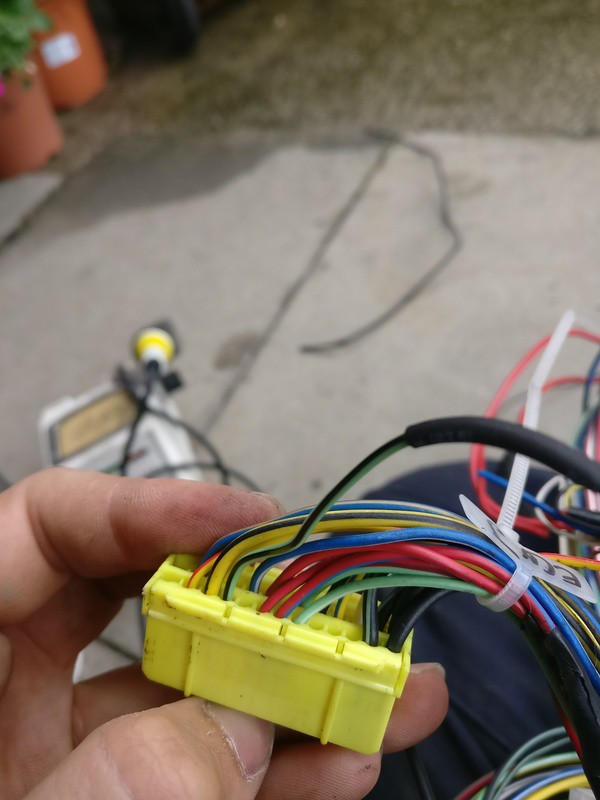 Such a professional pin relocation. 2. Add a new relay for my second fuel pump. I'm using a low pressure and high pressure pump, as you may have previously read. The high pressure pump is hungry for amps so it's recommended that I add a separate feed direct from the battery. I decided initially that I would put in a new relay and splice into the feed to the other pump. I stated to have doubts as to whether putting this in Parallel would create a short of some sort that would blow the original fuse. I was being stupid anyway, in the end I sat and thought about it and decided to wire it in parallel with the standard relays signal wires. Idiot! I also decided that it would be best to use redundant fuses rather than add inline fuses to the car. I have decided that this fat wire will be the fuel pump feed 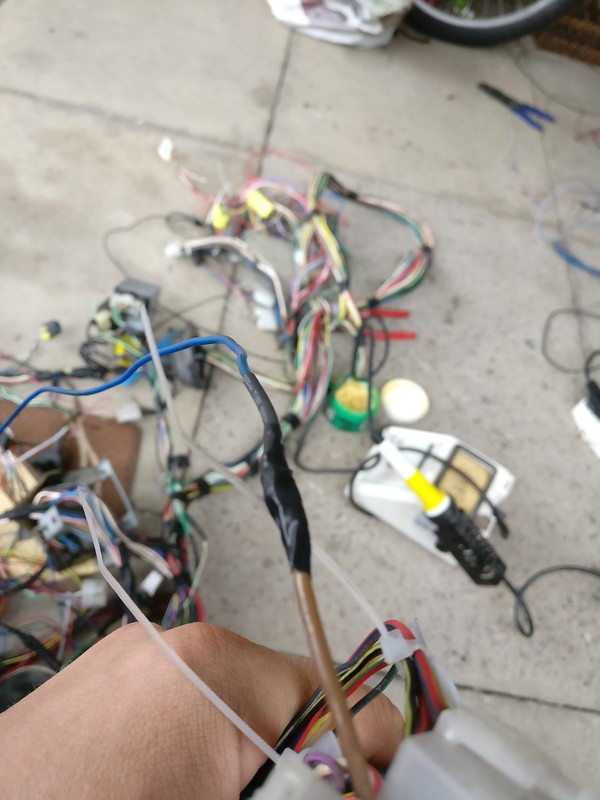 That wire is the retractor feed. It has a direct line to the battery (near enough, it's all large gauge wiring) and is totally redundant in this car. Mission almost successful, I still need to add an earth to the rear of the car and complete wiring once I can get it up against the car. 3. Carry on with removing unnecessary wires. Something tells me I'll regret cutting away over 2kg of wiring, and hopefully G19 Engineering send the sump my way soon so I can actually try to crank it over. After all this I finally managed to get the fuel pump and filter bracket it. Told you it was really simple. 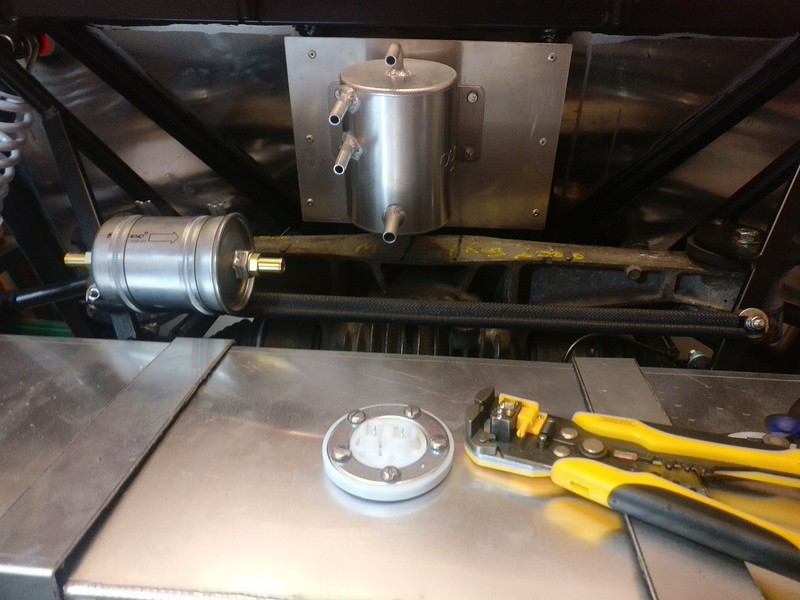 On top of that we got the lower steering column in and torqued down and the middle section in the post for modification by Westfield. 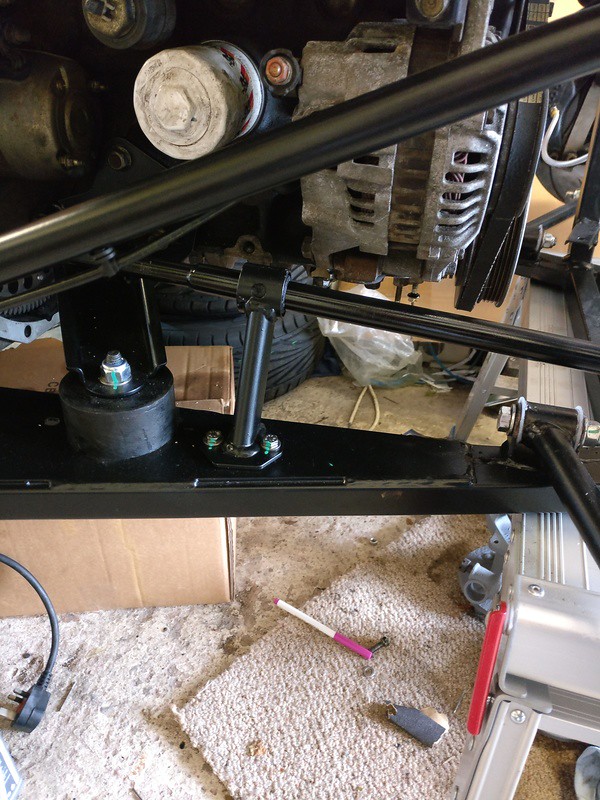 Aim for tomorrow is to receive and start to fit the roll cage. My breath shall not be held. |
|
|
|
Post by teamawesome on Jun 29, 2017 19:31:57 GMT
Day 4 of my week off. I started the day by going back to one of the local engineering shops to buy 3 sets of nuts and bolts. These were for the steering joints that can be fitted or will be fitted after modification. The one to the steering rack is in place and now torqued down to spec. Hopefully Westfield will have modified the other soon and can be fitted as it's the only thing stopping us from dropping it off the stands. We finally took delivery of the roll cage. It was supposed to arrive last week but the company we bought it from told us that there had been a mix up with the courier so it was delayed. These guys can't lie properly, their postage date was on the documents and it shows it was sent after we enquired about the whereabouts! Either way, it's finally here so we set about fitting it. We'd read that it was much easier to fit the cage and them the bodywork so that's why we wanted it here. People weren't lying, nothing is in the way to block it. Yes, we have to fit it for the measurements, remove it to drill, Fitbit again to check everything and then remove again to get the bodywork on, but it's still a lot easier than trying to work around the bodywork which is essentially working blind. Here we are half way through 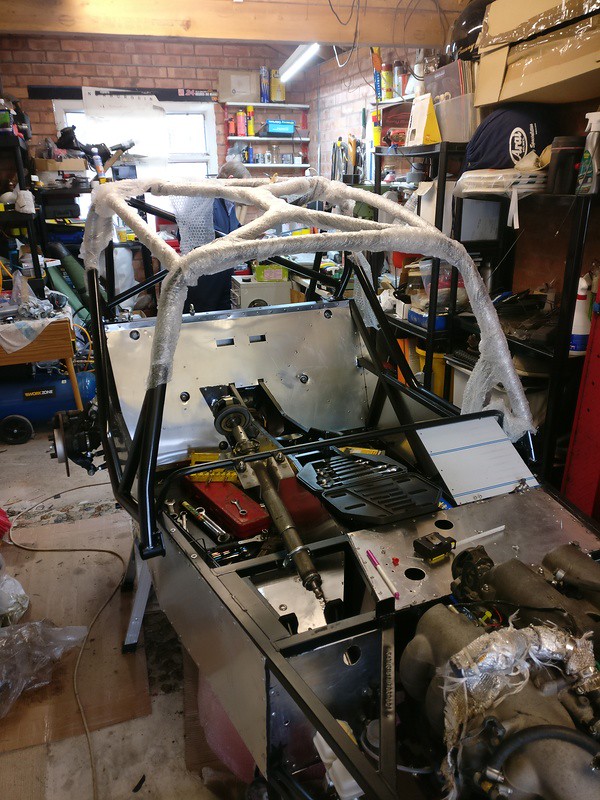 As you can imagine, working with this stuff meant photos weren't foremost in my mind! After we had this on and off, back on and off again I turned my attention to various small items that would be worth doing before the body went on. One being the fuel tank grounding point. Nothing photo worthy and a 5 mins job to get a rivnut in the chassis and bolt the strap to where it need to be. Westfield even make it easy and weld a boss to the tank..... on the right place. The second job was to finish the fuel system, bar the hoses. That is waiting for clips, I only want to use stainless with this. We honestly spent hour after hour looking at the rear end of this car looking for locations for filters and pumps. In the end we came up with a really simple solution. I'm happy with the solution but kind of disappointed that it took so long! My brain obviously isn't as young as it once was. We ended up using some angle iron from one diff mounting to the other, mounting that on some rubber bobbins to remove the worst of the vibrations/noise. What do you think? 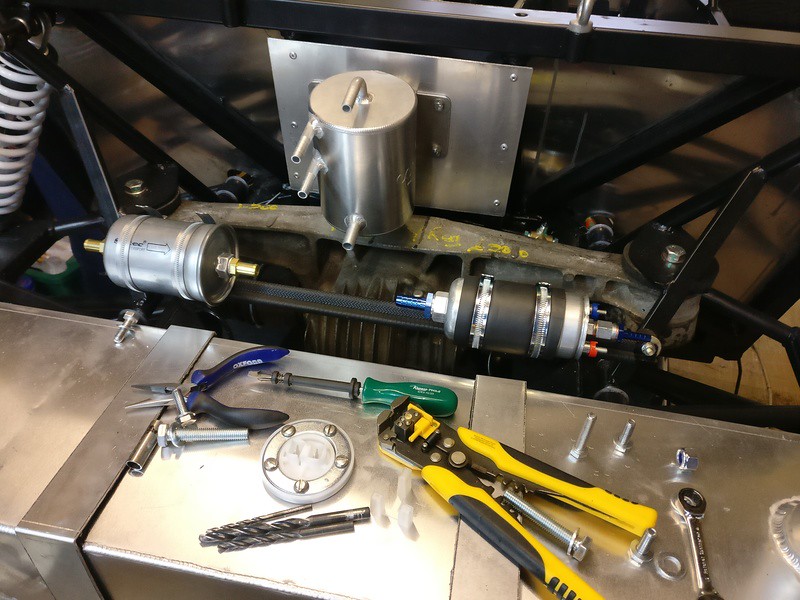 We finished off the day with a rather big step. Putting the main tub on. It's not fixed down, but it's on. We have to fit the bonnet tomorrow and all other measurements are taken from that. It's the only way to get a decent fit. We've left it here for now. 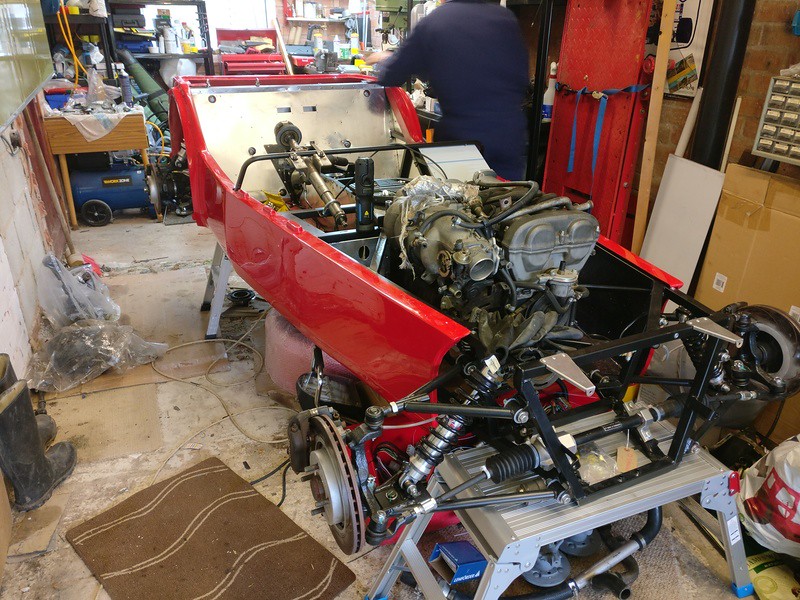 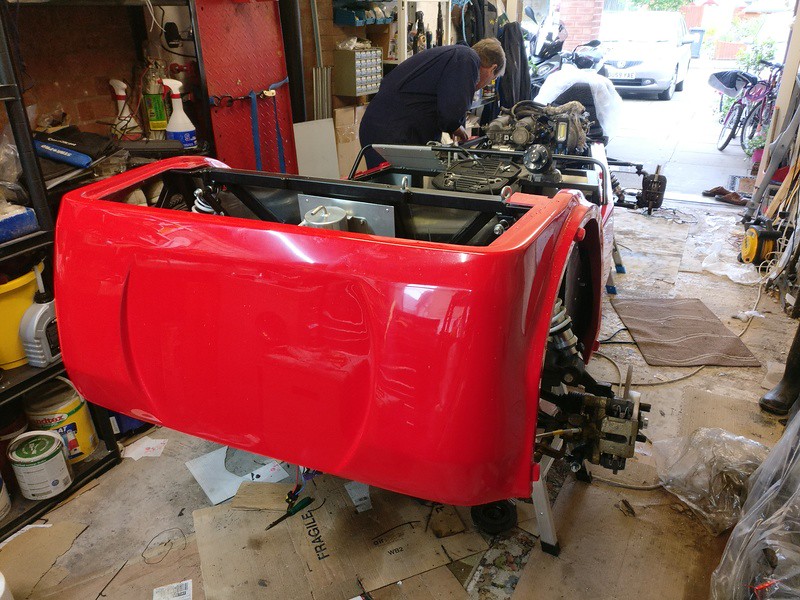 |
|
|
|
Post by teamawesome on Aug 19, 2017 13:21:06 GMT
So after 2 months I've finally sorted out my photo's. Moved them from Photobucket after their terrible move to hold people to ransom and hosting them on Flickr now. Stay tuned for updates in the next few days, lots has happened since my last update!
|
|
|
|
Post by teamawesome on Aug 19, 2017 15:10:00 GMT
Right, so 2 months further down the line and I was so annoyed at Photobucket that I didn't really take any photo's as I wasn't going to be uploading more. In the end I thought that regardless of the number of people that read this I'd like to have a record of my work for myself. So lets continue. The bodywork continued from the last update. The bonnet is the first thing to be fitted to the car, everything else is aligned based on that. It's amazing what Westfield consider to be car parts, in this case we have gate hinges as bonnet hinges. Seriously. I ended up ditching their zinc plated steel ones for some powder coated ones from Homebase, which I've chucked some extra paint on. 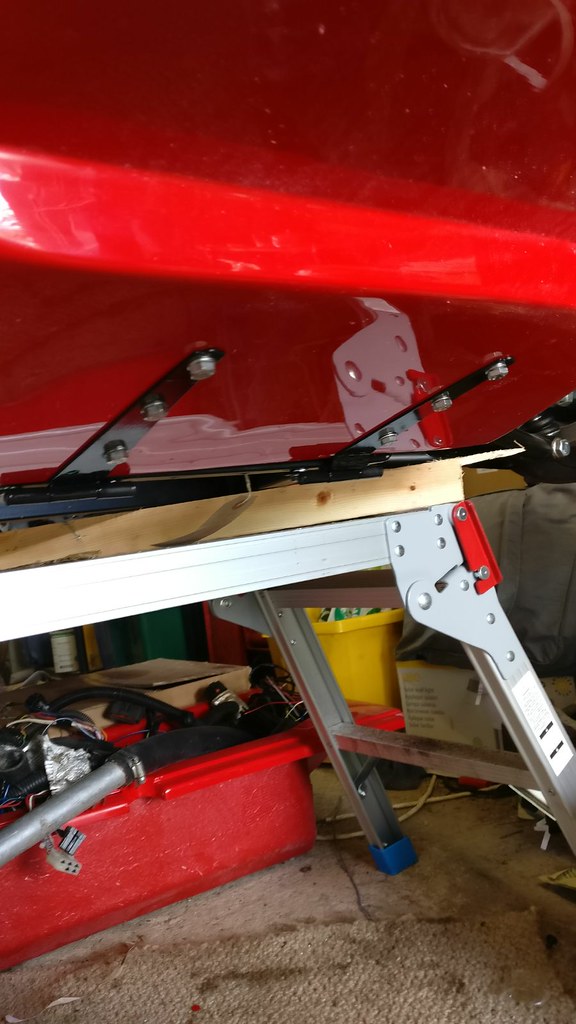 They're not perfect, as you'd imagine by now if you've been reading since I started on the kit car. The bonnet is hand made and thicknesses vary meaning that we had to tweak the hinges slightly to work well. It all takes time and think we spent around 5 hours moving it millimeter by millimeter until we were happy. The fruits of our labour: 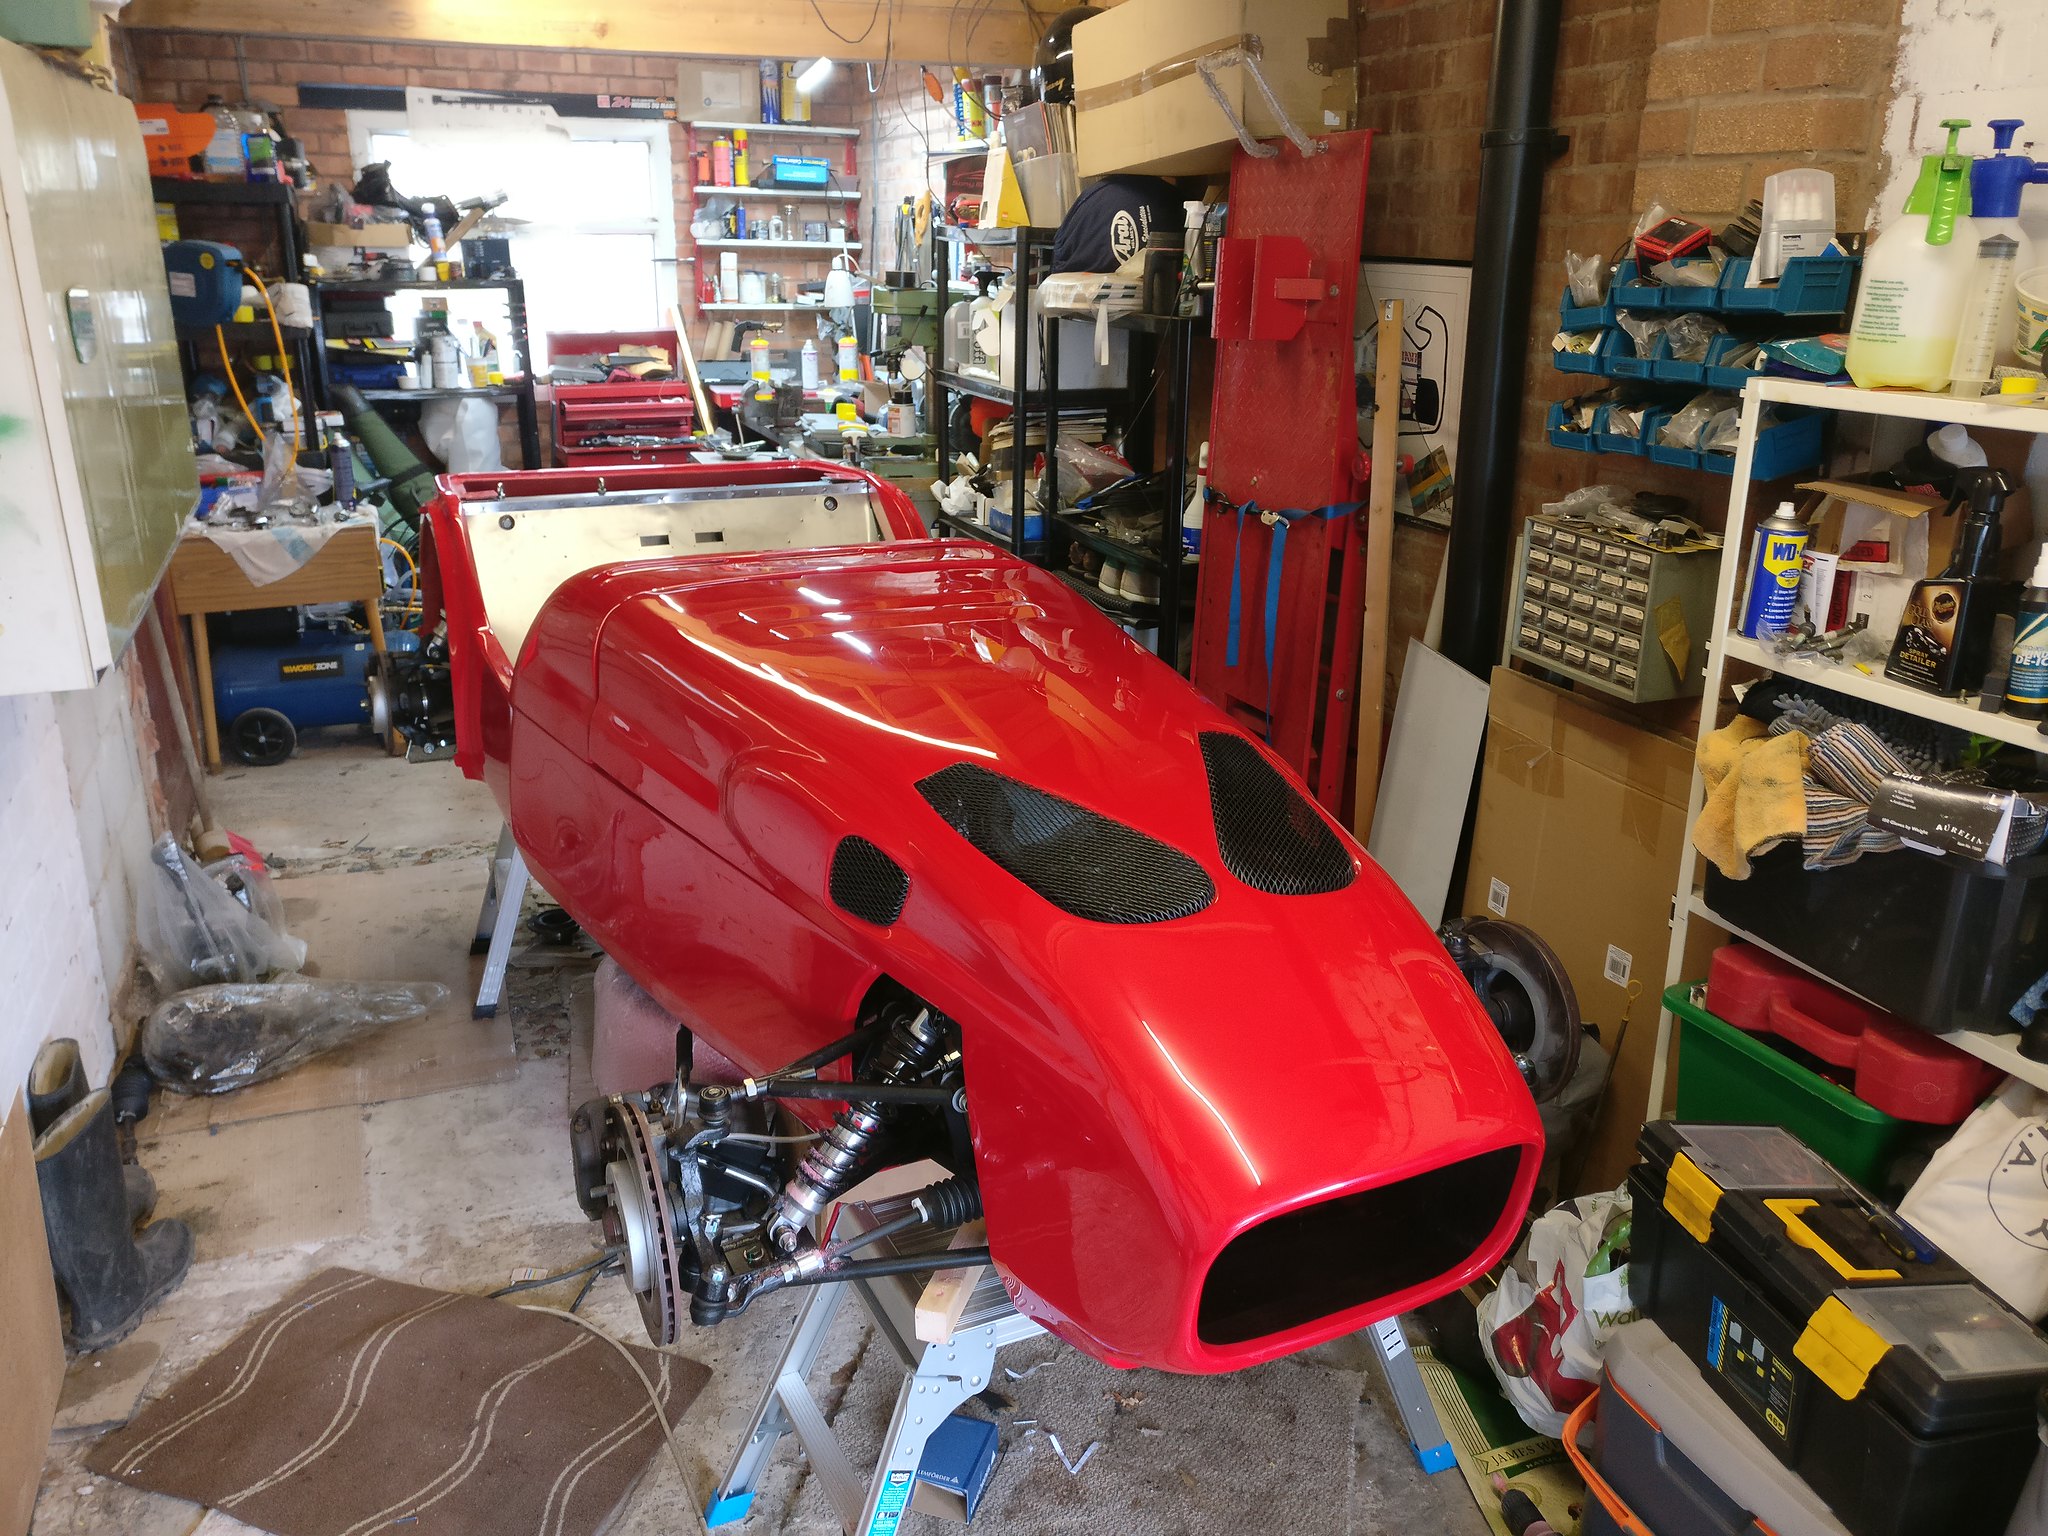 The bodywork is fairly straightforward from here. We had to trim part but that was 100% expected. The scuttle was a bit of a pain as the scuttle hoop was well in the way. In the end all we could do was hit the tube flat with a hammer so the scuttle could actually fit over. Not a problem as it can't be seen once the scuttle is fitted, and it almost look engineered that way once painted! The tub itself is held on by about 20 rivets and then the roll cage on top too. The roll cage itself is fitted loosely, all bolts are in but not tightened yet. 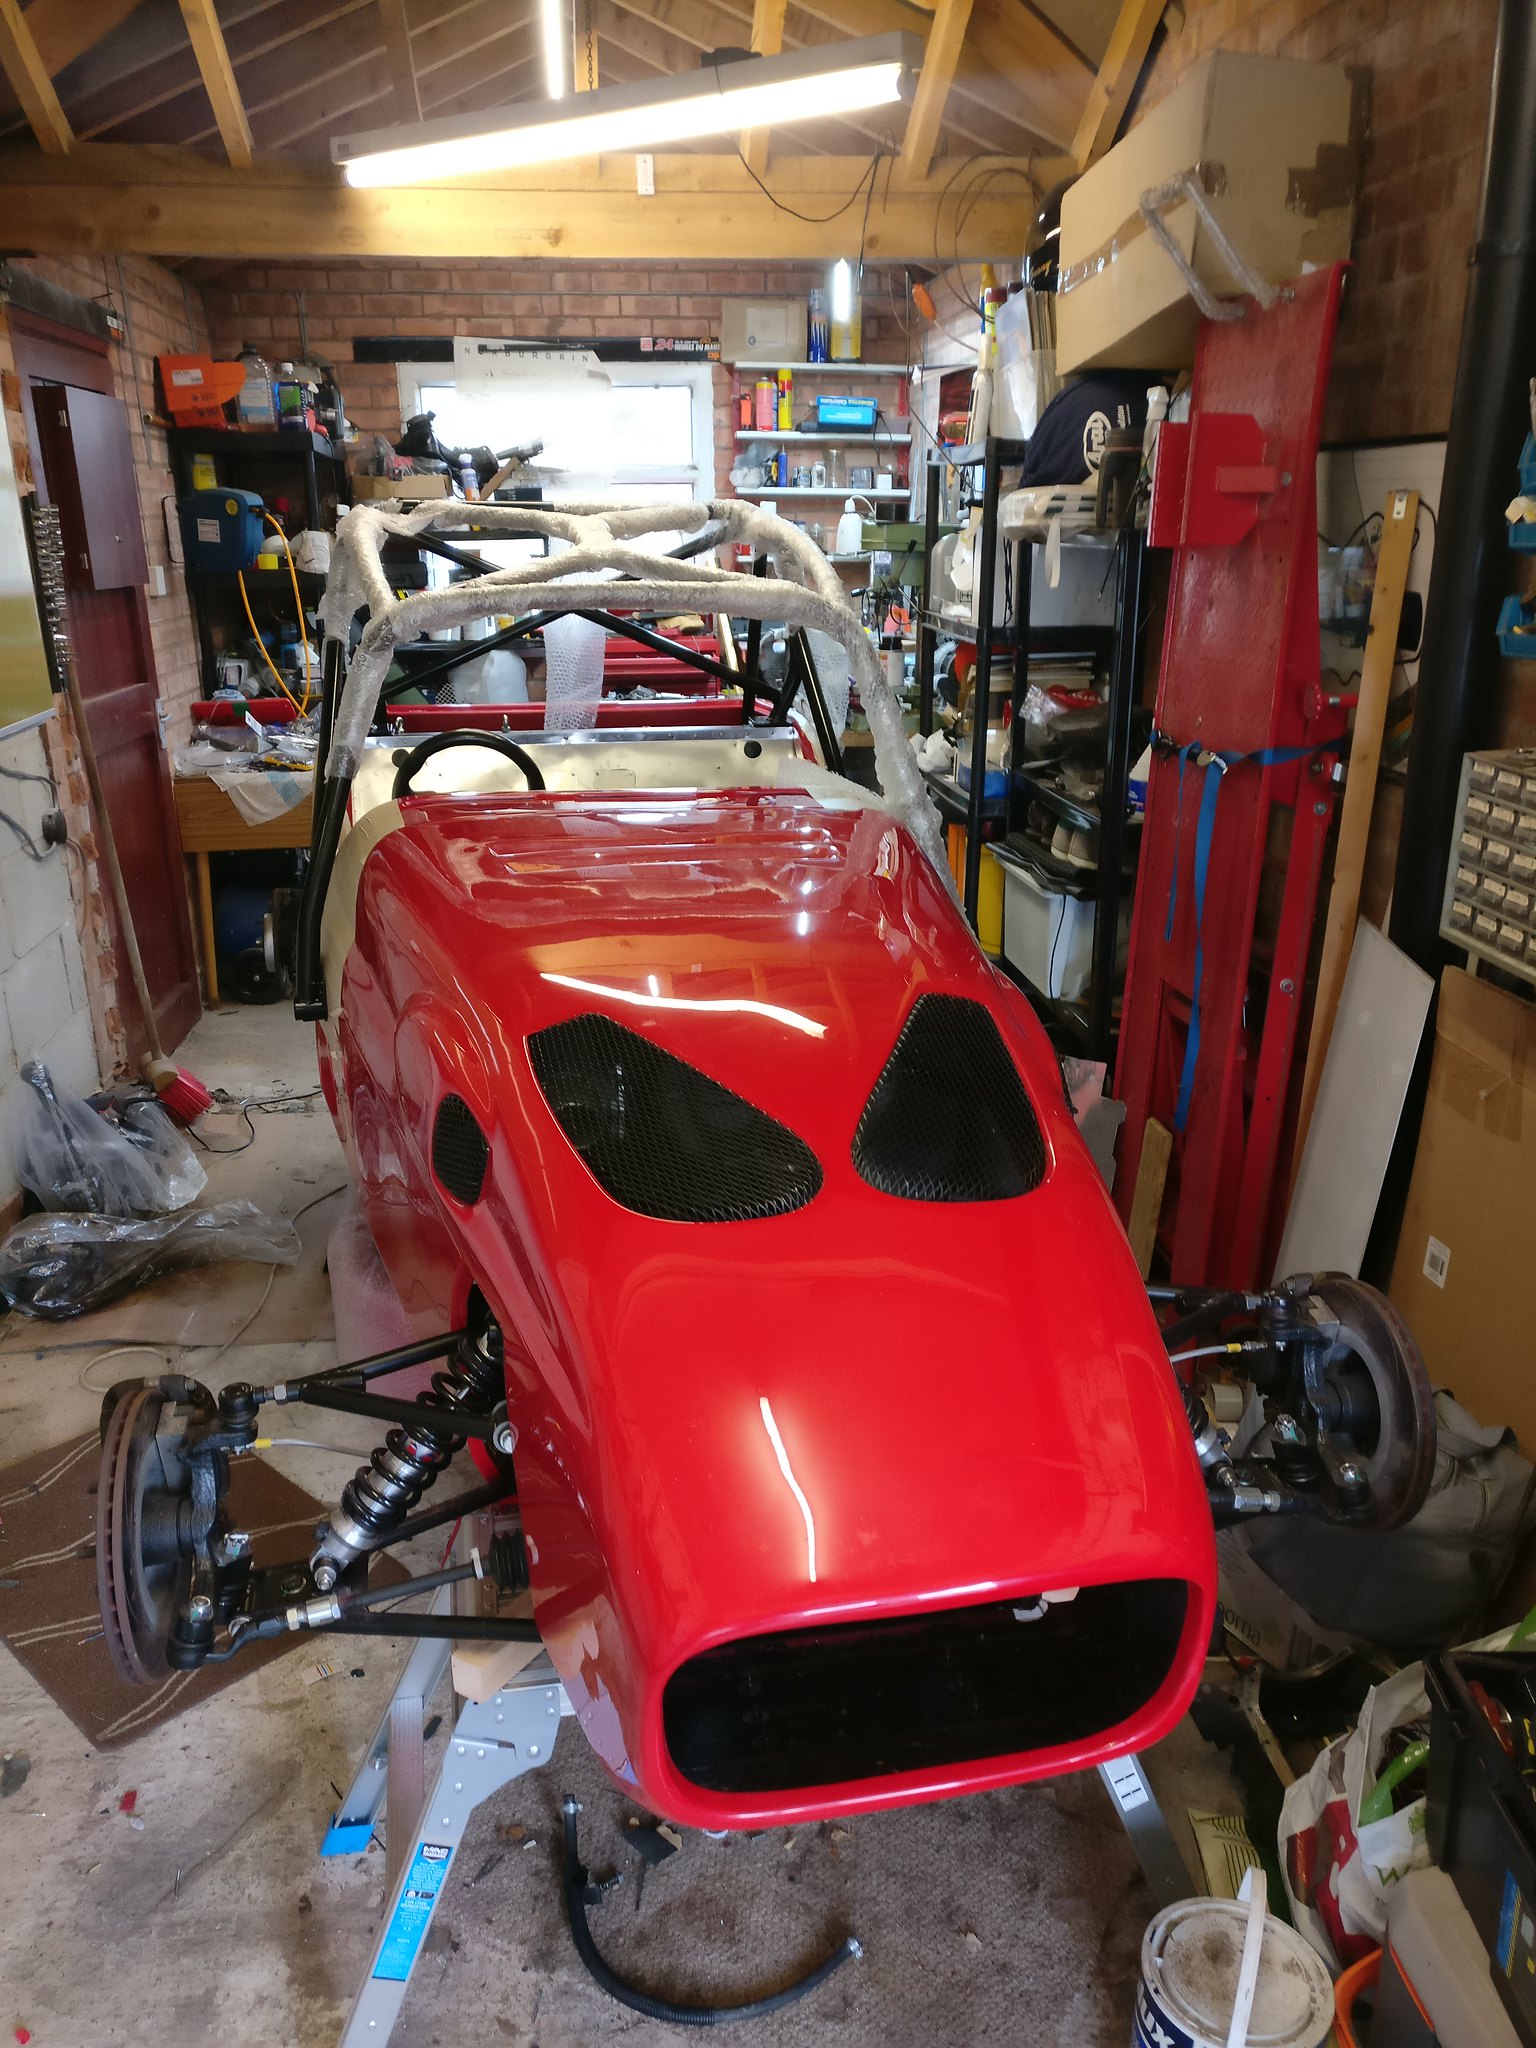 We've fitted a few other parts of the bodywork, the rear arches have their lights and the headlight mounts have been fitted to the front of the bonnet. Pictures of this next time. Another item on the list was the cooling system. As I explained previously mentioned I had a few issues with the fitment with the radiator and intercooler and had to send it back to Coolex for modification. They were true to their word and they modified all my issues. When it came back their were still some problems, but nothing we couldn't solve at home. First problem: 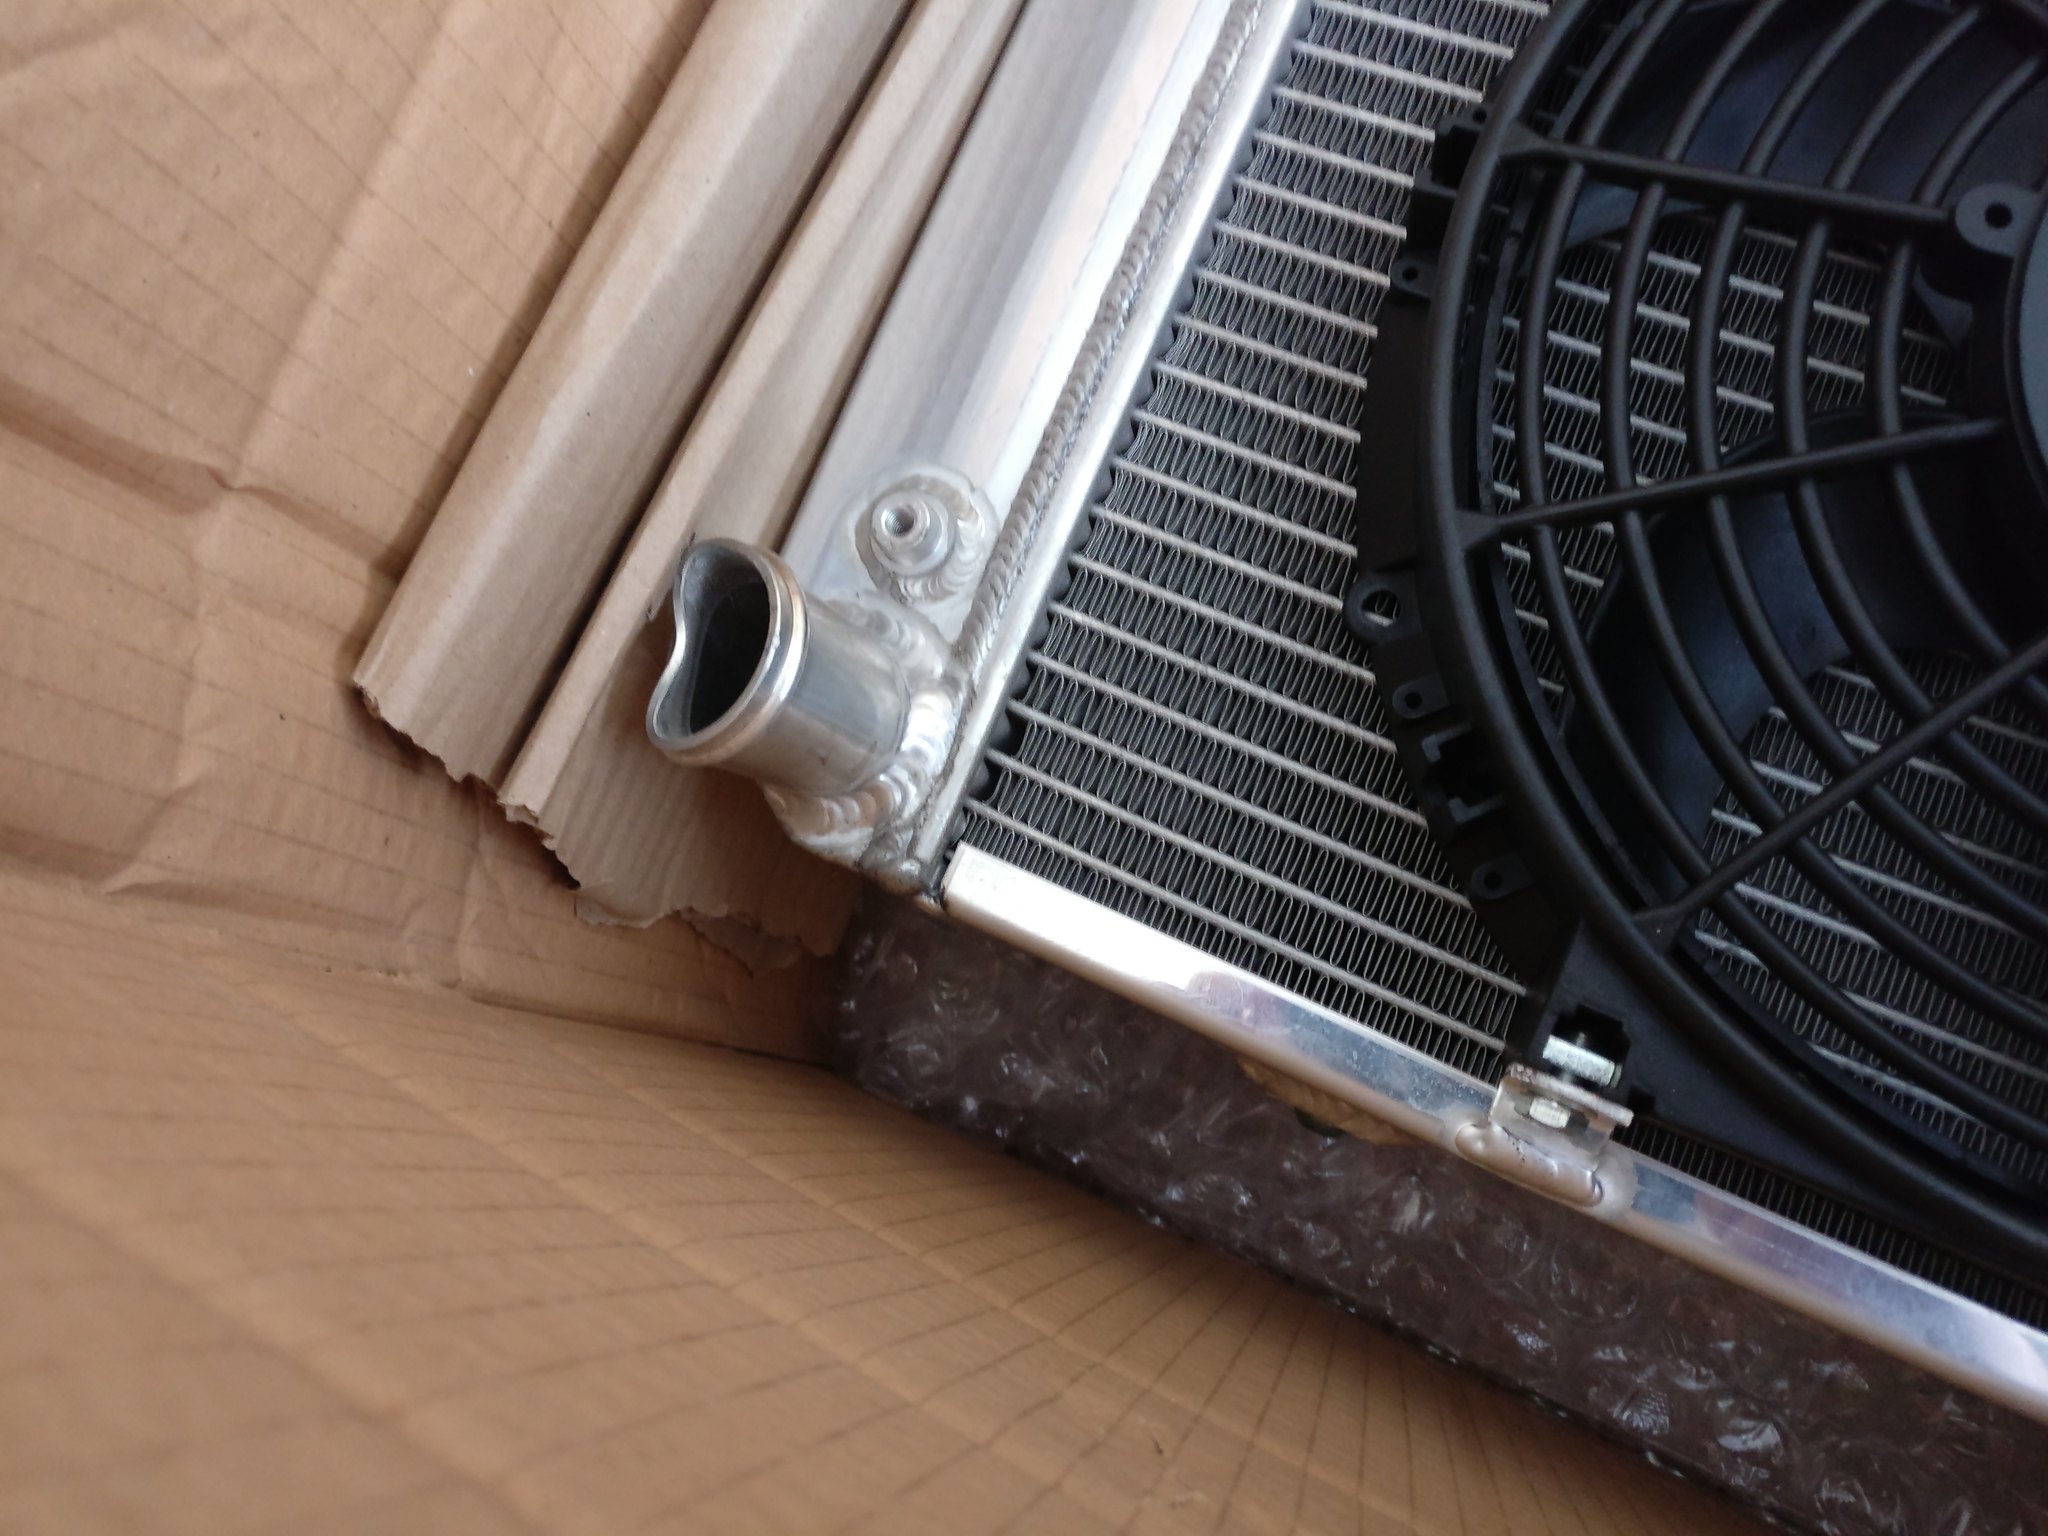 When I called Coolex to tell them about the delivery damage we agreed that I would try to hammer it out and if that failed they would take it back to repair. We did a reasonable job of the fix, I'm not going to send it back. The next issue is that the mounting points are too high and the bonnet wouldn't fit. On the Westfield their are solid steel mounts at the bottom which tale all the weight and some rather flimsy aluminium mounts at the top which really just hold it steady. We ended up making 2 simple mounts for the bottom ones to lower the radiator by about 2cm and just bending the top mounts downward. Problem solved and the assembly fits very well now. It fills the nose wonderfully. 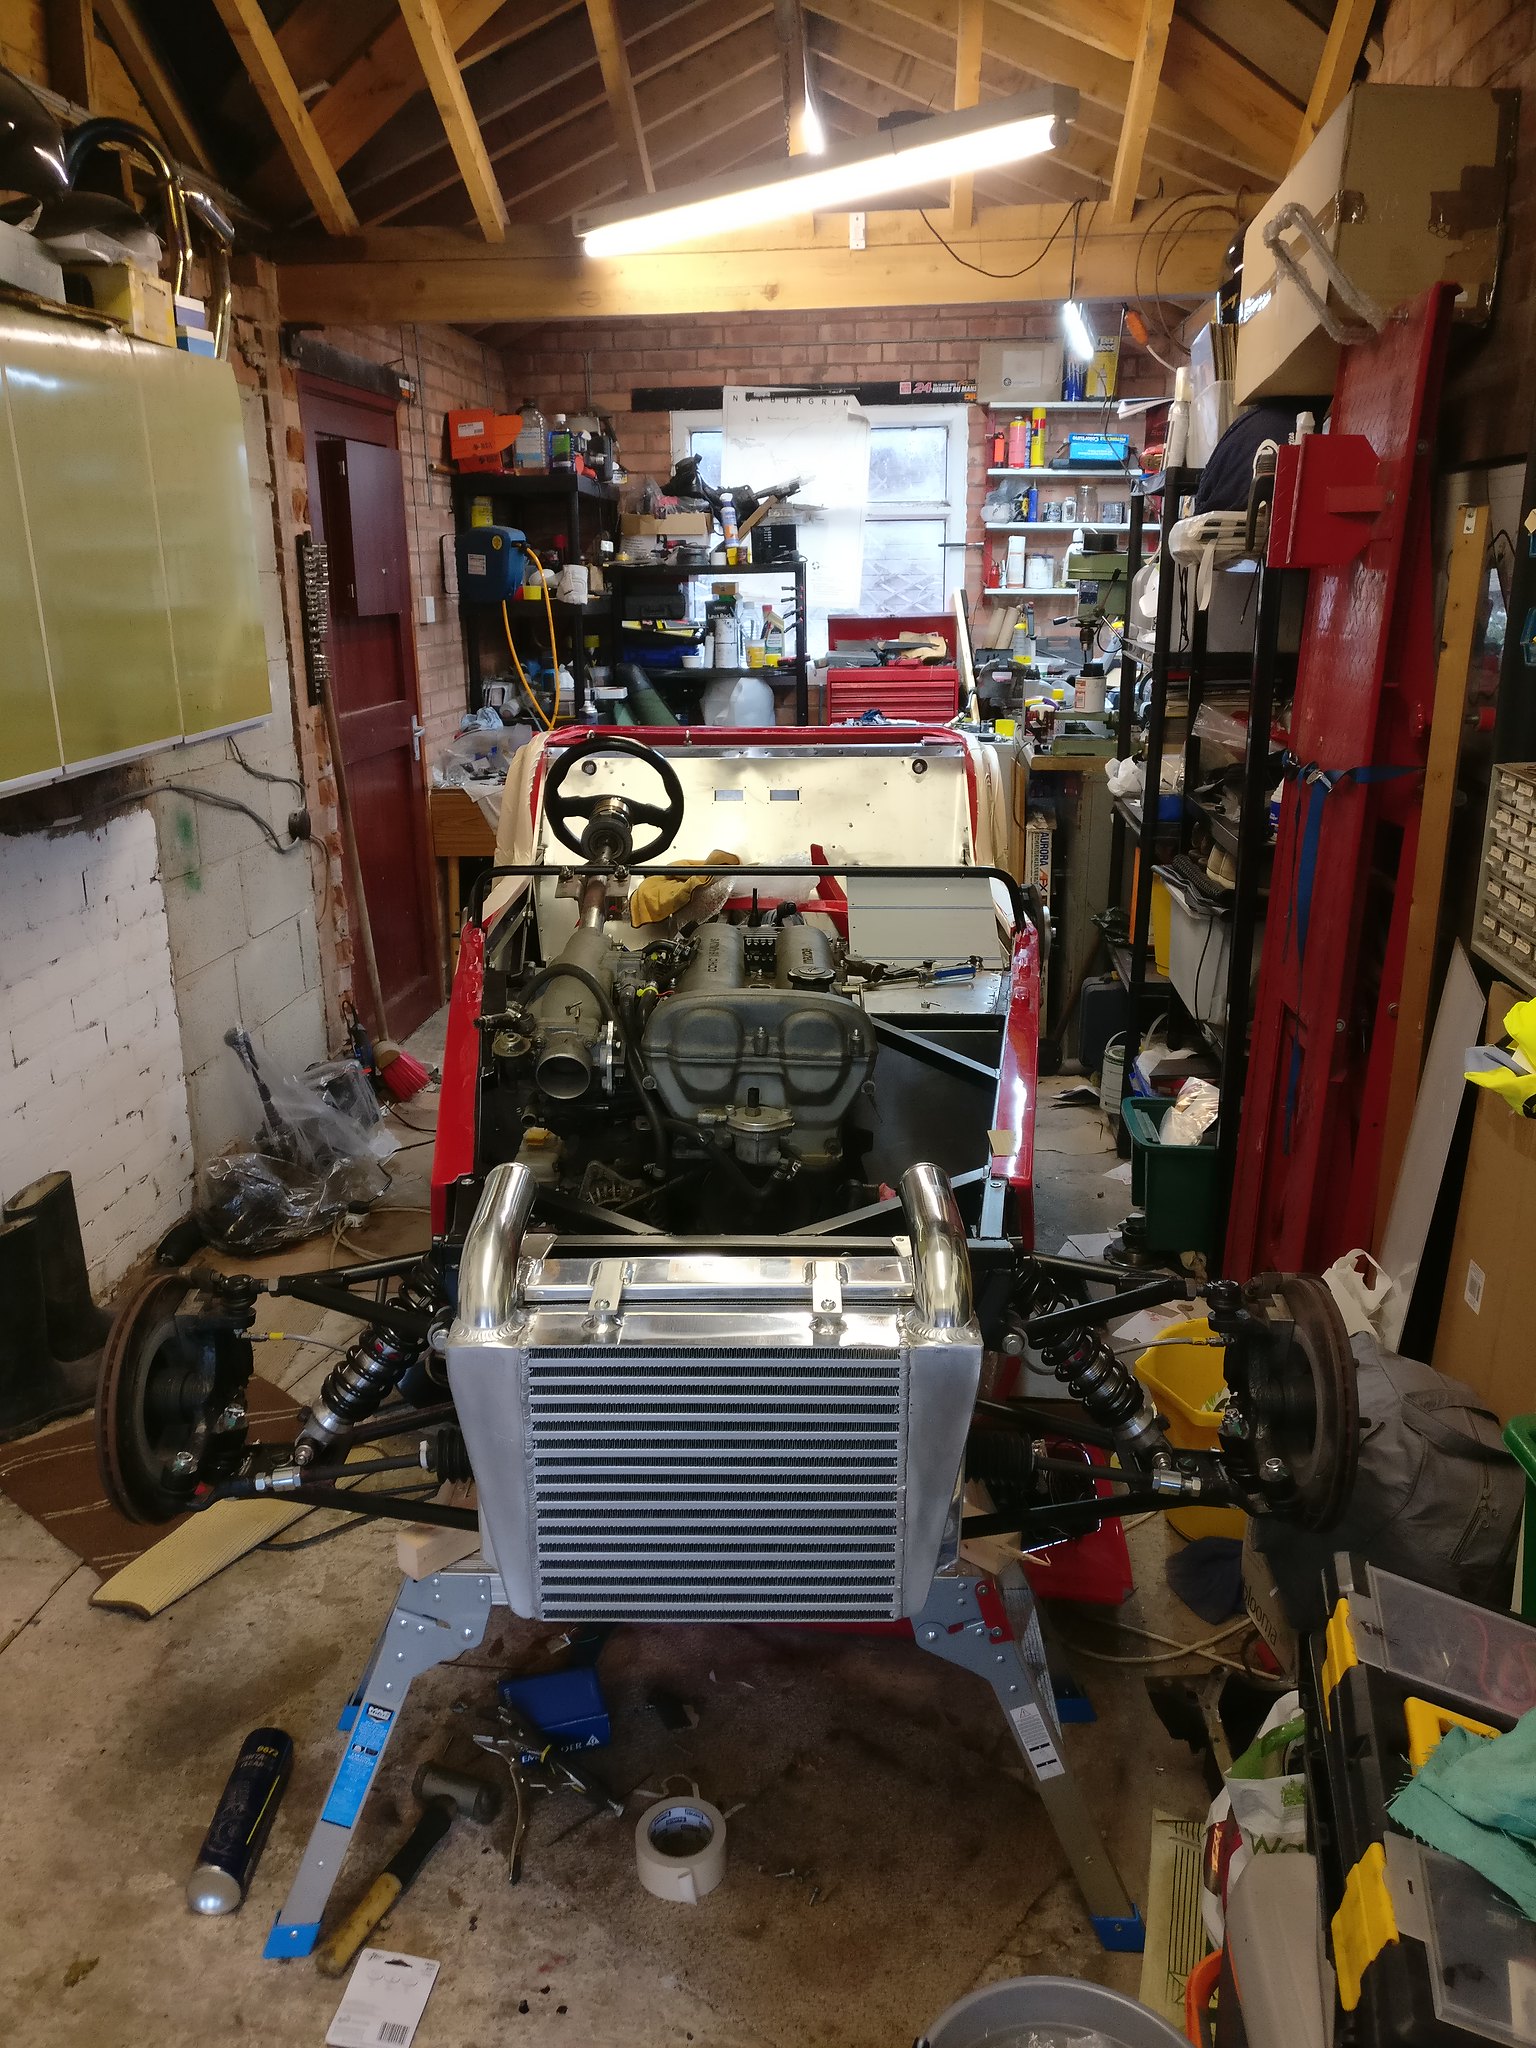 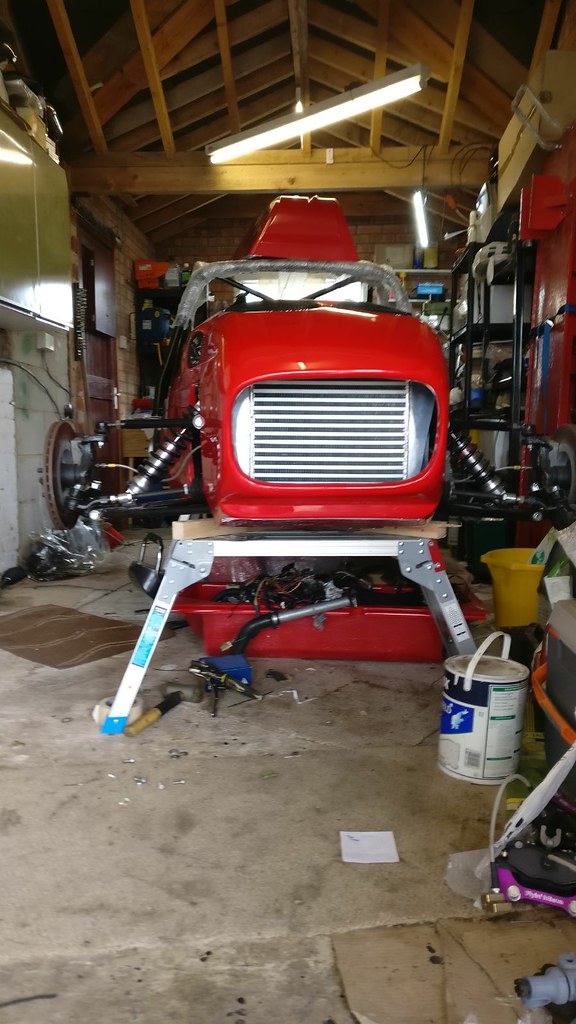 Last update is the fuel system. This is now 100% complete. I have used all new lines including what was in the engine bay. Some of those lines were 26 years old so about time. The rear end looks a little bit convoluted but from speaking with other Westfield owners fueal starvation can be a real issue. The tanks aren't baffled so round long bends the fuel can move away from the pickup at the bottom left of the tank. There is a small sump but not much. The rear end of the system looks like this 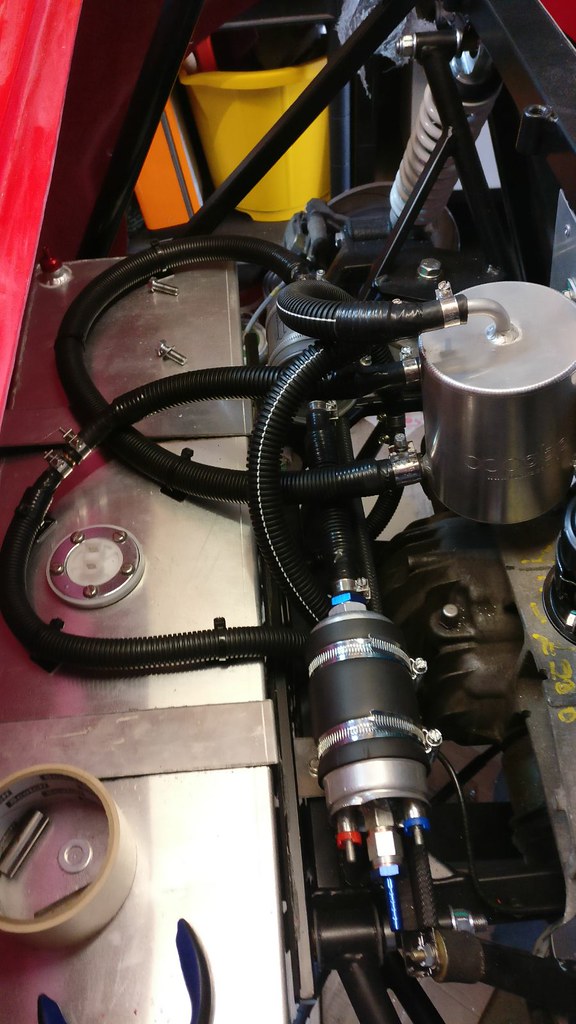 The difference here is my inclusion of a swirl pot. I have a low pressure pump to feed that, which is then filtered before going to the high pressure pump (the Bosch 044 type are notorious for failure if the fuel isn't filtered pre-pump), this is then filtered again through the OEM filter before heading to the engine The return line goes back to the swirl pot and there is an overflow back to the tank. All hoses have been covered in convoluted tubing as protection for the IVA. Apparently I need to keep samples of my hoses as they won't be able to read the hose for it's suitability for unleaded fuel. The IVA can be a real minefield! I'm quite positive about how this is going now. The wiring harness is on the car for it's initial mock up. The ECU is on and the steering is on an fully fitted. I'm still waiting for G19 Engineering to get my sump out to me, I've been waiting for it since April! I spoke to them last week and they are saying it's ready to go, payment details have been handed over, fingers crossed it'll be here soon as I really want to get it fitted so I can test fire the car. |
|
|
|
Post by teamawesome on Oct 17, 2017 20:17:03 GMT
I've had around 7 or 8 weeks off the car now as I've been very busy at work and my dad's been away on holiday but I got around to doing stuff this weekend. I wanted to finish the bonnet so I bought a fibreglass kit and some studs that can be fibreglassed on. The headlight spats need to be fitted and Westfield recommend that you use screws and rivet however I wanted it to be an invisible fit. I fibreglassed 2 studs onto each spat and fitted them rather easily. Hardest part was leaving them alone to cure! I did a terrible job of taking photos this weekend unfortunately so nothing of this to show. Once this is complete the headlights can go on. Followed by the front grill. The grill is actually held in by an ingenious method, drilling the fibreglass and using cable ties. Seriously. Either way, the car is really starting to look proper. 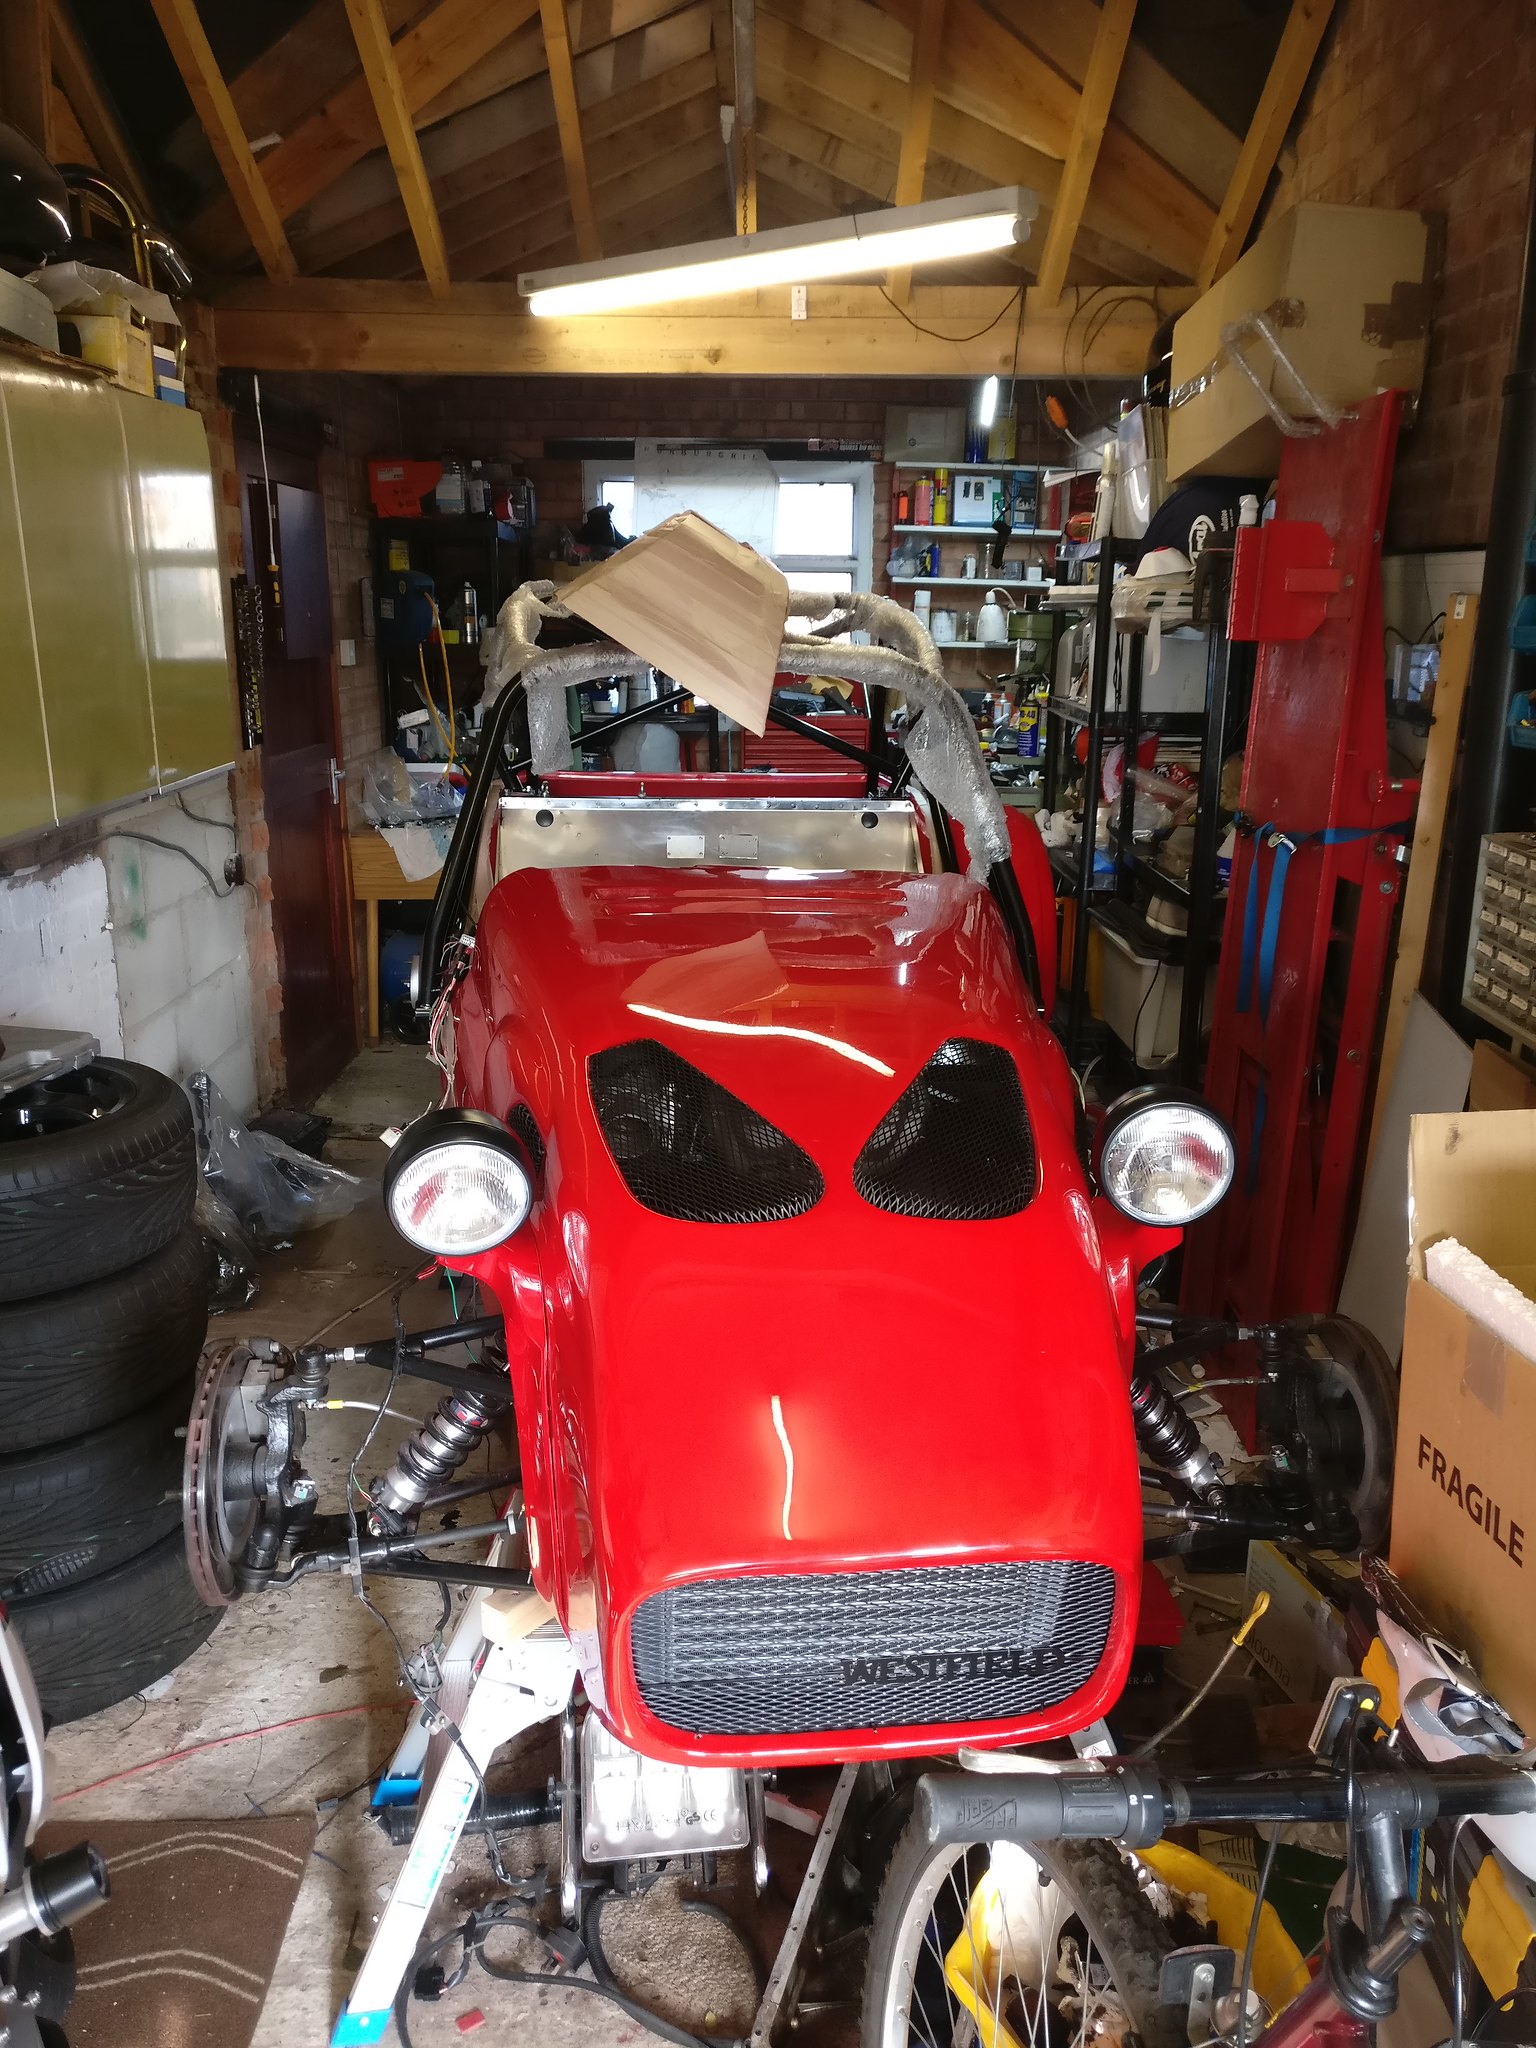 I then spent a large amount of time looking at the rear end of the car to figure out where I want lights, which I think I've figured out now. Hopefully I'll be able to go back in a few weeks and do some more. I've ordered rear shocks and springs for the front, which is common upgrade on these. Westfield usually do normal track and wide track suspension, the wide track uses the same shock and spring on each corner. The normal track uses short ones on the front. The MX5 kit is in-between the 2 but suits the wide track better, so I've ordered some. There's not a huge amount left now, just time and details! |
|