|
|
Post by teamawesome on Nov 27, 2017 18:13:33 GMT
I spent the weekend doing more wiring. It seems to never end. Friday wasn't so productive as I had to do some work on my daily driver, and then I was just trying to sort out a little more of the rats nest Saturday was completely different though. We decided to make a start on the carbon dash since I already had the digital dash and my billet switches have arrived. We must have spent hours making sure it fit the scuttle just as we wanted, and then we had to drill the scuttle and dash to attach it. Scary stuff drilling through carbon, that stuff's expensive! We got it to fit just about right and then I spent a couple of hours drawing on the masking tape and measuring out where I wanted all the switches, dash and other buttons. This wasn't so much a case of measure twice, cut once it was more measure 5 times and cut once. I'll leave these photos here and you can let me know what you think. I'm really happy with it except for one button where the drill wandered slightly. It's not too noticeable though. 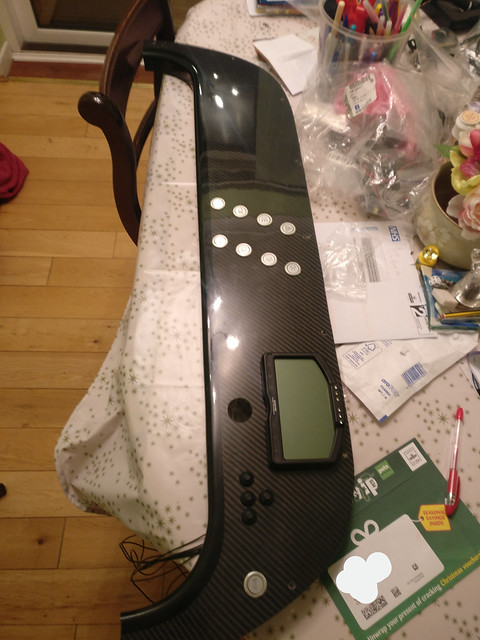 And once fitted 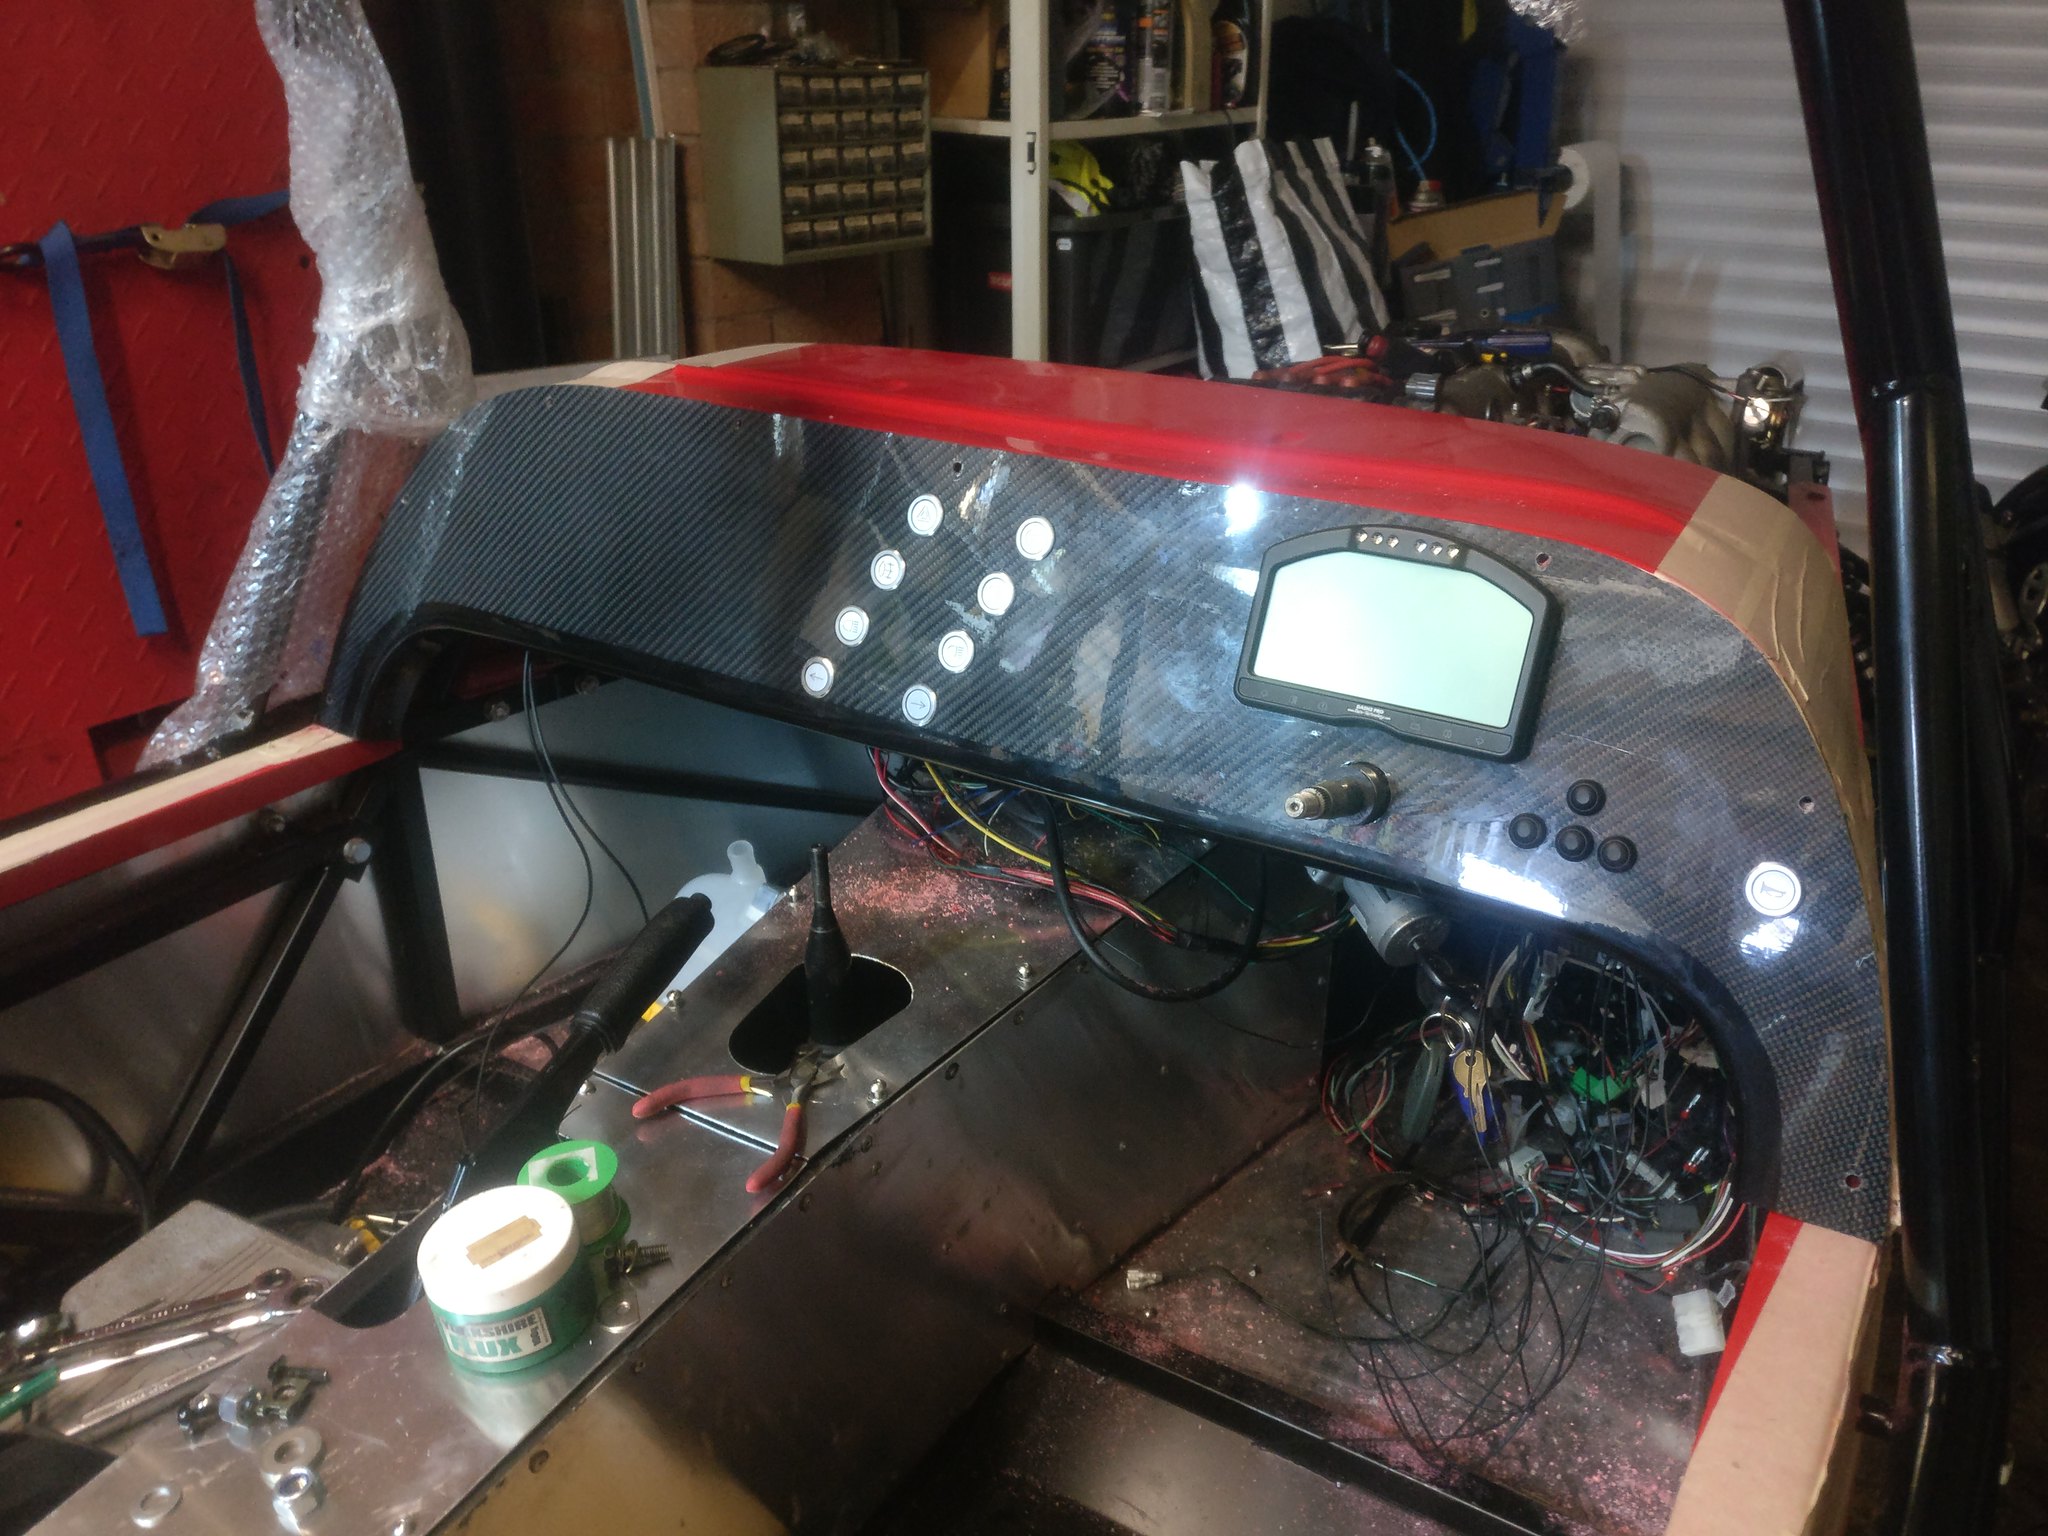 |
|
|
|
Post by teamawesome on Dec 18, 2017 10:27:56 GMT
I would like to have this post serve as a public service announcement to all those wishing to build a Westfield, or any kit car for that matter, especially based on the MX5 and the decisions that I've made. I've done the maths, I've spent 90 hours on the wiring harness. That is a huge amount of time! I think I've mentioned before that I really wanted to have the harness as minimal as possible, only supporting the functions that I'll actually have in the car. It sounds so easy, figure out what I won't use and cut out the wires. Then just add in wires for what I will use. Yeah..... Easy. I think it took about 20 hours to cut out what I didn't need. From there it's been putting in the new functionality and trying to make it work as I want it to. The dash has been the worst bit, taking around 40 hours alone. The problem is that it's all new, not one piece of the Mazda is retained. My goal was to have the wiring loom completely separate to the rest which would allow me to remove it by simply unplugging 2 connectors. I've managed to donit and I'm happy with the work, but it was damn tiring both mentally (as someone who is taking this on a first electronics project) and physically (as a 6'4" man who has had to hunch over a car for hours on end). I hope that the next few photos go some way to showing the amount of work required to do this, and seriously..... if you try to do this yourself, really consider the amount of time you're committing to! Making a start (1 hour in) 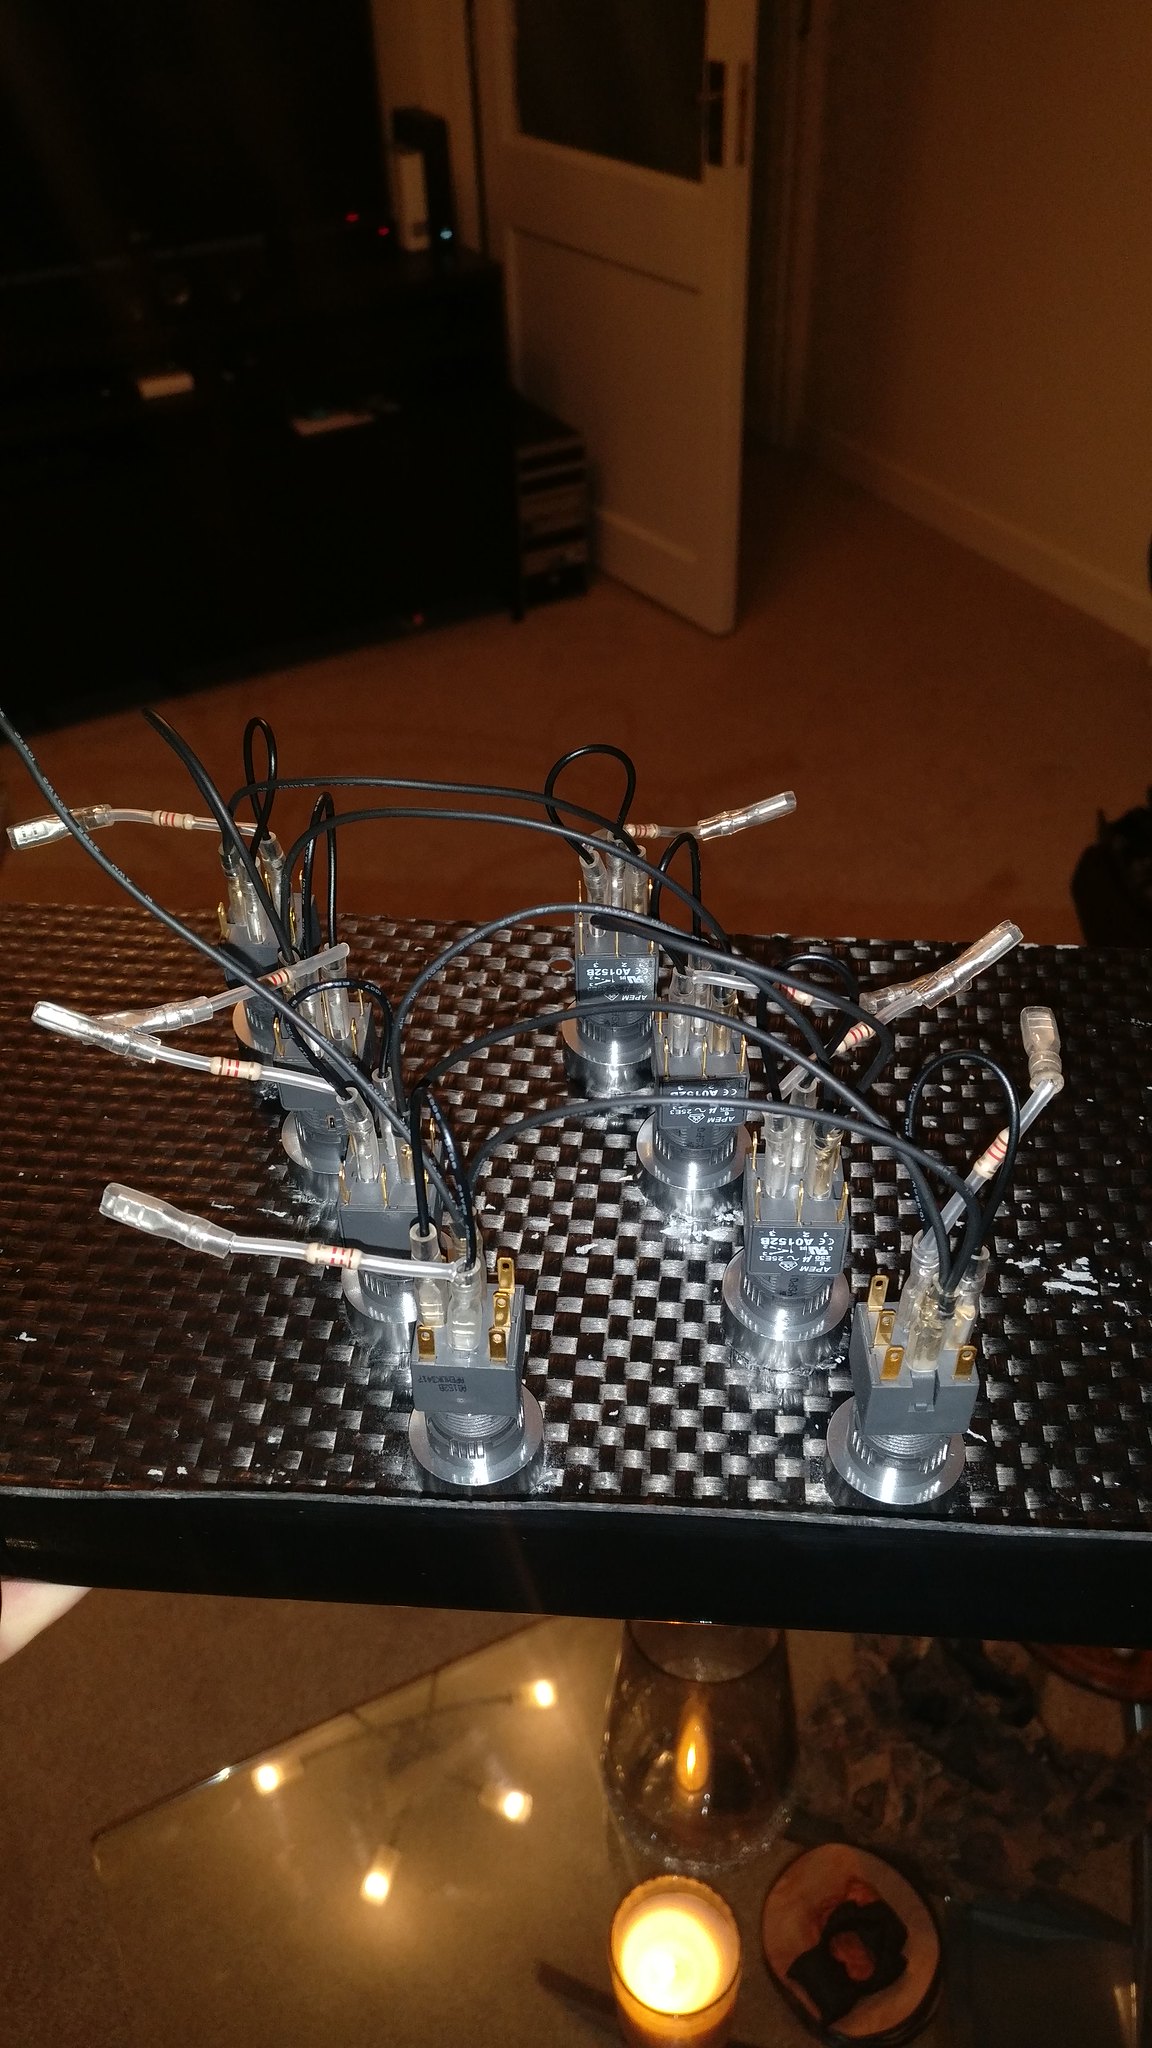 Getting messier. I should probably mention that plugs are available for these switches, only the spade connectors. (5 hours in) 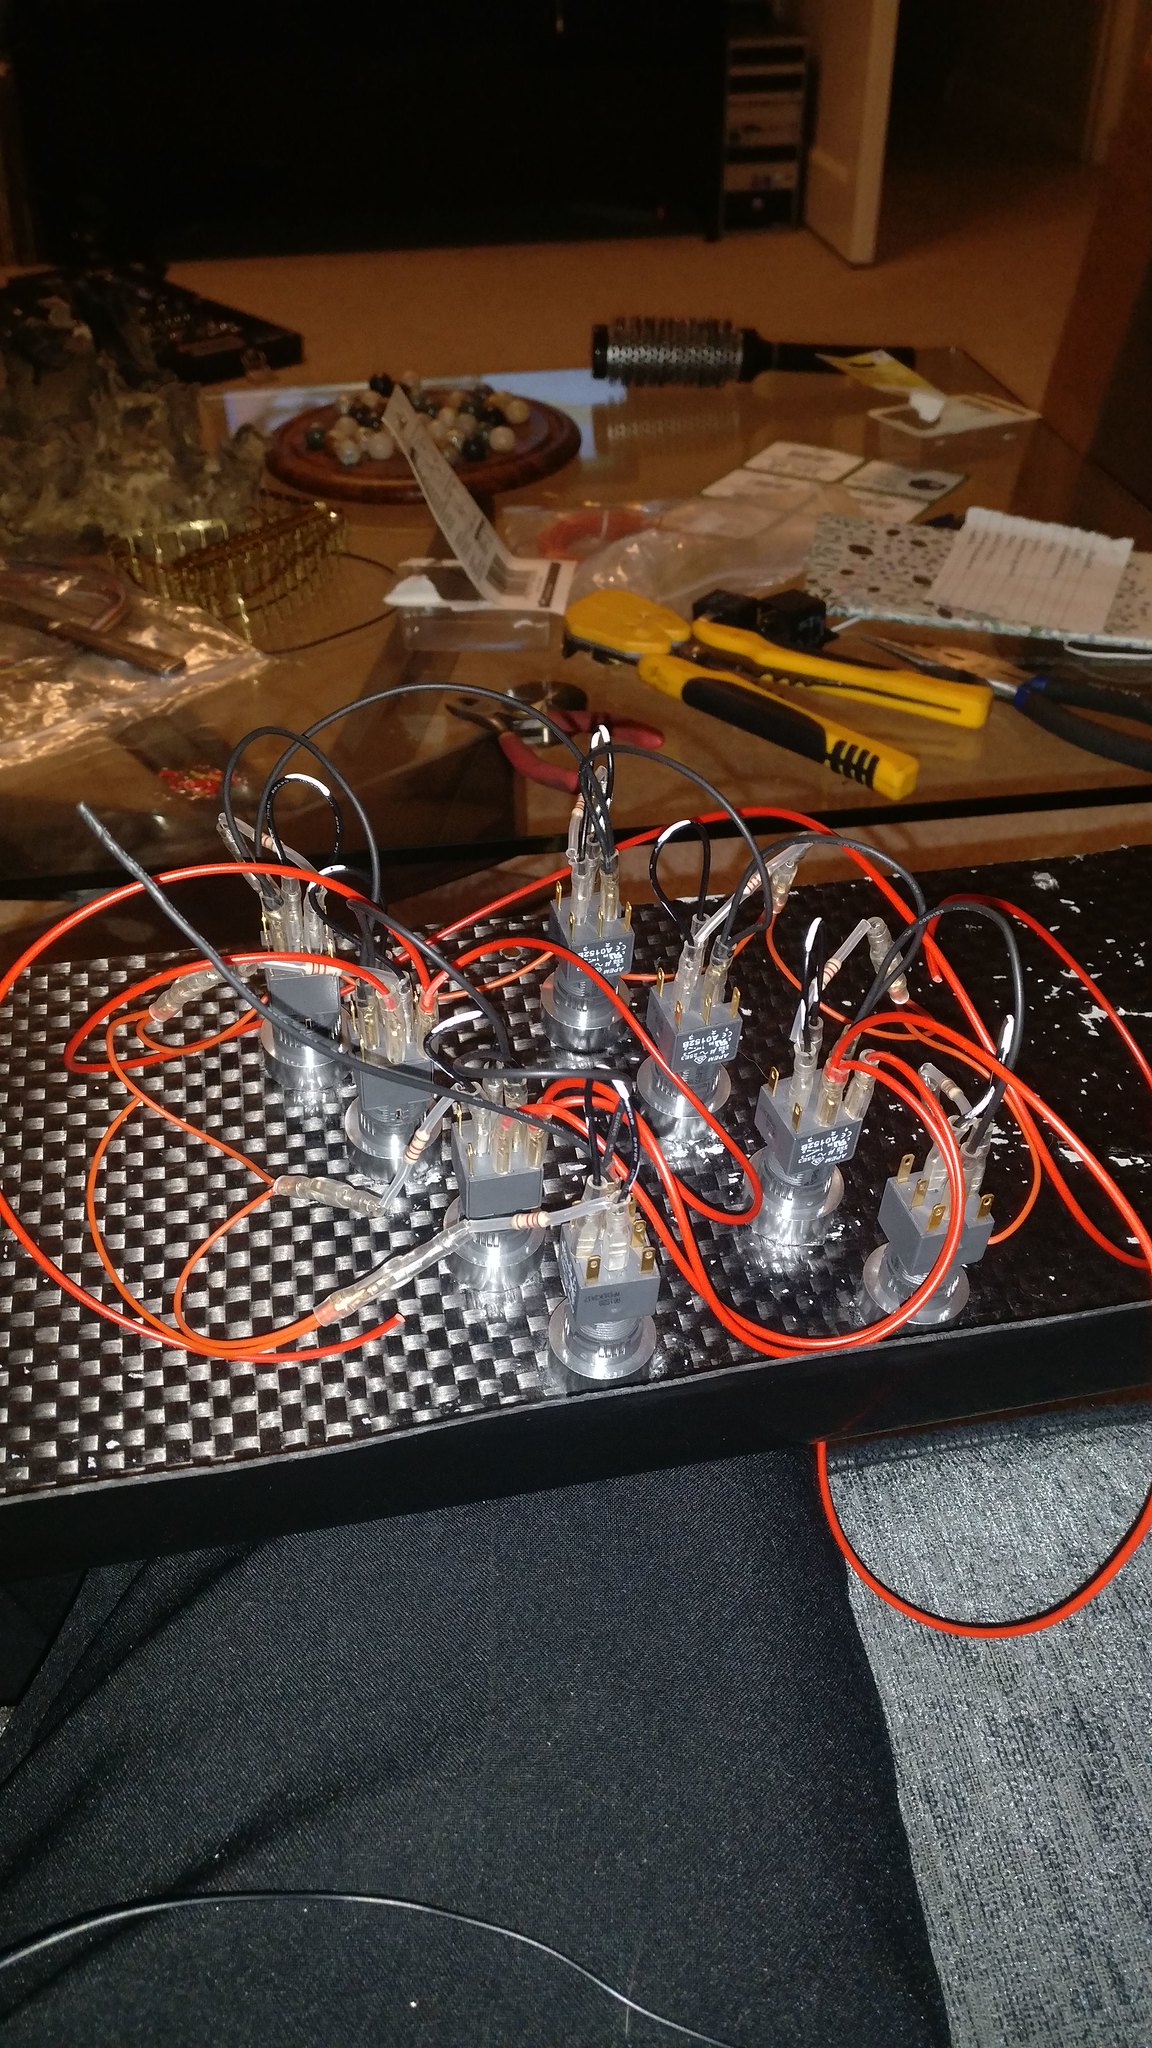 Almost ready to mate up with the car (35 hours in) 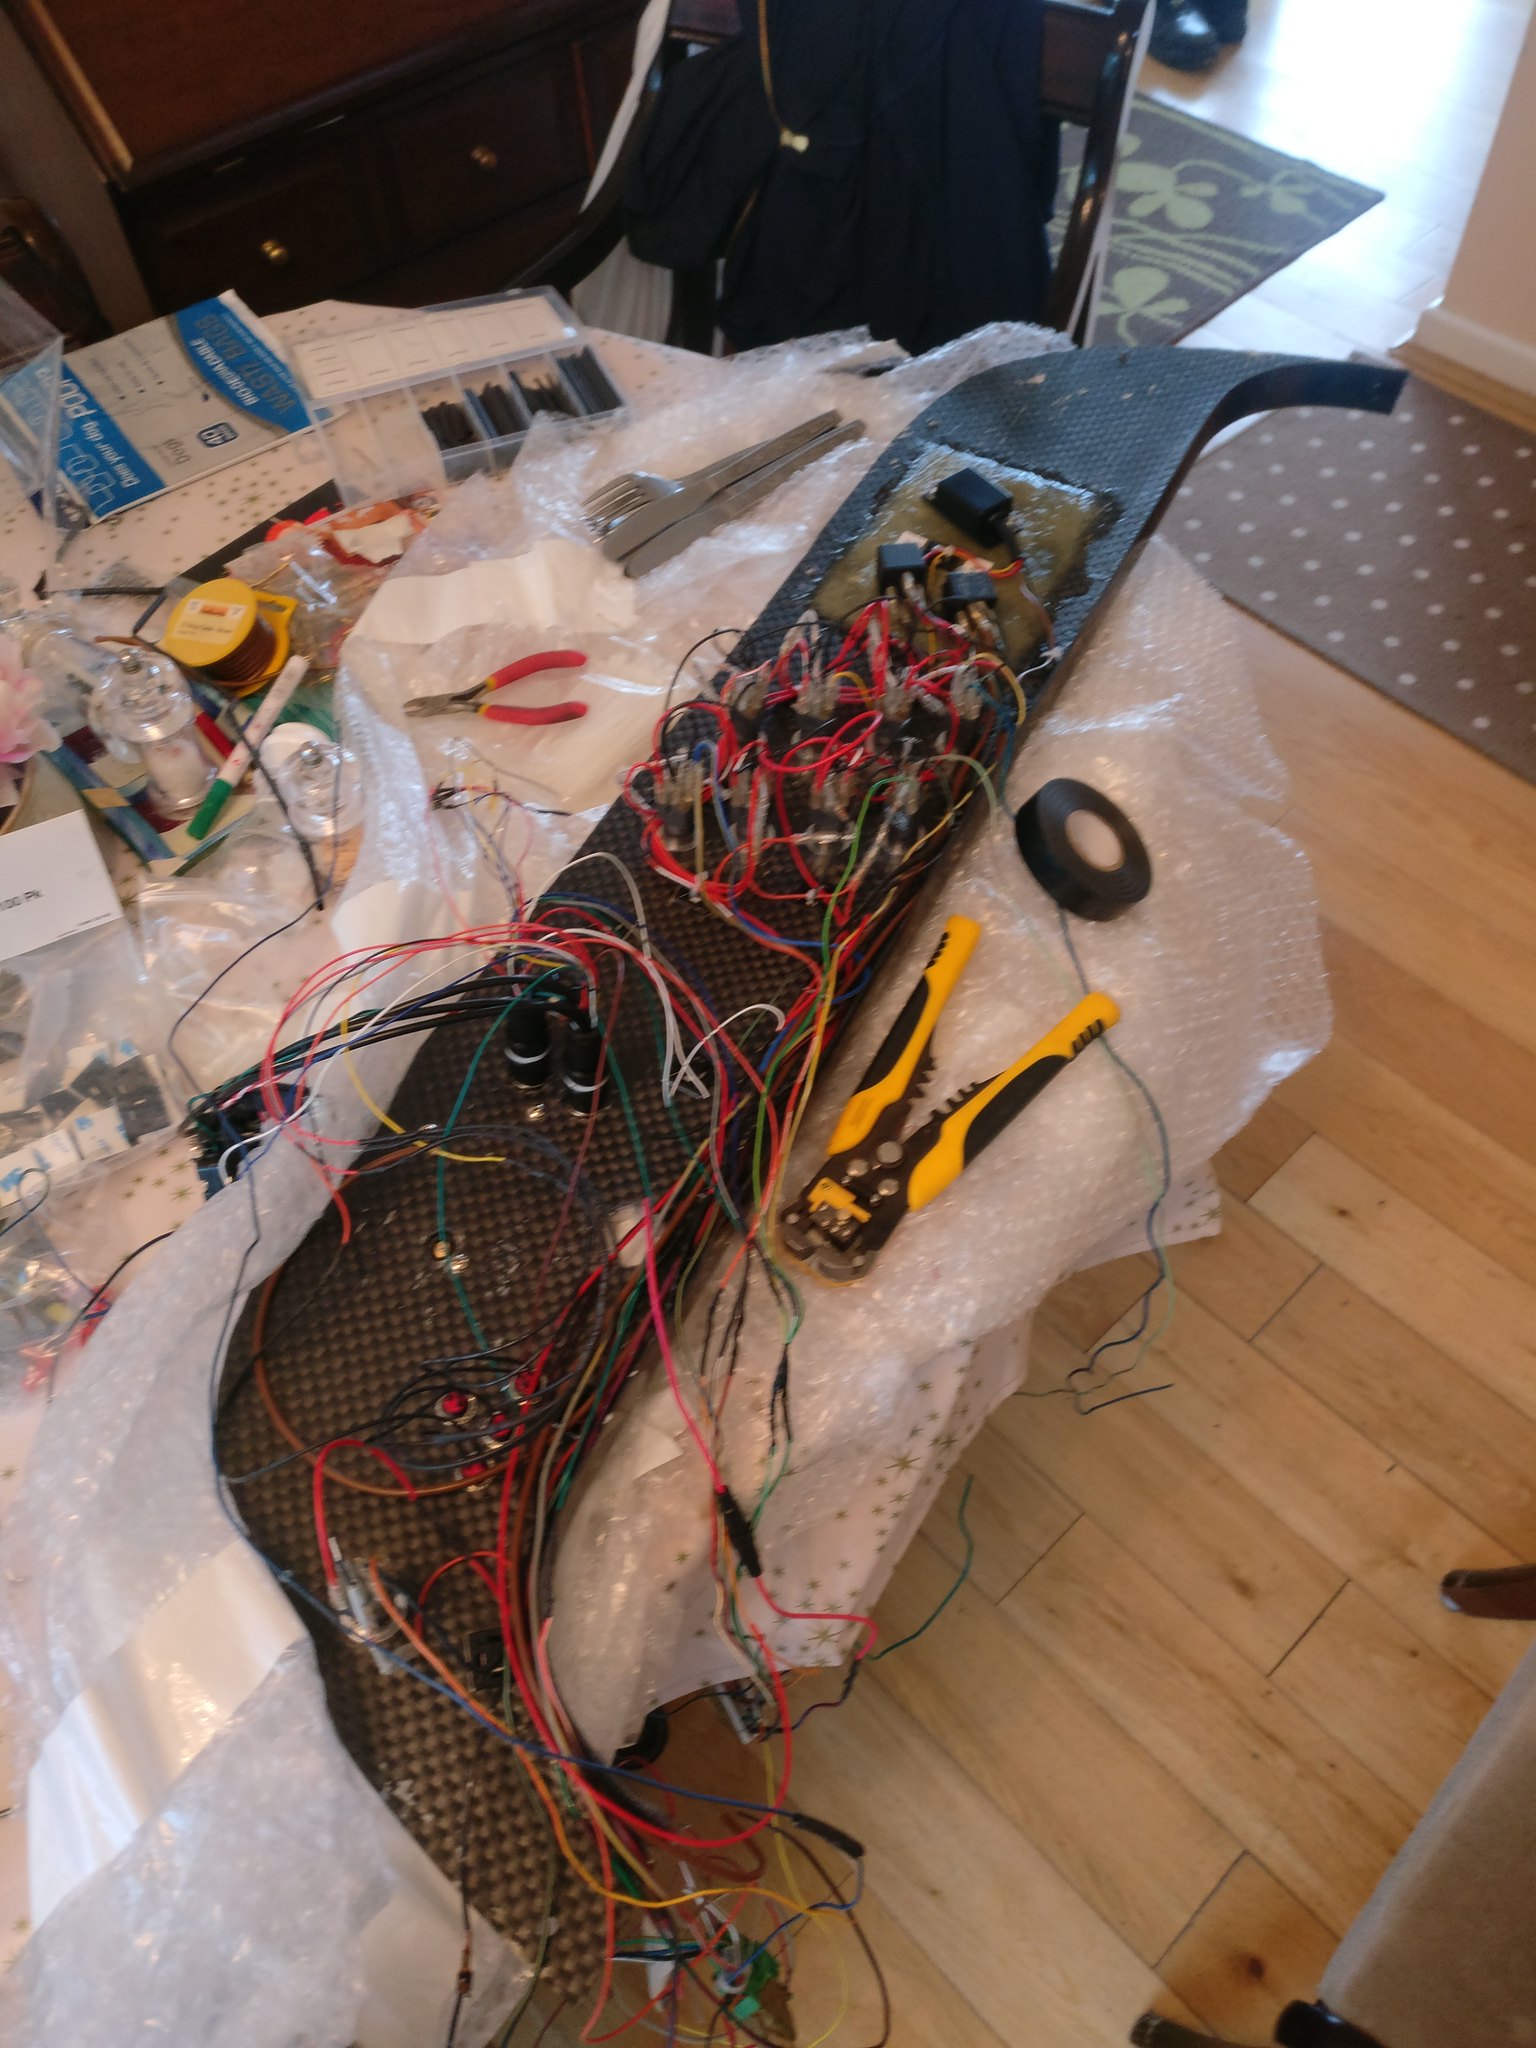 And tidied, matched to the car loom and ready for testing (40 hours in) 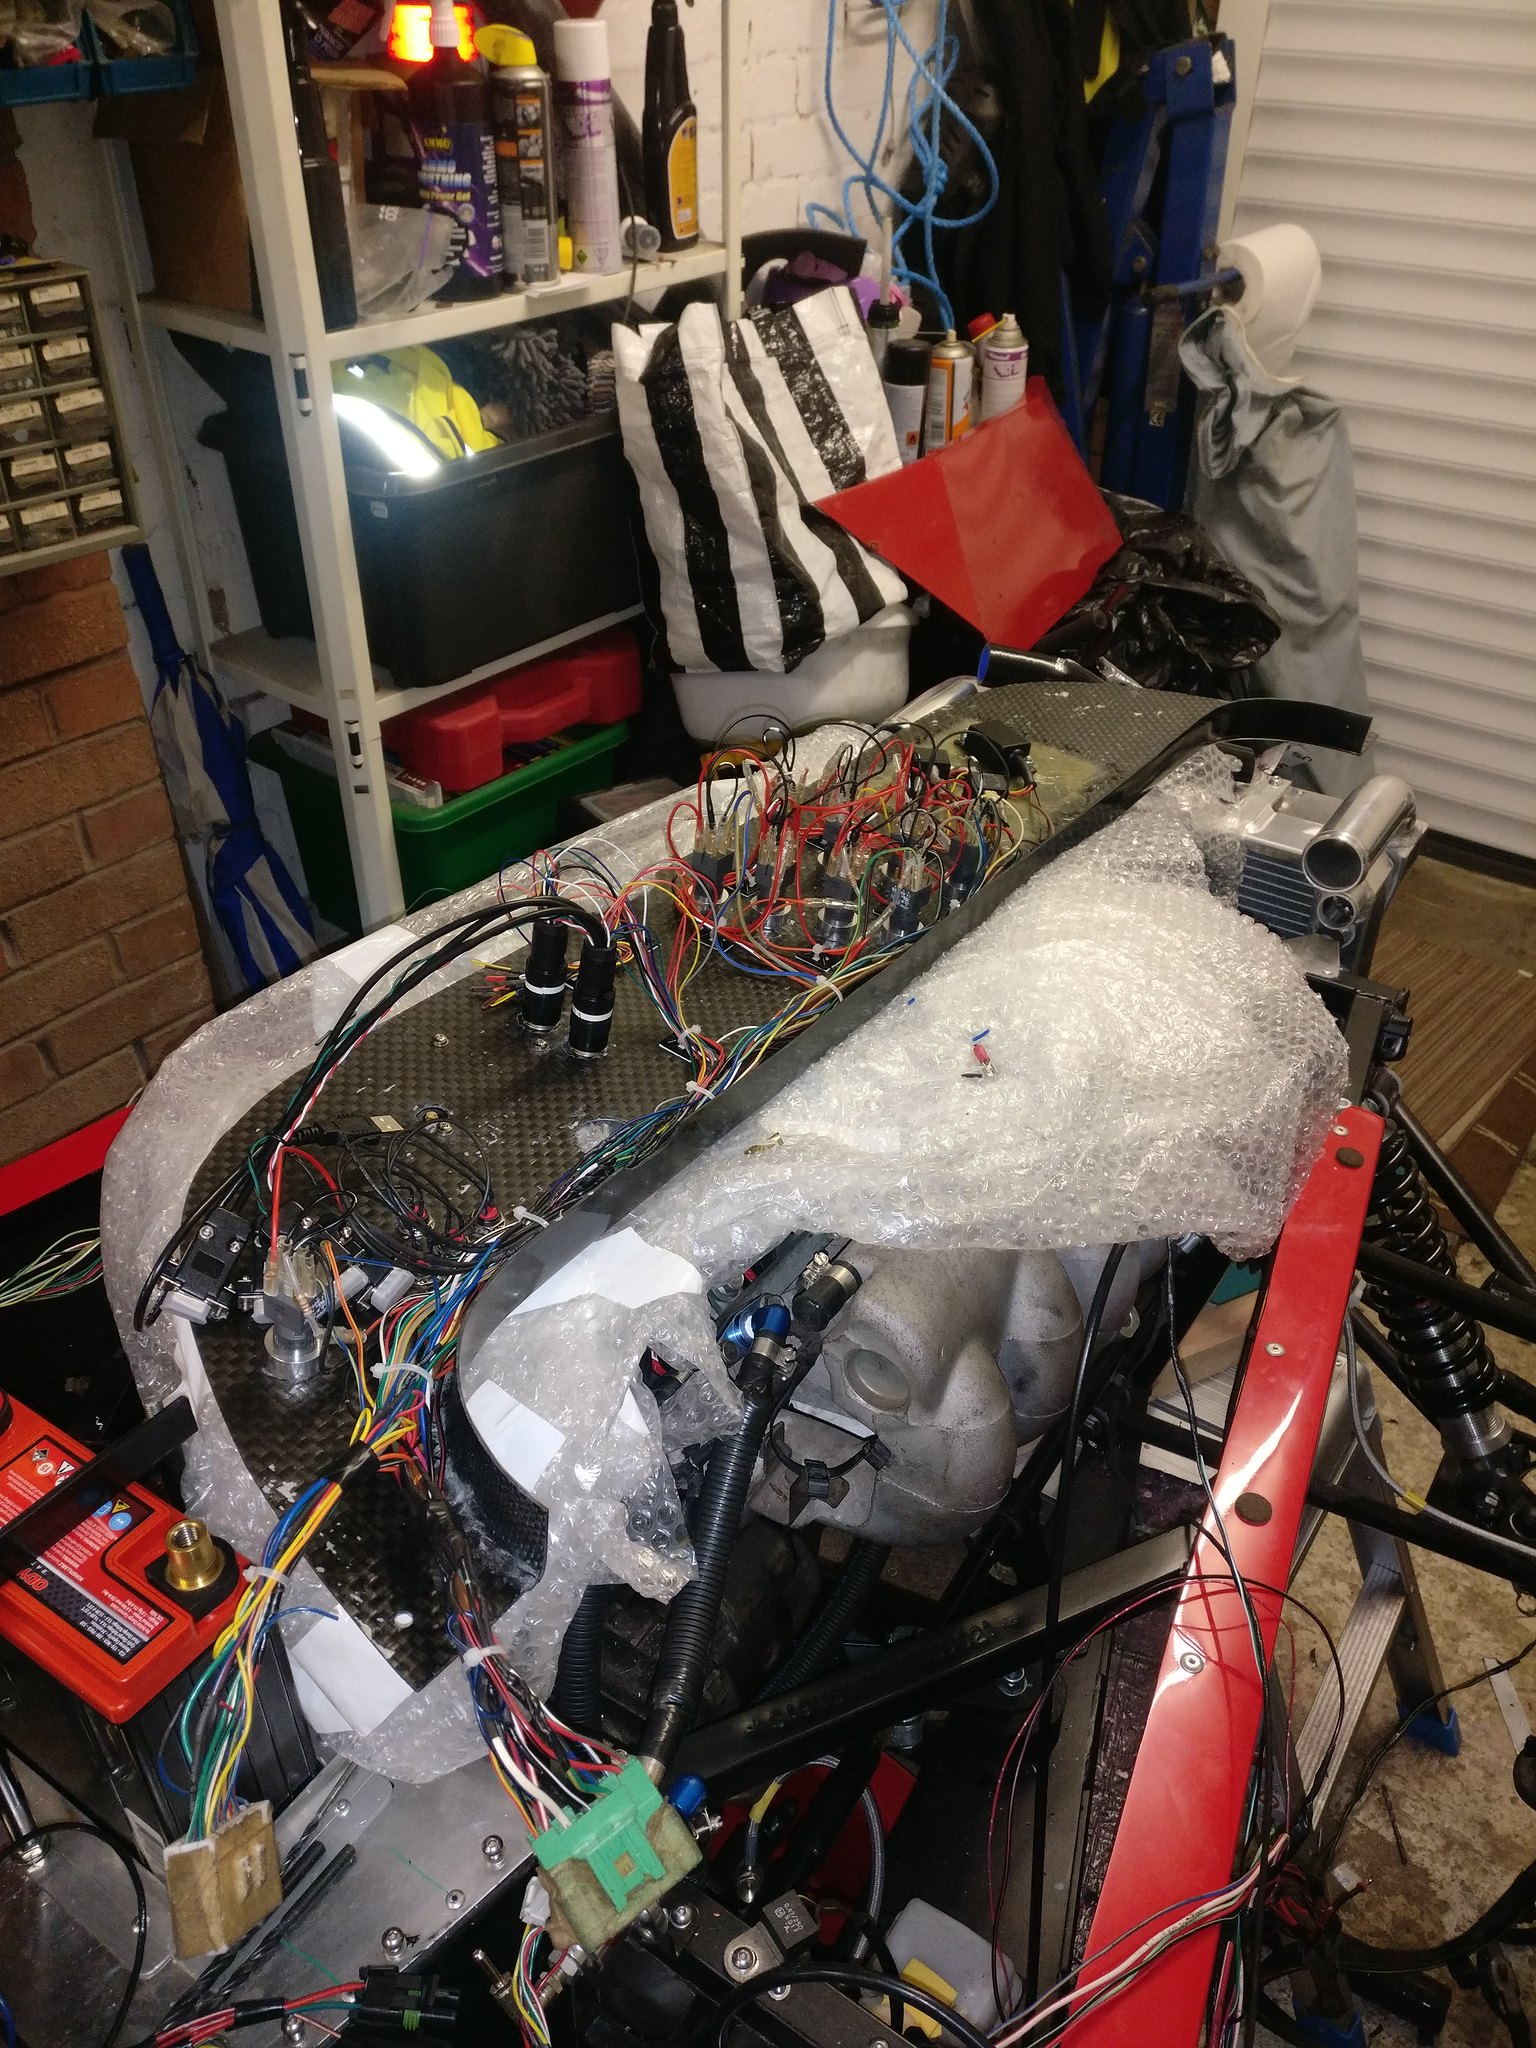 The above times are just for the dash loom... In other news I've got some seats and they are looking awesome. Should be fitted soon enough. 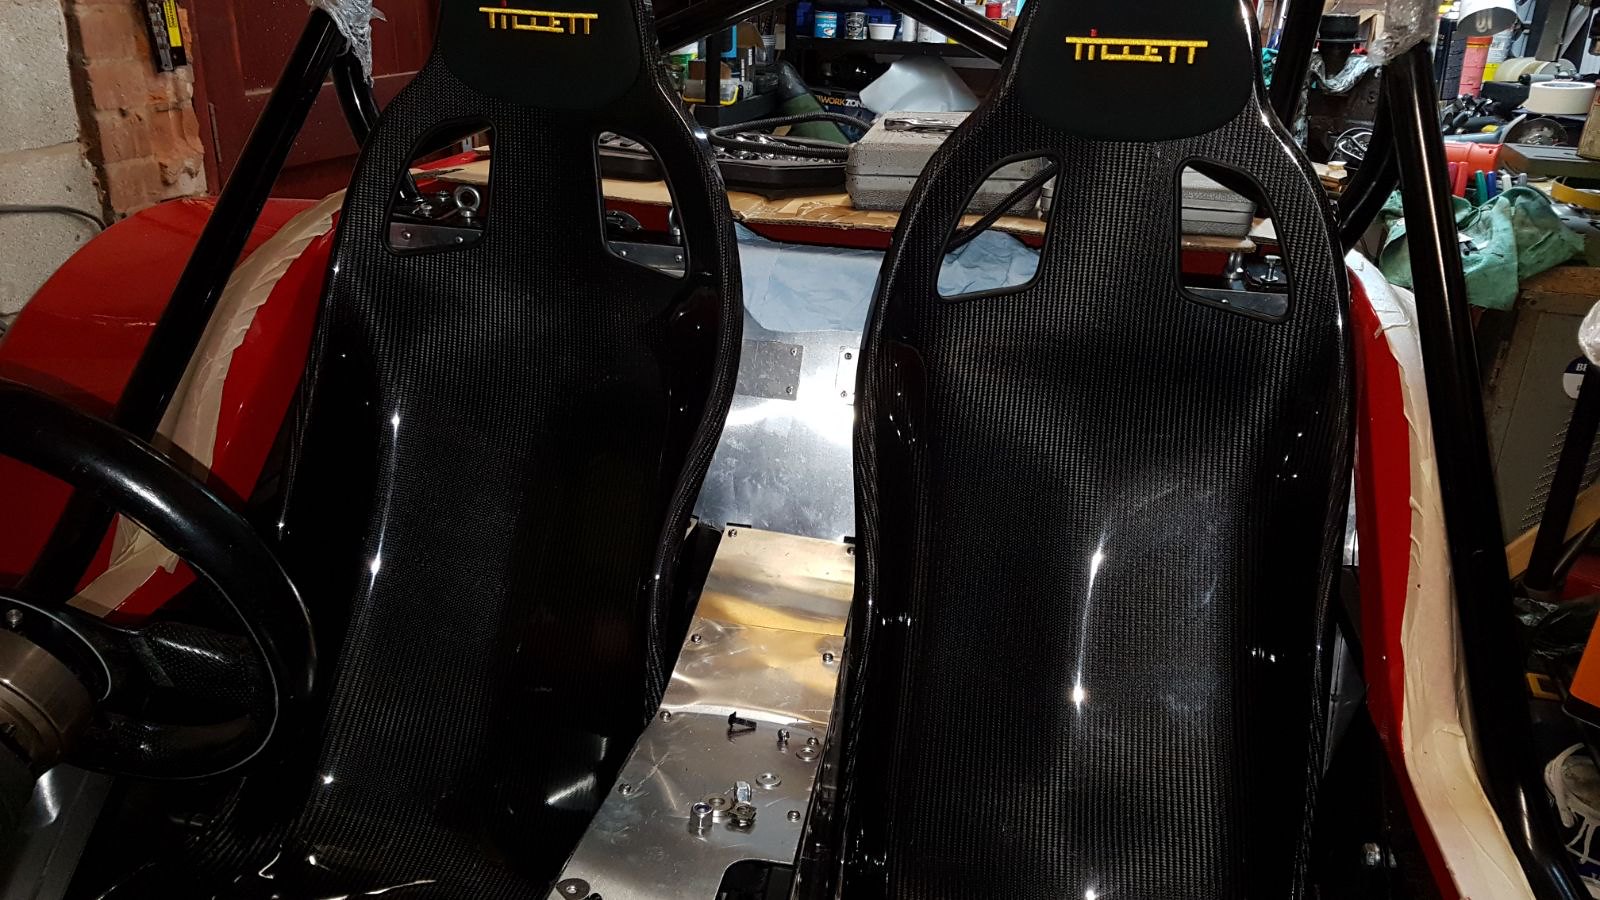 |
|
|
|
Post by browno on Jan 4, 2018 14:10:35 GMT
Since I am on the same stage on my Exocet (but as I am retaining the Mazda dash binnacle I am just stripping and tidying with much less modification!), I can really sympathise with your pain - it is amazing how painful and uncomfortable hunching over the car for ages gets!
Your dash looks lovely though, and I think it is these sorts of touches that do take the time that will result in an end product that looks just right - I can see the time that you will have taken to get all of that switchgear aligned just right, let alone wired up and working!
I am loving your seats! I am thinking about what to go for in mine at the moment - unfortunately, my budget won't quite go to anything quite as lovely as those!
|
|
|
|
Post by teamawesome on Jan 4, 2018 21:09:47 GMT
Thanks! The wiring has now been tested slightly as I had a small amount of time over Christmas. So far I know the following:
Sidelights - circuit works, headlights are not fitted so untested.
Switch Lights - weren't working, I'd wired them all backwards! Simple fix and now all working except one which is faulty. I now have a replacement.
Dash - wasn't working, but only because I forgot to bolt the earth block. Works just fine now. All sensors are finally worked in.
Headlights circuit - relays for both dipped and main work, however the current setup allows for both to be on at the same time and this can overload the bulb. I will add another relay into the dipped circuit which is normally closed. This will be activated by the main beam switch so that I breaks the dipped circuit when I switch the main beam on.
Hazards - they work but I tried to have the switch light flash between dimmed and full brightness as a sort of indicator that it's on (IVA doesn't need this as the dash has the telltales, but I thought I was fancier). My wiring for this didn't work, but I have a fix lined up.
Indicators - as above, except the wiring does work, so I'll hook into one of these wires for the hazards seeing as they're on anyway. My wiring diagram also didn't say whether the wires were for RH or LH so it was a 50/50 chance and I got it wrong. Easy fix and they work as expected now.
Next week I'll fully test the system, with the exception of the engine as if I get the sump back it'll still need the sealant to cure. I want to work on the cooling system too.
|
|
|
|
Post by teamawesome on Jan 13, 2018 21:14:51 GMT
Few more pics of how the sump is coming along. I'm glad that this one is actually happening! 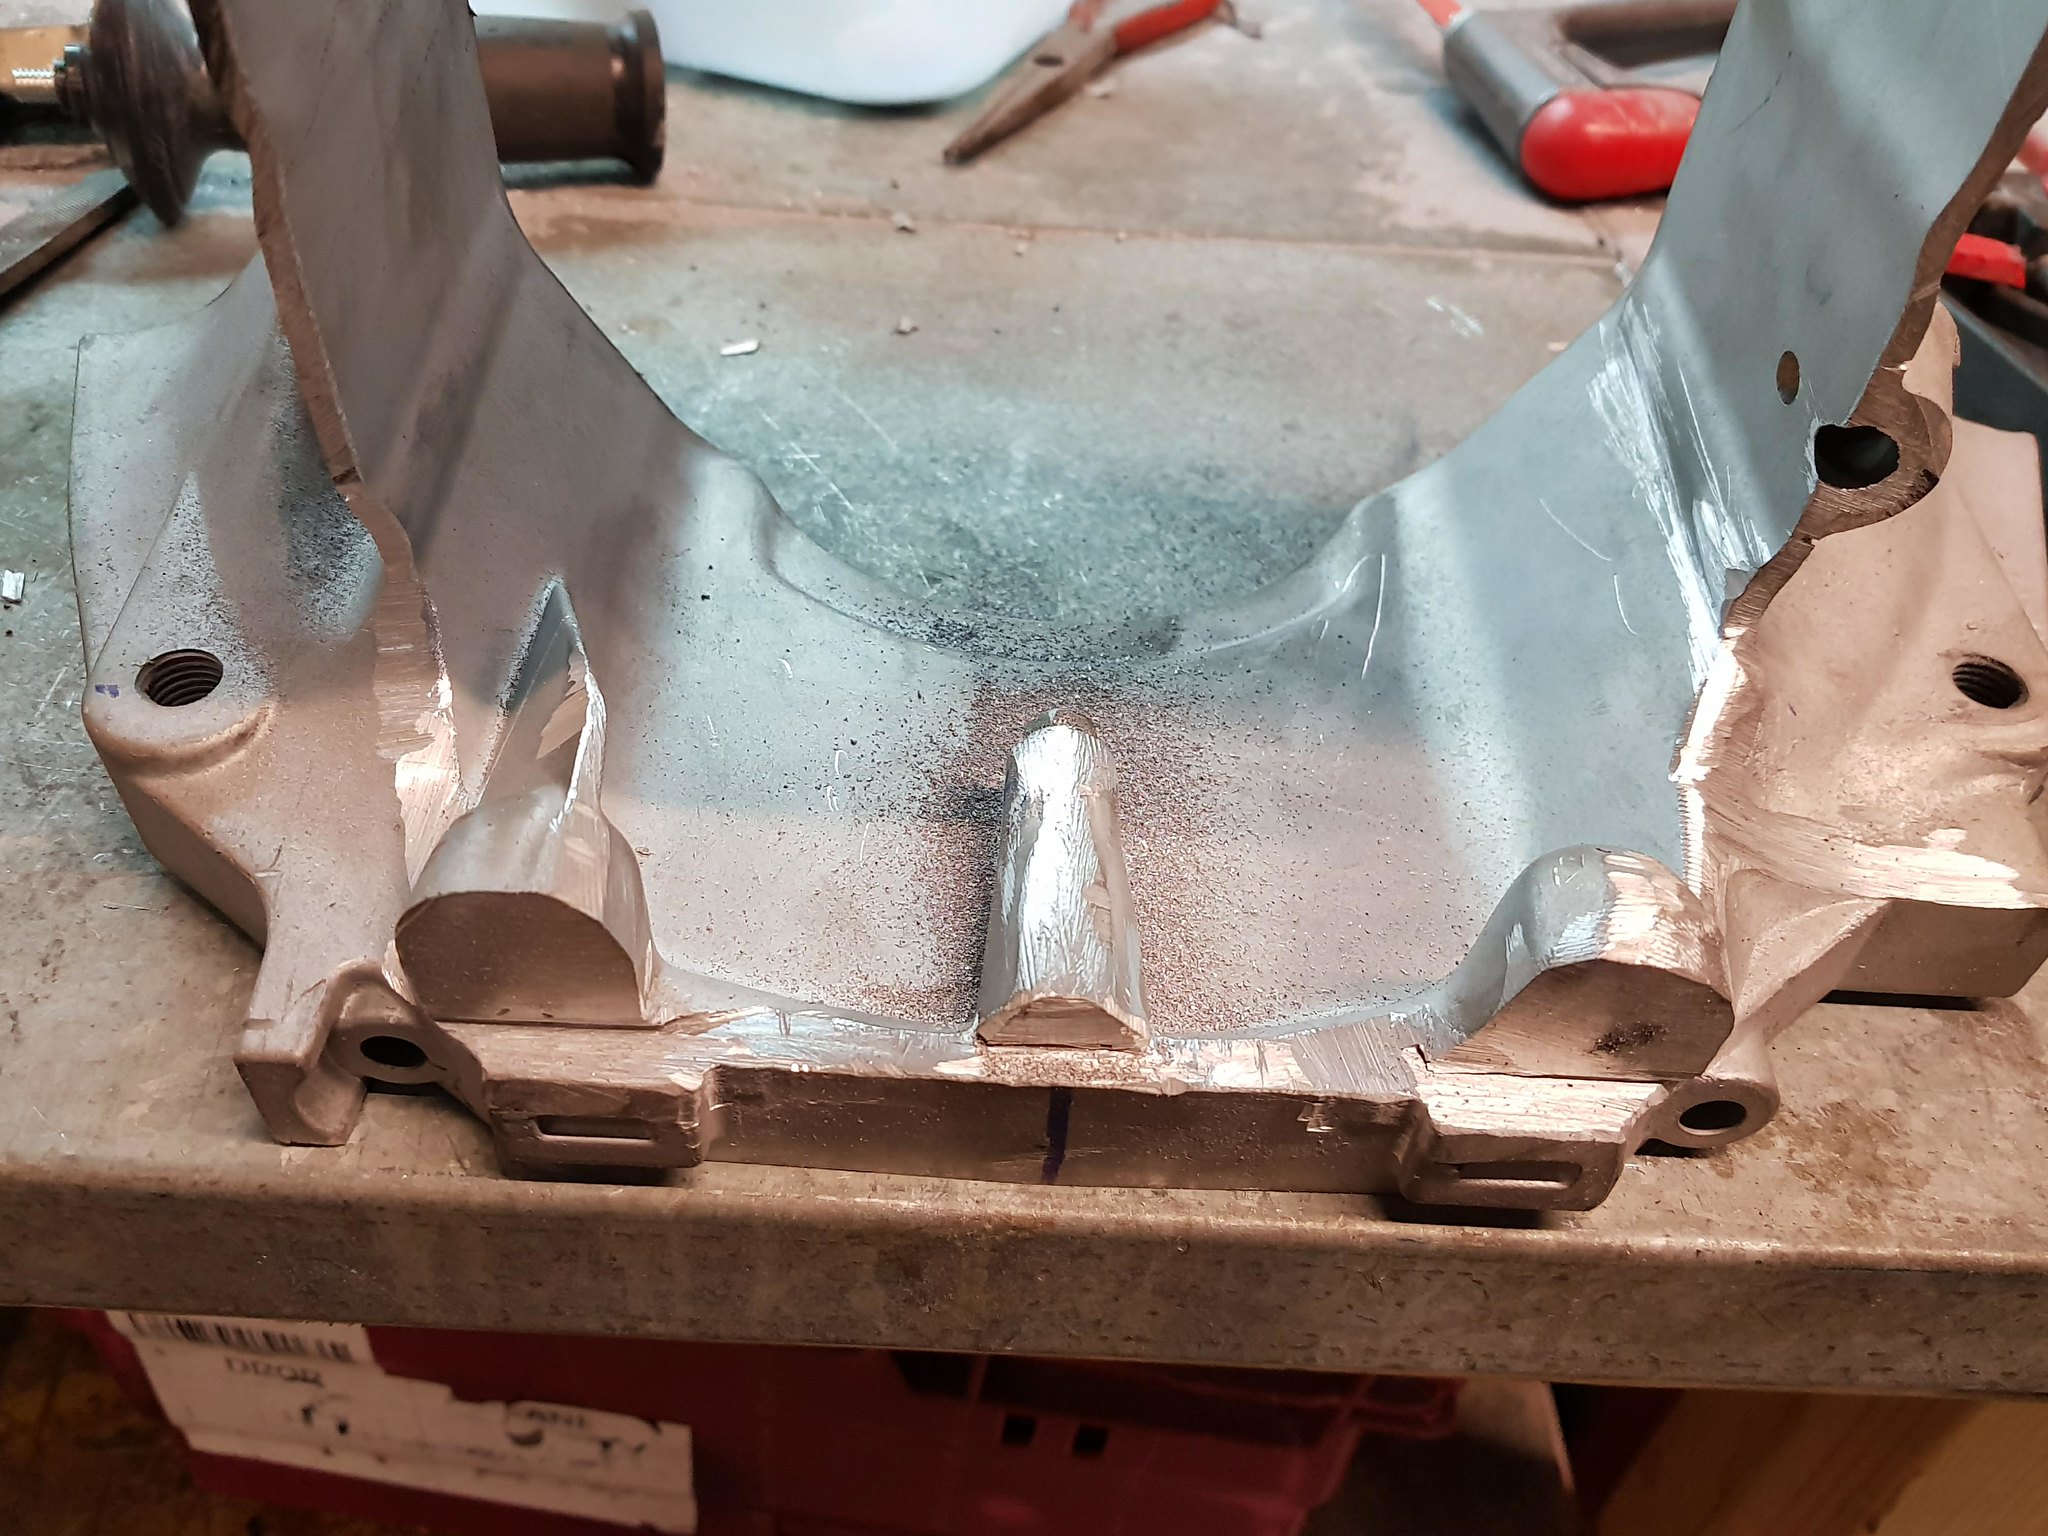 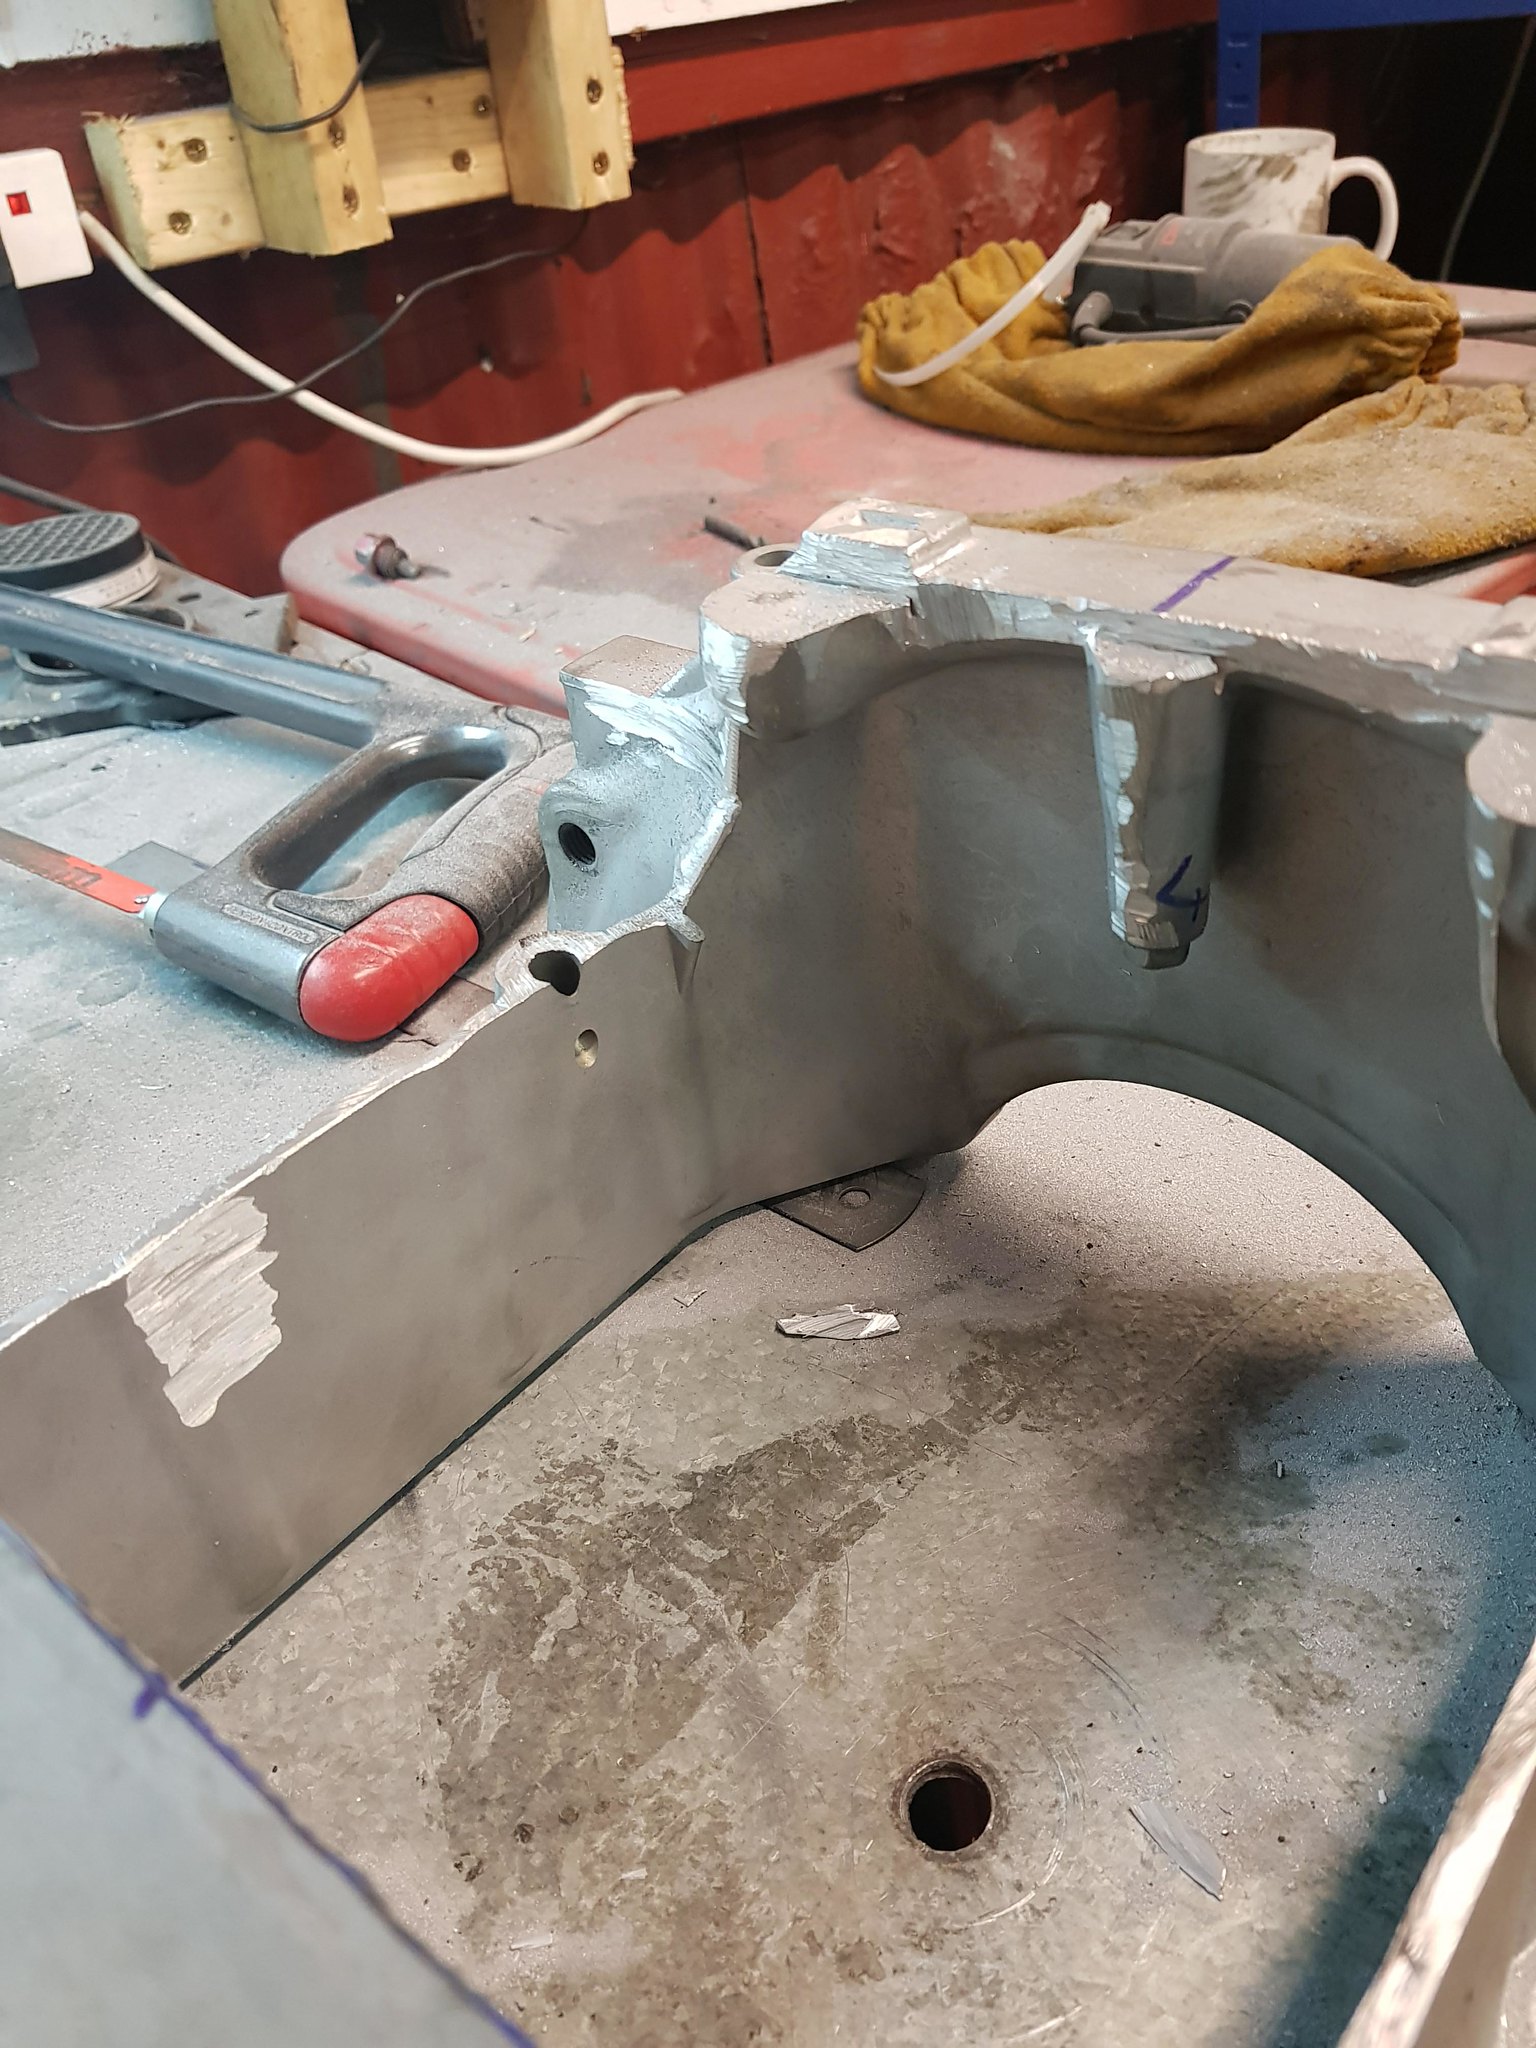 Kept the drain plug as it has a steel insert 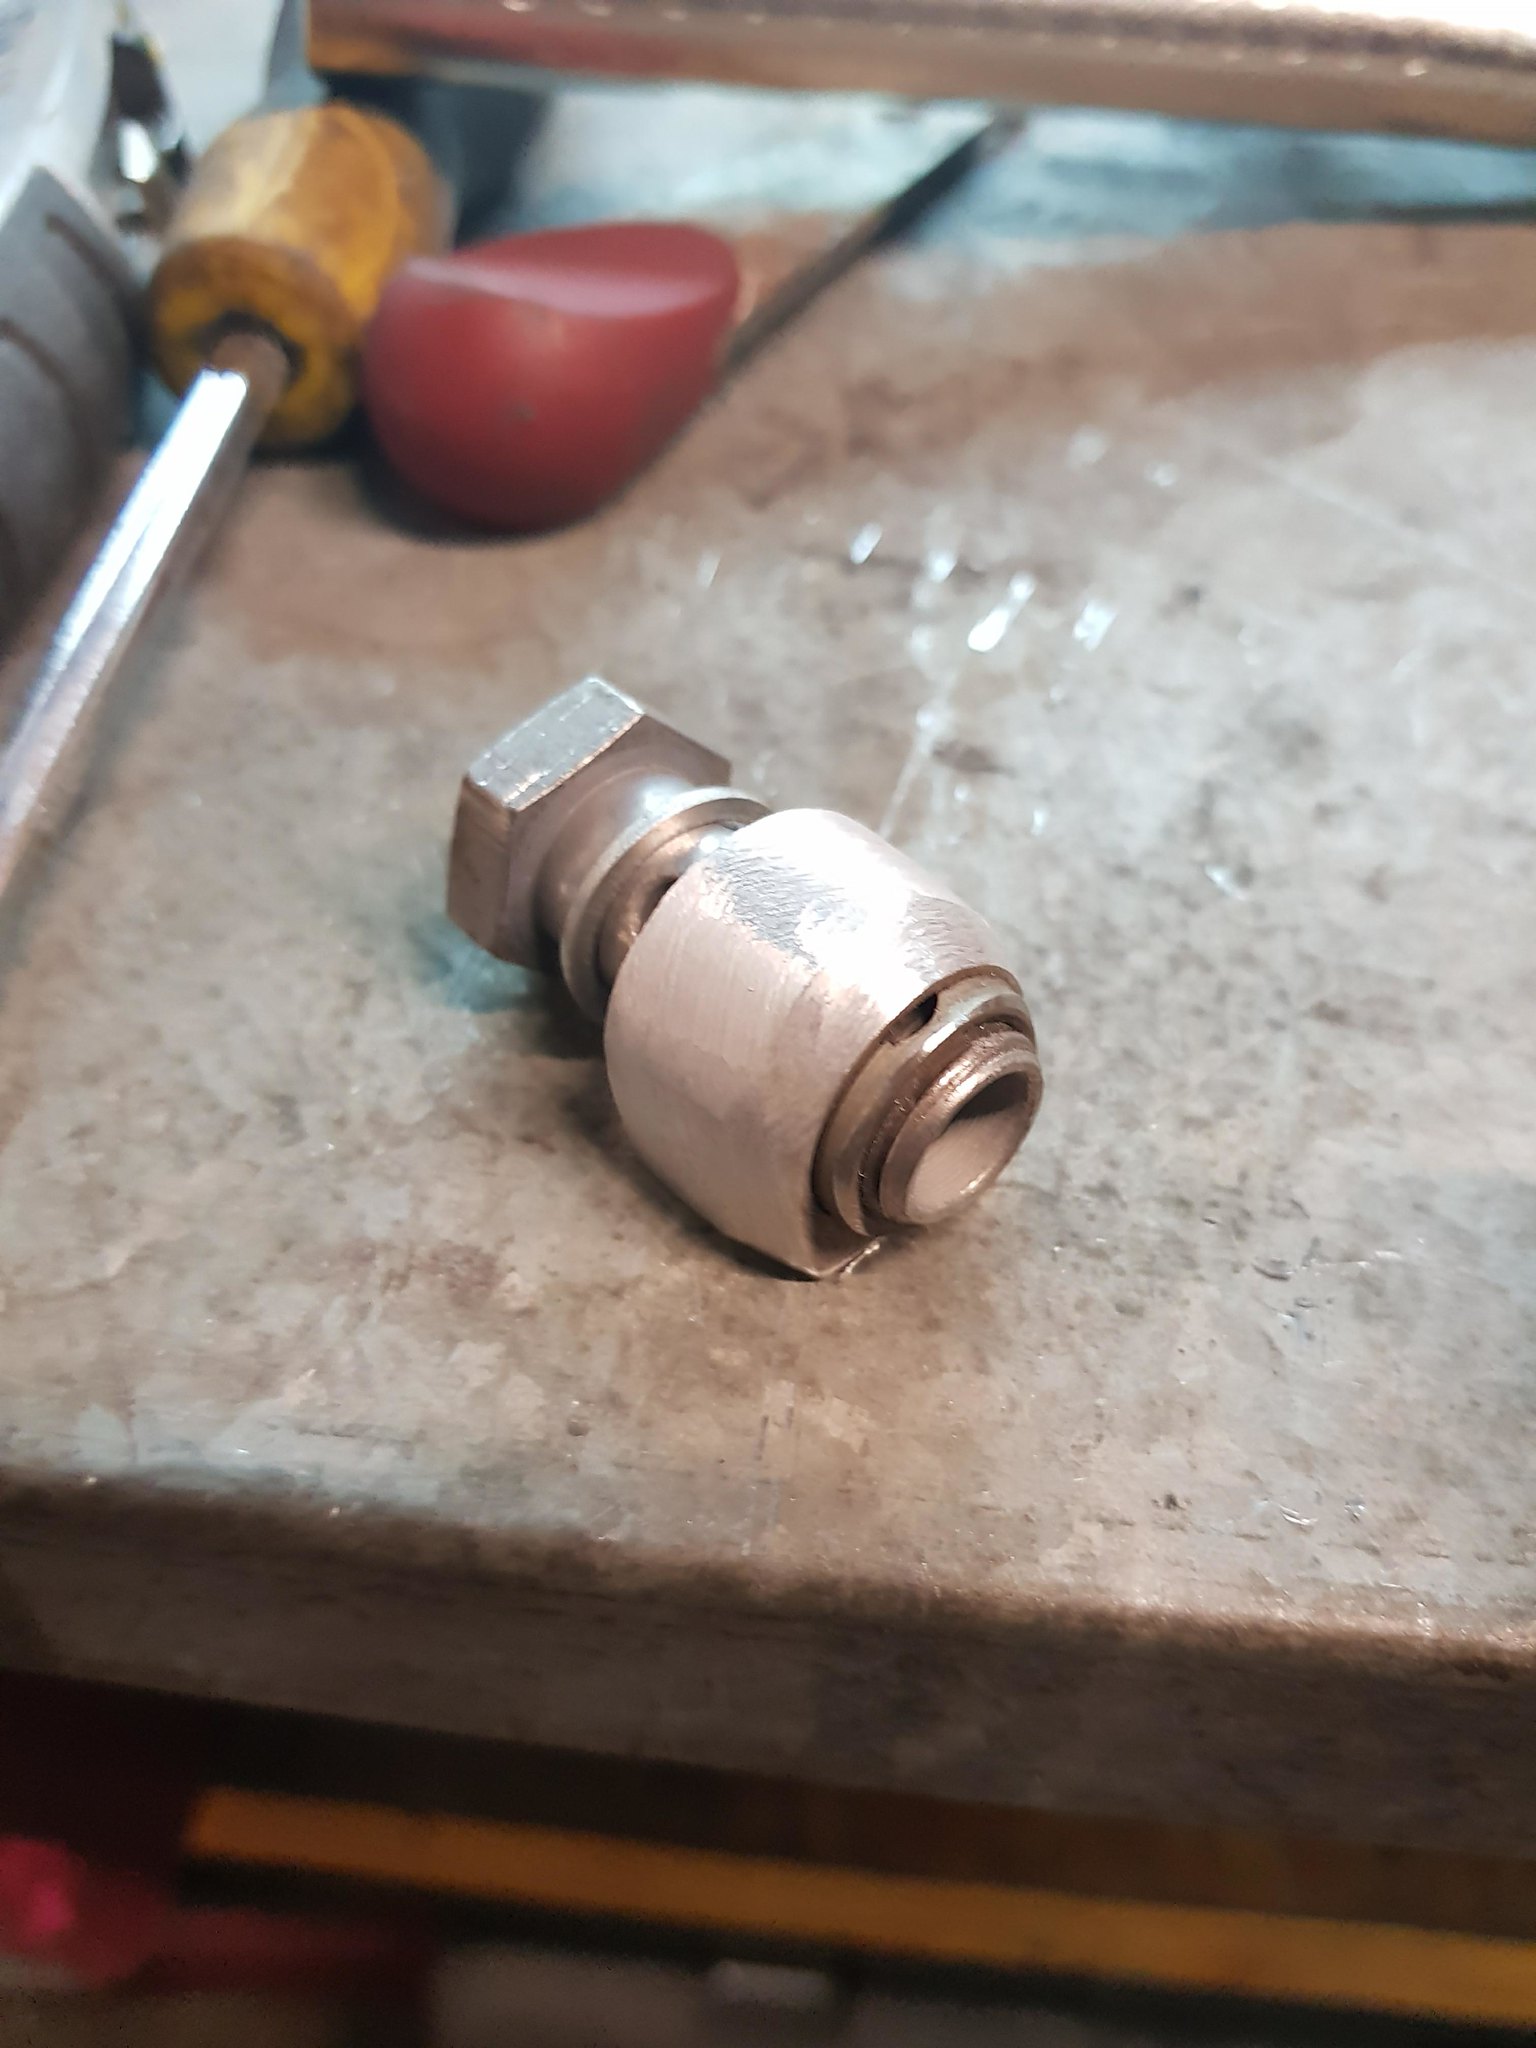 Getting there.... 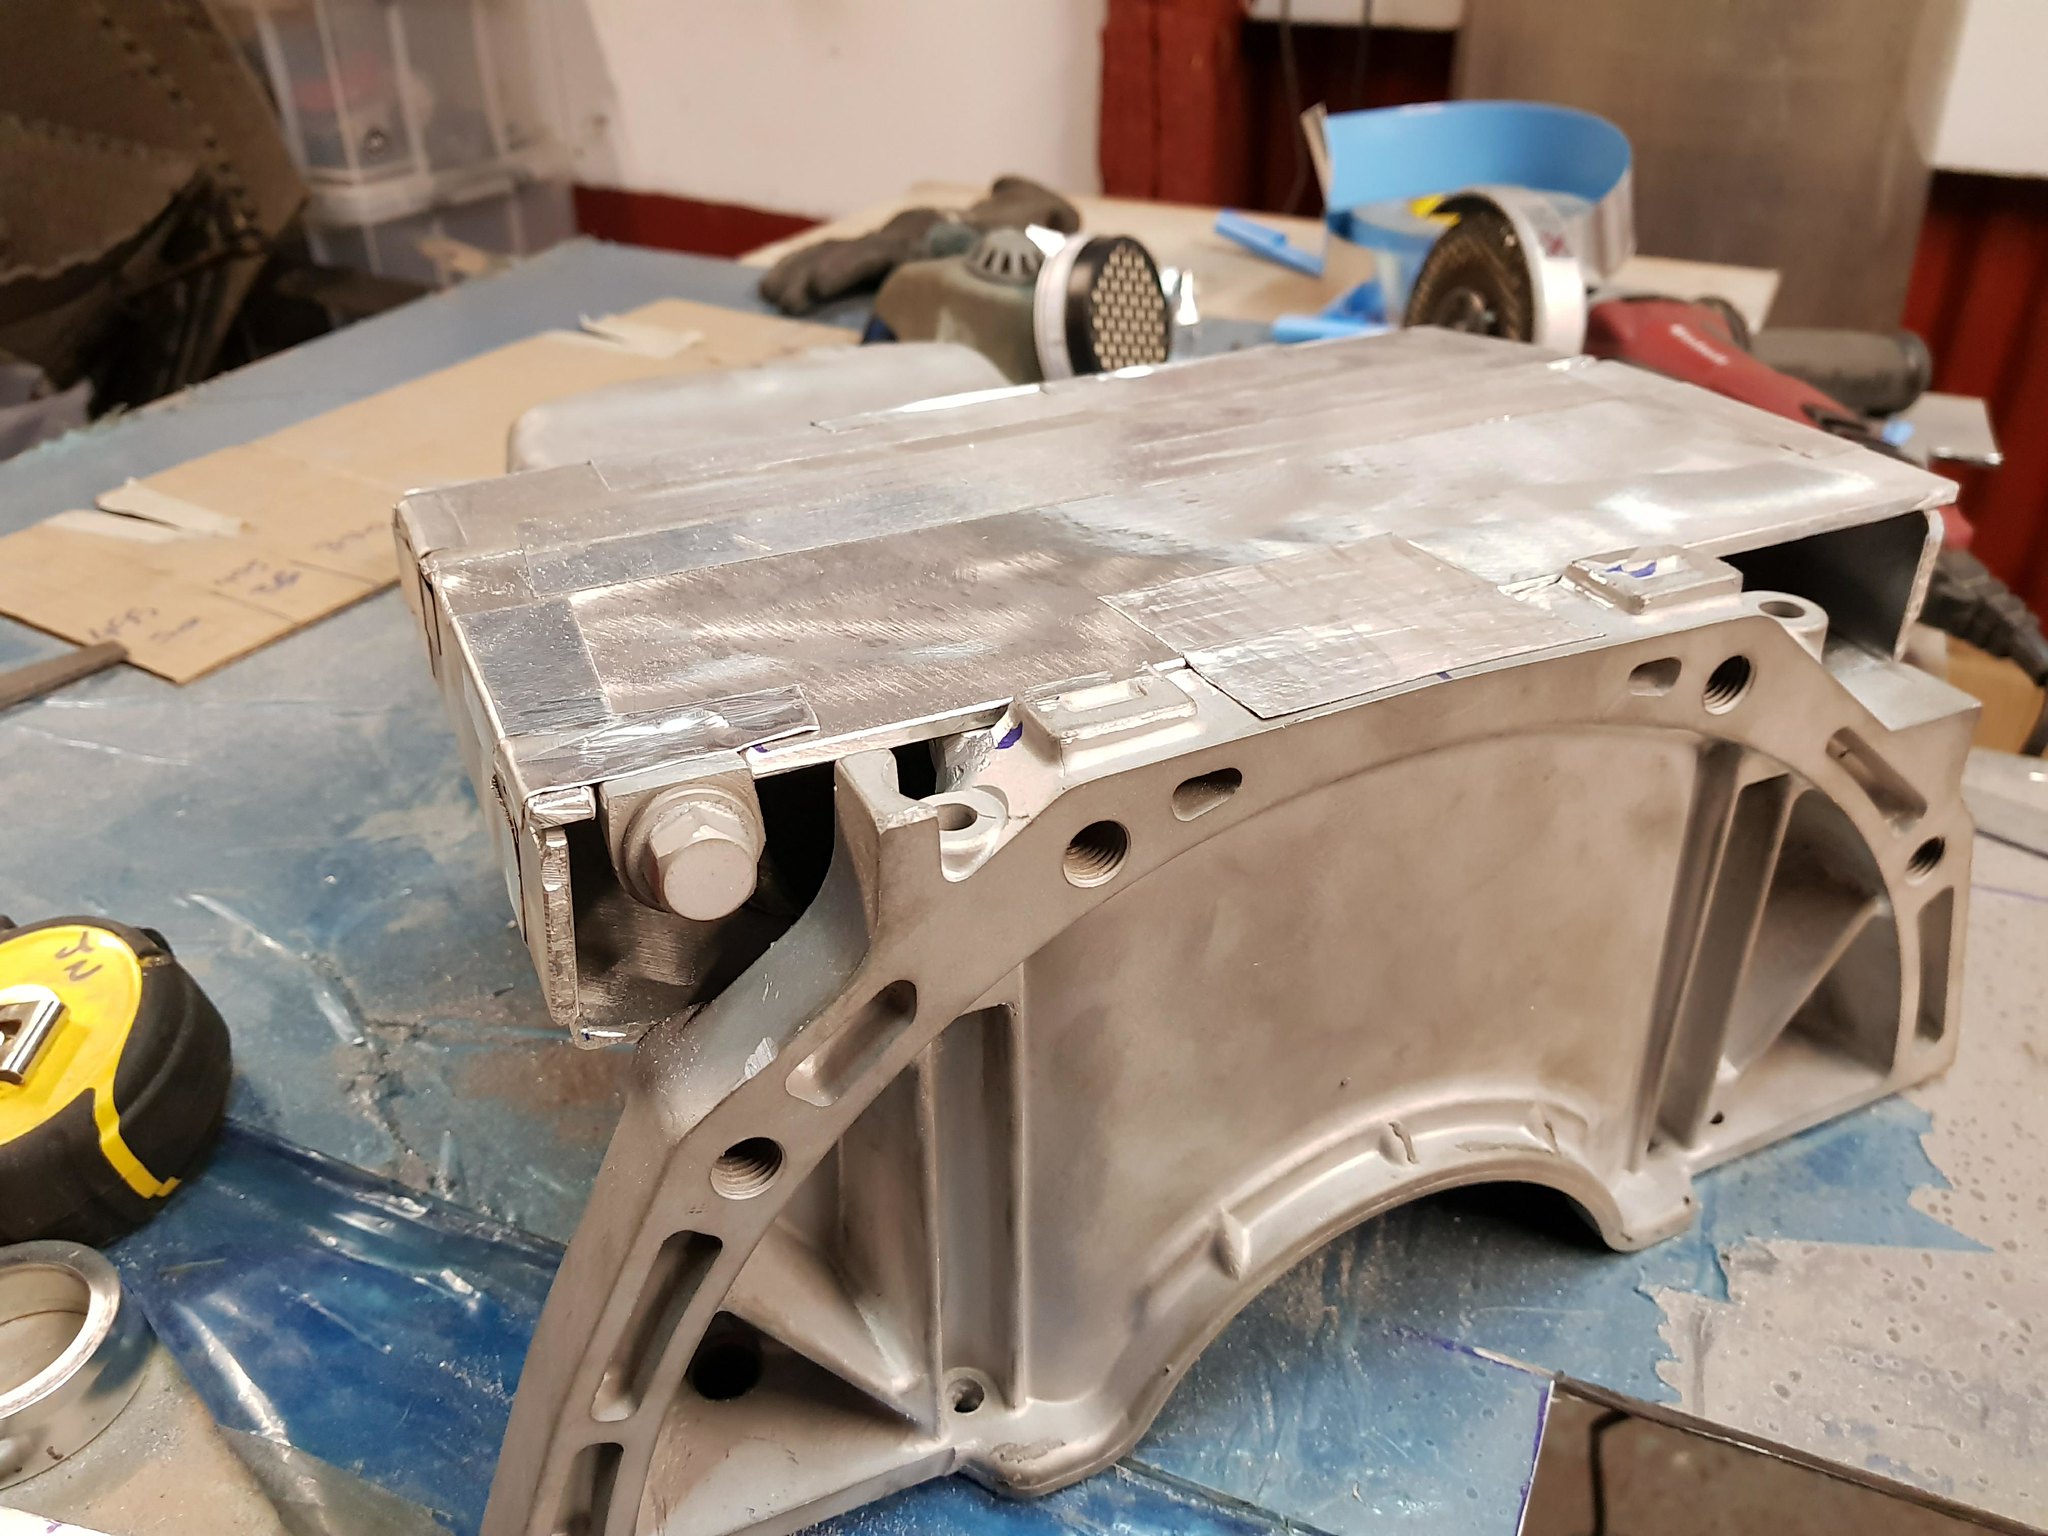 Welding almost finished. 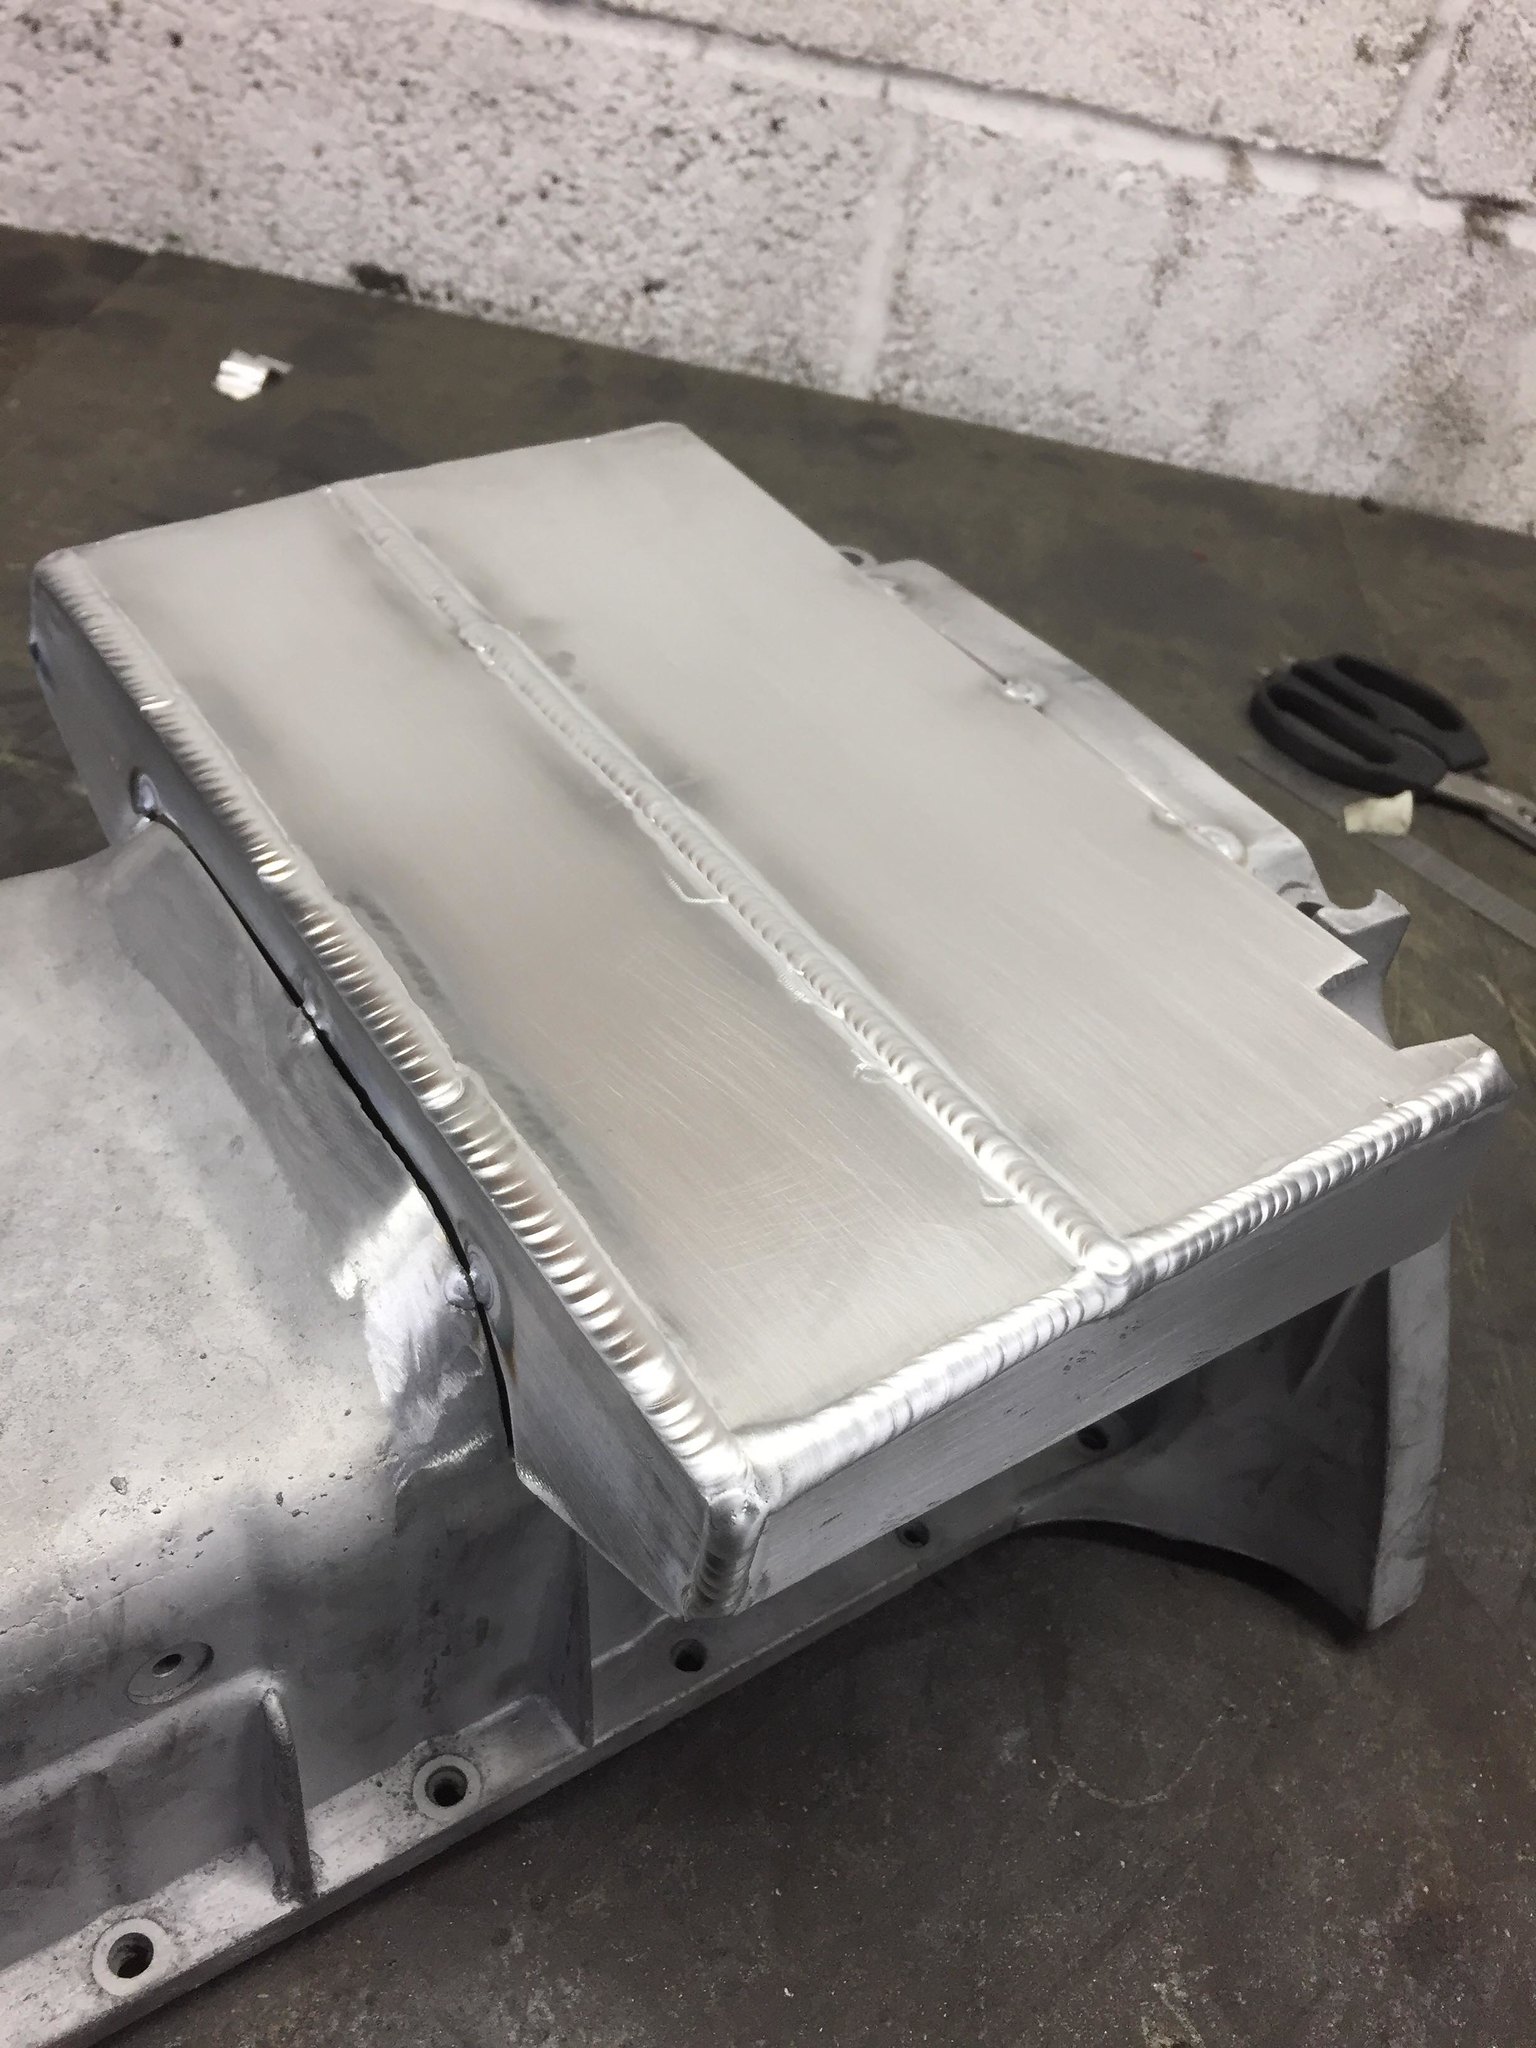 |
|
Rasc
Chats A Bit
  Nutz troll apparently
Posts: 130 
|
Post by Rasc on Jan 14, 2018 20:07:39 GMT
Nice work on the sump, very accomplished fab skills and welding.
|
|
|
|
Post by teamawesome on Jan 14, 2018 21:12:20 GMT
I can't take any credit for that, I had a professional sort it!
|
|
|
|
Post by teamawesome on Jan 14, 2018 21:30:29 GMT
What a weekend! So happy with the outcome and it finally makes the wiring effort worth it. I think I've spent around 100 hours doing this now and my back has ached after ever weekend, with standing over the car with my back slightly bent for soldering. Not nice.
We did the first major tests today and we have had a lot of success. I had to make few modifications to my wiring this weekend, firstly the hazard light switch wasn't flashing when activated. This isn't a huge issue but it's annoying when it was the intention. In the end I hooked into the left indicator to the dash and it now works.
Secondly I wanted to change the wiring for the dipped beam as the previous wiring allowed for the dipped and main beam to be on at the same time. This isn't necessarily bad, but can lead to blown bulbs or possibly overloading the shared ground. I solved the issue by putting a normally closed relay in the dipped beam circuit which is activated by the main beam switch. When I press the main beam switch the dipped beam circuit is broken and so only one the dipped is active. As soon as I turn the main beam off the dipped is reactivated. Works perfectly!
So here we have a list of tested items:
Sidelights - working
Dipped beam - working
Main beam - working
Indicators - working
Hazards - working, although it kept blowing the fuse to begin with. Turns out I got the switch inputs wrong and was directing the lights to earth which drew a lot of current. Must pay more attention to what I'm doing.
Brake lights - working
Fog light - working
Reverse light - working
Horn - working
Radiator fan - working
Dash display - working
Handbrake and master cylinder warning - working
I just need the sump and I can start the car. Fingers crossed that will work too!
We also got started on the cooling system. I have bought a laminova oil cooler which will be fitted over the next few weeks and I bought a new expansion tank for the car. I'm not a fan of the standard location on the scuttle as the line to the bottom hose is a pain, so I have one at the front of the engine bay. The bottom hose is now sorted too, so not much more to do!
|
|
|
|
Post by Horney on Jan 14, 2018 22:14:01 GMT
Best be bringing this to Llandow. Top work.
|
|
|
|
Post by teamawesome on Jan 14, 2018 22:35:41 GMT
I hope so!
|
|
|
|
Post by teamawesome on Jan 31, 2018 8:53:52 GMT
Finally I'm making some progress that actually looks like I've done something. I started this weekend by trying finish off my expansion tank setup. I'd gone away from the usual Westfield route of using a Corsa tank on the scuttle and decided to use a universal tank in the front. This has the benefit of being much closer to the bottom hose it has to connect to. It's worked really well, turns out the standard MX5 heater hose is a near perfect fit for this job. 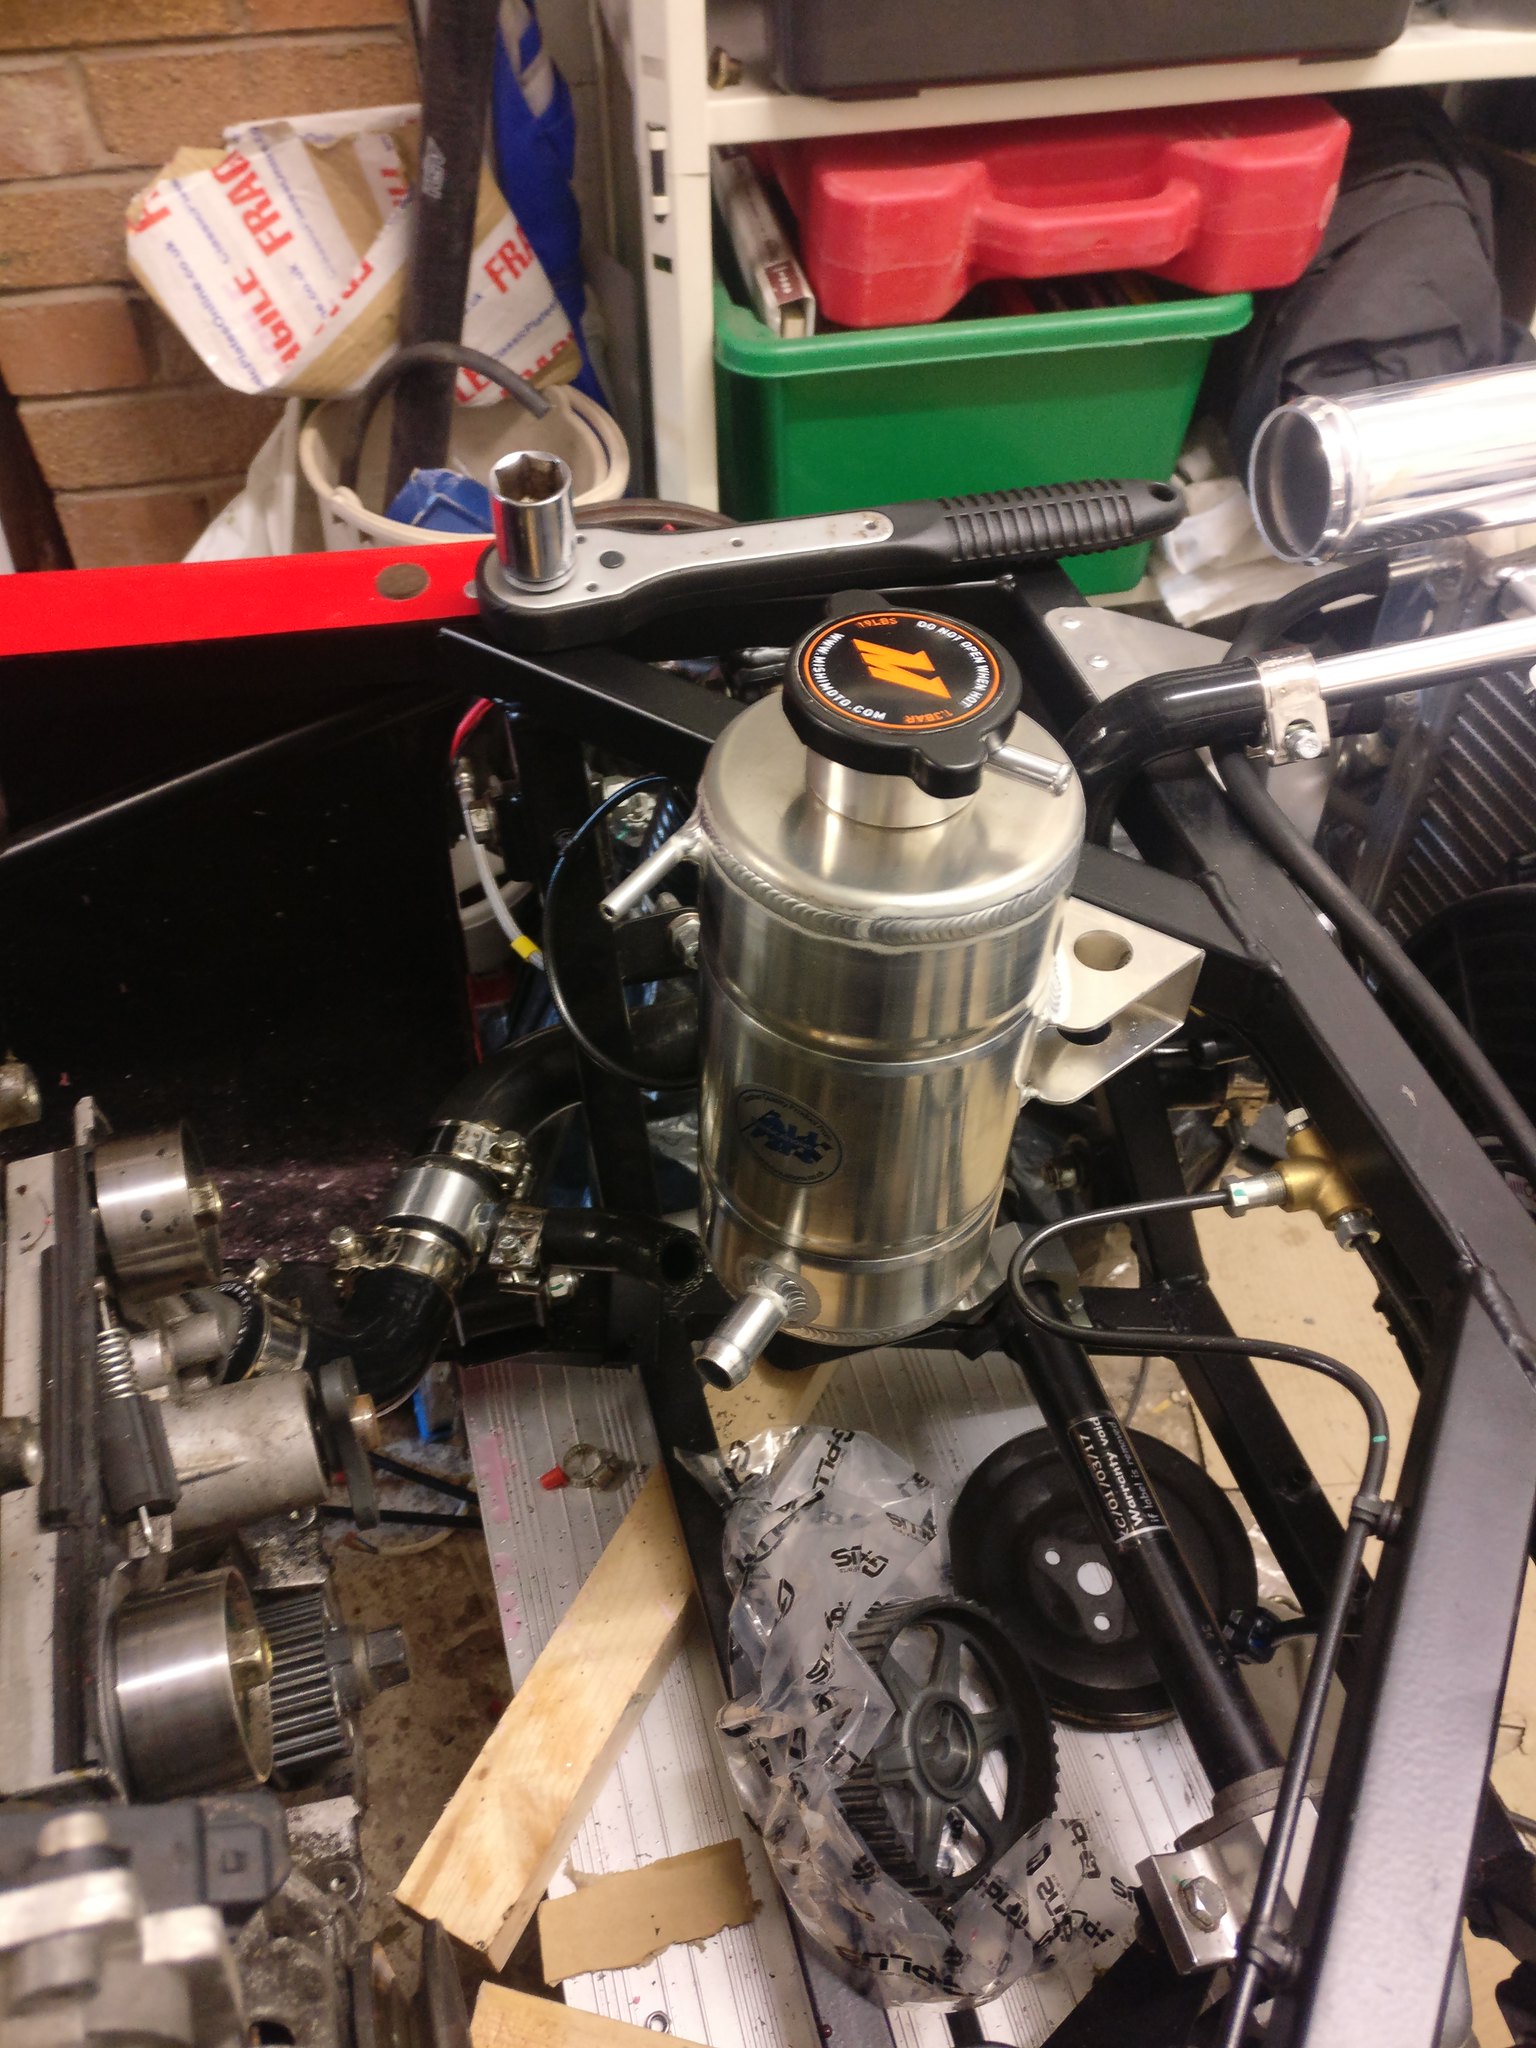 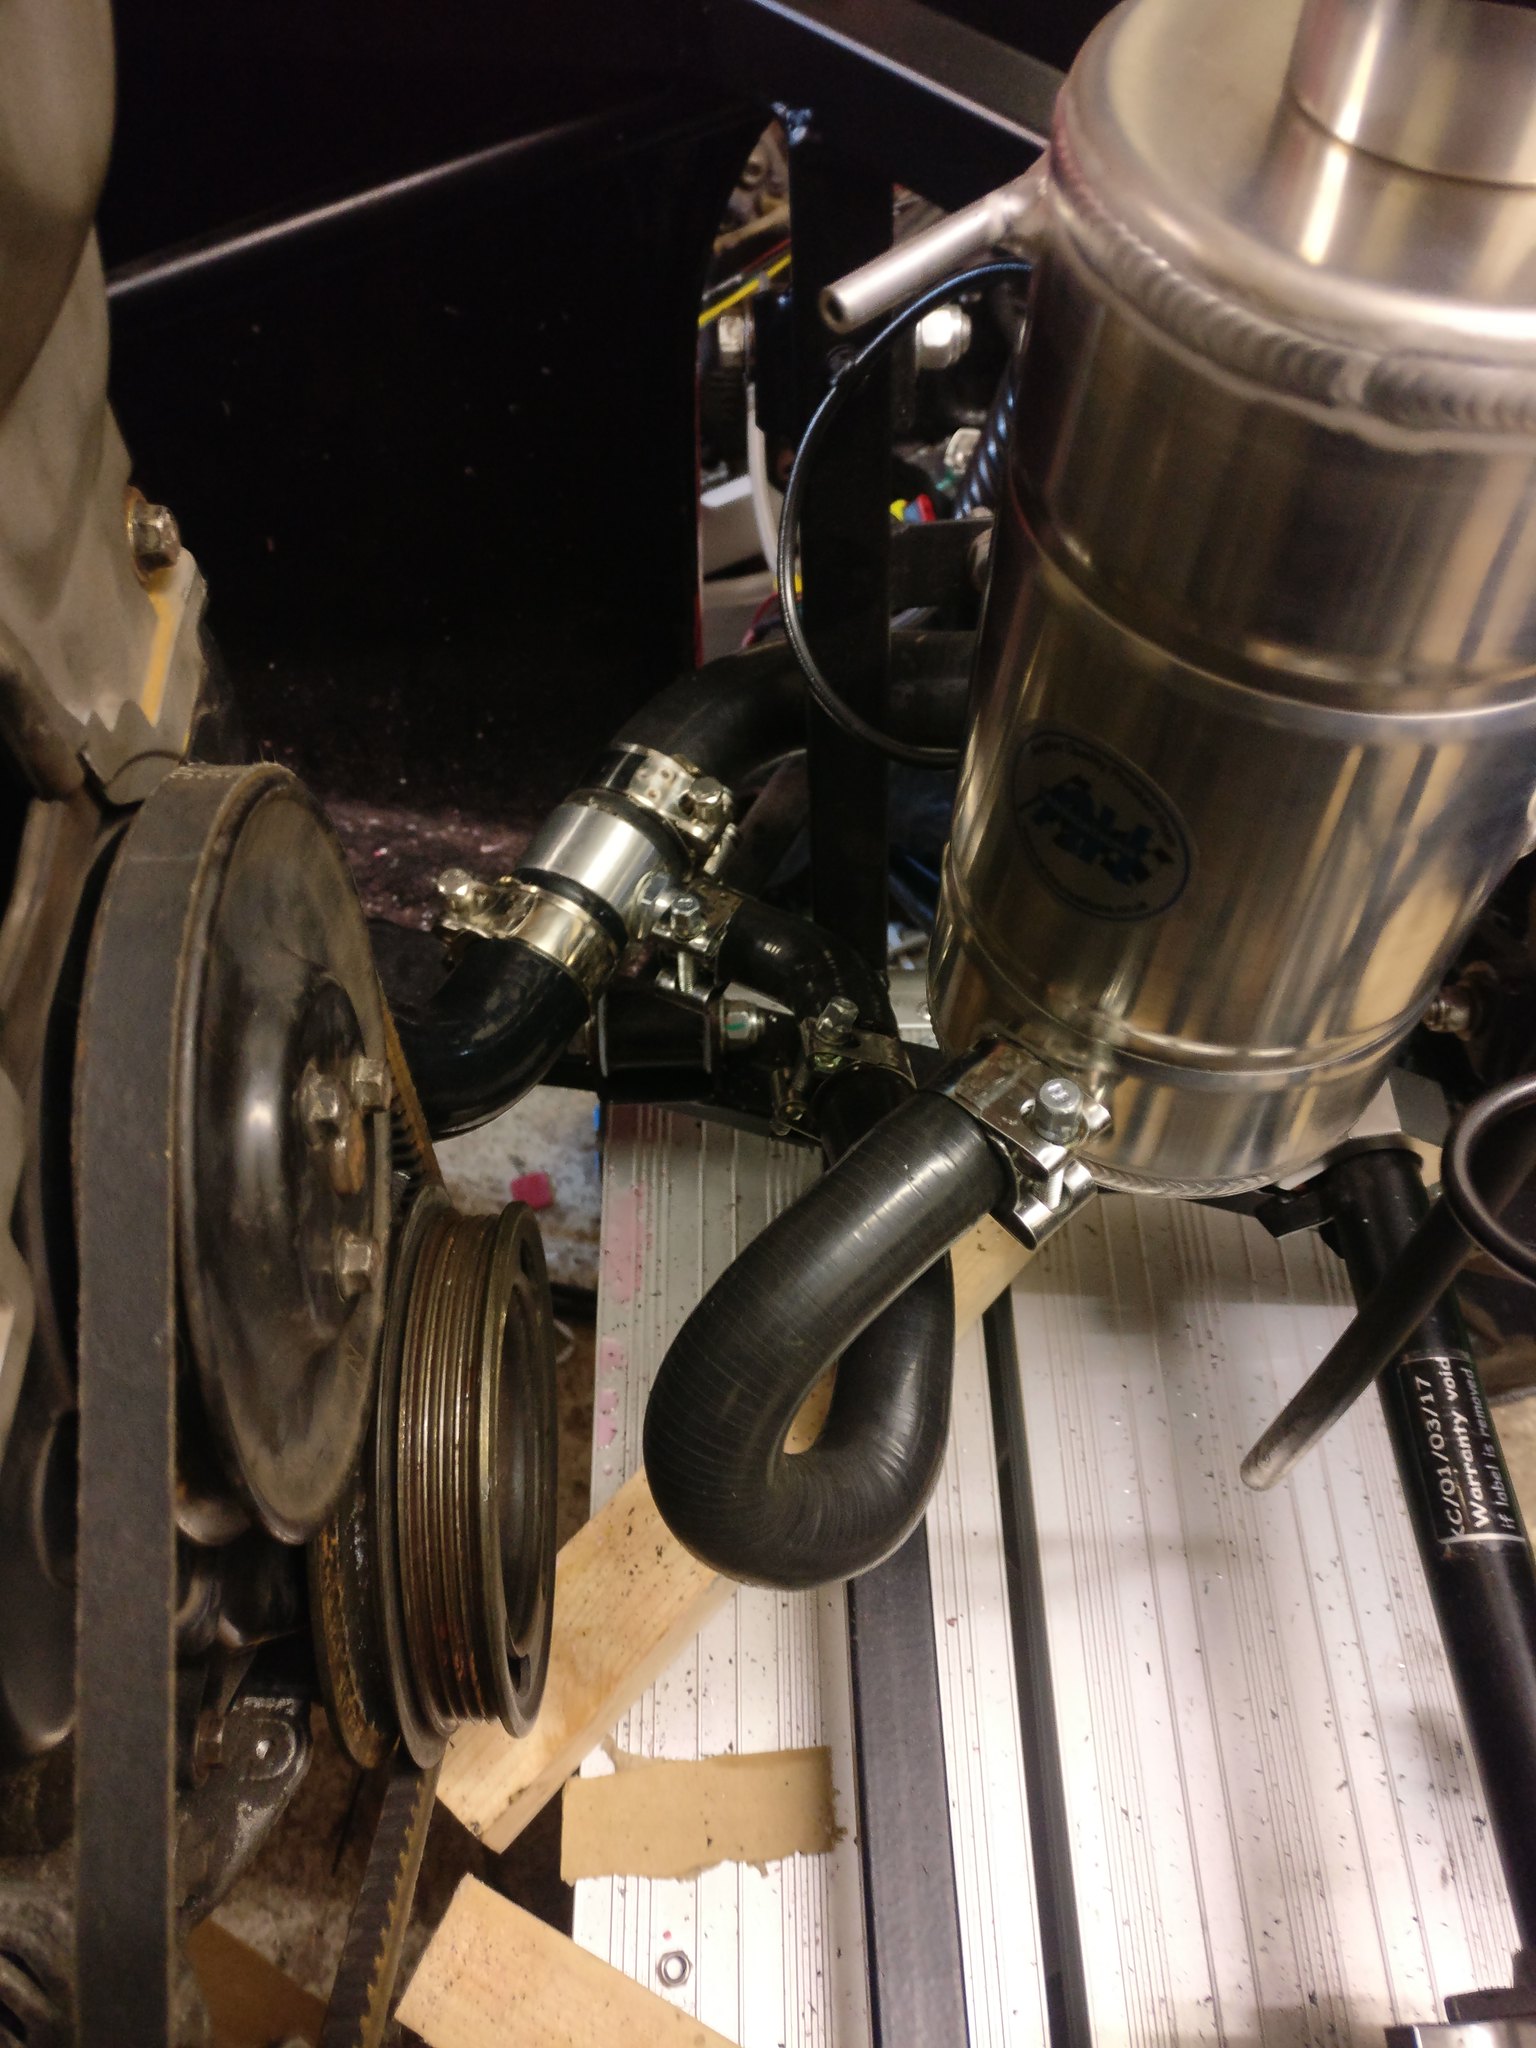 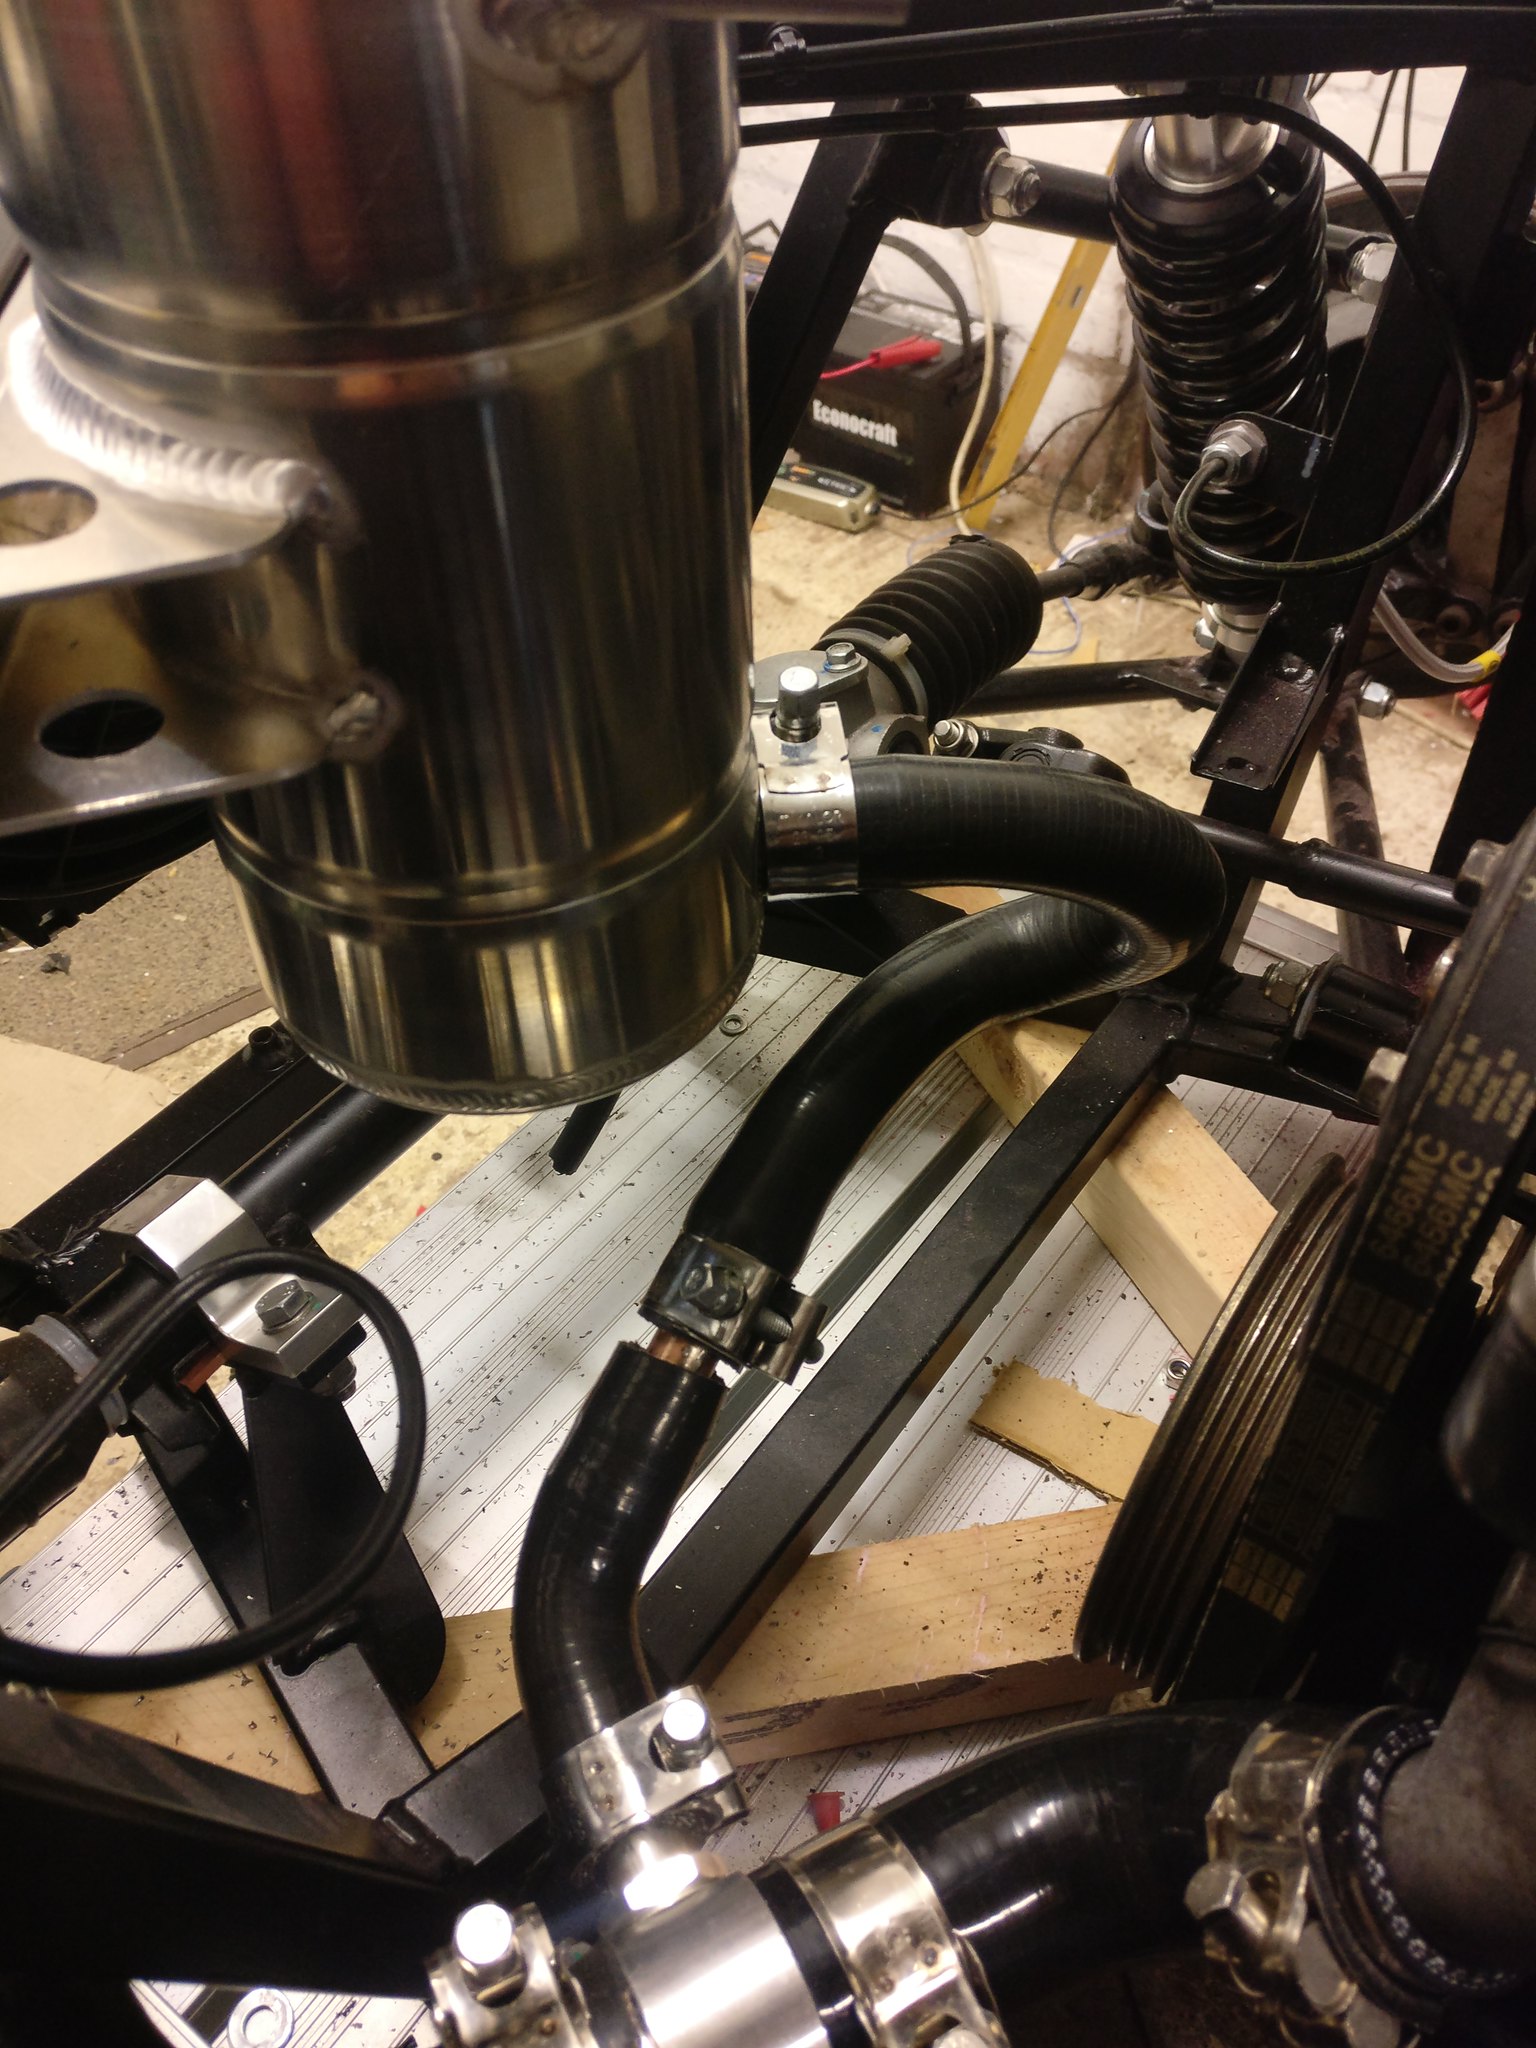 With that sorted I moved onto the next job. I wanted to remove the thermostat neck at the front of the engine as it's surplus to requirements. I was only using it for the fan before, but now the radiator has a sensor and I don't even use it for that. This turned out to be a bigger job than expected but only because the cam belt slipped and I had to remkve everything to re-time the engine. Good in a way because I've found that my crank pulley isn't true, some if anyone has a 4 slot pulley please let me know! It certainly gives more space. I used a core plug but also put a plate over it to make sure! 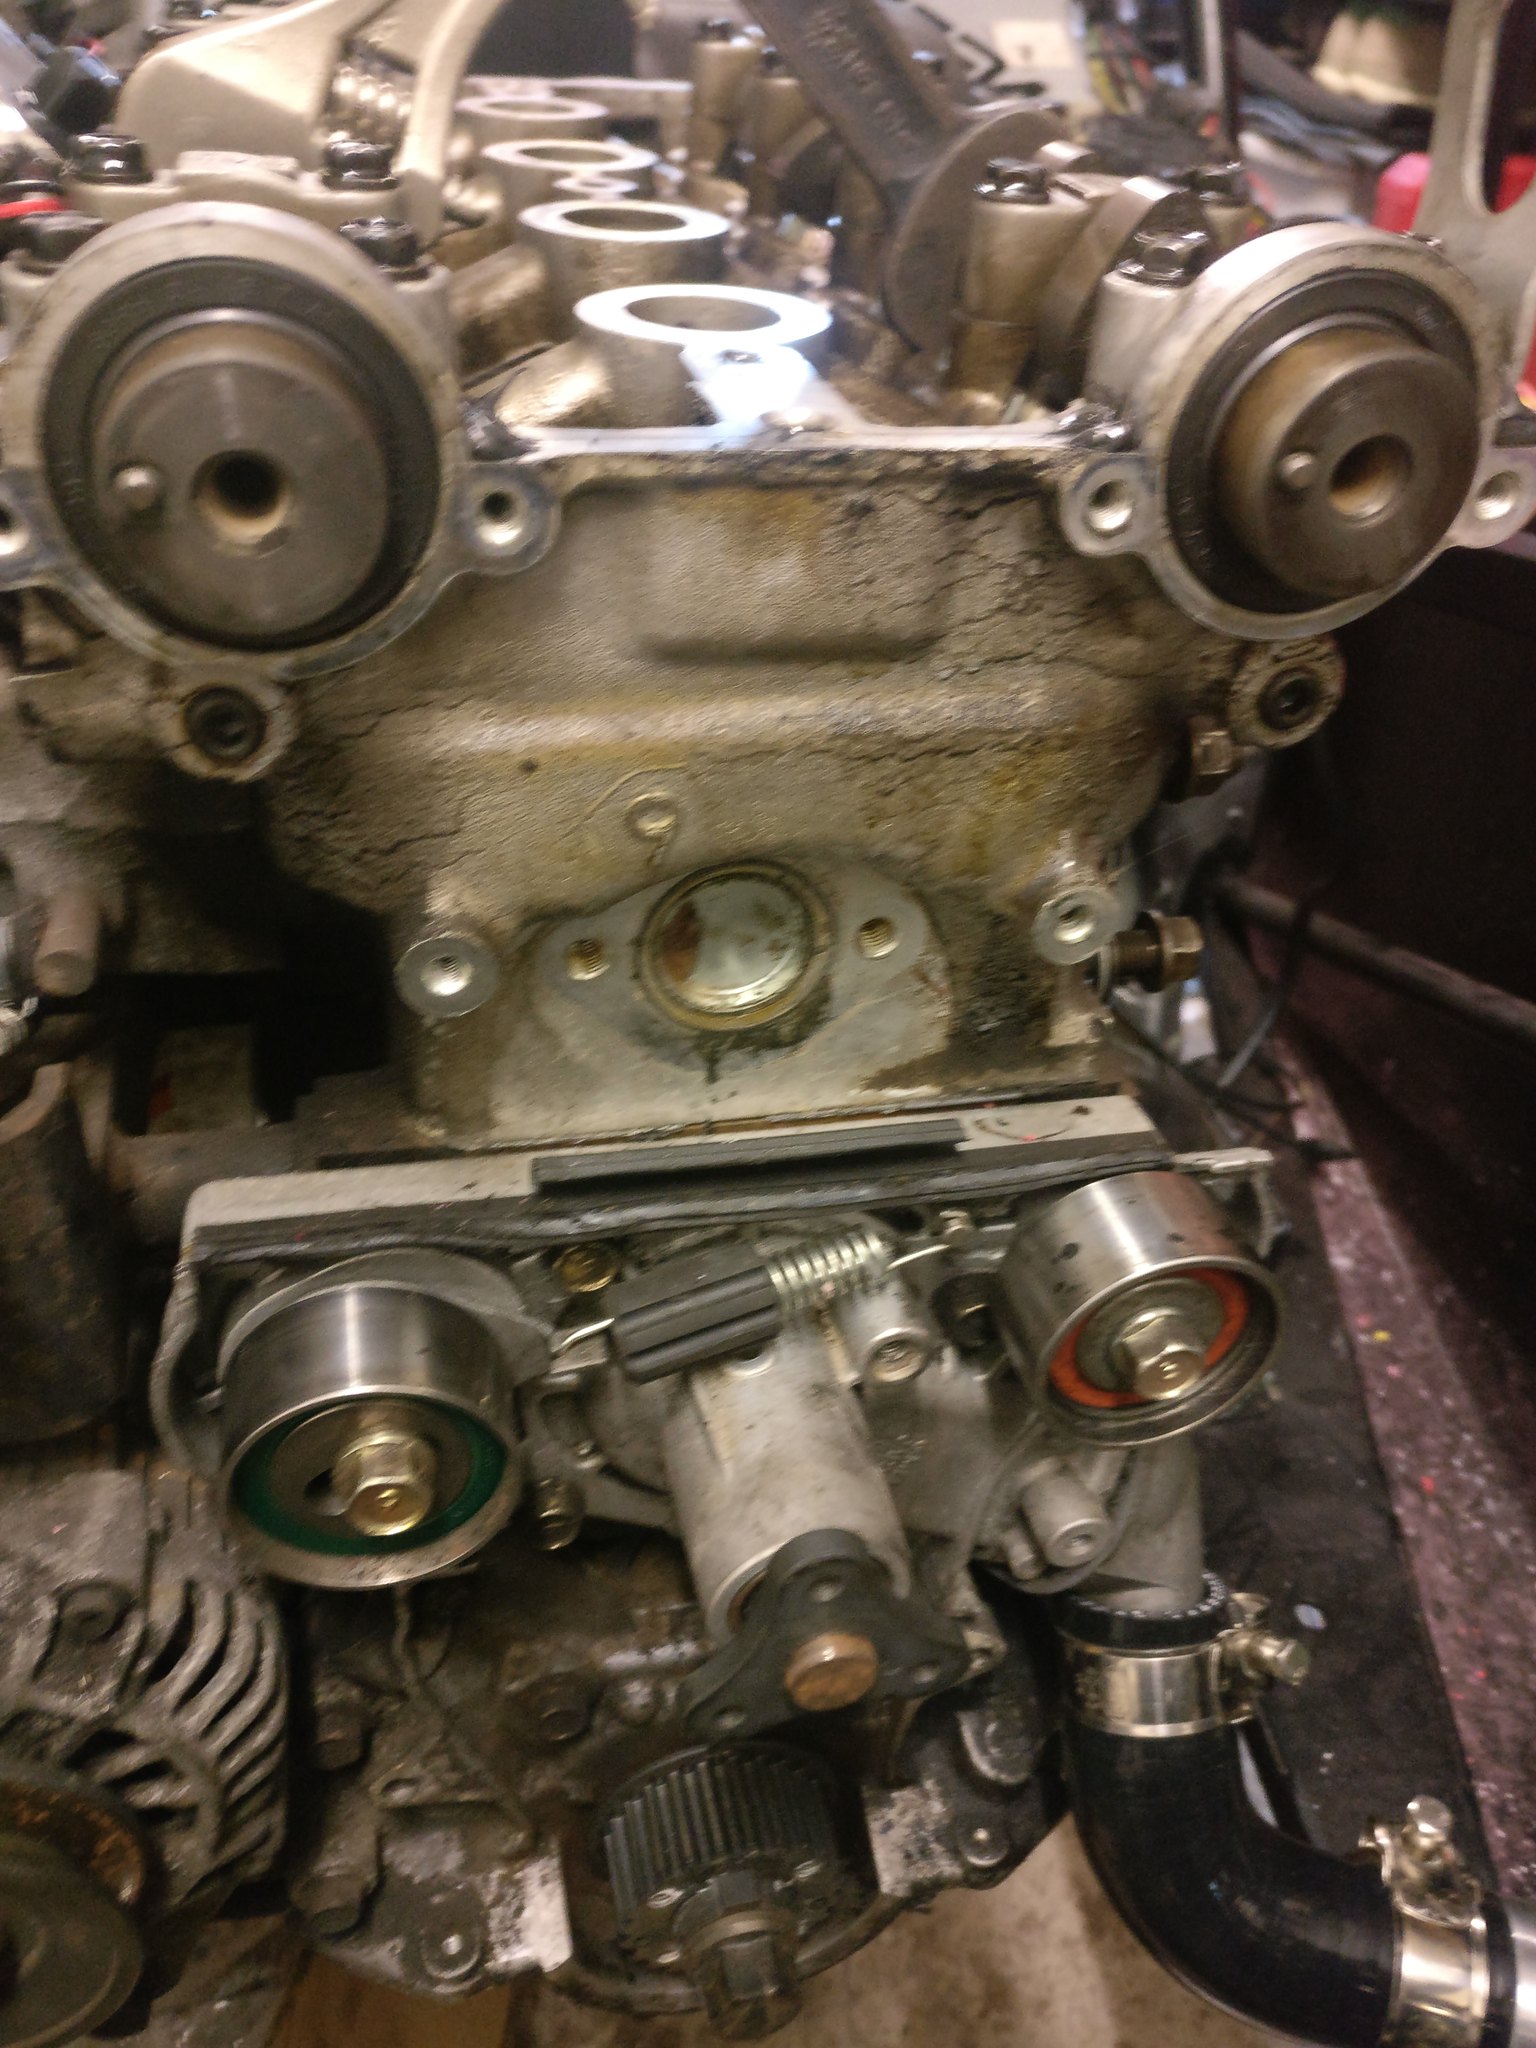 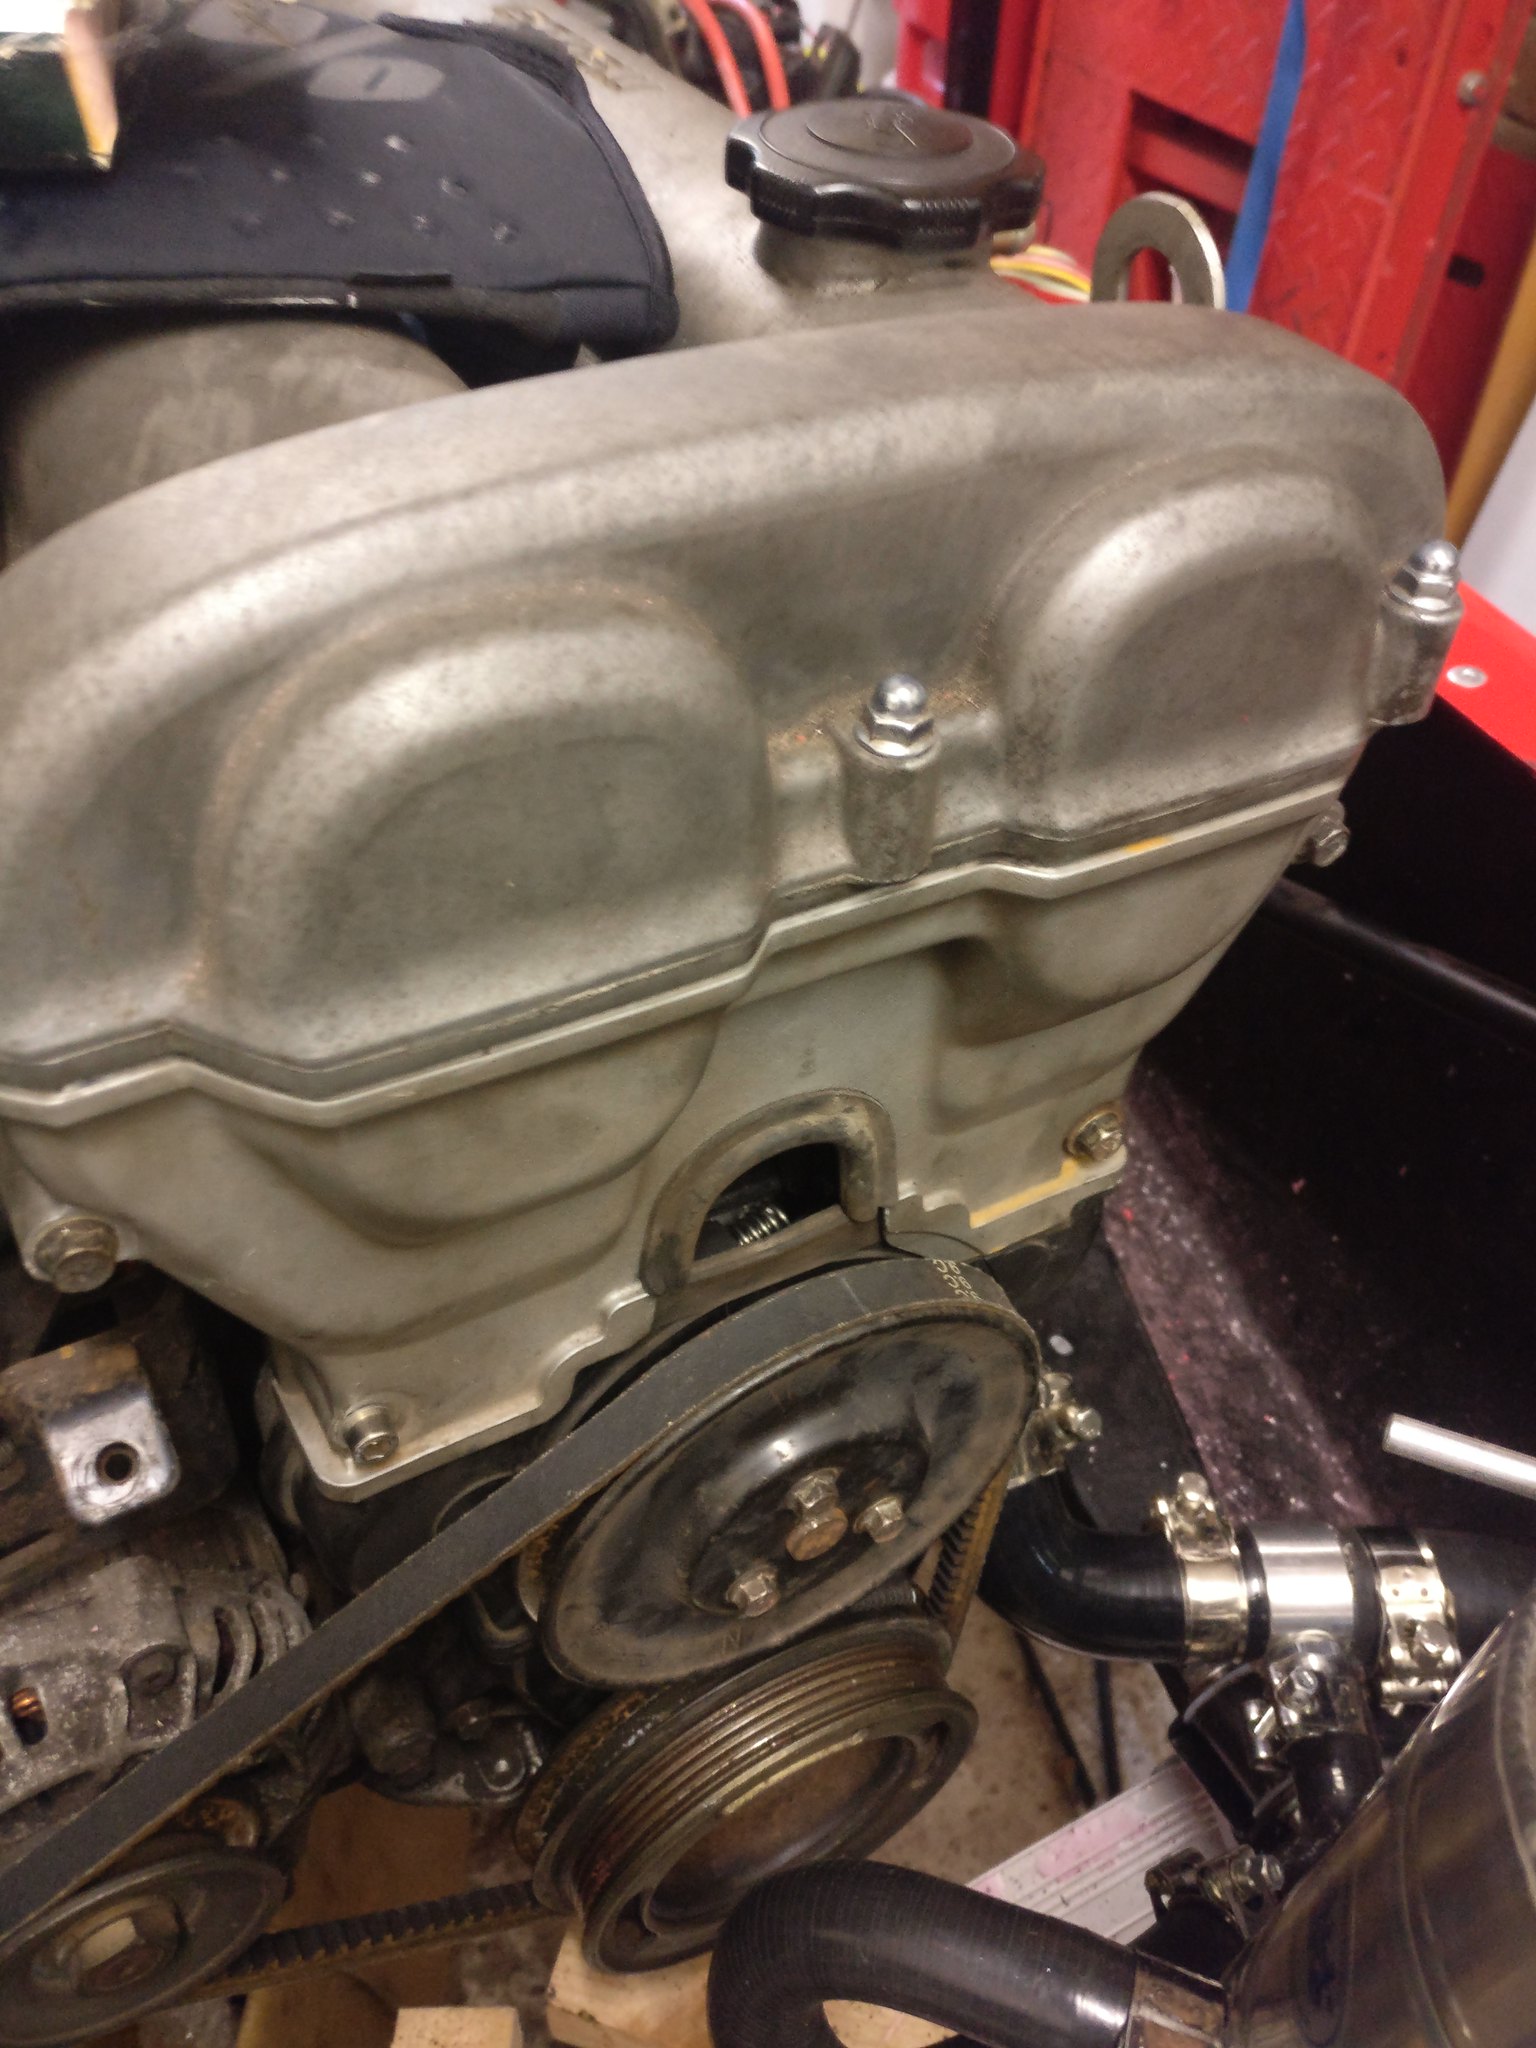 Apart from that I've fitted the boost controller on the ECU and set up the config file for the Dash2 unit. I get the sump today so next week should be time for the first start! |
|
|
|
Post by FFS Corders on Jan 31, 2018 9:59:49 GMT
Promising progress!
|
|
|
|
Post by teamawesome on Feb 12, 2018 18:57:11 GMT
It's taken a long time to get to this point because I was let down by G19 Engineering last year, but I finally have a fitted sump! For those that aren't aware, the Westfield has the engine mounted rather low and the sump becomes the lowest point of the car if left standard. A lot of people have had theirs modified to increase the ground clearance. This is usually done but shortening the sump, but also adding wings to keep the capacity roughly the same as original. My sump came off the car last April and is finally back on after giving the job to Lavron Composites. All in all I'm happy with the results so far, although time will tell now it's full of oil! 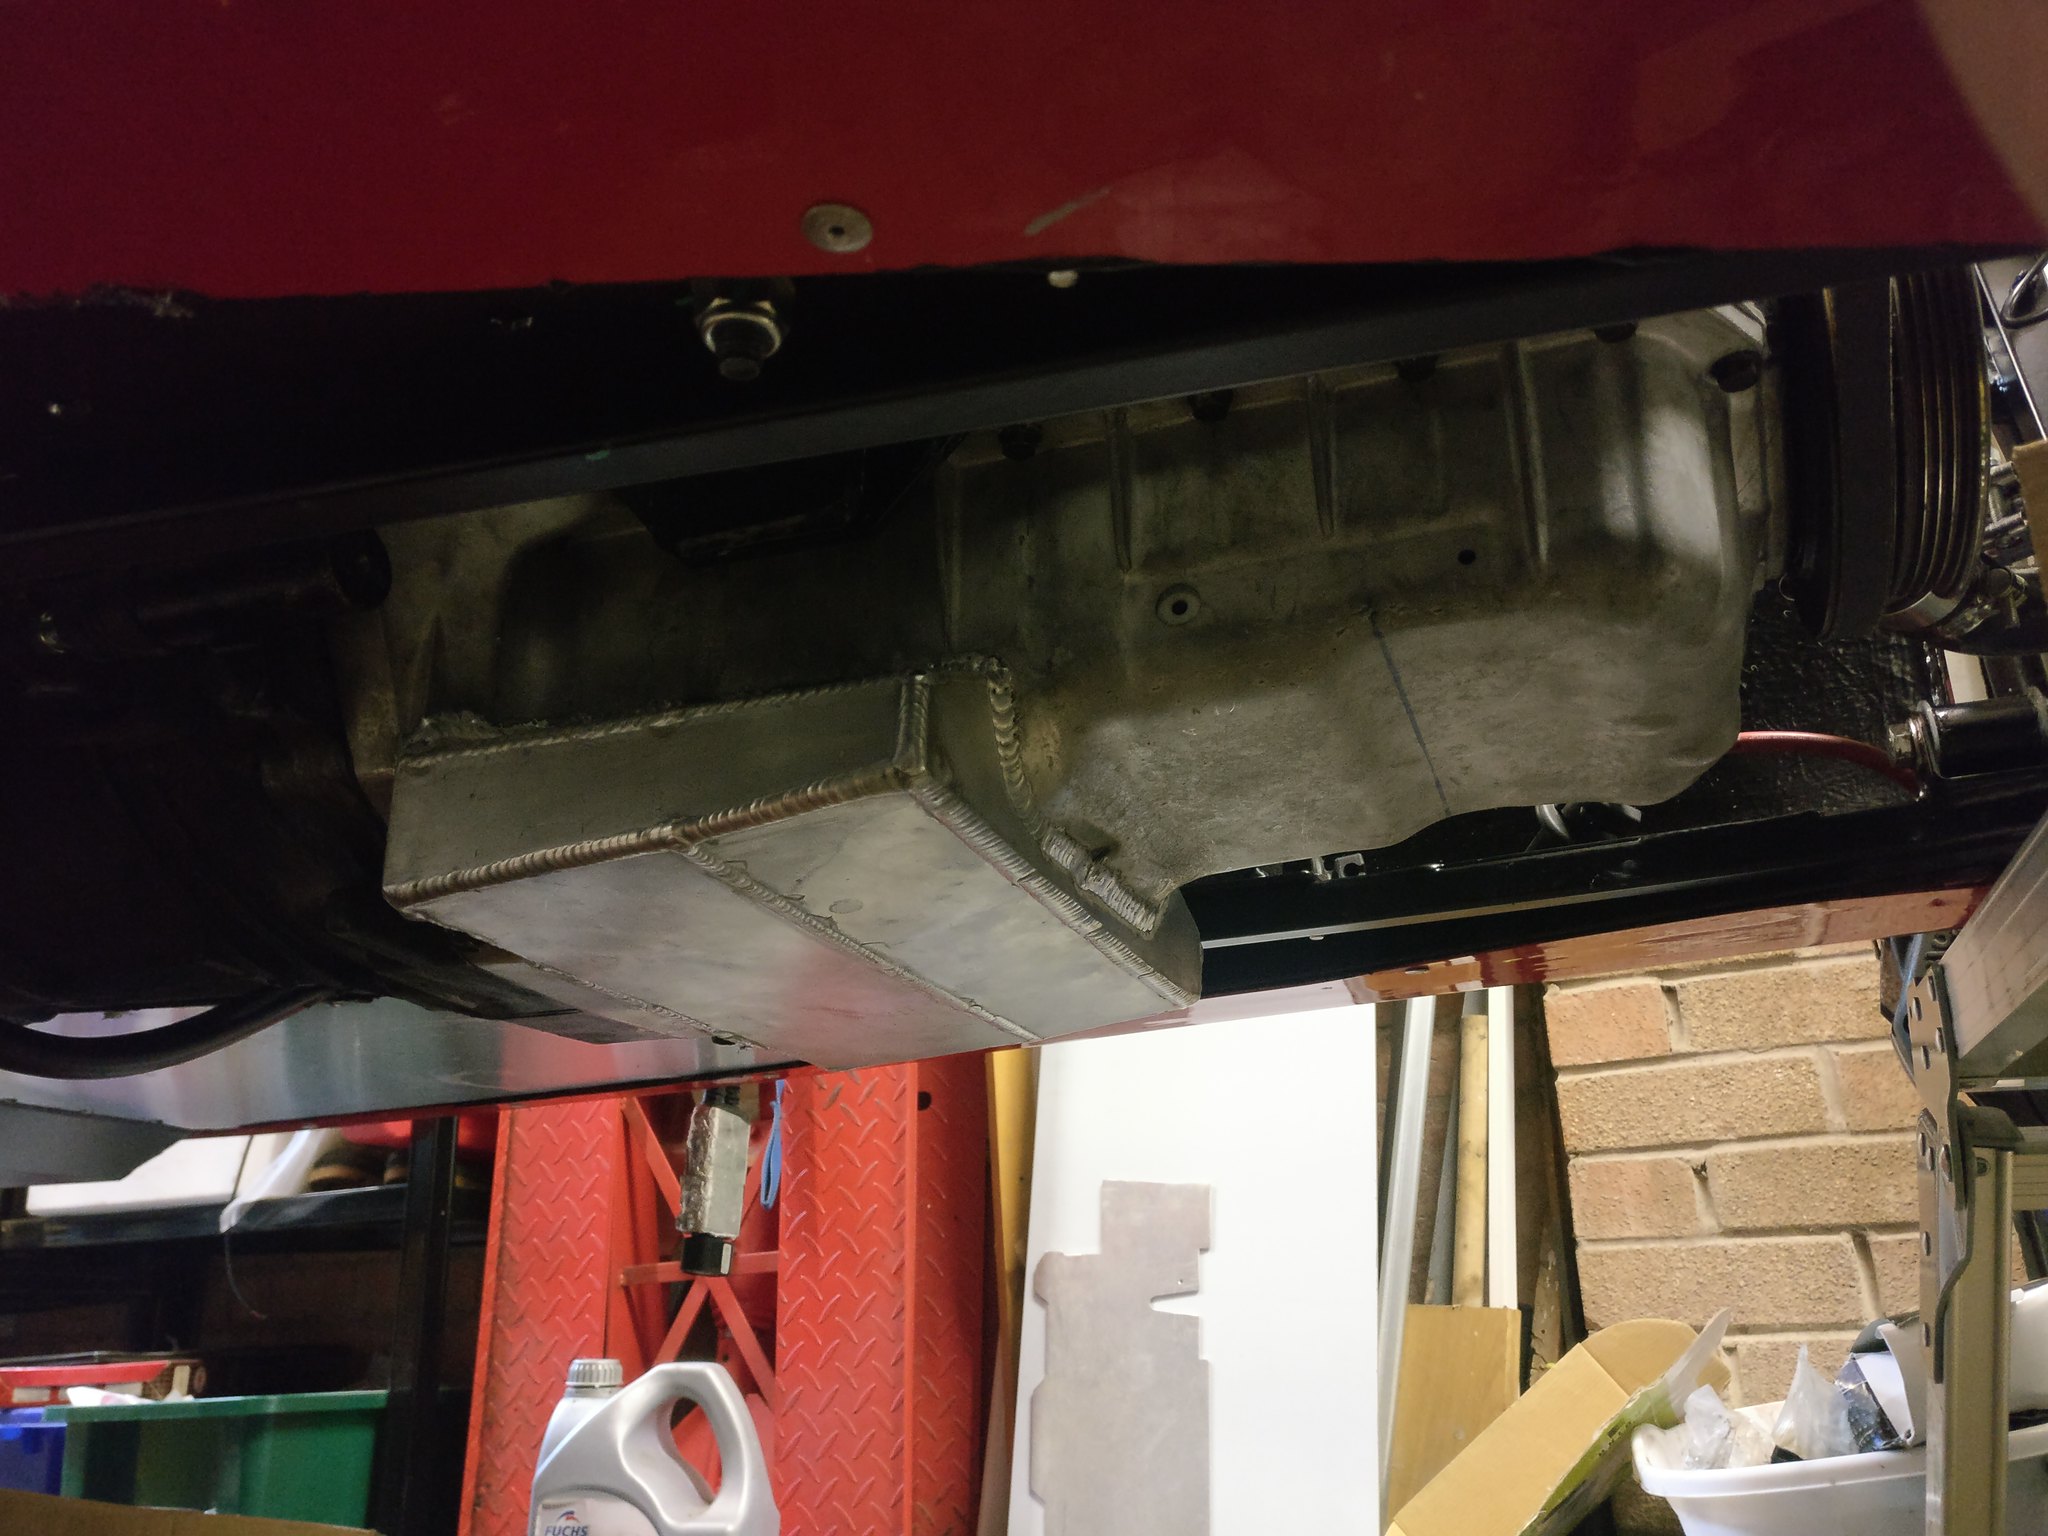 Next up was something I didn't take photos of, more bloody wiring! After that was fitted we moved onto the cycle wings. A half hour job surely, just pop some wheels on, fit the brackets and see where I want the wings to be mounted? Sure, in my dreams. The brackets were a nightmare to get fitted correctly after they were rubbing against the tyres. This seems to be pretty standard. This took about 5 hours to get right on the end (with several tea breaks) but we left it at the end of the day with the wings bonded to some Big Head fixings just waiting for it to fully cure. You can see here just this close the brackets are to the wheels. 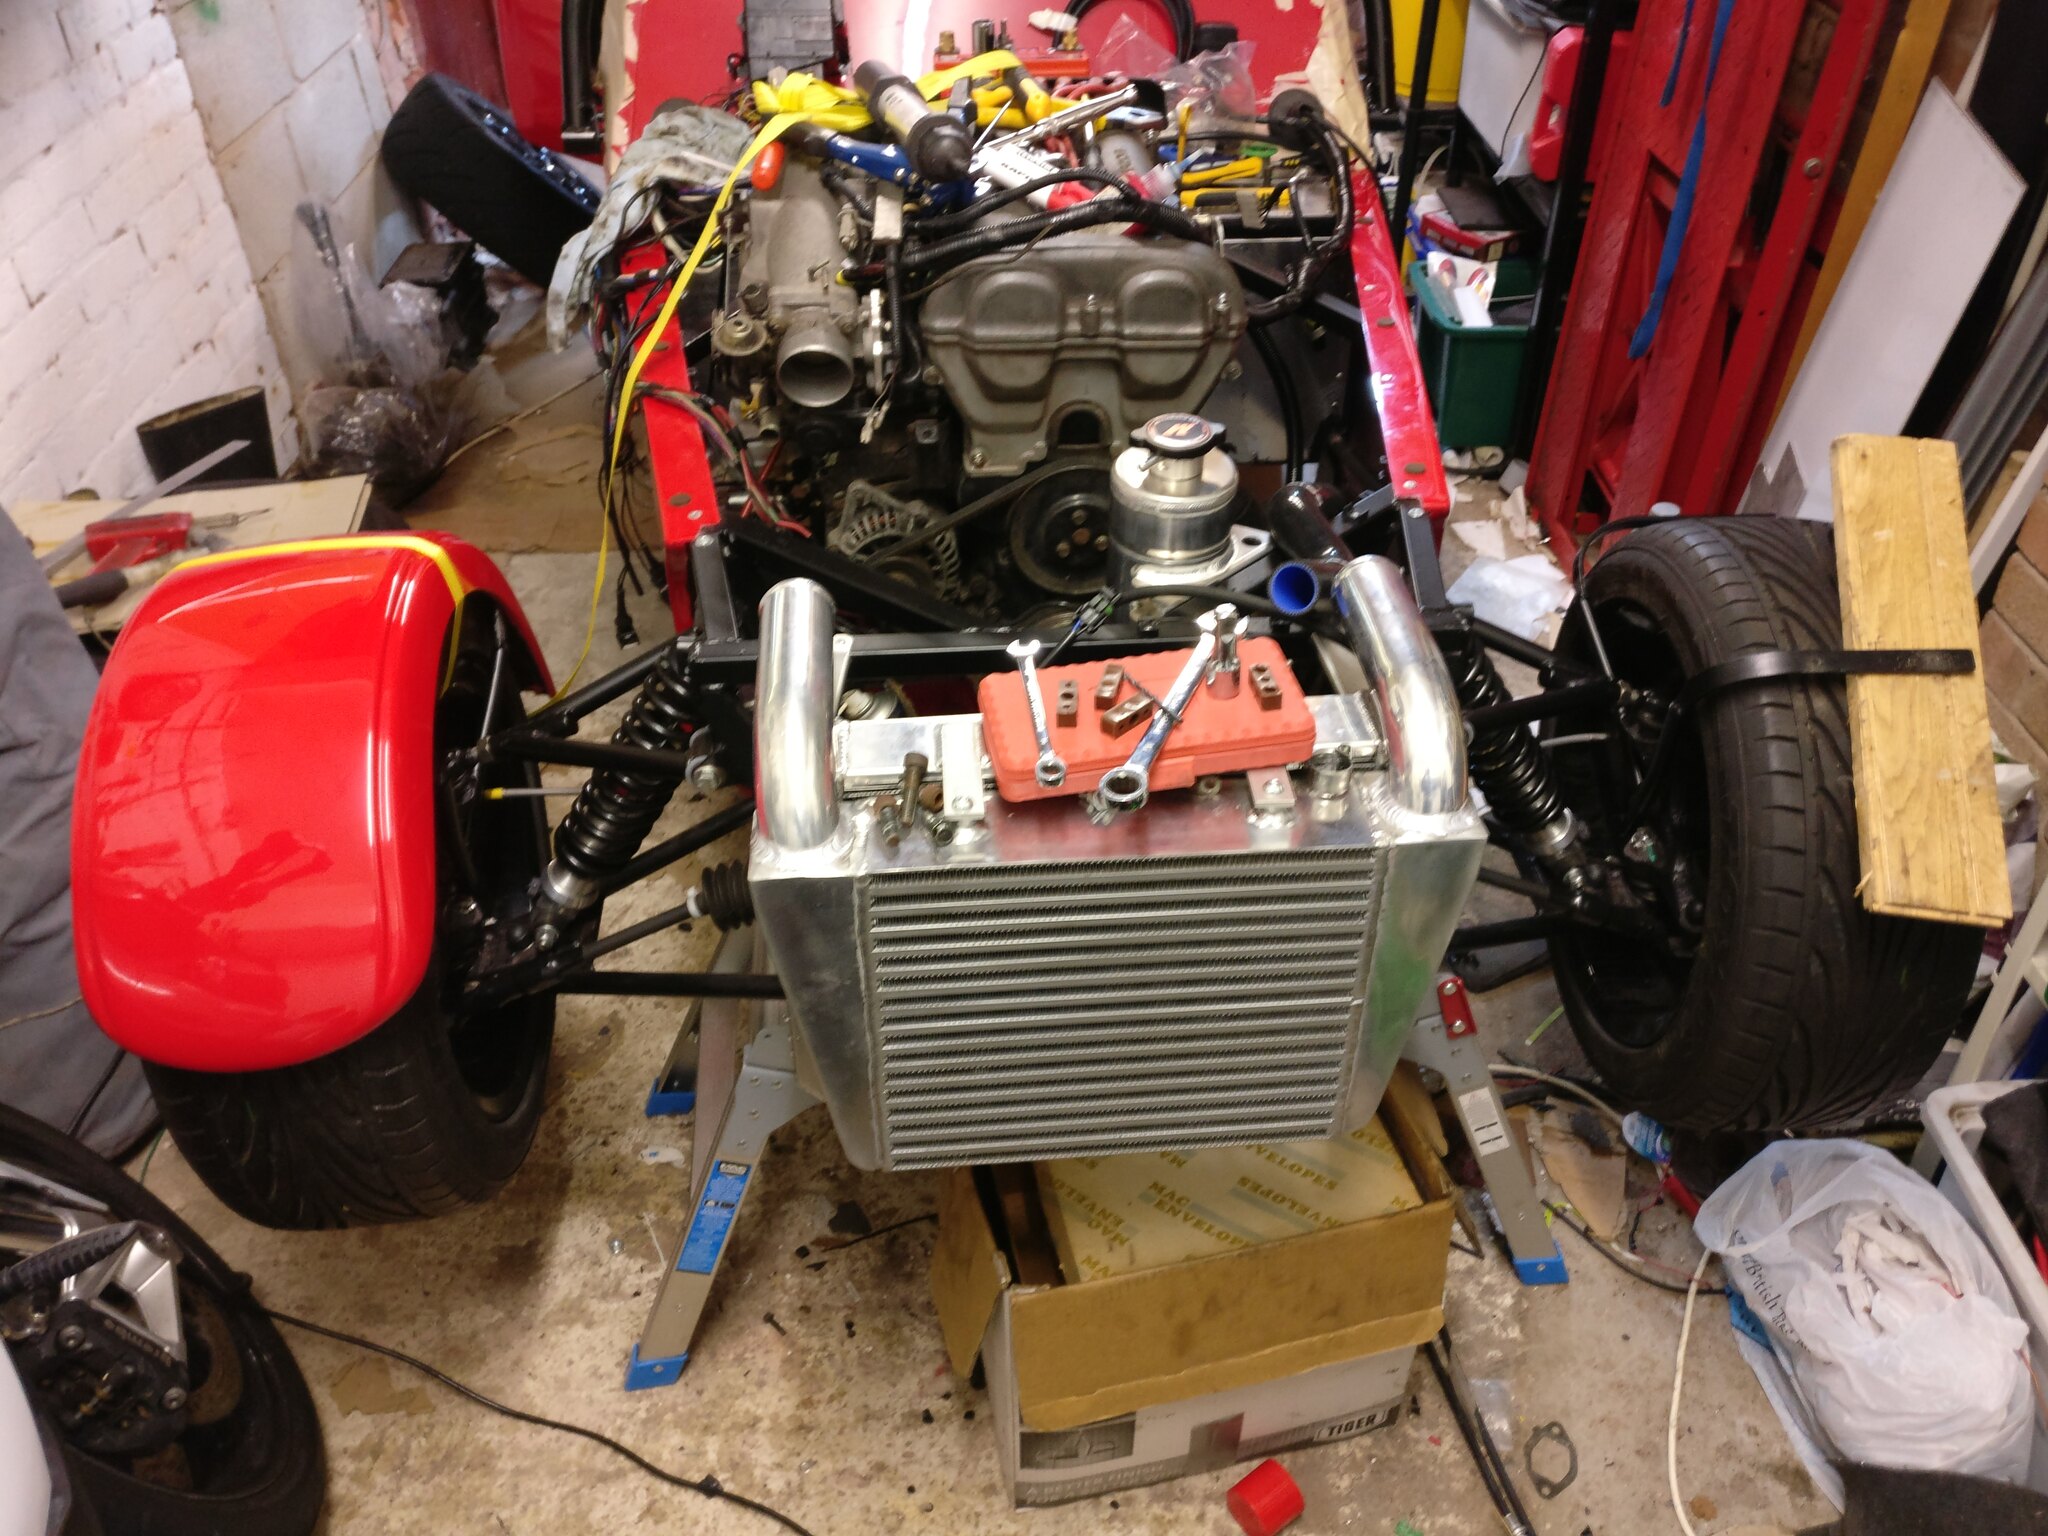 This broke promptly the next morning as the wasn't enough flex to pull them out of the holes. Very annoying. We took alit all apart again and this time we cut slots in the back mount and kept the holes as they were in the front mount. This should allow the wing to just pull off, in theory. Either way I'd run out of time and we left it with them bonding again. It sure looks like a car though! 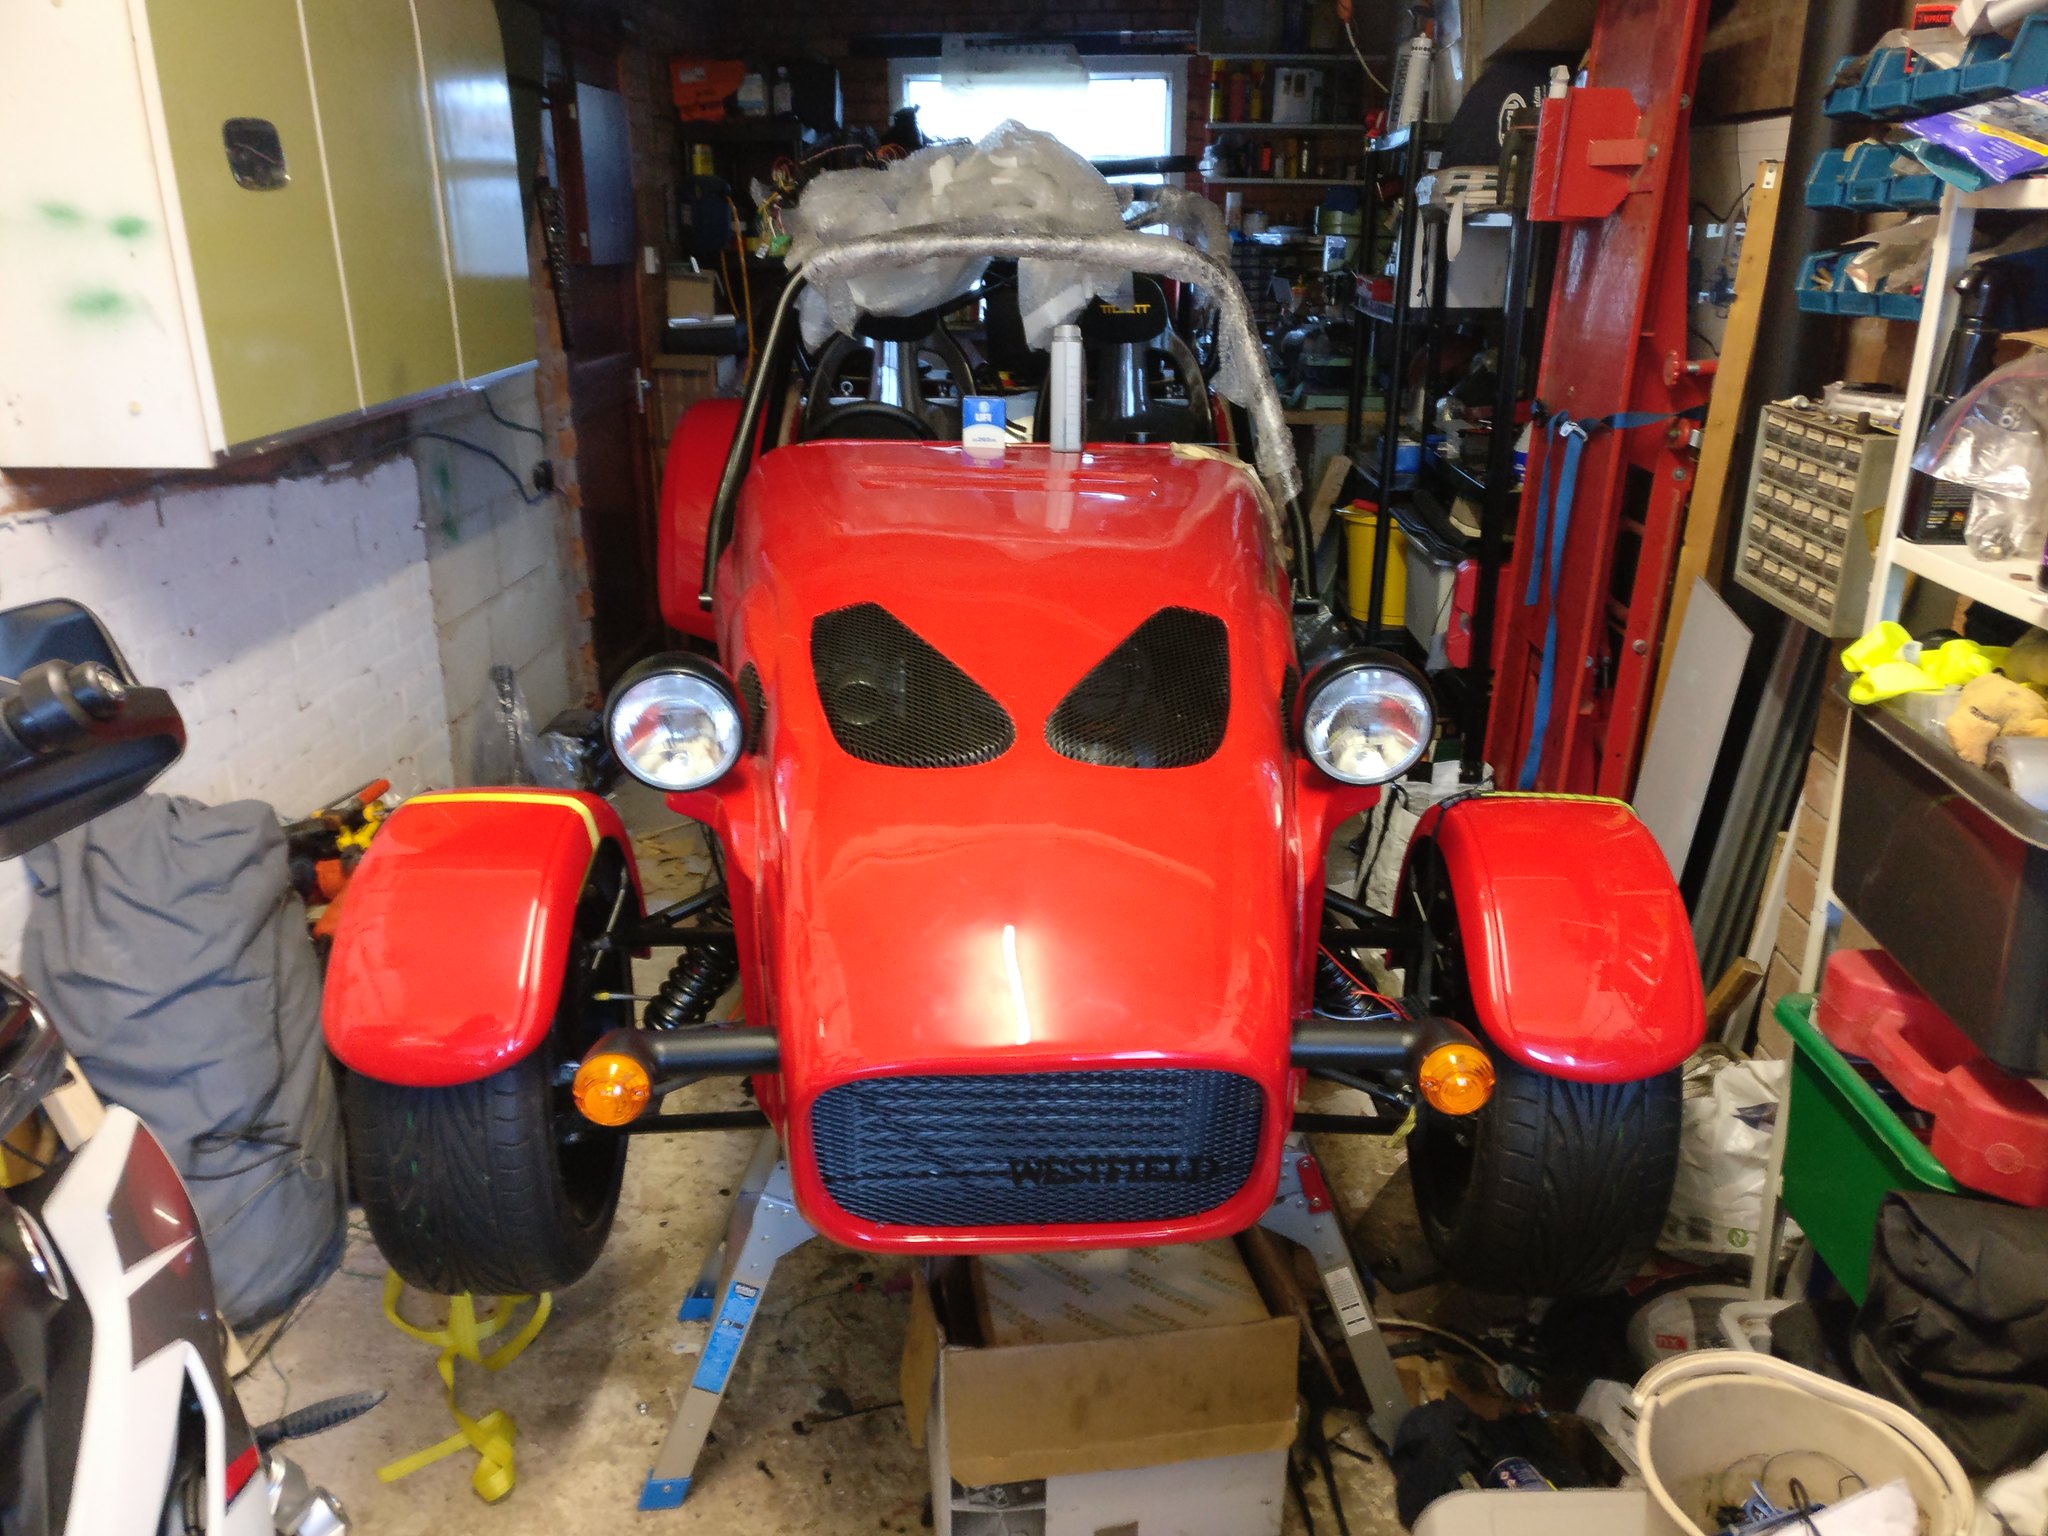 Next on the list would be to finish the cycle wings and then some exciting stuff as DaveFab is currently building me a very nice manifold and downpipe for my TD04. I can't wait to get my hands on them. |
|
|
|
Post by FFS Corders on Feb 12, 2018 19:56:30 GMT
That's some great progress once again Sam!
Can't wait to see this moving
|
|
|
|
Post by teamawesome on Feb 13, 2018 10:40:46 GMT
Thanks! Shouldn't be too long before I can start it up.
|
|