|
|
Post by Bilbo on Jan 5, 2023 1:34:58 GMT
Did a bit of research into 2 port master cylinders. From everything I could find it seems to just be universally that the port closest to the firewall is for the fronts, and the port further away is for the rears. At least on cars that run a front/rear braking setup. To be honest I've not really looked into why, but mine was the opposite way, so I swapped them over tonight.  They look a little wild and spaghetti like at the moment haha, I'll get them bent a little differently and tidied up a bit, but that's essentially the hard/awkward bit done now. Got the front in the air and got to work on the lines for each side, and the hoses. Got the driver's side bent to shape, attached the hose, got the banjo threaded in, and tapped a brake hose clip into the original bracket to hold it all securely.  Then got the passenger line cut to length, added a union and flared the end, and got it all put together:  We'll get them bled when I have someone there to help with pedal duty. I'll do a check of all the unions and connections across the entire braking system, and then we'll bleed it. My only real concern is the banjos are a bit crap, mainly just the bolt heads. We've got loads of banjos at the unit, but these have some really strange big thread pitch on them, and I have nothing even close to matching, so we'll just try these. If they leak I'll get new ones ordered. I'd been meaning to bolt the gearbox mount in after the final engine/box fitting, but I got annoyed when my stepper drill bit went blunt and I just couldn't get the hole I needed bored out wide enough. Went absolute brute force on it and the drill started smoking, so I just binned that job off for a couple of weeks haha. It's just a hole in the bottom driver's side of the mount, but it needs to be fairly large to get a socket through it to do that side of the mount up. It's an M10 nut that threads onto the bobbins, and a 17mm socket just wouldn't fit. Anyway I found an M10 nut I had lying around that's only 14mm, and that size socket fits through nicely, so I could finally get it on.  I've double nutted both sides because I'm paranoid, probably won't help, but it can't hurt right? Now for something I messed up:  My janky midpipe is just way way too low. I knew this when I put it together initially, but looking at it from this angle it's just way too low, and to be honest a little too close to the fuel line for my liking. I'm going to take the manifold off and shorten the downpipe a bit so the front sits a bit higher, and then I'll get this midpipe re-done, further away from the fuel line and probably about 2" higher. Also that bit of welding in the centre of the pipe you can see I absolutely hate, all the welding on the exhaust went really well but that bit is so ugly. Going to completely redo the midpipe as I'm just not happy with it at all. Also one other thing is these vents. I'm not 100% sure what the OEM setup was really like but these just won't do as they are. Rain is just going to flow through them directly onto the wiring loom on both sides with the 5 loom all in place.  I've not really decided on the plan yet, I thought about putting a mini scoop type thing over them, but don't like that idea. Thought about putting some metal in and smoothing them out, but again not really wanting to do that, would involve removing the windscreen seal and I just can't be bothered. I might try and make up some rain channelling inside that feeds the water back out down the inner wing or something. It'd probably be good to have them to promote airflow through the bay, but at this point they're more of a pain than anything. |
|
|
|
Post by wannabe on Jan 5, 2023 10:34:40 GMT
Could create a filter airbox arrangement as they should be (may be  ) high-pressure at the base of the windscreen? |
|
|
|
Post by Bilbo on Jan 6, 2023 2:25:50 GMT
Could create a filter airbox arrangement as they should be (may be  ) high-pressure at the base of the windscreen? Ah the good old Randall Cowl haha, I did consider it, maybe will in the future, I do like intake noise. |
|
|
|
Post by Bilbo on Jan 6, 2023 2:26:06 GMT
We got the prop measured up tonight. Cut the Vauxhall prop and the MX-5 prop down so we could attach both ends with them sleeved over each other, and when everything was in place we took the measurement.  Looks weird but the adjustable spanner was the perfect size to hold the prop perfectly level so we didn't have to hold it by hand. It clears the handbrake cable perfectly, and the handbrake recess for the handle unit isn't in the way either. Good news, looks like it'll be nice and simple to fit. Going to send it off to a prop company local to me, my mate has used them before and says they're good, a proper old school setup with an old guy in a workshop doing the work. We'll get it sent off next week hopefully. When this was done I took the exhaust system off again and got to work on raising the midpipe. I cut the lower part of the downpipe section of the manifold off, shortened it by about an inch and angled it a bit differently. This has both raised the front of the exhaust up to chassis rail level, and moved everything away from the fuel line a fair bit. A mate at the unit gave me a length of brand new exhaust pipe he had been given, it was ideal for what I needed. I cut it down and got it welded onto my flexi pipe.  It's very simple and straight, I just had to weld a slight bend on the end after this so it would sleeve into the centre silencer. The angle is just a little bit off, and I got very frustrated laying under the car trying to sleeve it in. I'll get back on it on Saturday, just a small adjustment needed. It looks far better than what I had before. This was just what I put together temporarily, but it was really quite bad, especially seeing as the manifold and rear section are quite nice.  Will start it up when it's on and see if it sounds any different. |
|
|
|
Post by scottydugg on Jan 6, 2023 9:38:11 GMT
Can't be too much left at this stage? you've made it look remarkably little fuss to get to this stage!
|
|
|
|
Post by Bilbo on Jan 6, 2023 10:18:11 GMT
Can't be too much left at this stage? you've made it look remarkably little fuss to get to this stage! Not much at all mate, the list is down to 15 items now to get it roadworthy, half of those are just little things that won't take long. Haha, the joys of highlight posts that show the work done, doesn't show the many swear words in between, should have seen me last night when my midpipe sleeve just about wouldn't fit. Absolutely raging, cut my knuckle punching the underside of the car in anger 😂 It's been a ton of work, but yeah it's not actually been that horrendous overall. I wouldn't want to do it all again mind you haha. |
|
|
|
Post by Bilbo on Jan 9, 2023 1:13:05 GMT
Got a load of stuff done on Saturday. Slightly shortened my new midpipe to make it slide into the rear end sleeve, and it worked perfectly. Got some exhaust/assembly paste on both ends and got it all clamped together. No noticeable blows which is good, and it sits way higher, which is ideal. Here's the original janky midpipe I made:  And the new one:  It's probably an inch or 2 higher, and brand new pipe rather than reusing the old stuff. It sound a bit nicer too I think. It does look a bit weird being so straight, but having it re-done like this has moved it a good few inches away from the fuel line, you can't really tell from the photo angle, but it is far enough away that I have no concerns now.  It is the lowest point on the car, but the car isn't slammed so it won't be an issue driving it, except maybe on the most extreme of speed bumps, but I'm used to those anyway after driving the 5 for so long, so this will be absolutely fine. Not related to the Cavalier but I found some welding mask lenses and finally changed the one on mine that has never been changed oh my god it's so much better I can't believe I left it this long haha.  Can actually see in HD when welding now haha. The throttle cable has a slightly tight bend in it's current placement, but it works fine. But the throttle end clip on the pedal end didn't quite fit into the Vauxhall pedal, so I removed the pedal and enlarged the throttle cable bracket on it by a few mm and now the MX-5 cable fits like OEM:  I added an old MX-5 shifter gaiter onto the relocated shifter. It'll do for now but I think I'll redo the whole thing and make the rose jointed version I mentioned before, the throw on this one will do initially, but I want it to feel OEM, which right now it doesn't. I added a piece of carpet just to cover it all but I need to make it again as the piece I used was too short. It's not neat but it'll do for now, it's not needed to get it roadworthy so I don't care too much. Just need to screw it down straight now. I cut some rubber insulation I'd previously removed from elsewhere on the car, and attached it to the hole around the gearstick, should reduce road noise a fair bit and stop any road grime getting into the car. You can also see a switch panel I added at the front of the centre console, I have the hazard switch on it at the moment, which is now all wired in, got a couple of other holes on it for other switches I'll likely add. 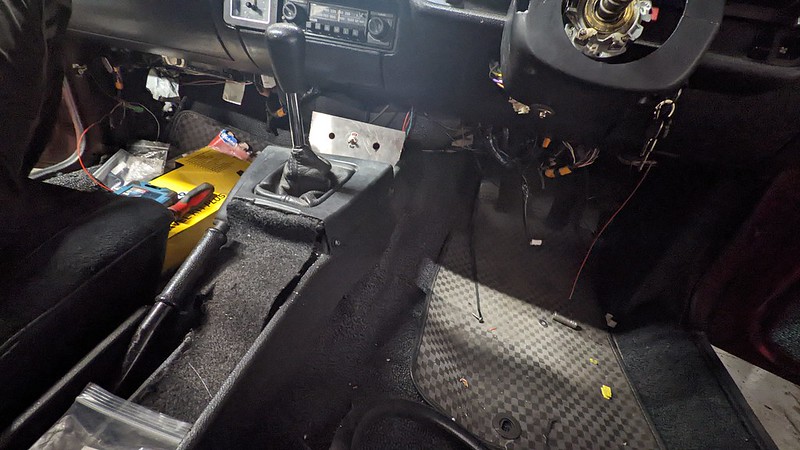 Finally got the driver's seat fitted as well. One of the original bolts snapped when the previous owner removed the seats at the start of his restoration, so I drilled it out and have nut and bolted that one now instead, as the original captive nut has been drilled out.  Looking more and more like a finished car now, sadly the headrests are both a bit broken, the headrests themselves are fine, but the plastic retainers aren't working properly, I think a couple of them have snapped and there's some bits of broken plastic inside the holes. Not sure what I'll do about this, the headrests are both pretty loose due to this. I'll probably find some other retro seats eventually and fab up some proper sliding rails, I mentioned before the OEM rails on these aren't even proper rails, they're weird and don't look too confidence inspiring. Also got the diff drained, the original oil smelled just absolutely horrendous, almost made me gag, but the good news is that it looked good without any weird lumps or metal in. Now re-filled and appears to not be leaking, which is good. |
|
|
|
Post by Bilbo on Jan 10, 2023 0:56:29 GMT
Got a couple of bits sorted this evening. I can't have a car without music so got some speakers sorted I had lying around in storage. Just a couple of cheap Pioneer ones. Sadly one of the only things missing when I got the car was the plastic cover from the passenger footwell, which is a shame. There really wasn't much room anywhere for speakers as the doors don't have room, the original setup just had a single speaker in top centre of the dash. I got the speaker mounted down in the recess in front of the door. I'll get some better fitting carpet to hide everything, but this will work for now.  The driver's side was much better as I have the plastic cover for that area, so I got a hole cut out if it and mounted the speaker in it.  Feels pretty sturdy and is far enough away from the throttle pedal to not be an issue at all. The wiring for both sides is all done and I've tested them and both speakers work. Good enough for me, I'll just get a little magnet phone mount somewhere, will be nice to be able to use my Spotify when driving this. Also found my coilpack bolts, so got those fitted. Checked the diff and it hasn't leaked a drop, which is good. We'll see how it is when it gets some movement in it. Contacted JW Engineering up in Bexleyheath and they said they can do the prop for me, so I'll get it up to them some time this week. |
|
|
|
Post by Bilbo on Jan 12, 2023 1:50:56 GMT
Got a few bits sorted out this evening. Sealed up a few holes in the bonnet drainage channel areas that were there after removal of the original heater etc. Would have been a direct route into the bay for rain water. Also got the driver's rear sill end welded up. I did the sill itself a while ago and posted it on here, but the end plate still had an unfinished hole in, so got that sorted. Got the entire sill repair primered and painted. These sills are red originally, but they are completely covered by the chrome sill cover plates, so I went with a hard wearing black stone chip, just seemed like it would give it a bit more protection. Like I say they're completely covered so I'm not too concerned about how well it is painted, as long as it is protected.  And here's the cleaned and welded up end plate, with original inspection bung still intact. Handy to have to spray extra primer in on the long 360 lance, and to cavity wax after. I'll do that this weekend and then find an appropriate sized bung to fill the hole.  Just need to sort that little bit on the lip where the 2 skins are bent away from each other. Not sure when that happened but I'll get it sorted. Pretty happy with this, looking at the original photo of this sill it's 1000x better now than it was:  |
|
|
|
Post by Bilbo on Jan 15, 2023 2:40:31 GMT
So, big update. Got a load of stuff done! Firstly, went in my box of random brackets and found something suitable to secure the fusebox into the bay:  Then Friday morning I took the day off work, borrowed my girlfriend's car and made my way up to JW Engineering in Bexleyheath to get the prop made. I always get a bit anxious going to a new place, not knowing for sure that they'll be sound. But they were class, the place felt old school, everyone there was super friendly, as soon as I arrived they were talking to me, asking my specs etc. I asked for lead time and he realised I was angling to have it done while you wait. He told the 2 lads in the workshop to drop everything they were doing and get it sorted for me, and for me to come back in an hour and a half. Under an hour and a half later he called me, done. My UJs I provided had been cleaned up, prepped, prop made to size, welded, balanced, painted and even dried. Amazing. The young lad working there even brought it out to my car for me. Can't recommend them enough. Cost me £200, which is a good price for the work and the stupidly fast turnaround time. Here it is:  Went to the unit and got it fitted. Perfect fit, measurements were spot on, and it went on easily.  Small amount of yoke sticks out of the box, the same as it sits on the MX-5s. 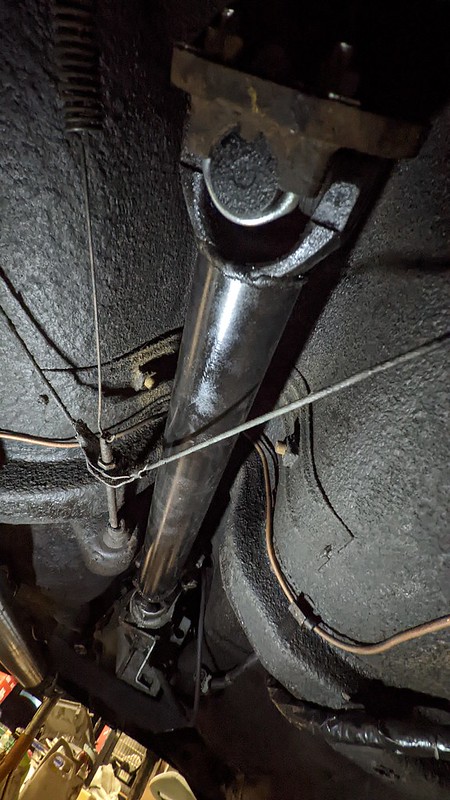 Rear end slotted on perfectly, I bought brand new U bolts and locking tabs set a while ago, always nice fitting new parts with brand new hardware. Prop clears everything fine, it's spot on. With this ticked off the list it was a case of finishing off the other bits to get it driveable. We had started bleeding the brakes the other night, but ran into some leak issues and it got late. So I sorted the leaking rear brake line, re-flared a new one, turns out it needed to be a double flare on the end that threads into the axle flexible rubber hose, I had done it previously as a single flare, hence it leaked like mad. Much better now. A mate helped me bleed the brakes, and the clutch. Both sorted now and seem to be fine. 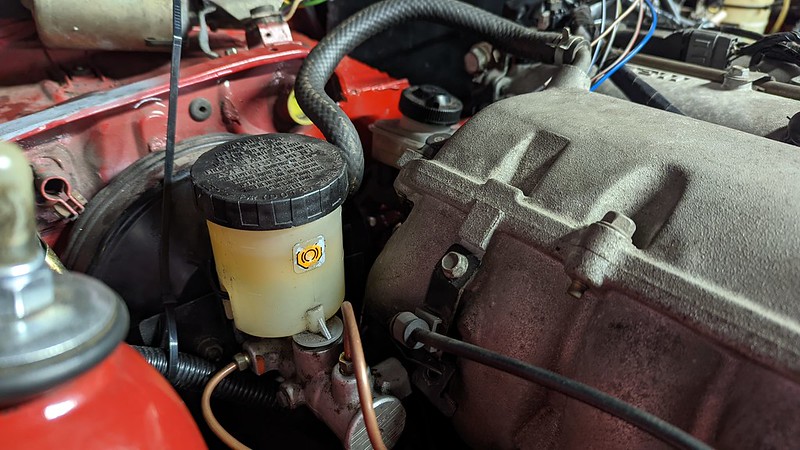 Nice clean fluid in the entire system is always nice to see. Finally got my other steering rack boot fitted, the original one on this side was torn as well:  Much better. A mate brought me an MX-5 steering hub, these fit the Vauxhall column perfectly. Original wheel is just too big, it practically touches my thighs, these seats really do not go back very far, and they're too high as well! I'll need to get some other rails and seats sorted in the next couple of months. Anyway there was a very slightly dodgy thread right at the start of the Vauxhall column, so my mate did a bit of filing work and we found a new undamaged nyloc nut. Sorted. All fitted, and this wheel will do for now. It's nothing special, but it works and doesn't hit my legs, good enough for me.  A nice retro wooden OBA would be perfect I think, might have to get one. Also got the gearbox oil filled, no leaks, all good. With the stuff underneath basically all done, I cleared all of my stuff out from under the car, got the wheels back on, and dropped it back on the floor.  Looking good. Went down to the unit again yesterday morning. Needed to get a few things checked, adjust the toe a bit to get it sensible and straight enough to test drive, torqued the wheel nuts up, cleared stuff out of the bay, tied up some wiring so it couldn't snag when the engine was running. Basically just checked over a load of stuff, made sure track rod ends were done up nice and tight after adjusting, looked over the brake unions and stuff. Sat there for a bit with a few mates going "Is it ready?" constantly haha. Chucked another jerry can full into the tank. Over 5 months of constant work and late nights all came down to this haha. So I started it up and just went for it. It drives! Clutch all good, nothing sounded horrendous, brakes a bit fresh and need some bedding but pedal works. Couldn't drive it far as needed to bleed the coolant, so we got that sorted, thermostat opened, fan came on when it should, nothing leaked, heater is lovely and hot, absolutely mint! Temp gauge works, but much like the fuel gauge the resistance is wrong. Dead in the red on the gauge is up to temp now haha. If it goes above the red mark we know it's gone bad. Out in the daylight:   Cool seeing it outside, even if it is still filthy (I'll wash it soon!). Once it was bled we took it for a test drive. All went well, I think the brake shield is occasionally just touching the front nearside disc, but other than that no dodgy noises at all under acceleration, braking, or steering. Prop is doing it's job, and the diff doesn't make any unwanted noises. We haven't really got it up to much speed yet, this is just the private road on our estate, did a little drive by video: Sounds pretty raspy, I quite like it. It's pretty quiet when you don't boot it, and on idle it's not bad at all. It's great moving it around and getting to see it from different angles:   We drove it around 4 up, and the wheels don't rub at all, even under hard acceleration. Suspension is fairly soft, but feels quite nice actually. Got a couple of little issues to sort, exhaust definitely needs raising more, it is too low, I'll need to redo my midpipe and shorten the downpipe more, I want to raise it probably another 2 inches. General ground clearance will be absolutely fine, the sump is all just above the subframe so not worried about that. But the exhaust downpipe and midpipe will hit on speed bumps and I don't want that, my MX-5 is like that which is fine, but I don't want both my cars to be a ballache. Speedo isn't working, so I need to check that, and the right rear brake drum is a bit tight, so I'll have a look at that too, it is adjusted all the way out already, but it's all new, so I'll pop the drum off and see what I can do. Handbrake needs adjusting as currently only has 3 clicks in it, and needs slackening off a little. Other than that the steering wheel has a little play, so I think the column bearing needs doing, the hub and wheel itself are not the issue, both are tight and absolutely fine. It's fine to drive, but I'd like to sort it for peace of mind. So so happy though, it just works. I can't believe it haha, you spend so long seeing it as a thing you work on, and fix things on, actually driving it for real is such a nice feeling. Starts on the button, seems to drive ok, very pleased overall. Once the few teething issues are out of the way it should be great! 4 hours sleep the last 2 nights so I'm going to bed after writing this, I'm done in haha. |
|
|
|
Post by dadbif on Jan 15, 2023 8:19:56 GMT
Your handbrake adjustment could be contributing to the rear brake drum binding.
Adjust the brake shoes with the handbrake slackened right off.
Car looks great!
|
|
|
|
Post by wannabe on Jan 15, 2023 15:16:14 GMT
Awesome  Can't wait to see this rear canoe-out in a private car park lol |
|
|
|
Post by atlex on Jan 15, 2023 16:09:54 GMT
JW Engineering sound amazing :-) The front of your cav looks so cool too. those lights  |
|
|
|
Post by Bilbo on Jan 16, 2023 1:15:05 GMT
Your handbrake adjustment could be contributing to the rear brake drum binding. Adjust the brake shoes with the handbrake slackened right off. Car looks great! That's a good point actually, thanks! I'll get it adjusted and see what it's like. Awesome  Can't wait to see this rear canoe-out in a private car park lol Haha, it'll be getting a fantastic 1 wheel peel burnout very soon. JW Engineering sound amazing :-) The front of your cav looks so cool too. those lights  Yeah great guys, always nice to deal with people like that. Yeah it is cool, I still want a front lip though. The lights do stick right out like square boggly eyes haha, but I actually really like it, though it does look a little odd. |
|
|
|
Post by Bilbo on Jan 16, 2023 1:16:27 GMT
Didn't get much done today to be honest, took it for another lap around the estate, everything seems alright. One very small weep from the rear line that connects to the flexible axle rubber hose. I'll try and sort that this week. Also realised my 3 shifter bolts that hold it into the box I only did up finger tight, so got those tightened properly, glad I remembered before the shifter fell out into my hand one day haha. It wasn't raining for once so I decided to give it it's first wash. Nothing special, just a quick jetwash and shampoo to get the dust off. I taped up the scuttle vents for now, just until I find a permanent solution. Came out pretty good, can actually see the red a bit now haha. There's a fair few paint imperfections and patches of surface rust on the panels, I'll probably clean up and paint the worst of it just to stop any rust from spreading. We'll just refer to it as patina and call it a day so I don't feel the need to respray it immediately haha. 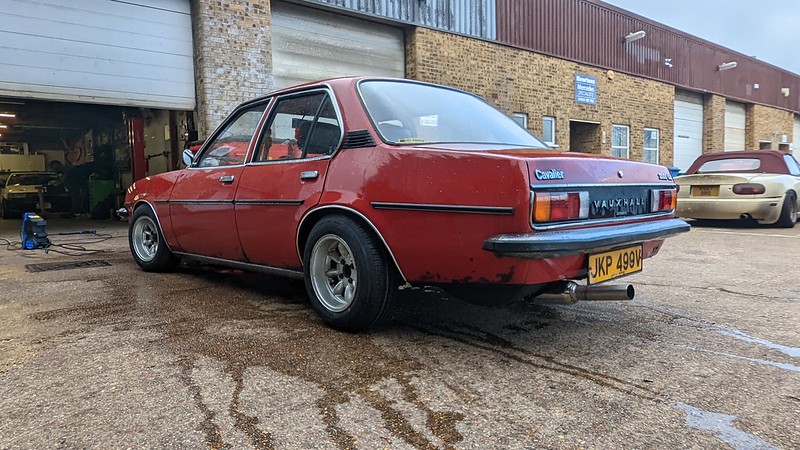 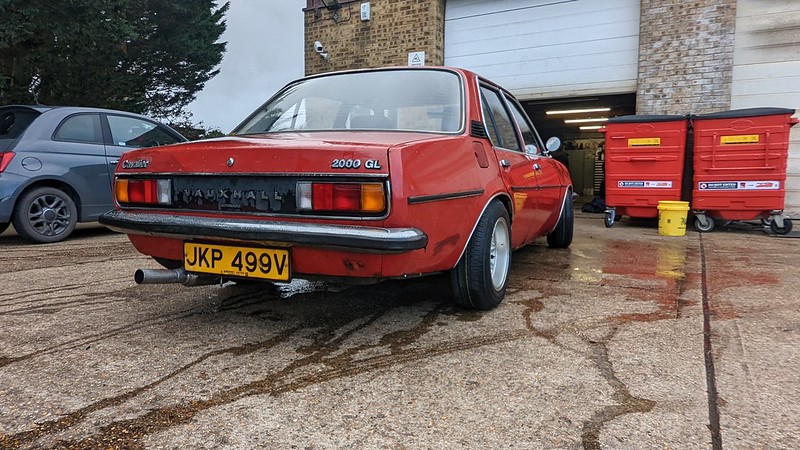  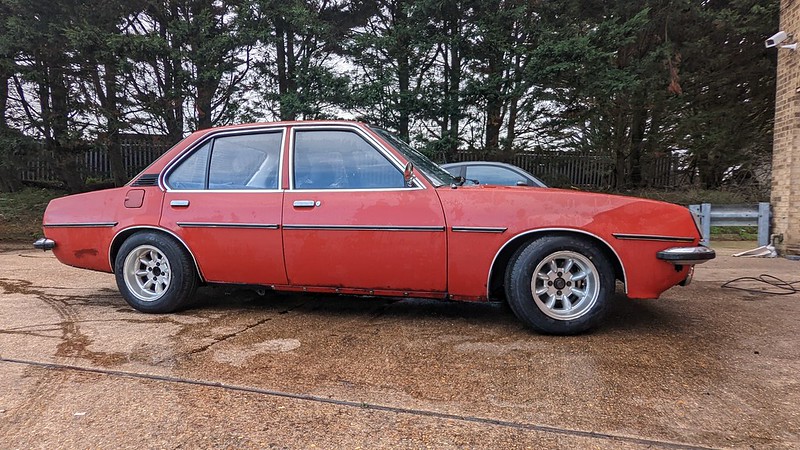 Sill cover on driver's side hasn't been refitted yet, I'll sort that this week.  Paint needs a bit of a mop, when it dries there are a couple of faded bits, mainly on the roof, but really not much at all. Shouldn't take much to make it look ok. I want to address the surface rust on the bottoms of the doors asap, before it becomes a proper issue. It's come a long way from the beginning of August when we picked it up haha. 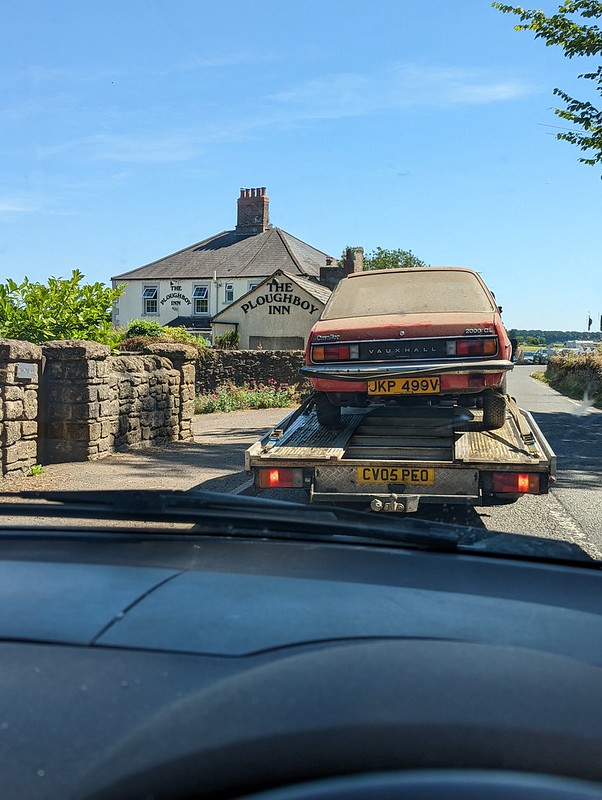 The front and rear windscreens were so caked in dust that even this wash didn't clean them properly, so I gave them a good clean with glass cleaner and they're much better now. Also cleaned up some of the dirty bits on the headlining and sun visors, and the little bit of mould on the parcel shelf. Sitting in the back I actually really like the retro look of the interior:  Done a couple of initial insurance quotes and it's looking like it'll be £200-£300 fully comp with all mods declared, including the engine swap etc. Not bad I don't think, that was with a £7,000 value, I really didn't know what to put the value at to be honest. The car is obviously not mint but it's pretty good, and as far as I know this is the only Cavalier/Manta/Ascona in the world that I can find with a full MX-5 engine and box conversion, so I'm going to try and get an agreed value close to that on it. Few bits to sort and then I'll get it booked in for MOT. Once that's done I'll sort the tax exemption stuff out, and then it can see the road. |
|


 ) high-pressure at the base of the windscreen?


 le sigh