|
|
Post by boggissimo on May 30, 2023 11:38:13 GMT
Hi
Did you get the R package track rod ends with a different swan neck for lowered suspension ??
Fitted to the Mk1 Bilstien equiped cars.
They help to mitigate Bumpsteer. I bought two pairs when I had two Rs Ltds
I might still have an unused set in the spares stock as I sold one of the cars which still had good originals.
I fitted extended lower ball joints onto the front of the ITB Monster which gives more negative camber without being silly. ( car in my Avatar pic )
Hi Dickie, no I just got a pair of IL Motorsport ones from MX5parts, cheap and hopefully cheerful. At this stage I just want to get it all back together ready for my next sprint at Brooklands in a few weeks. If you come across that pair of extended ones and want rid, drop me a DM! |
|
|
|
Post by lowender on May 30, 2023 13:24:22 GMT
Another way of mitigating bump steer on lowered suspension is to fit rack spacers (mine are Garage Star ones):  |
|
|
|
Post by boggissimo on May 31, 2023 9:45:48 GMT
Got the driver's side suspension stuff finished up last night. What I didn't know is how to set the alignment bolts up properly, so I put them all with the middle mark at the top of the hole. It's going to need an alignment anyway so I thought that was probably a reasonable compromise. All the stuff I've seen online, and the Haynes manual, says to mark where it was and put it back the same, but what if that was wrong in the first place? ...or if you forgot to mark them?
|
|
|
|
Post by boggissimo on Jun 1, 2023 8:55:02 GMT
More wrestling last night, got the passenger side nearly all undone - one stubborn bolt on the lower control arm, of course the one that's hardest to whack with a hammer just behind the track rod (nut is off but bolt is not moving), and both the ball joints in the steering knuckle. Bit of heat will sort them probably. My replacement arms came with alignment bolts in them, and I've got new ones and didn't bother to swap them in on the drivers side, but have now noticed that the new ones are the Mk2 bolts with double slots for the eccentric washer, so will go back and swap them over on the drivers side too, should help them stay in position better.
|
|
|
|
Post by dickie on Jun 4, 2023 15:43:02 GMT
Hi Folks,
I have just ordered a lightweight RPC flywheel from Tegiwa Imports for the new engine.
I have also cleaned the donor block down and given it the first coat of engine laquer.
Yesterday I dropped the fuel pressure down on the Mongrel to 50 PSI and re set the injector dead time.
I decided that a lower pressure will give a slightly longer fuel burst and give the fuel pump a bit less work to do. It was running at just over 60 psi.
Running 550cc EV14 injectors.
|
|
|
|
Post by dadbif on Jun 5, 2023 7:01:39 GMT
Hi Folks, I have just ordered a lightweight RPC flywheel from Tegiwa Imports for the new engine. I have also cleaned the donor block down and given it the first coat of engine laquer. Yesterday I dropped the fuel pressure down on the Mongrel to 50 PSI and re set the injector dead time. I decided that a lower pressure will give a slightly longer fuel burst and give the fuel pump a bit less work to do. It was running at just over 60 psi. Running 550cc EV14 injectors. I thought that the length of the fuel burst was determined by the injector opening time? Reducing the pressure would result in less fuel flowing whilst the injector was open.. |
|
|
|
Post by dickie on Jun 5, 2023 16:47:48 GMT
The aftermarket ECU compensates,
At a lower pressure it will inject for longer than at high pressure as long as the dead time is matched to the actual pressure set by the adjustable FPR.
I am still running the EV14s at the lower end of the pressure recomendations as they recommend between 40 and 100 psi
Your point would be valid on a stock ECU if you fitted an adjustable FPR. Up the pressure to make mixture richer / lower the pressure to weaken the mixture.
|
|
|
|
Post by boggissimo on Jun 6, 2023 11:40:47 GMT
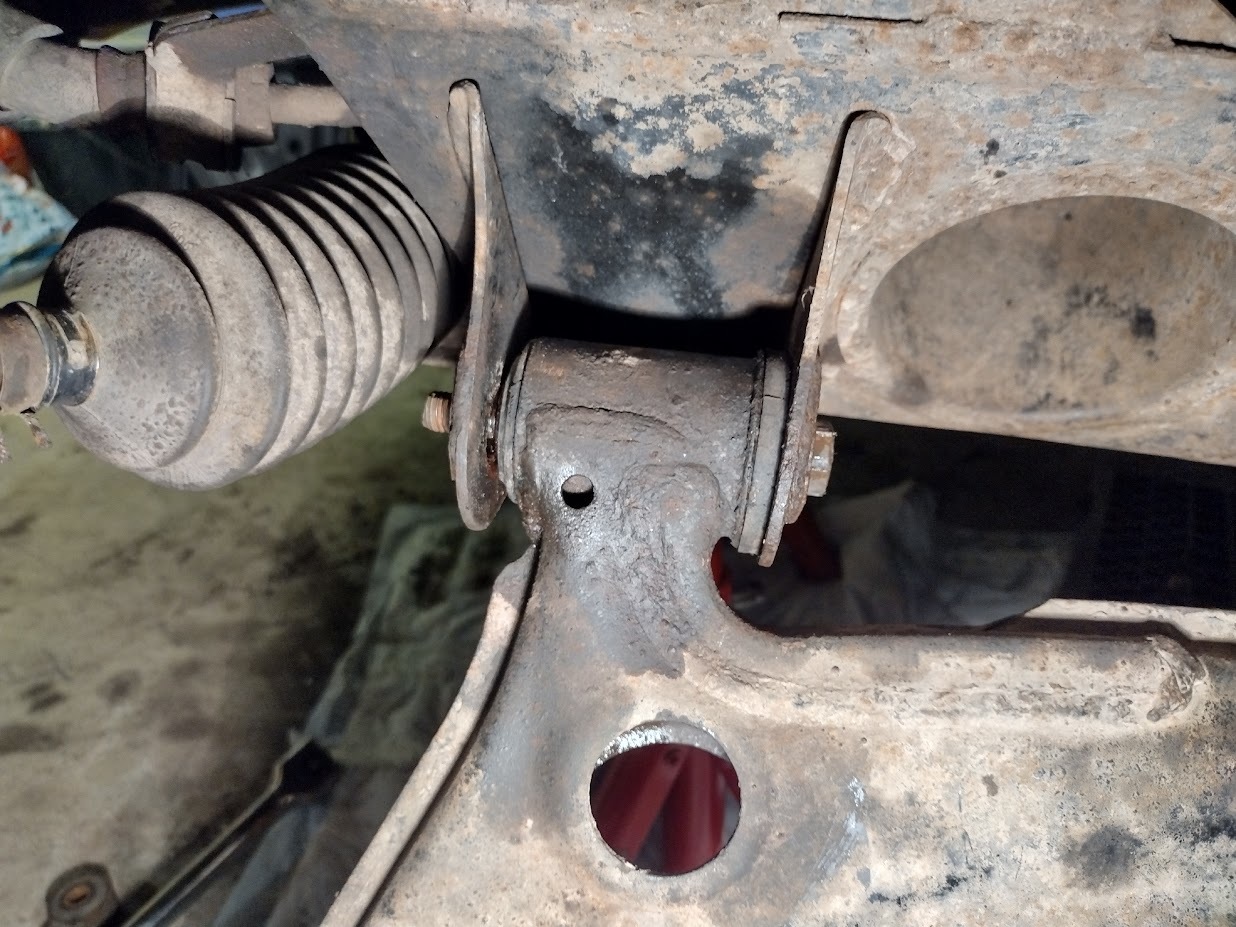
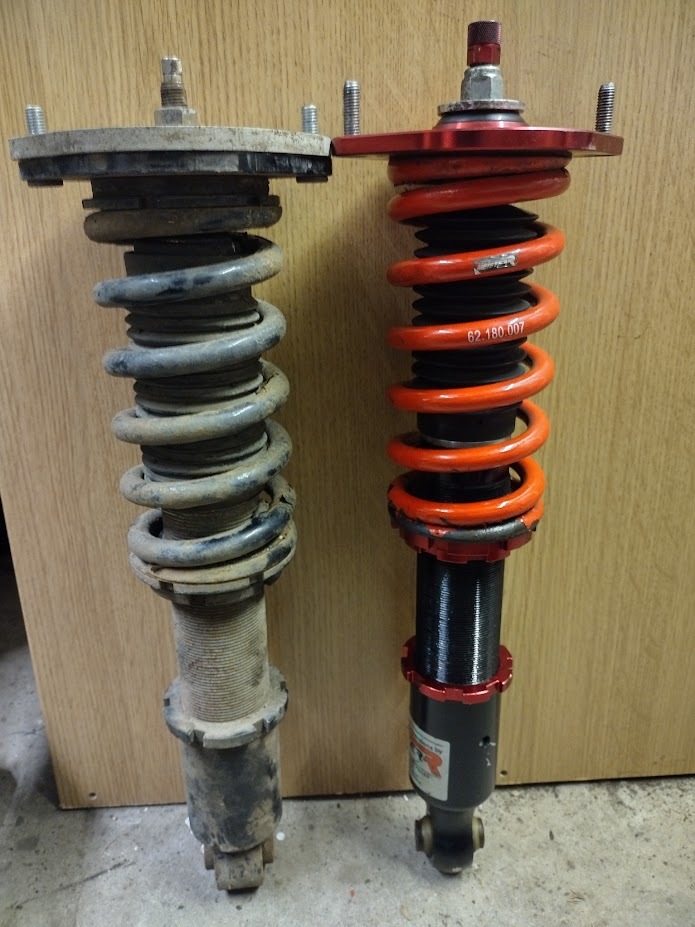
This barsteward bolt won't come out of the lower control arm.  It seems to have fused with the >30 year old rubber bushing so when you try to turn it, the rubber twists and rebounds back to where it started. The arm rotates with it and even when I put a block of wood under to stop it turning, there's not enough room to rotate the bolt more than about 45 degrees to break it loose. I've tried the ugga dugga but it doesn't turn it at all. So I've resorted to cutting it off with a hacksaw. Took best (worst) part of half an hour to get the nut end off, as the access is terrible. Will hack the bolt head end off next time. I got the ball joints out of the steering knuckle eventually, had to take the lower ball joint out of the arm, then put the knuckle in the vice with some heat to smack the lower one out. And then the nut that I'd put back on the end to make it easier to hit wouldn't come off as the ball joint was rotating with it, so I had to partially put it back in again! Light at the end of the tunnel though, and the new (lightly used) coilovers should make a nice difference. I'll cover them in ACF50 and put them in coilover socks to help keep them looking nicer than the old HSDs.  |
|
|
|
Post by boggissimo on Jun 12, 2023 9:15:27 GMT
Still battling with that bleddy bolt. I've got a metal cutting blade for the Dremel which is making some progress on the head of the bolt, and have shattered the blade of my new reciprocating saw trying to cut between the bracket and the bush. Hopefully will finally get it off tonight so I can start putting it back together...sprint on Saturday is looming
|
|
|
|
Post by boggissimo on Jun 13, 2023 8:06:59 GMT
VICTORY IS MINE! Took another hour or so of slowly hacking at the bolt and it finally went. After that it was pretty plain sailing to get the new coilover on and everything loosely bolted up. All the ball joints went in fine on this side (on the other side I had them spinning in the tapers so I had to add more compression with a ratchet strap to get them tight).
Need to torque everything up on the passenger side, and swap over the two alignment bolts I'd previously put in on the driver's side with the new Mk2 version. I'm setting all of them in the middle, hoping that'll give a reasonable initial setting and will try to get an alignment done at the end of the week.
The track rod was much shorter (more wound into the track rod end) on the passenger side than the driver's side - should I set them both the same?
|
|
|
|
Post by wannabe on Jun 13, 2023 14:35:00 GMT
The track rod was much shorter (more wound into the track rod end) on the passenger side than the driver's side - should I set them both the same? Did you measure the old ones? lol |
|
|
|
Post by boggissimo on Jun 13, 2023 15:07:10 GMT
The track rod was much shorter (more wound into the track rod end) on the passenger side than the driver's side - should I set them both the same? Did you measure the old ones? lol No, but they're clearly marked by where the rust appears on the track rod threads!  |
|
|
|
Post by dickie on Jun 13, 2023 19:07:22 GMT
Hi
You should set the rack in the middle position then set camber / castor then the tracking last.
once thats all done make sure the steering wheel is centred.
Its all a fiddle as camber / caster changes will alter the tracking.
Have fun !!!
|
|
|
|
Post by boggissimo on Jun 14, 2023 12:48:34 GMT
Hi You should set the rack in the middle position then set camber / castor then the tracking last. once thats all done make sure the steering wheel is centred. Its all a fiddle as camber / caster changes will alter the tracking. Have fun !!! Thanks dickie! I'm doing a sprint on Saturday and have just finished putting the front suspension back together. Want to get the new coilovers on the rear and replace the alignment bolts there too, so it will be a blank canvas as far as alignment goes, and I don't think I'll have a chance to take it anywhere to get sorted on a proper machine, so will inevitably be a bit of a bodge job. |
|
|
|
Post by dadbif on Jun 14, 2023 21:05:17 GMT
|
|