|
|
Post by scottydugg on Jan 4, 2018 15:30:47 GMT
Love the wheels, first thing I thought when I saw them "I hope he's getting chunky tires to go with them!" Good man! plenty space for tire writing  |
|
|
|
Post by Bilbo on Jan 4, 2018 16:40:51 GMT
Love the wheels, first thing I thought when I saw them "I hope he's getting chunky tires to go with them!" Good man! plenty space for tire writing  Haha yeah man, got to have chunky tyres. No stretch for me. You need chunky tyres on 13s or they just look like Lego wheels haha. Also love a bit of tyre writing. Had it on my old mk2 with the Toyos. Not sure Falken is such a cool brand to write on there, but I'll give it a go and scrub it off if it looks awful haha. Fingers crossed for the arch rolling, my mate has done it before so it's all good, he's got a heat gun too. Just hope it goes smoothly, and then I'll finally have it looking more how I want. |
|
|
|
Post by Bilbo on Jan 14, 2018 15:10:27 GMT
Got the tyres fitted to the Superlights yesterday 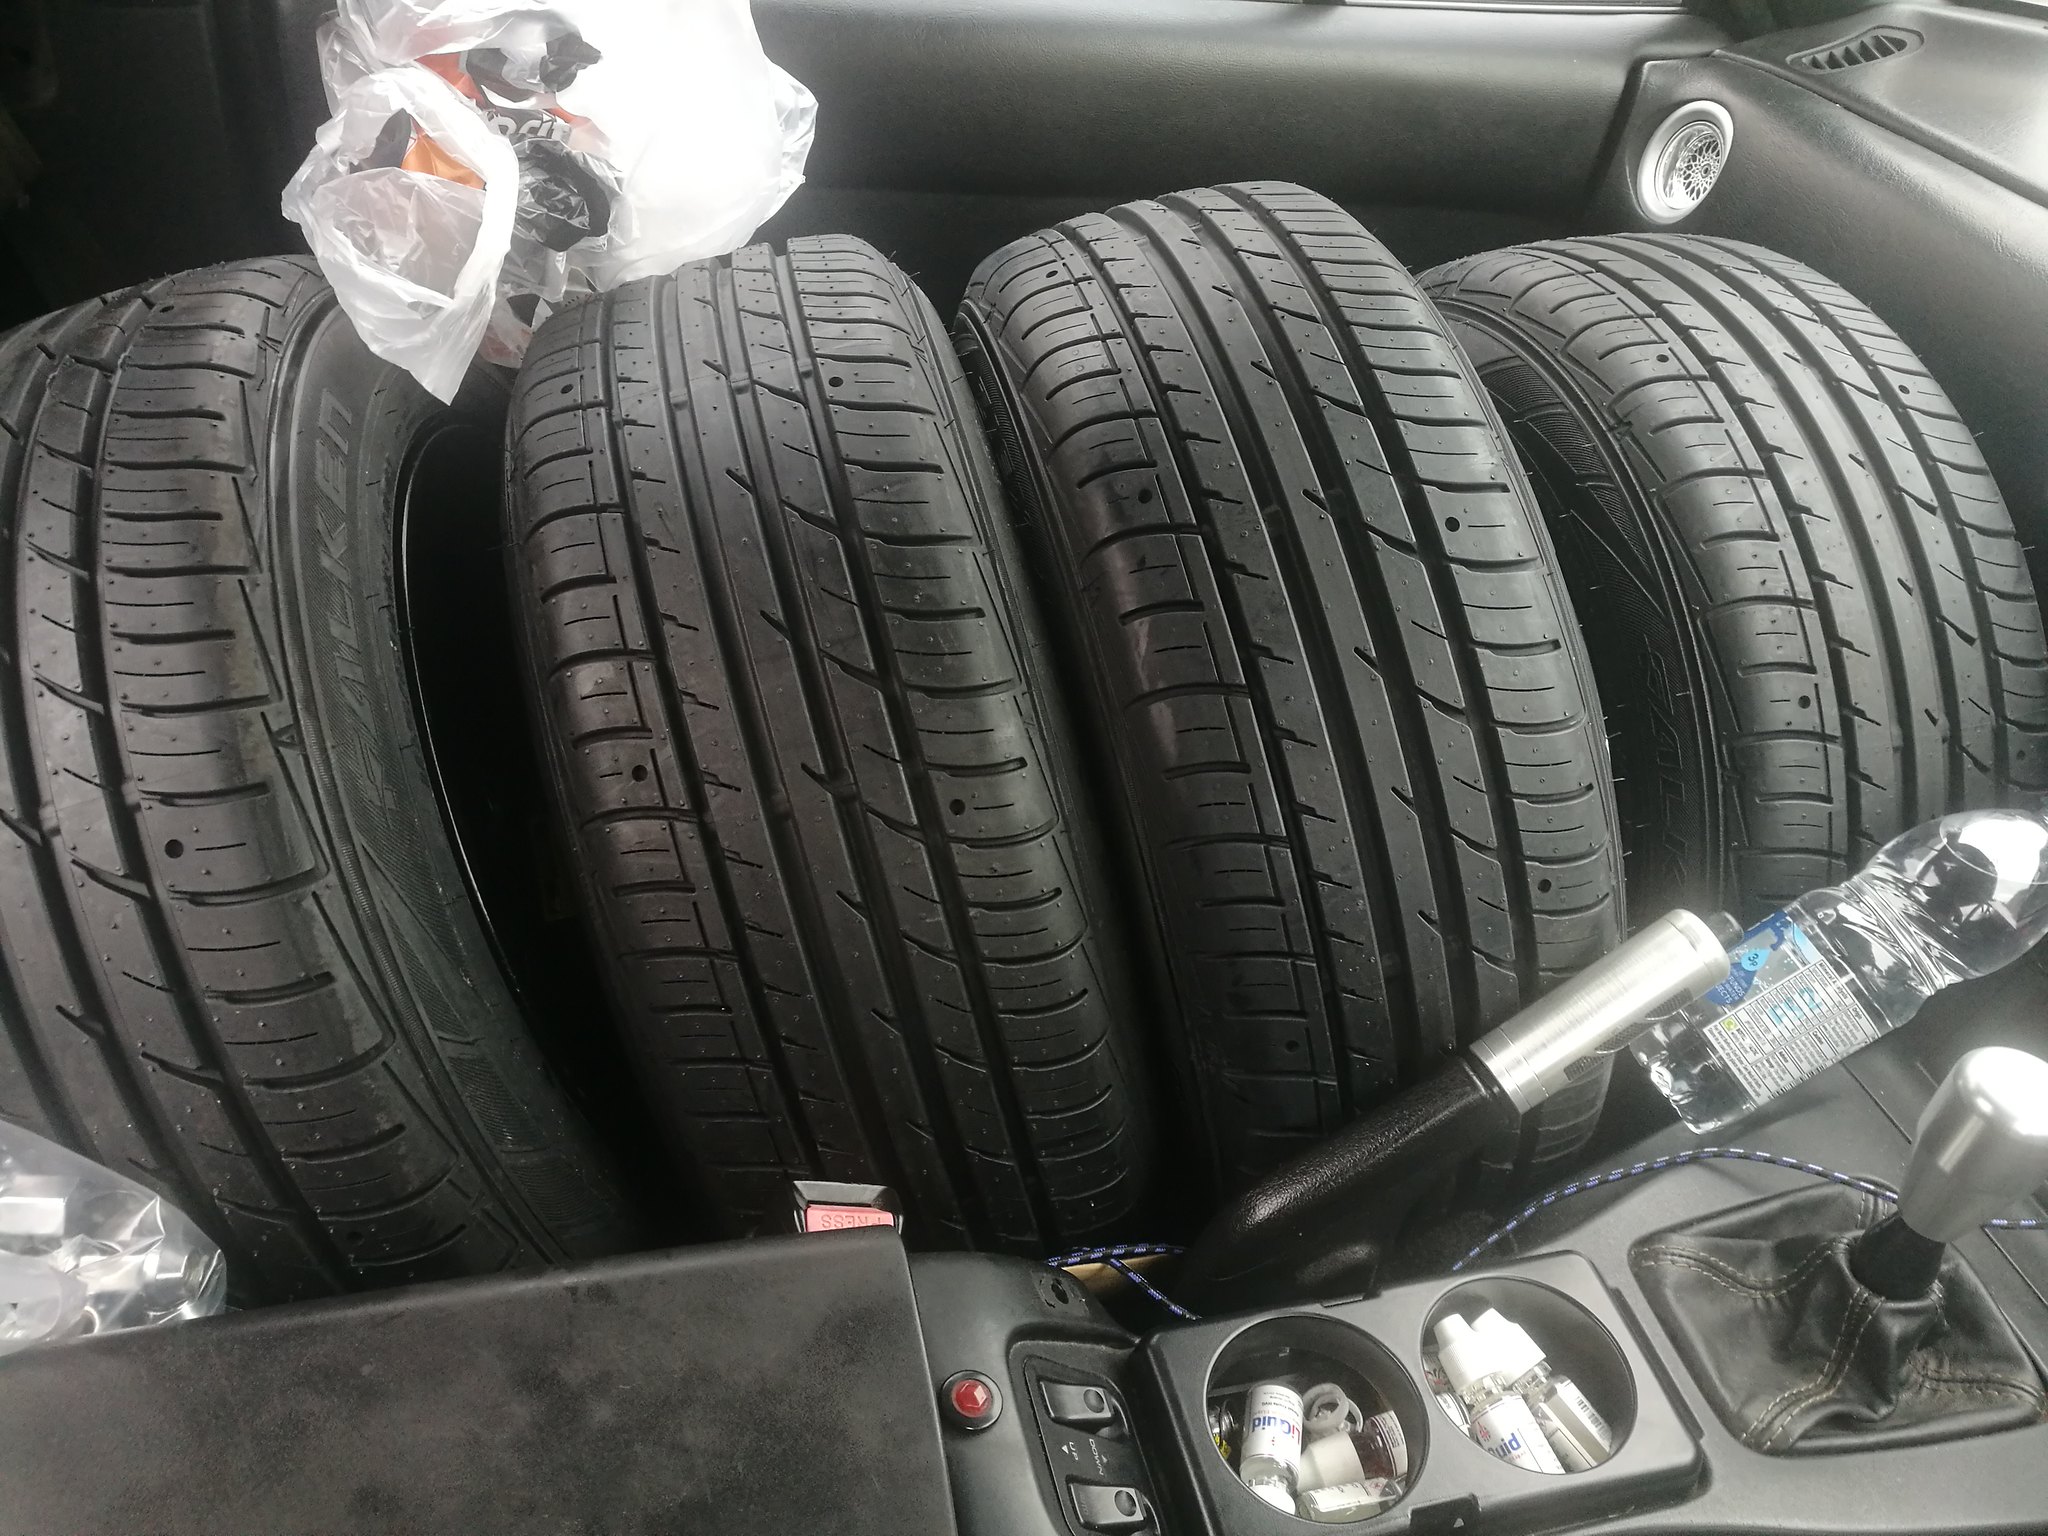 JBW Superlight MX-5 JBW Superlight MX-5 by Chris Oldham, on Flickr Good thing about 13s is they fit snugly in the passenger side. I just had to remove the passenger seat and the door pull/arm rest. Not the definition of practicality but they fit so it's all good. Had a bit of a delay on the arch rolling, but it's happening next weekend hopefully. I test fitted one of the rears to get an idea on size  JBW Superlight MX-5 JBW Superlight MX-5 by Chris Oldham, on Flickr  JBW Superlight MX-5 JBW Superlight MX-5 by Chris Oldham, on Flickr Looking pretty fat, but a roll will be needed to clear I think. The fronts are going to be tighter, but I've spoken to a couple of people who had/have the exact same wheel/tyre combo, and a light roll and a bit of fettling on the arch liner tabs up front should have them fitted with no rubbing issues. Even though I only fitted one I can tell it will completely transform the look of the car, so excited to get them on now. |
|
|
|
Post by melx5 on Jan 14, 2018 18:41:29 GMT
My god, what did you have to go and do that for, I've been looking at those wheels for some time, telling myself not to be dumb as they will look prarrie canoe and you go and post those pics.
|
|
|
|
Post by minty on Jan 14, 2018 19:12:19 GMT
My word fella you’ve been busy whilst I’ve been gone! Looking great!
|
|
|
|
Post by atlex on Jan 14, 2018 22:30:36 GMT
Looking forward to seeing this.
|
|
|
|
Post by Bilbo on Jan 15, 2018 11:14:16 GMT
My god, what did you have to go and do that for, I've been looking at those wheels for some time, telling myself not to be dumb as they will look prarrie canoe and you go and post those pics. To be fair they can look bad. It's all about the tyre size you go for. Something with a fat profile fills the arch way better. I've gone for 185/60/13, and I think that's the best balance between looks and arch clearance. 70 profile might cause more arch issues I imagine. Anything smaller makes them look like lego wheels, and they're just too tiny in the arch. Check Ebay as last I looked they still had the Superlights in 4x100 for £240. They list them weirdly though as they don't use JBW in the product title. Search "13 x 7 4 x 100" and it brings them up. My word fella you’ve been busy whilst I’ve been gone! Looking great! Cheers mate. Yeah a few things going on, but still lots to do. Cambelt and front seals as well as new brake pads are the next big maintenance jobs on the list. Looking forward to seeing this. Hopefully have them on and sorted this Saturday. Very excited. |
|
|
|
Post by Bilbo on Jan 29, 2018 21:45:00 GMT
So the Superlites are now on. Arch rolling was a tough job in the cold, luckily a mate was a total legend and offered to help, which was great as he had done it before. The heat gun helped so much. Overall the arches were in alright condition, a tiny bit of filler on the left side but nothing too bad. Quite a bit of paint cracking on the lip itself, but we used the heat gun extensively to prevent it making its way onto the visible panels. I'm going to sand and treat the rolled lips to prevent any rust forming in the paint cracked areas. I think they look great:  MX-5 JBW Superlight 13x7 ET-7 13 inch MX-5 JBW Superlight 13x7 ET-7 13 inch by Chris Oldham, on Flickr 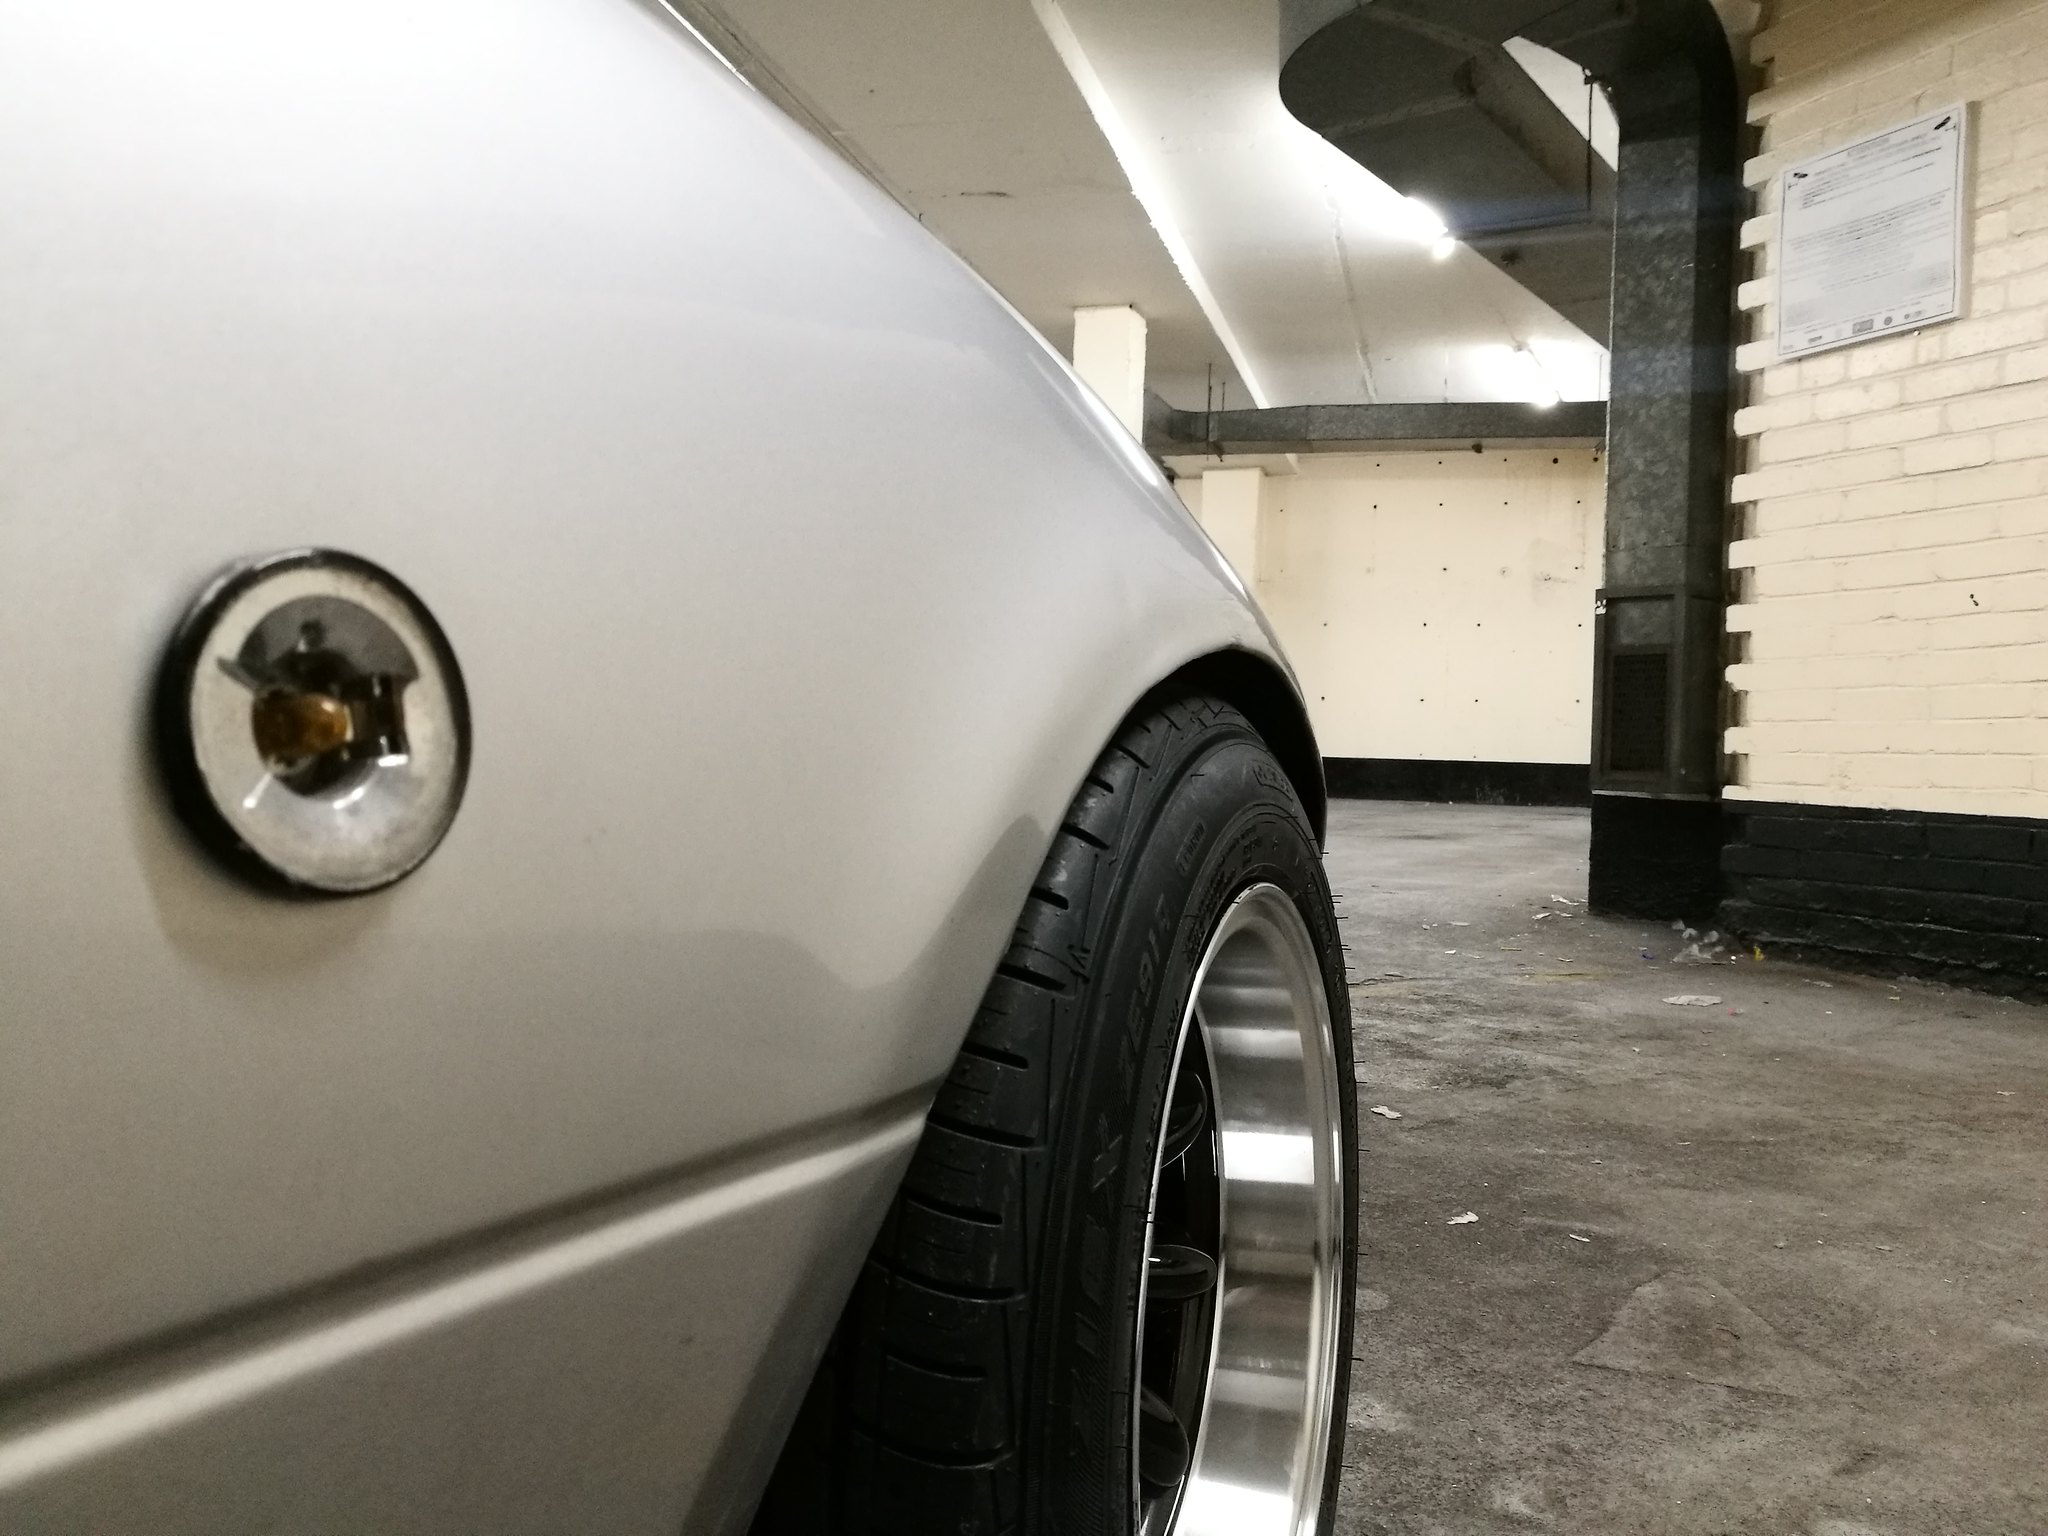 MX-5 JBW Superlight 13x7 ET-7 13 inch MX-5 JBW Superlight 13x7 ET-7 13 inch by Chris Oldham, on Flickr 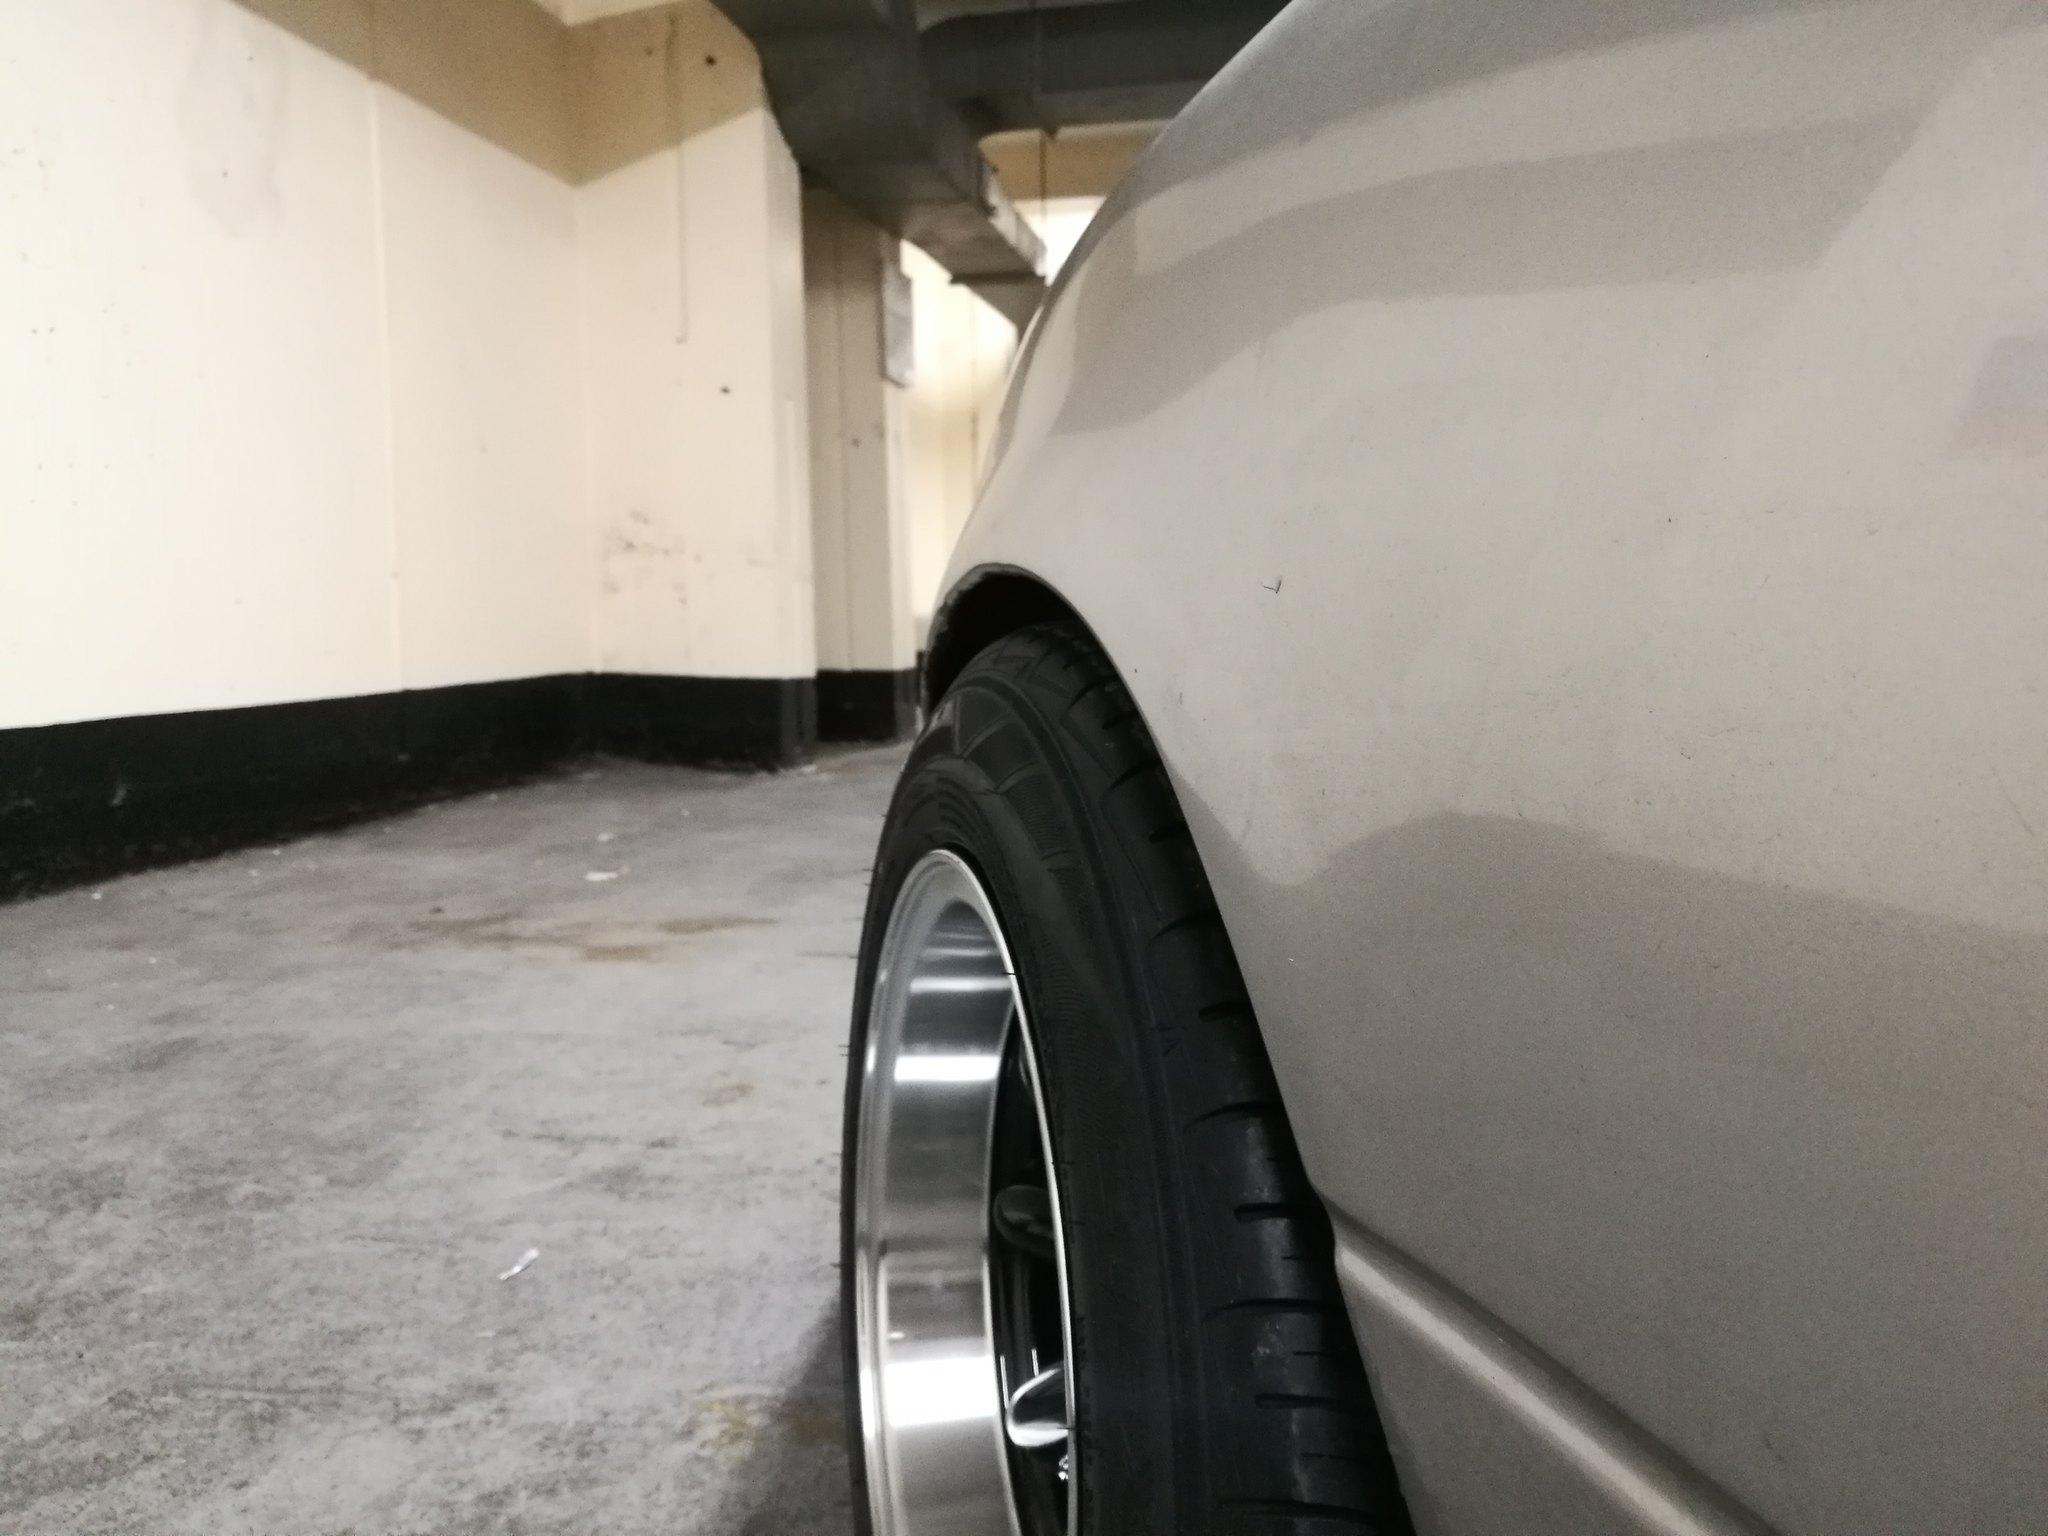 MX-5 JBW Superlight 13x7 ET-7 13 inch MX-5 JBW Superlight 13x7 ET-7 13 inch by Chris Oldham, on Flickr Got myself along to Sussex Brekkie Meet, and being black they look better in daylight I think: 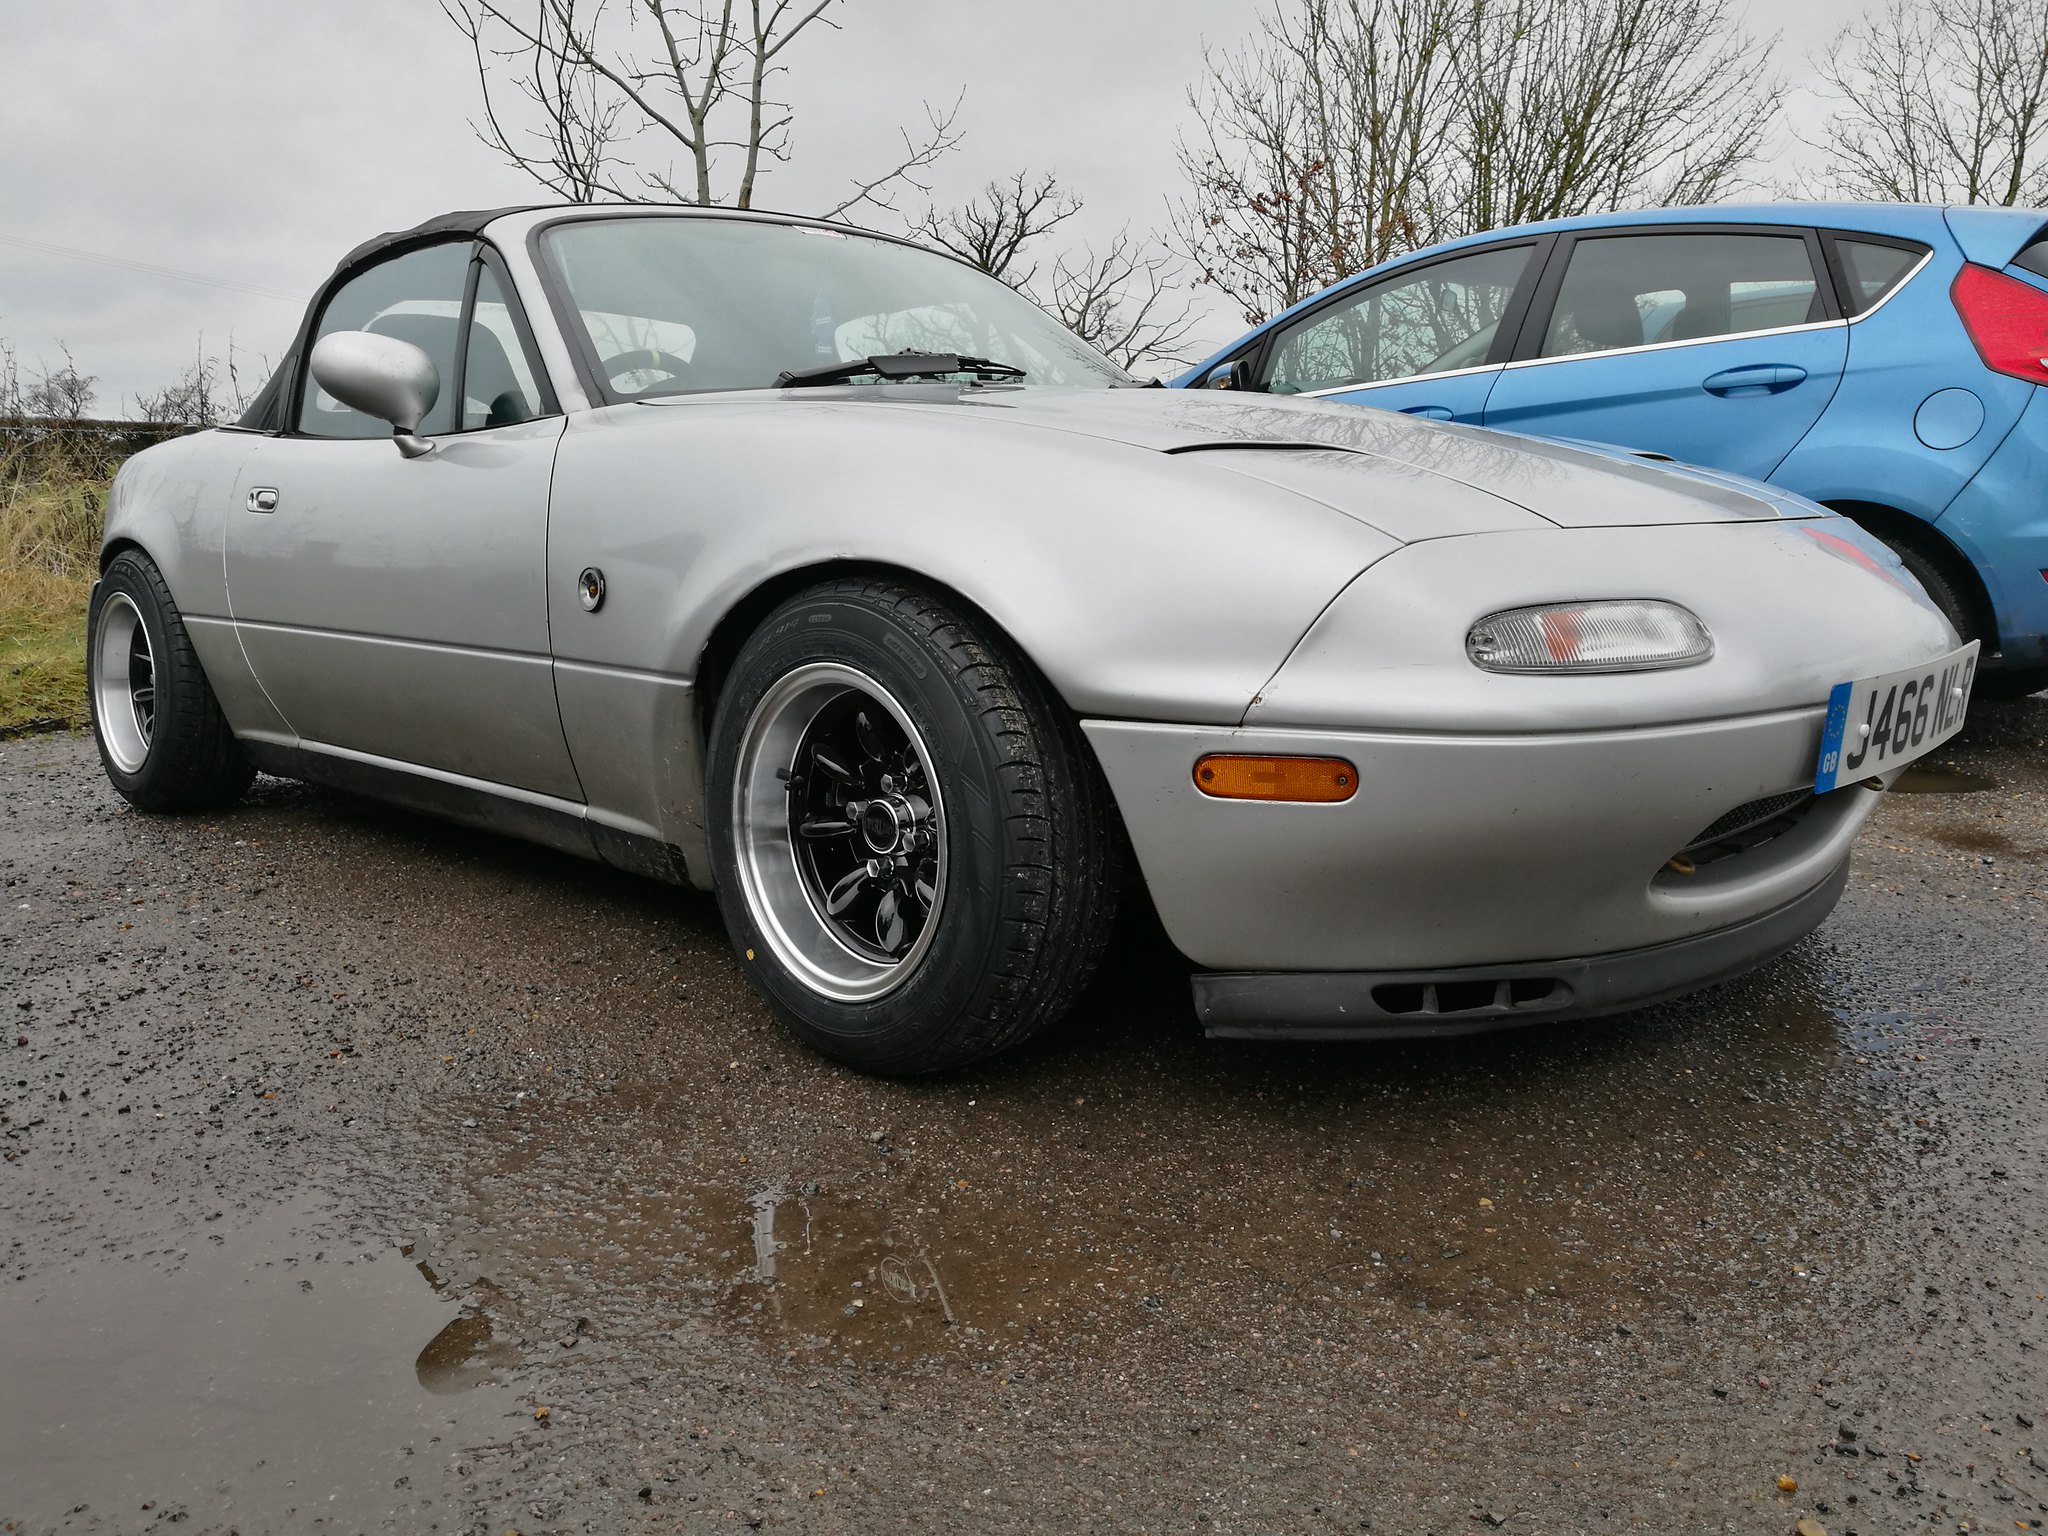 MX-5 JBW Superlight 13x7 ET-7 13 inch MX-5 JBW Superlight 13x7 ET-7 13 inch by Chris Oldham, on Flickr 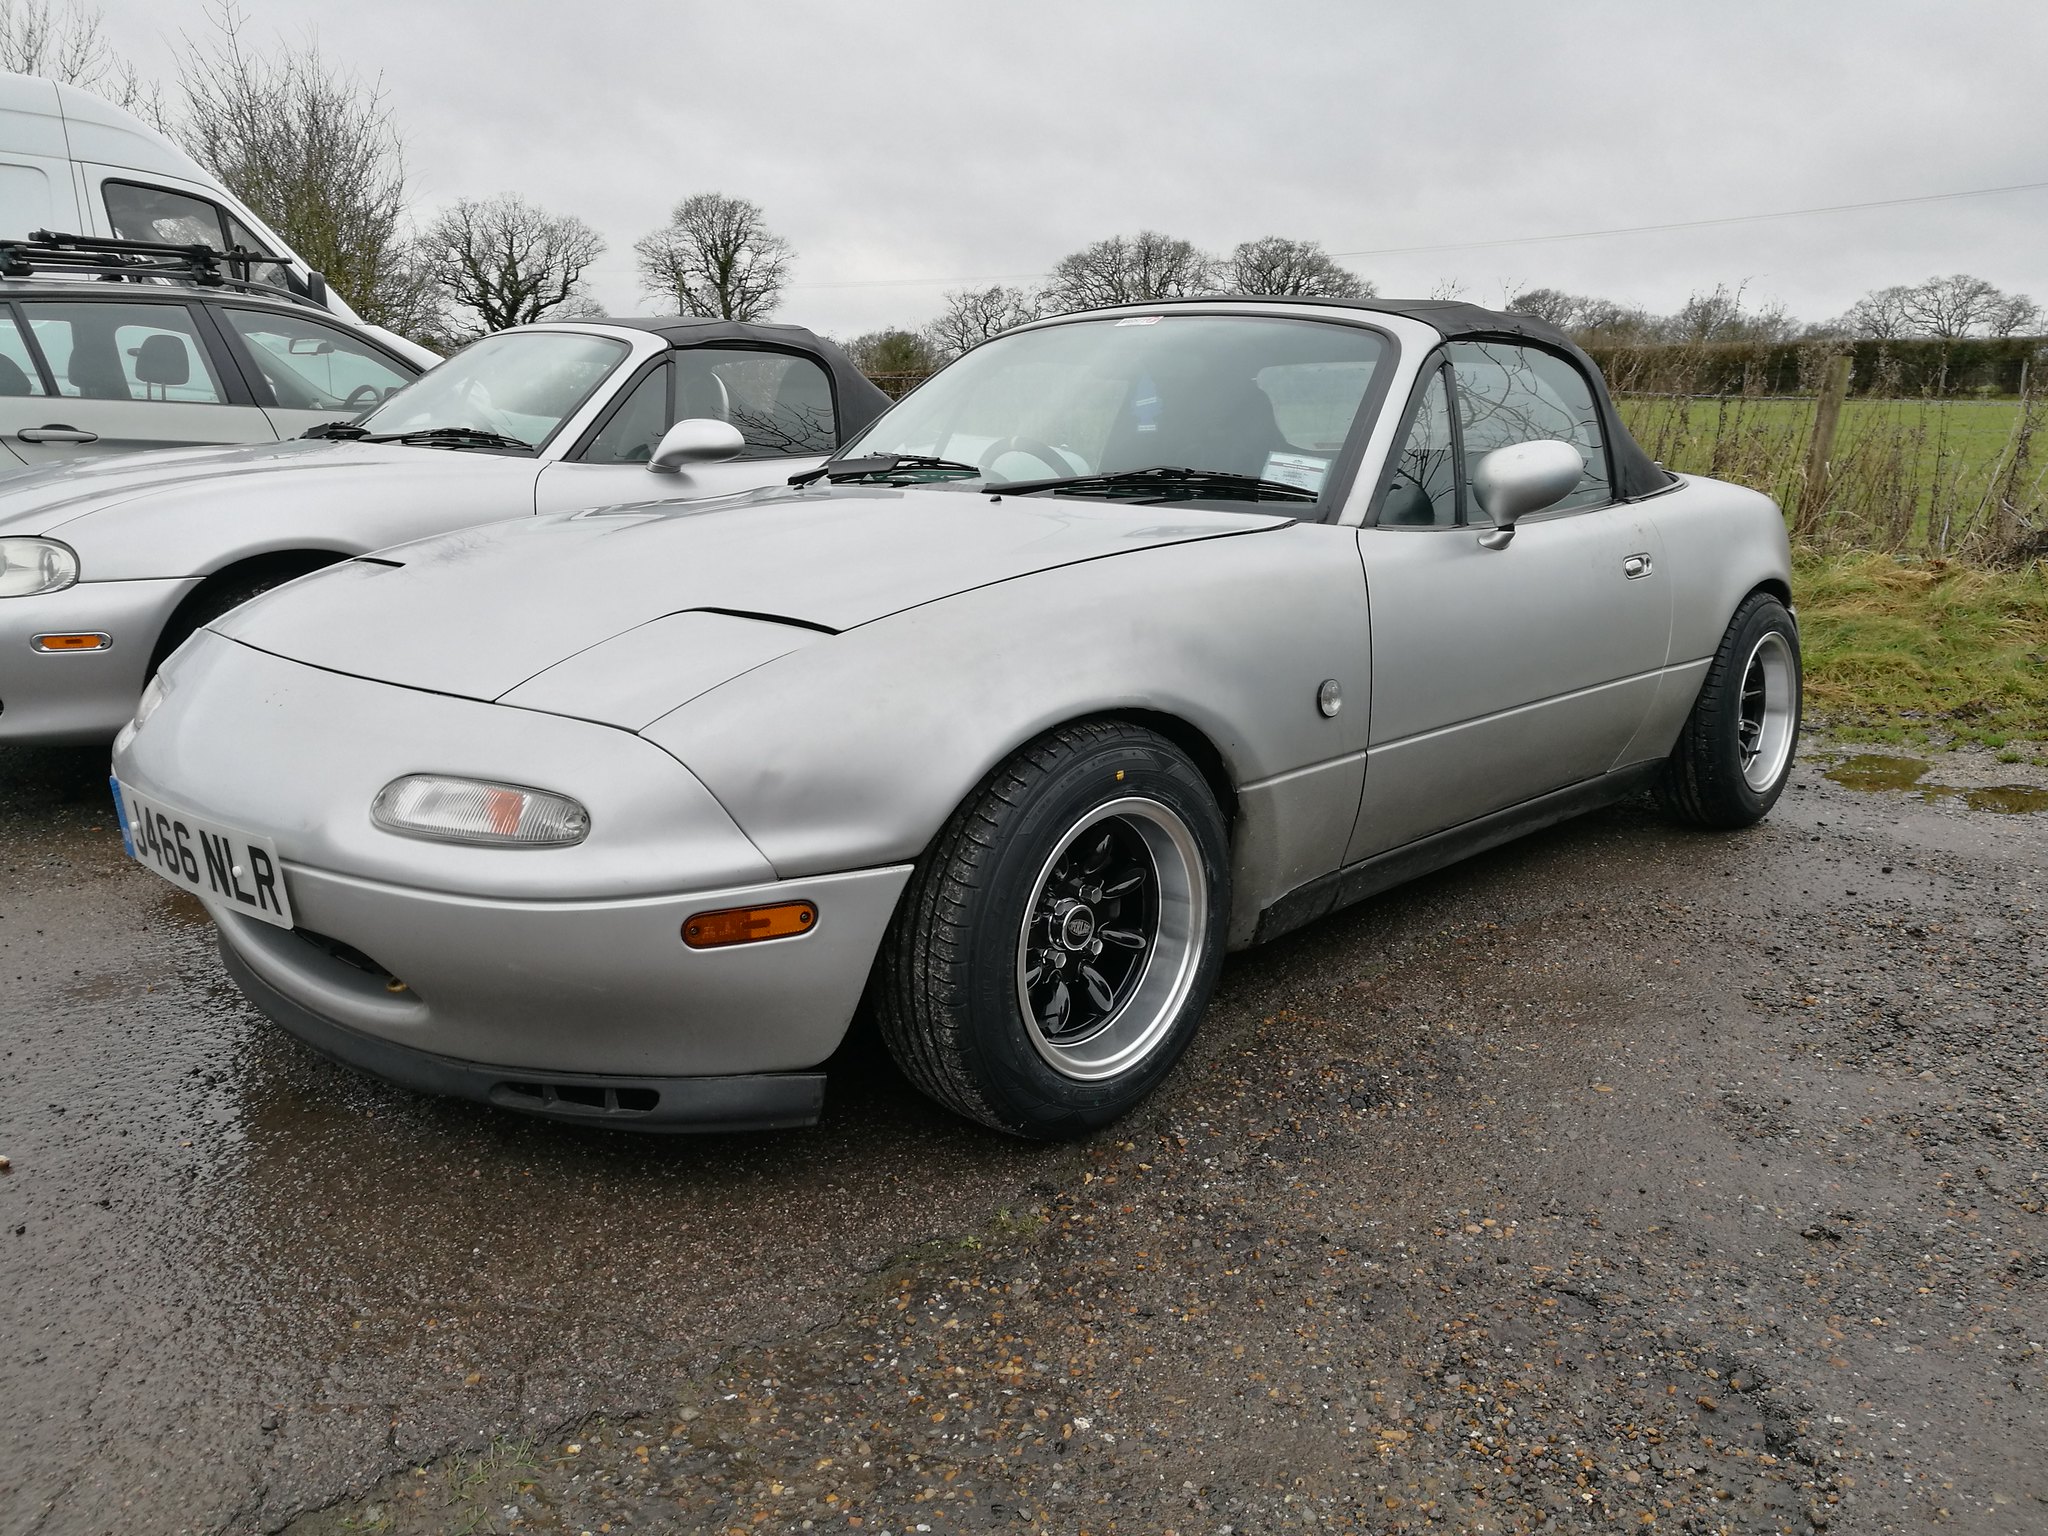 MX-5 JBW Superlight 13x7 ET-7 13 inch MX-5 JBW Superlight 13x7 ET-7 13 inch by Chris Oldham, on Flickr  MX-5 JBW Superlight 13x7 ET-7 13 inch MX-5 JBW Superlight 13x7 ET-7 13 inch by Chris Oldham, on Flickr 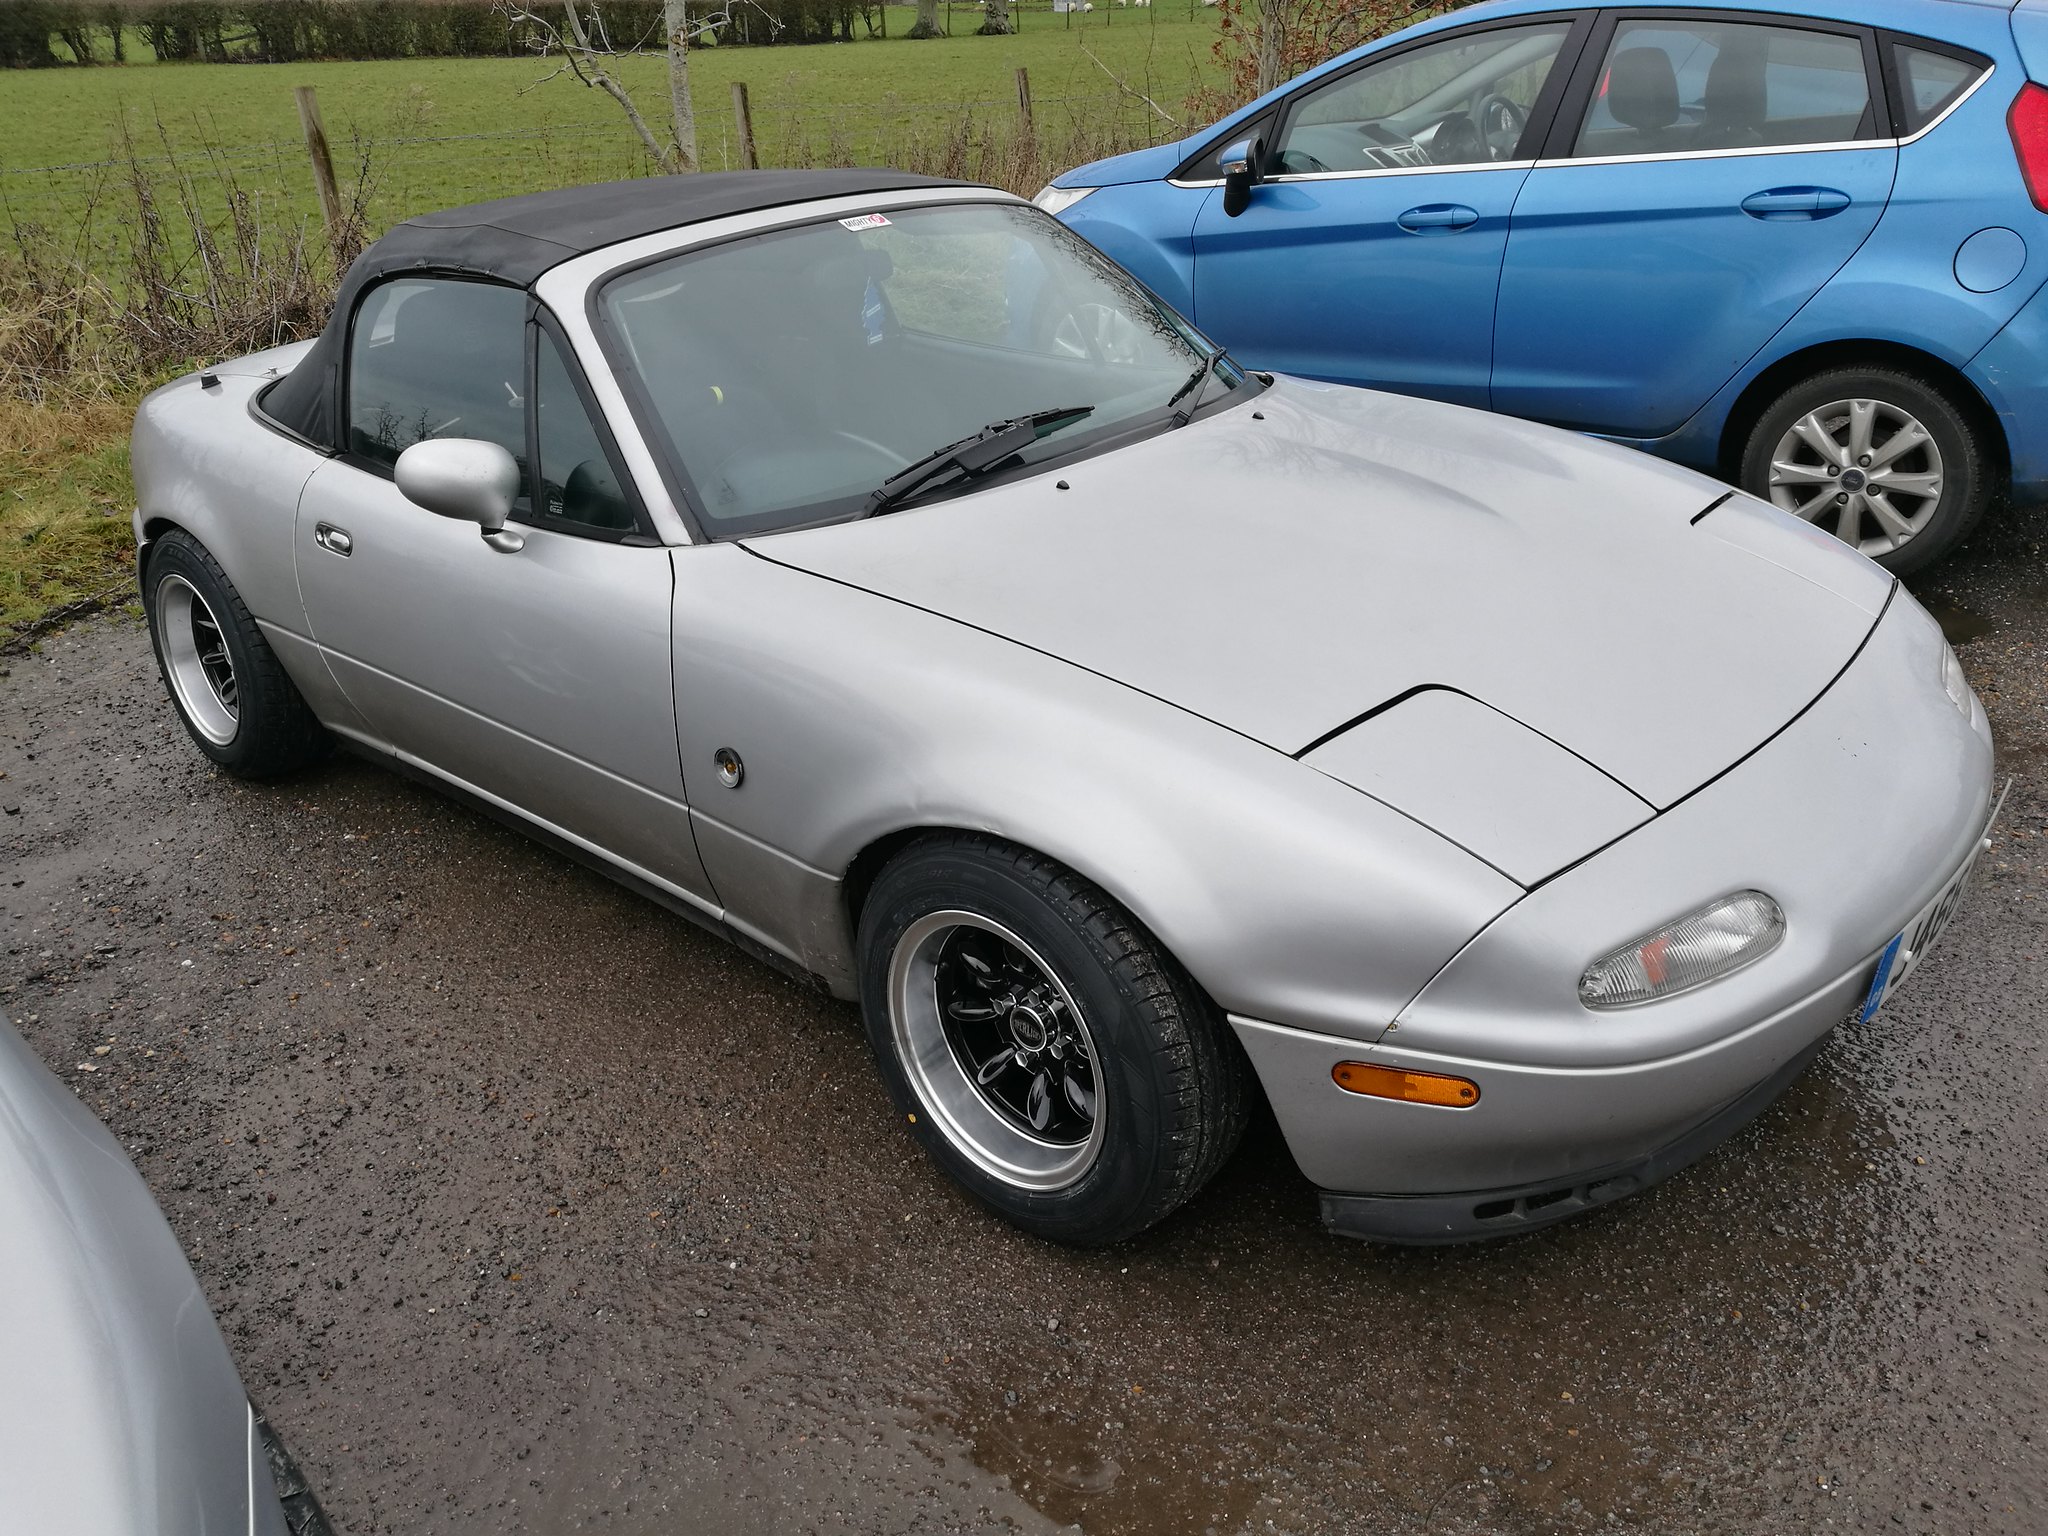 MX-5 JBW Superlight 13x7 ET-7 13 inch MX-5 JBW Superlight 13x7 ET-7 13 inch by Chris Oldham, on Flickr Some decent cars there too, some kit cars, Caterhams, a couple of Lotus Elises, some nice bikes, and a few others, as well as the 5s of course.  MX-5 JBW Superlight 13x7 ET-7 13 inch MX-5 JBW Superlight 13x7 ET-7 13 inch by Chris Oldham, on Flickr  MX-5 JBW Superlight 13x7 ET-7 13 inch MX-5 JBW Superlight 13x7 ET-7 13 inch by Chris Oldham, on Flickr  MX-5 JBW Superlight 13x7 ET-7 13 inch MX-5 JBW Superlight 13x7 ET-7 13 inch by Chris Oldham, on Flickr All in all I'm pretty happy with them, and the Falken ZE914s feel decent so far. The tyre garage put 32psi in them, so I need to change that to 28 soon. Now just waiting for the warmer weather so I can enjoy it more! |
|
|
|
Post by Bilbo on Feb 24, 2018 23:21:54 GMT
|
|
|
|
Post by Bilbo on Mar 10, 2018 20:38:53 GMT
So MOT time is coming up and I know there's a few things which should cause a failure: Fog light smashed (stupid bumper mounted one, may have caught a kerb when parking  ). Driver's seatbelt frayed. horn button not working (horn wiring is fine). Right side indicator lens snapped off. So, safety first. I started with the seatbelt. Fairly simple job in all honesty.  MX-5 seatbelt replacement MX-5 seatbelt replacement by Chris Oldham, on Flickr As you can see this is in no fit state to be used. The fray sits right on the buckle when I've got it on, so it's only going to get worse. I'm not one for living dangerously when it comes to seatbelts. As I said it's pretty simple, even with bucket seats in the way. The Skidnation mounts helped a lot, literally just unbolted the two rear side mounts on the seat and pivoted it forward to access the belt. The trim itself is just screwed in with one screw, and then it has a couple of metal push clips that go into the side panel that just pull out. So I changed over the belt, as it is a Eunos it comes with the pre-tensioner electrical connector. This was the most annoying part as the connector clips together underneath the metal panel across the parcel shelf. I got pissed off at the prospect of having to remove the carpet and panel and just unbolted two of the bolts and bent the panel out of the way:  IMG_20180309_130115 IMG_20180309_130115 by Chris Oldham, on Flickr You can see the white connector I'm referring to there. It bent back completely fine and was then just a case of looping the new belt through the seat hole and bolting everything back together. Job done:  MX-5 seatbelt replacement MX-5 seatbelt replacement by Chris Oldham, on Flickr An interesting thing I discovered during this job was that there's an access hole to the sill area behind the plastic shroud, just behind the door. I got my phone torch on and had a little look. Now this isn't the very rear of the sill, but it is still towards the rear of the sill area, generally where rust forms. I know that I need a new driver's sill eventually, as it is starting to show. However this photo shows that it hasn't spread along to here yet, looking very clean in there (the discoloured areas are just dirt, I wiped them away with my finger after this):  MX-5 seatbelt replacement MX-5 seatbelt replacement by Chris Oldham, on Flickr The photo doesn't really show it off that well, but there was very little rust to be seen here. I have an endoscope so I will have a proper look soon. So moving onto the smashed fog light. I decided to ditch the crappy rear fog and re-wire it into the right side reverse light. I am in no way electrically minded, I've never crimped a wire, only soldered once (and almost set the headphones on fire that I was soldering) so this wasn't a job I fancied, but I bought a set of wire cutters/crimpers and a box of various spade connectors etc. and got on with it. I cut the old wiring down, pulled it back through the boot hole, and then cut and crimped the existing reverse live onto the fog live. Started up and it all works perfectly, except my other reverse light wasn't working. I was gutted, knew I'd messed up. Anyway turns out the bulb was just blown, changed it and all good now. Just need to replace the fog with a red bulb as it's currently white, and then electrical tape over my crimped together wires. No photos as my phone died, soz. Last part of the update is that I'm getting a mig welder. I had a long think, and really a decent sill repair will set me back £360 after VAT with MX5Restorer, and to be honest I hate taking this car to anyone for work, even if the work they do is fantastic. I've done almost everything myself, so thought why not this as well? A basic setup will cost me about the same money, and after it's done I've got a repair, a welder, and a new skill. Eyeing up a Sealey MightyMig150, which will run as low as 30A which will be ideal for thin bodywork from my research. Also there's a company near my parent's who are distributors of rent free cylinders, so I'll be getting some 95/5 mix Argon/CO2 from them. Planning to have all the gear in a couple of weeks, and then I'll get cracking on some thin scrap metal! Bonus snow photo from last week:  Eunos Roadster MX-5 snow Eunos Roadster MX-5 snow by Chris Oldham, on Flickr |
|
|
|
Post by atlex on Mar 10, 2018 21:33:19 GMT
Those superlites are badass. Swoon.
|
|
|
|
Post by Bilbo on Mar 10, 2018 21:43:38 GMT
Those superlites are badass. Swoon. Thanks mate. I love them, they suit the mk1 so well, proper retro wheels. |
|
|
|
Post by Bilbo on Mar 20, 2018 12:52:46 GMT
Did a little bit of work on the car to get it ready for the MOT, fog light, seatbelt, and a few other bits and pieces. Paid off:  IMG_20180316_185229_2 IMG_20180316_185229_2 by Chris Oldham, on Flickr One advisory for corrosion to underbody, which he said was relating mainly to the rear sills. I'm happy with that, getting a mig soon to sort that issue out. Also booked Japfest Silverstone tickets which is exciting, can't wait! |
|
|
|
Post by Bilbo on Apr 1, 2018 22:07:43 GMT
So "Project: learn to weld and sort the sill" is beginning. I had this delivered last week:  IMG_20180326_194315 IMG_20180326_194315 by Chris Oldham, on Flickr A Sealey MightyMig150. Ultimately a budget option but in all honesty I think it'll serve it's purpose well enough. Sealey had their Anniversary sale and they were £200 on Ebay, with the one-day Ebay 20% sale on top I got it delivered for £160. Not bad. The side door hinges were broken on delivery. Not ideal but seems a pretty common issue from the reviews I've read. I'm really not too fussed about this though, it still has a lower clip to hold it in place. I've already changed the polarity for gas welding, and had a look over it. The wire feed mechanism is mainly plastic, the rollers themselves are metal. It feels quality in some places, but cheaper in others. For the price I can't really complain, it seems like it'll be up to the job. I got an auto-darkening helmet, respirator, and leather welding gloves from my family for my 25th, so that was a few more things off the list. I've bought an industry size dual gauge regulator with the hobby bottle converter, some impact resistant safety glasses, 0.6mm wire, 0.6 tips, and gas shrouds to suit. Just need to get a rent free cylinder from a local motor factors and I'll be good to go. Going to practice a load on some 1mm mild steel to get the feel for it, then crack on with the sill when I'm comfortable with the job. Also got a Dremel 3000 for my Birthday which will come in handy for various tasks I'm sure! So this is really a turning point for the car now, hoping to get it clean and sorted underneath by the end of the summer. I've done a fair bit of research, and I'm confident enough to give it a go. Also went over to the Sussex Brekkie Meet today. Turnout is getting better now it's warming up, some cool stuff there:  IMG_20180401_103132 IMG_20180401_103132 by Chris Oldham, on Flickr  IMG_20180401_103139 IMG_20180401_103139 by Chris Oldham, on Flickr  IMG_20180401_104852 IMG_20180401_104852 by Chris Oldham, on Flickr  IMG_20180401_103229 IMG_20180401_103229 by Chris Oldham, on Flickr  IMG_20180401_103243 IMG_20180401_103243 by Chris Oldham, on Flickr  |
|
|
|
Post by Bilbo on Apr 4, 2018 11:10:18 GMT
Initial post updated with full spec and links to most parts used so far. Hope it helps people wanting anything I've used!
|
|