Yo, it's Speeduino time!Edit: this turned into some mega long post, hope it helps someone. It took like two hours to write this out haha 
It has not been a relaxing Bank Holiday! Wiring, drilling, ripping stuff out, putting stuff in, I even soldered and crimped some wires successfully!
So as I said previously I put a deposit on a Speeduino until I had the money. James Brandon, the UK guy doing the Speeduino stuff has been a tremendous help, answered dozens of my noob questions, and always got back to me with a decent answer that helped out. Very much recommend him!
So the purchases:Speeduino MX-5 plug-n-play
B-M-W E36 Variable TPS (Löwe Automotive)
3D printed TPS adapter bracket
Bosch IAT sensor
Innovate MTX-L Plus wideband with Bosch 4.9 sensor.
6mm vacuum hose
Tools needed:Socket set
Spanners (ratchet type preferable)
Phillips and flat head screwdrivers
Soldering iron
Wire (don't know the gauge, just eyeballed it and looked identical to wideband wiring size so just used that).
Heat shrink
A rubber mallet (maybe)
Crimp connectors
Wire cutter/stripper (giggidy)/crimping tool
Dremel (optional)
DISCLAIMER: this isn't a how-to guide, I'm not a pro in any way at all at this, and I've almost certainly done something wrong. Don't copy anything I do here without doing your own research. If you blow your engine up or set your car on fire because "Bilbo said..." then you're a retard 
So it started out pretty well, unplugged the battery, ECU cover came off, wasn't too rusty down there so not seen much water in it's time, good start. Got the ECU in, literally just plugs into the stock connectors.
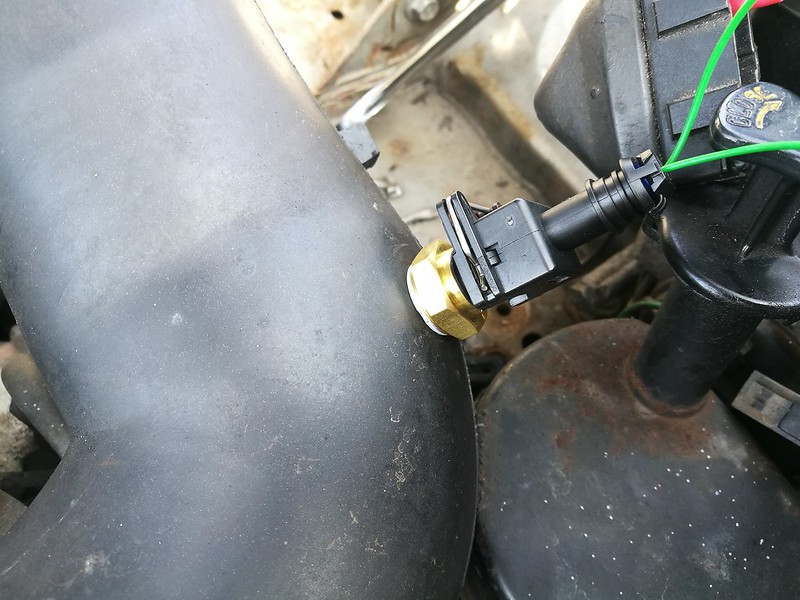
IAT SensorIAT sensor was pretty simple really. It's a Bosch type, with an M12x1.5 thread. Tapped a hole into the crossover tube and threaded it in:
 IMG_20180526_101702
 by
Chris Oldham, on Flickr
I did some research and most people suggested fitting the IAT over by the throttle body, however I assume this was due to most installs being on a boosted setup, hence you want a reading after the intercooler. As I'm staying n/a for now I just tapped it over the other side. Less wires in the bay to get caught on stuff, and it seems to be working just fine.
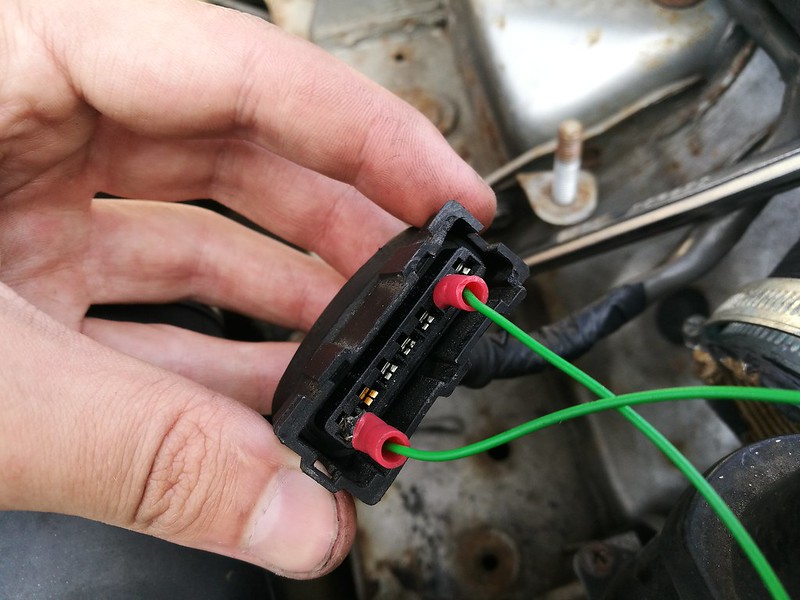
As the AFM was no longer needed I removed it, and you simply bridge pins 1 and 6 on the AFM connector plug with your IAT wires (not polarity sensitive apparently):
 IMG_20180526_101723
 by
Chris Oldham, on Flickr
Easy enough, though the spade connector size is very small! My dad actually used a Dremel and filed two down for me so they would fit.
Variable TPSThe 1.6 mk1s came with a switched TPS, so either on or off essentially (except the auto which came with a variable TPS). The problem with this is the ECU can't see how much throttle is being applied, apparently it can cause some issues with acceleration enrichment. So the E36 VTPS is the obvious choice. It has the exact D-shape slot needed to fit right over the throttle pin thing (technical term, I don't know what it's called). This style TPS seems to have been the go to for years now so it was a no-brainer really. Though many people have suggested that a genuine one is better than some of the aftermarket alternatives.
It's super tight (giggidy) around the TPS, so you need to pop the crossover tube off and undo the throttle body bolts to get the standard TPS off. You can't get it off without doing this as the throttle pin thing is just too long. So off with the throttle body, undo the 6mm head bolts holding the TPS on, and take it off.
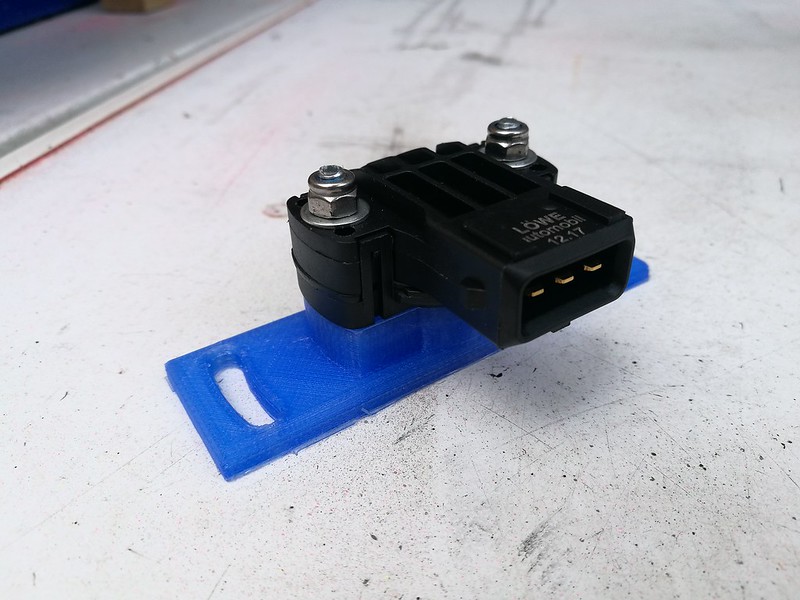
I mounted the new TPS to the 3D printed bracket:
 IMG_20180525_135644
 by
Chris Oldham, on Flickr
Again pretty easy. Two M4x30mm bolts and two M4 nylock nuts to hold it on. On the back of the bracket there is a sunk in section which allows the bolt heads to sit without fouling the mounting face of the bracket. Really easy.
Wiring wise I spent hours, literally hours reading up on how to wire it. I read conflicting information in a few places and eventually went with this post on Nutz by WooDooUK from 2013:
www.mx5nutz.com/forum/index.php?showtopic=1311&p=1393939Essentially all 3 wires are moved.
Red pin 3 to pin1
Green pin 1 to pin2
black from pin 2 to pin 3
I needed to get it done and he said this worked on Megasquirt, so I just gave it a go. It works, TPS calibrated perfectly first try, and it can't be reverse signal like Megasquirt yet as that hasn't been implemented in Speeduino firmware, so has to be wired spot on.
As for fitting, it has to be fitted with the plug facing backwards, as this is the only way the E36 TPS can slot on to the throttle pin. Don't force it ffs, you'll damage it. Line it up, slot it on, it sits like this:
 IMG_20180526_101658_1
 by
Chris Oldham, on Flickr
Fiddly, but it works. You can use the standard bolts to mount the bracket to the throttle body, they're just about long enough to get enough threads on. I loctited one of them just to be sure once I knew the TPS was working. I bolted the throttle body back up and re-connected the crossover tube. Other than the bracket being blue it looks pretty OEM imo.
TPS calibration is easy in TunerStudio, just select "Calibrate TPS". Ignition on, throttle off, on "Closed Throttle" option click "Get current". Then "Full Throttle" option, foot flat to floor, click "get current". Done.
WidebandFor me this was the big one. Quite an involved job that required various interior bits to be removed. I've heard conflicting reviews about Innovate widebands, but it seemed a good product to me, and it is in and working well from what I can tell.
It's actually quite simple. Extend the four wires that come out of the gauge to the required lengths, mine are a bit long to be honest.
Red is 12v live
Black is ground
White is optional dimmer for when lights are turned on, so dims at night.
Yellow is the analog output to the ECU.
I wired the red to my cigarette lighter live, not 100% sure this is the best solution, but it works.
I chose not to use the dimmer, so this is just grounded with the black. I grounded both of these with a ring terminal, into the engine bay, right in the back passenger side corner below the window wiper motor, same ground as the white block of grounds there. Easy to find, works fine.
Yellow is simple enough, the standard single wire narrowband plug runs up past the coilpack from the o2 sensor. Unplug the connector, cut the o2 sensor off and leave a bit of wire, then solder the yellow onto there. Plug the connector back in, this goes straight to the correct pin on the Speeduino.
Didn't get any photos of all this as I was stressing about doing it right and forgot.
Undo your standard o2 sensor, you'll probably need to take your manifold heatshield off to do so (snap, snap, snap go the heatshield bolts). 21mm spanner IIRC for the o2 sensor. This is where the mallet came in, that thing was in tight! Don't plug your wideband o2 sensor in yet as it needs calibrating in fresh air first (Innovate does, don't think AEM ones do?), but I can confirm it fits the standard o2 sensor bung hole (something something Cornholio) just fine.
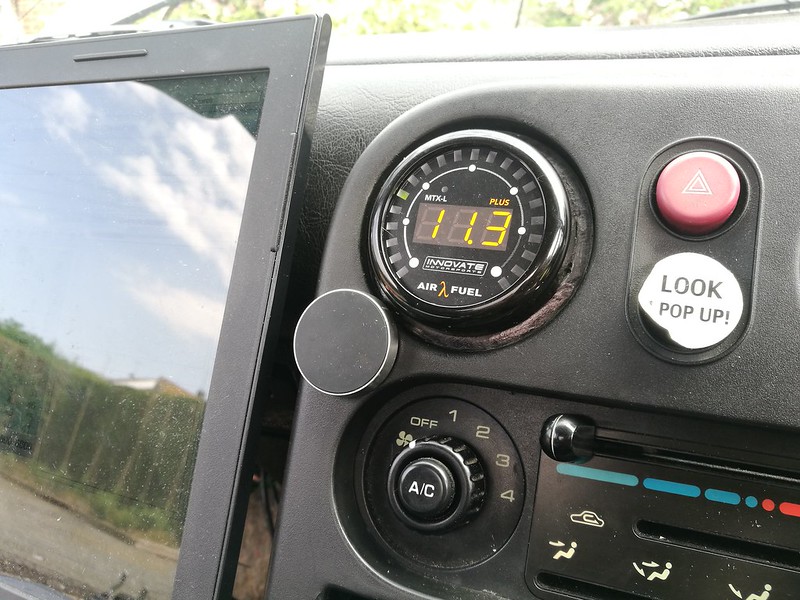
I used one of the middle air vents for the gauge. Drilled and enlarged a hole in vent tube:
 IMG_20180526_114916
 by
Chris Oldham, on Flickr
You need to take center console and tombstone out to really get to this properly. Then I fed the wires through and mounted the gauge. It fits pretty well but needs a bit of work really:
 IMG_20180526_150155
 by
Chris Oldham, on Flickr
Get it all plugged in, leave the o2 sensor unplugged when you switch ignition on, let it show an error code. Then ignition off, plug o2 sensor in, let it display "htr" and wait for the 22.4 reading. That's it, calibrated, you can fit the o2 sensor into the exhaust.
OtherFit the 5mm or 6mm vacuum line to the specified blank on the inlet manifold as per the Speeduino manual (see section below for
link).
Fit an air filter. I've just put together an open cone for now that I had from my old mk2. It's not ideal and heatsoak is a consideration, but I'll be buying one of those cheap carbon enclosed intakes soon and re-connecting my Randall Cowl setup soon:
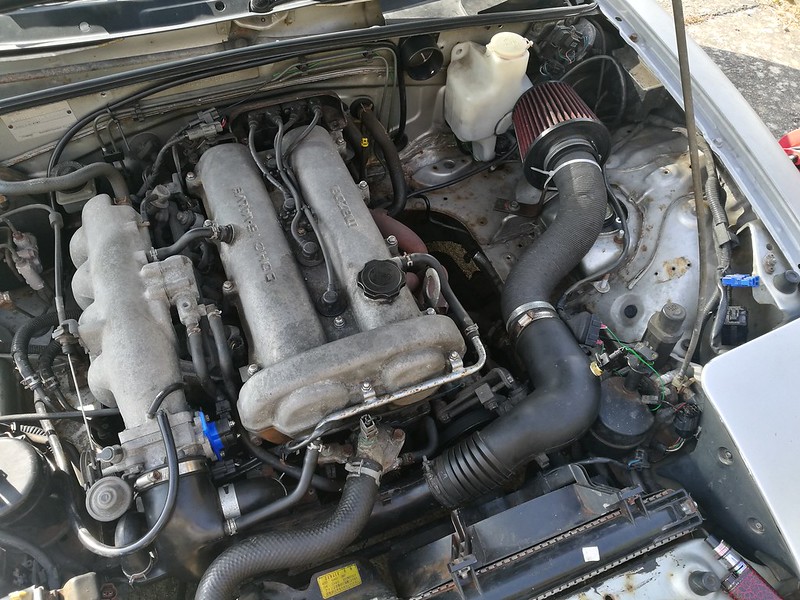 IMG_20180526_163703
 by
Chris Oldham, on F
lickr
SpeeduinoI'm not going to go into the Speeduino setup too much, the manual is here and it's very concise:
speeduino.com/Speeduino_mx5.pdfThis is a good resource to if you need more info:
speeduino.com/forum/NOTE: In the Speeduino manual it does say to select "Other/Browse" when trying to set up your TunerStudio project. Don't do this, I spoke to James about it and he said that bit is outdated, just click "Detect". TunerStudio will likely download what you need, and just use that. Currently it is called "Speeduino 2018.4" (correct as of 28/05/2018), I believe there is an update every month so this will likely change to reflect that. It also may come up as "Unknown", this is also fine from my experience. As long as it finds the Arduino board when you run "Detect". But yeah, don't spend two hours like me looking in the "Other/Browse" section. You won't find it.
Also, all of the compiling firmware stuff in the manual isn't needed if you buy the full ready to go pnp unit, it's already on there with a 1.6 base map.
TunerStudioI'm not going to go into too much detail about TunerStudio. It's an established product, and your answer is likely online somewhere already, written by someone far more knowledgeable than myself!
What I will say is if you've watched any MegaSquirt based TunerStudio videos, Speeduino doesn't quite have all the same options and settings available. It's still fairly new and some stuff doesn't seem to be available as of yet. Off the top of my head stuff like spark cut or fuel cut rev limits and launch control settings aren't available yet, it seems to just run spark and fuel cut for both right now.
Read the Speeduino manual for calibration advice, it's easy, I sorted it easily and I'd never used TunerStudio before. RTFM!
Running the carIt started on the basemap second try. Yay, 10 points to Griffindor. It runs, but it's a basic base map, it runs rich, which is safe I suppose, but not a long term solution.
I had massive issues with hard throttle. Basically it's like it died for a second when you plant your foot. Made pulling away difficult, and it was hard work to drive on faster roads. Anyway, turns out it was the TPSdot setting in Acceleration Enrichment. It was set to 30, I changed mine to 135 and it's so much better. Acceleration Enrichment isn't perfect but I've got the "Accel Time" at the default 700ms right now, so that is probably what's causing the minor stutter I have remaining, will be testing lower values tomorrow. I've seen some people say 200-300 is a better setting. Also you may want to turn on the "Deceleration fuel cut off" in the same menu, it's deactivated on the basemap and it's meant to help with fuel saving.
As for the map itself, it seems ok, runs rich, bit boggy in places, but doesn't seem to run lean much/at all. I don't have much of an idea about the tables yet, that's going to take some more learning.
MOST IMPORTANTLY OF ALL: Launch control works! So childish and stupid on a standard power car with a dodgy clutch, but just brapping at 3k rpm on the driveway with my dad was hilarious.
Final recommendationsBuy the TunerStudio and MegaLogViewer licences. Honestly it's worth it for the AutoTune feature in TunerStudio, and the logging capabilities in MegaLogViewer. Plus you can analyse and get a suggested table edit from a log of infinite length with the MLV licence, it's well worth it! It costs $59 for TS and $29 for MLV, with more expensive options if you want/need even more features. But yeah just do it (Nike/Shia LaBeouf).
Do your research, read the manual:
speeduino.com/Speeduino_mx5.pdfspeeduino.com/Speeduino_mx5.pdfspeeduino.com/Speeduino_mx5.pdfspeeduino.com/Speeduino_mx5.pdfspeeduino.com/Speeduino_mx5.pdfGoogle everything, read the threads, ask questions, watch videos.
Watch this guy:
www.youtube.com/channel/UCY7ZNcVB9S2T5Go9Yjks3Gg really good in-depth understandable videos, and he has some on TunerStudio, wiring a wideband, and loads of other related stuff. It helped me so much to watch someone do it first.
I'm literally only just scratching the surface on this standalone stuff, but I really like it, it's great having control over all the little details, and I've learnt so much by just throwing myself in at the deep end. Speeduino is a quality project, and the product is great if you're on a budget, and James Brandon has been invaluable during the whole process.
I've almost certainly missed something, so yeah just ask about whatever you can't see, I'm no pro but I'll do my best to answer.
Oh yeah I also went to RetroRides Weekender at Goodwood last weekend, here's the car on the Mighty5s stand, which we got right on the start grid of the track!
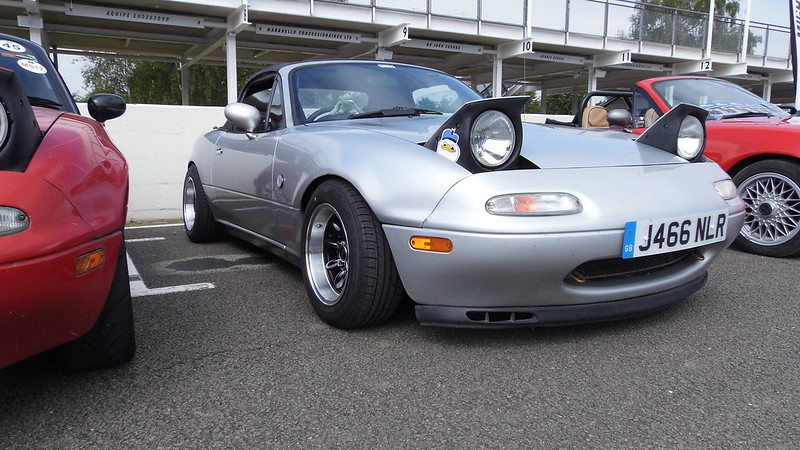 P1000399
 by
Chris Oldham, on Flickr
And sexy Zoom Elan shot:
 P1000542
 by
Chris Oldham, on Flickr
Full 283 photo album here if anyone wants to browse some of the insane cars that were there:
flic.kr/s/aHskynbUqvI'm going to bed, this took too long to write.